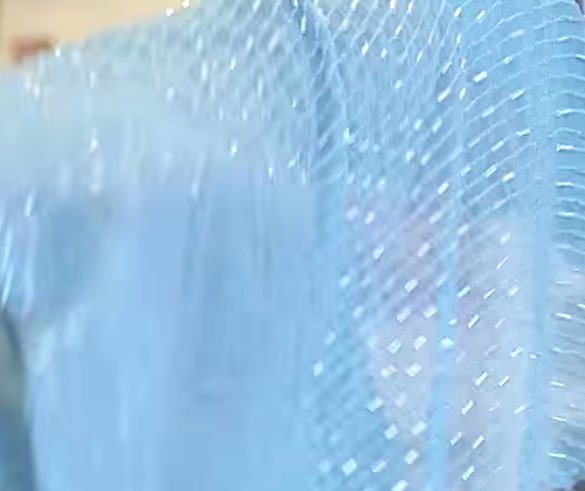
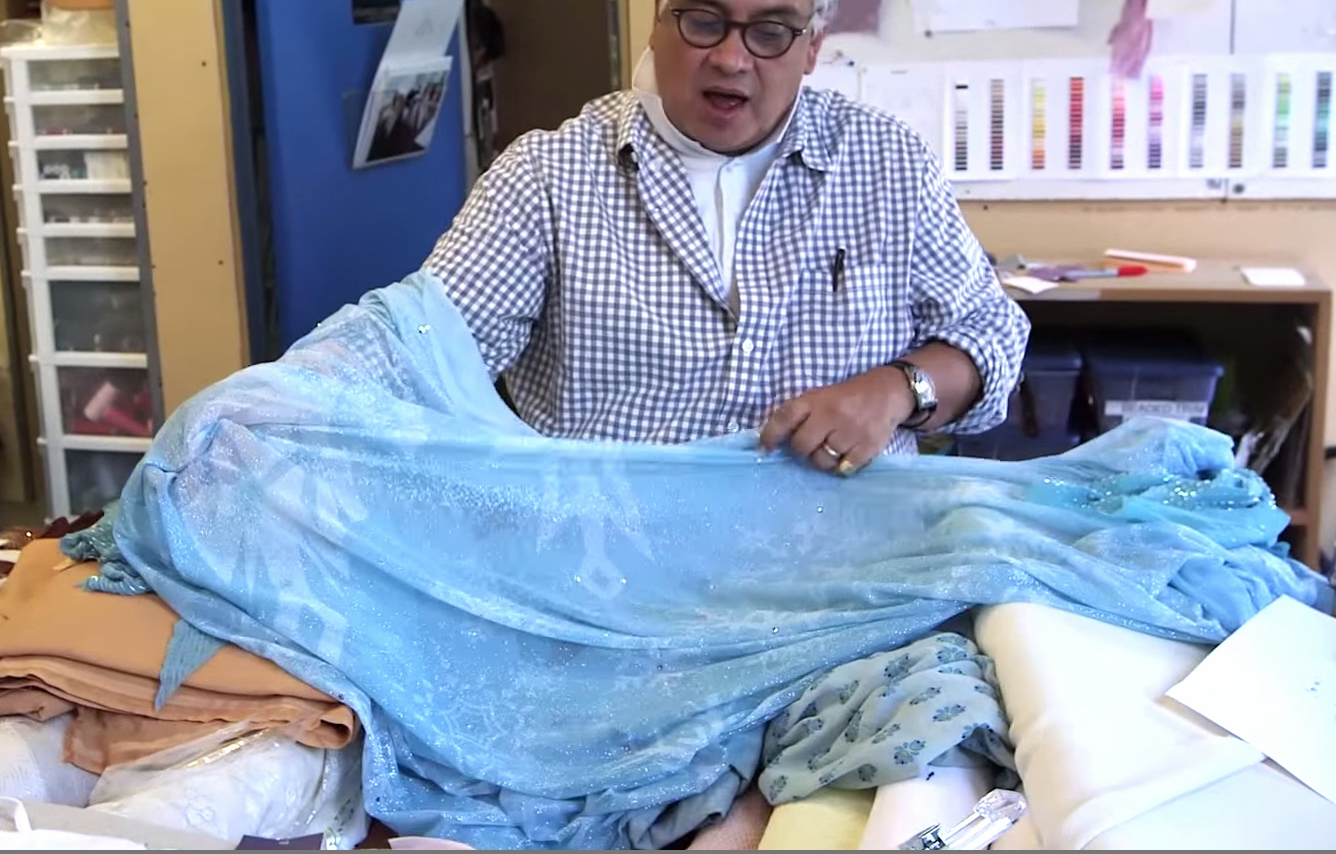
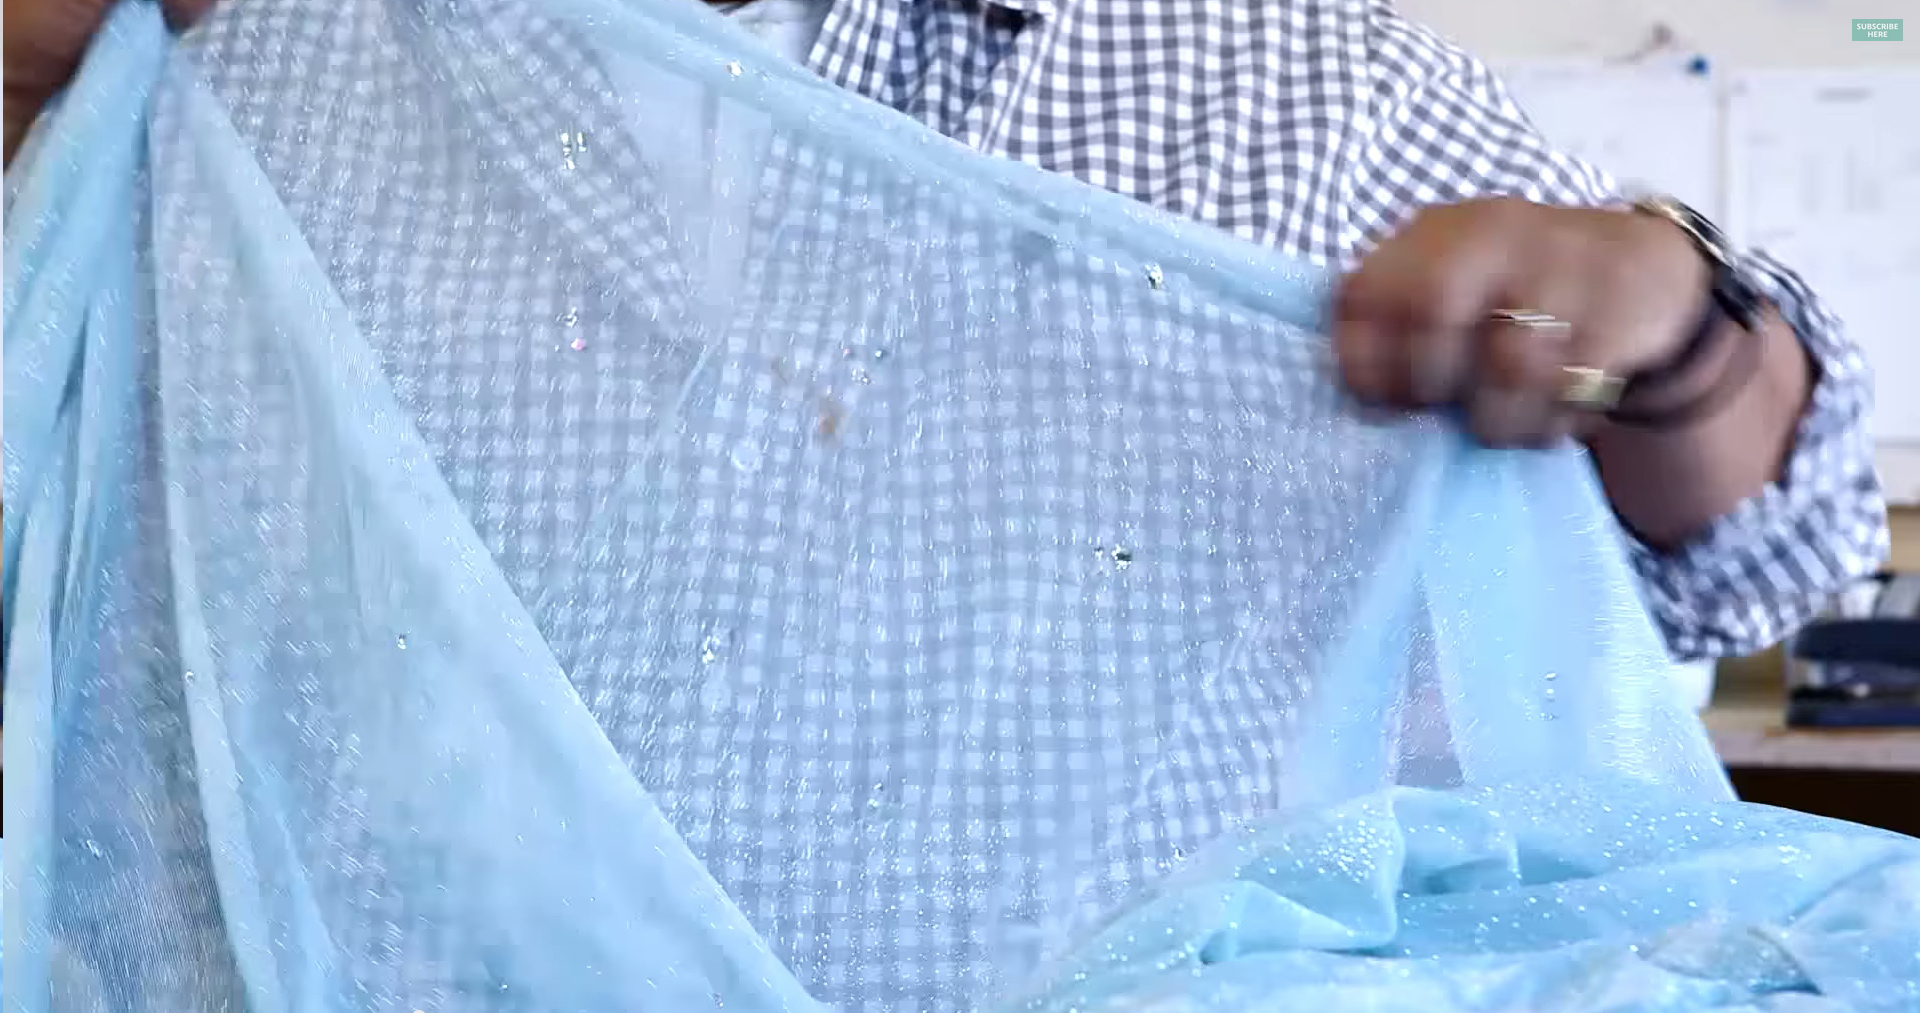
I am covered in them. well the carpet is 🙂 My new Elsa fabric arrived and it will work exactly how I want it 🙂 So long as I can dye it 🙂 But I get to do that tomorrow 🙂
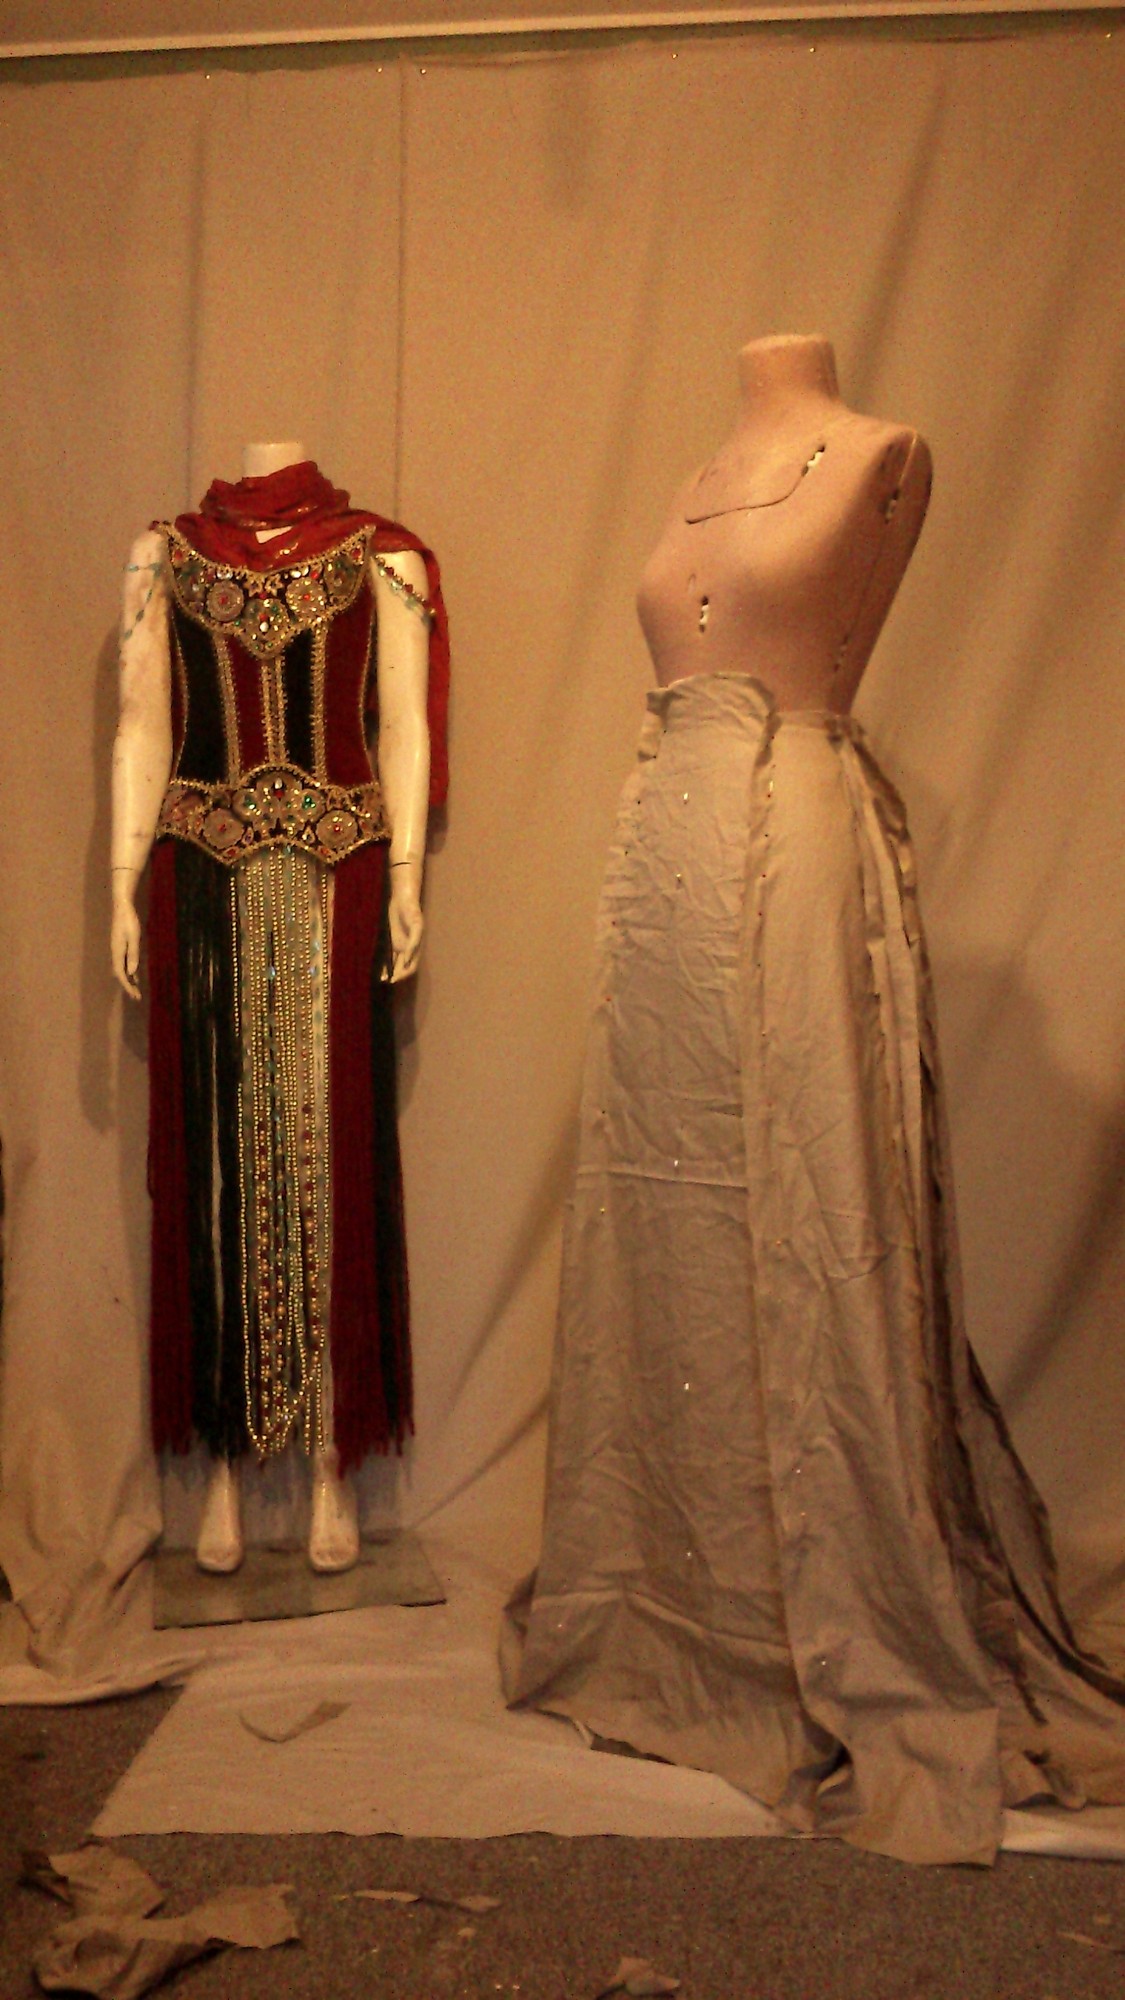
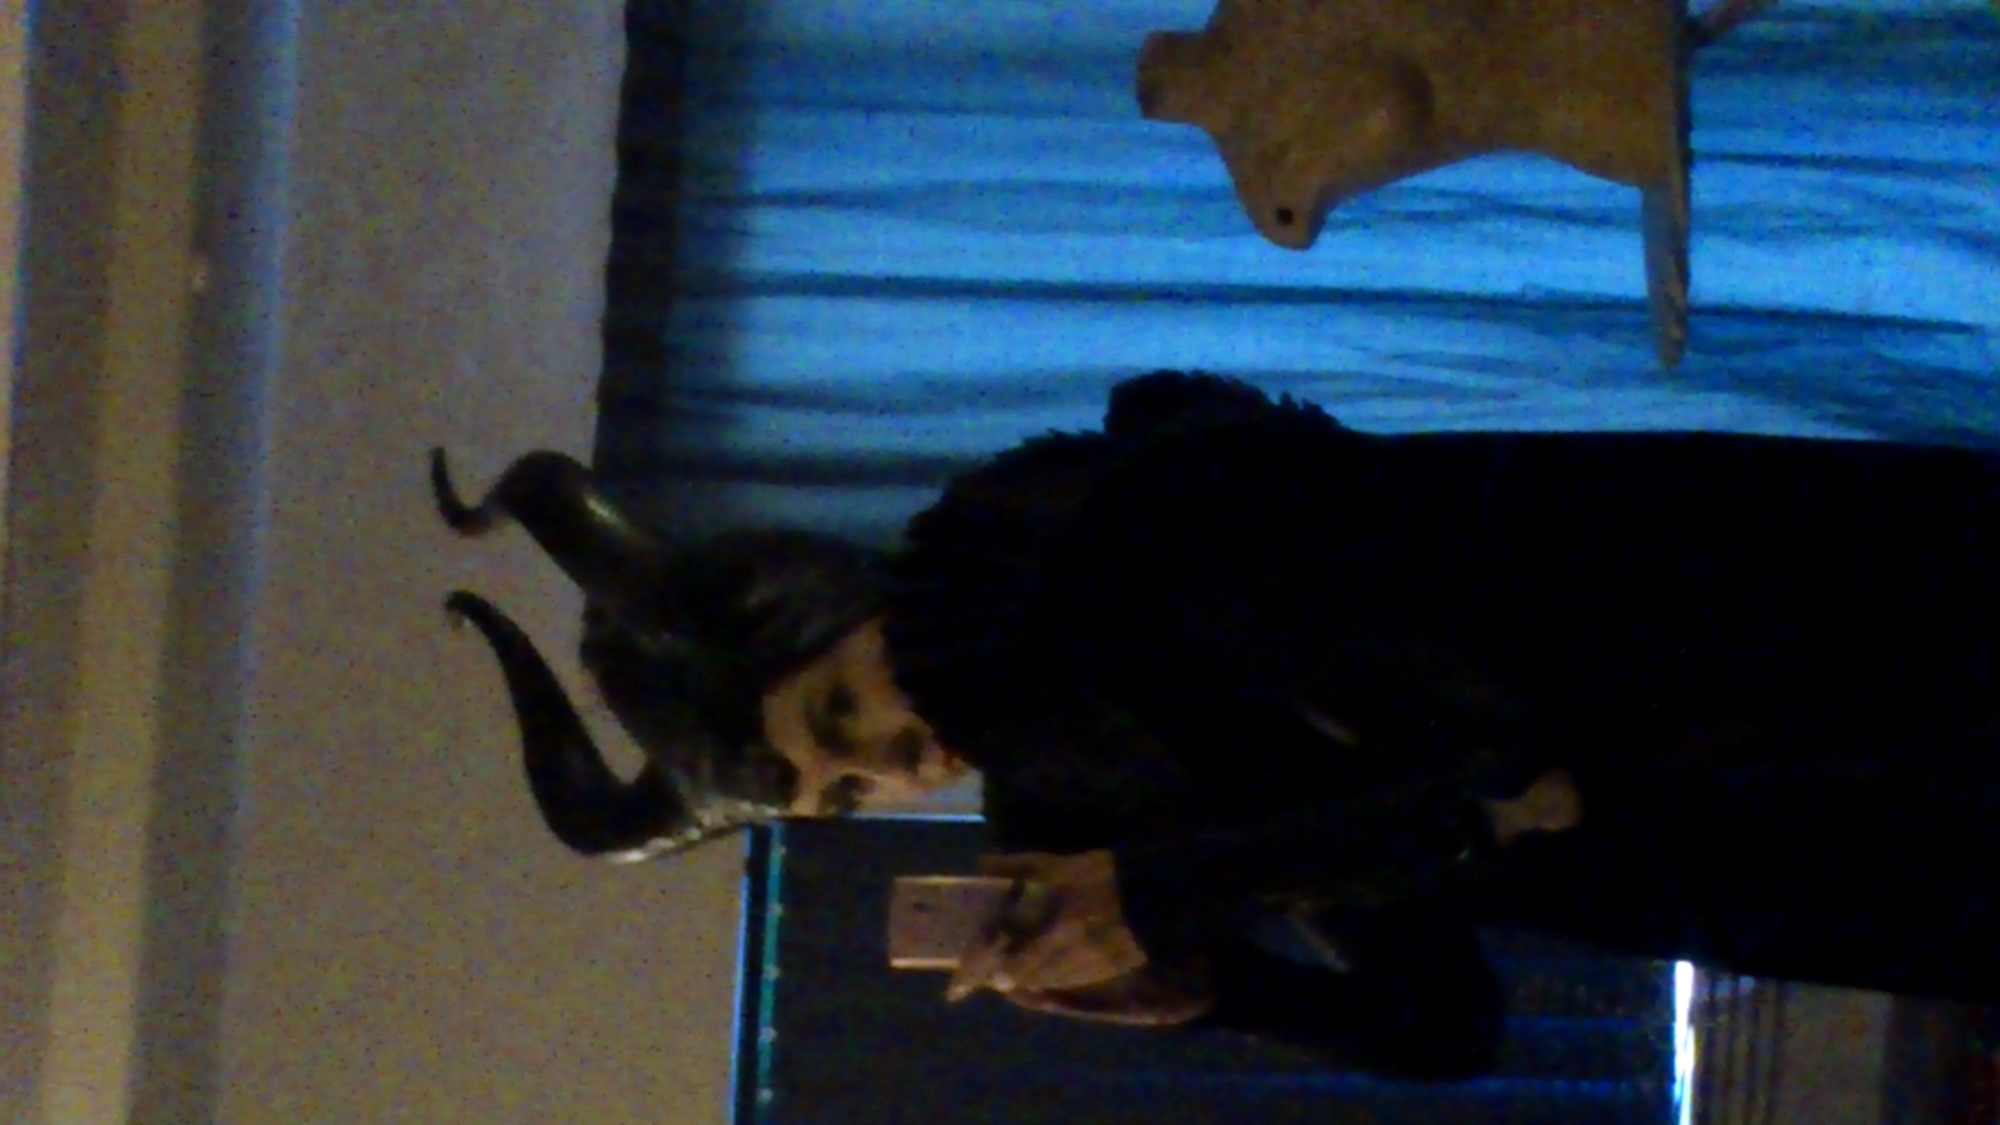
I am seriously, seriously liking having something so nice to work on 🙂 Don’t get me wrong. I loooove my Maleficent. I love my Shae, I love my Regina. I love my Jedi, and MINA!!! But frankly only a few grown up fellow geeks appreciate them- on any level.
I am being a bit selfish in that I really want to just have some fun and happy moments associated with costuming 🙂 I feel so on the outside of things. My femshep? Blood Drgaon armour. Which not many people recognise. Not even with Mr Boo! But kids loooved the giant Black Widow prop! So…
But really seeing kids just speechless with delight with my stunt Elsa? That was magical, for all of us. I’d like to feel like I deserve that response, hence the efforts in dying and cutting sequins and fabric. And frankly I have fewer pretty costumes than I am assumed to have 🙂
That said, pain, lots of pain. Though I am confirmed for my next set of infusions 🙂 I probably could have done with them earlier, basically the medical system really is more reactive than proactive.
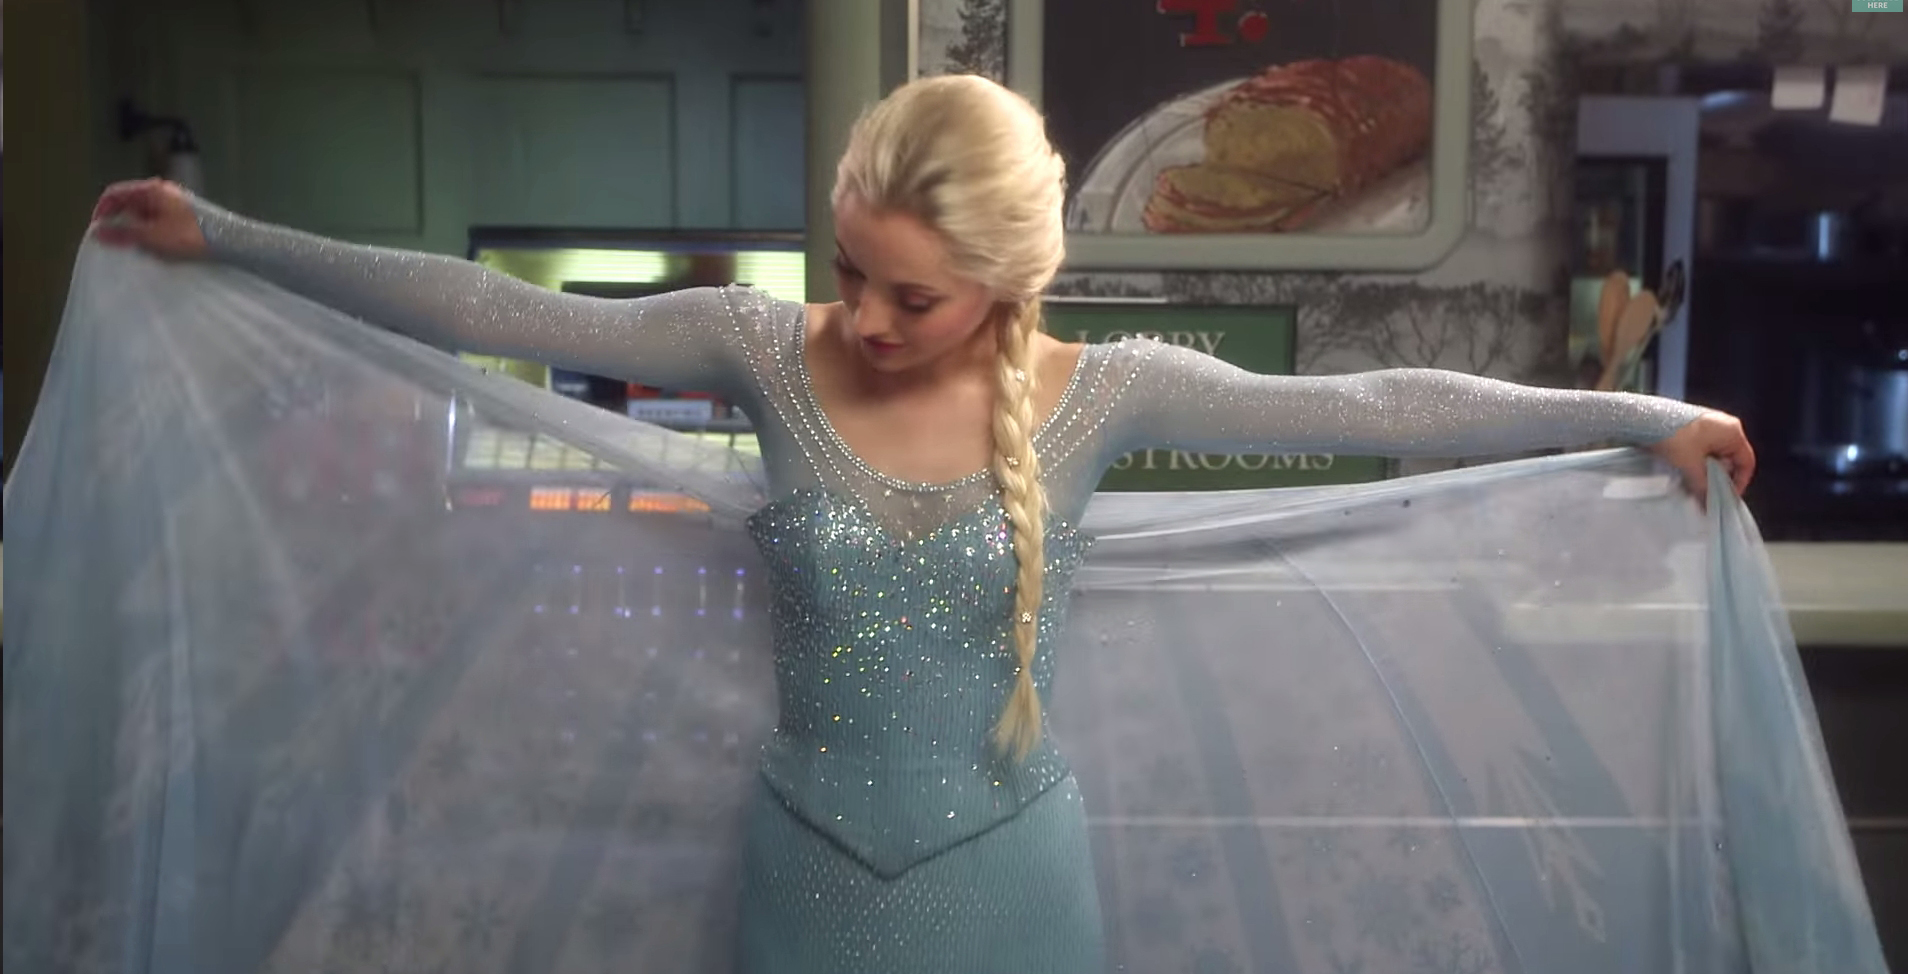
I posted much of this to Tumblr as a video of the behind the scenes got blogged. And wow. What a beautiful job they did. They really did 🙂 Both Anna and Elsa were beautifully crafted and the fabrics were stunning, absolutely beautiful in texture and fit and making real what wasn’t 🙂
I admit to falling in love with this gown just a little bit more and it’s keeping me on track with my own. I can’t afford the fabrics used, but it’s pretty much what I thought. My thought process was “what would Mackie do?” But I probably should have thought “what would Eduardo do?”
So, just briefly Bob Mackie is a designer, very well known for creating gowns for divas, Cher being perhaps the most well known. Super super vibrant and sparkly but almost solely in bugle or double cut beads on a silk ground. There were even a range of exclusive Barbies produced!
There were two fabulous behind the scenes videos that were released. With a fabulous huge moniter and high resolution youtube I managed to stang some great screen caps that highlight the gown with an eye for costumer geeky details 🙂
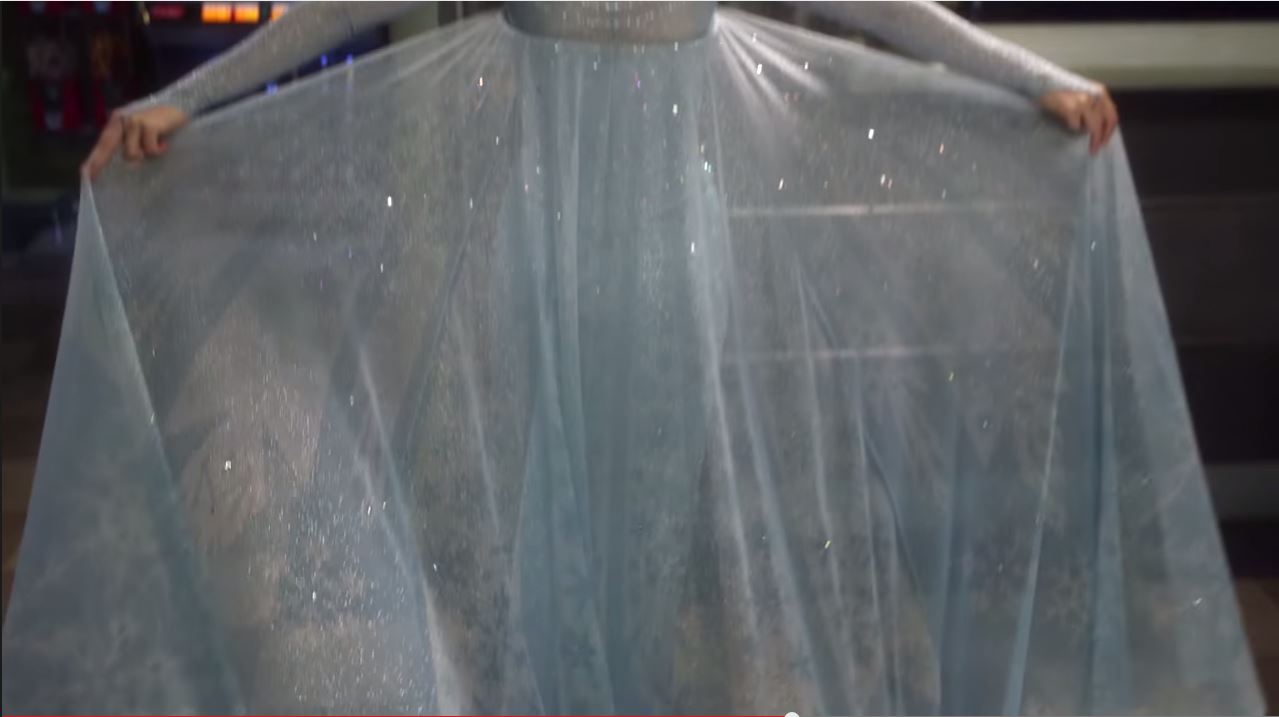
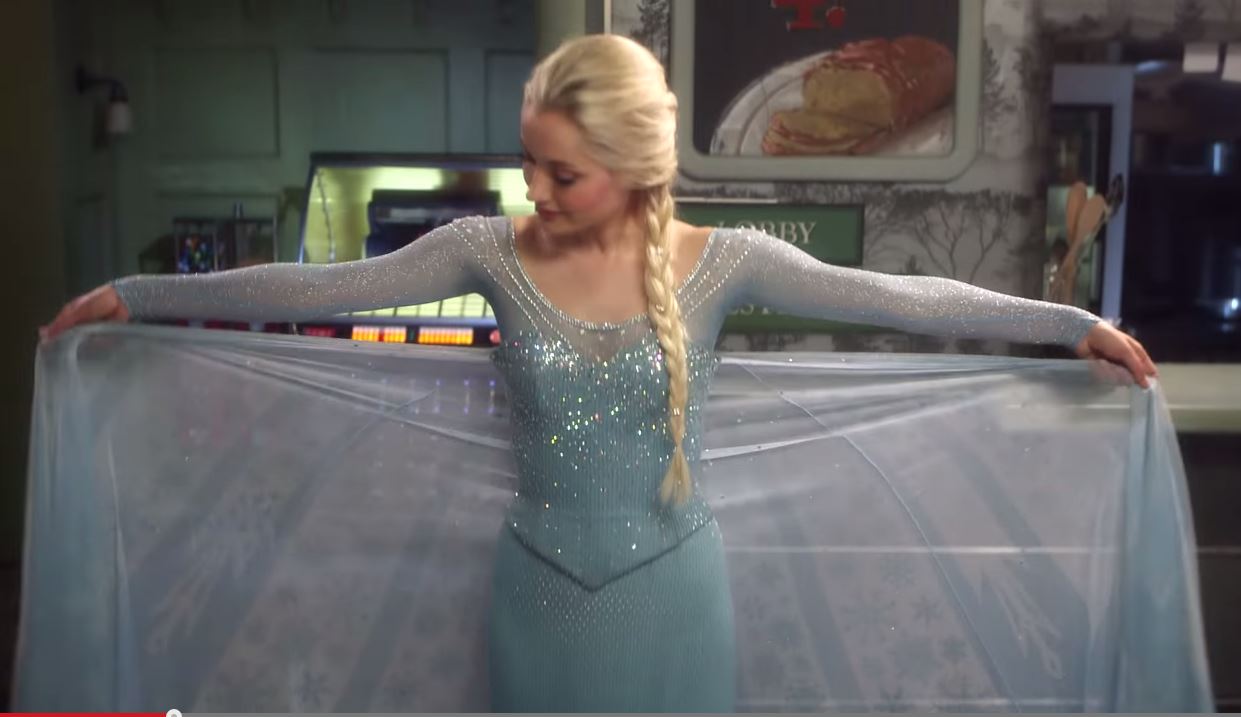
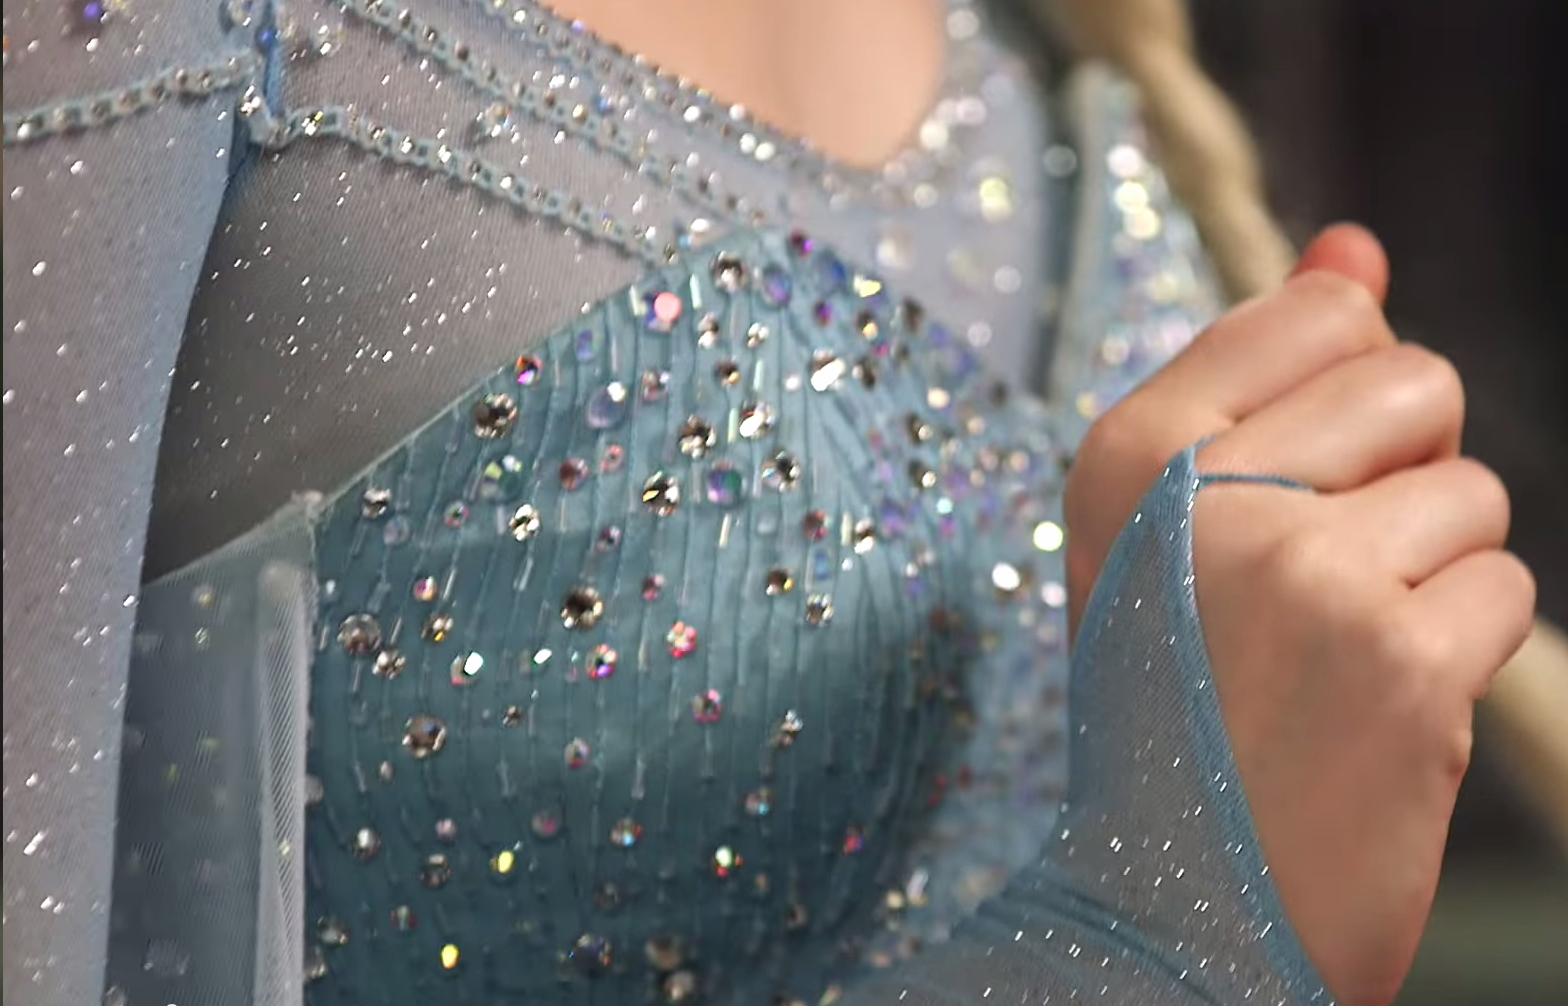
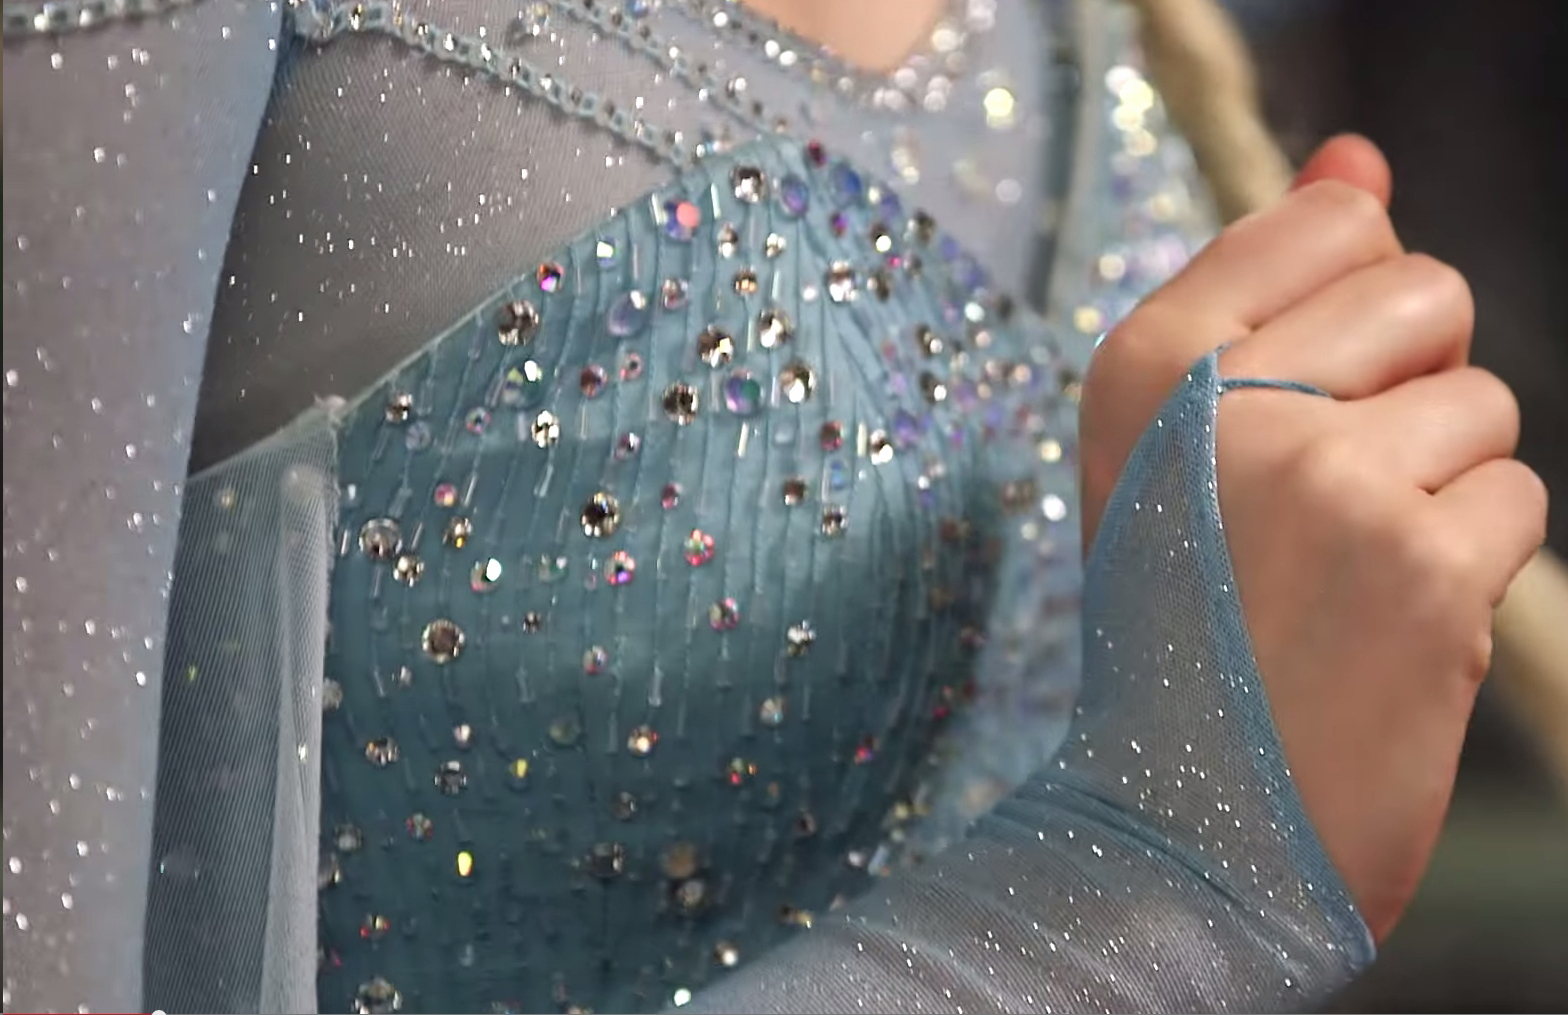
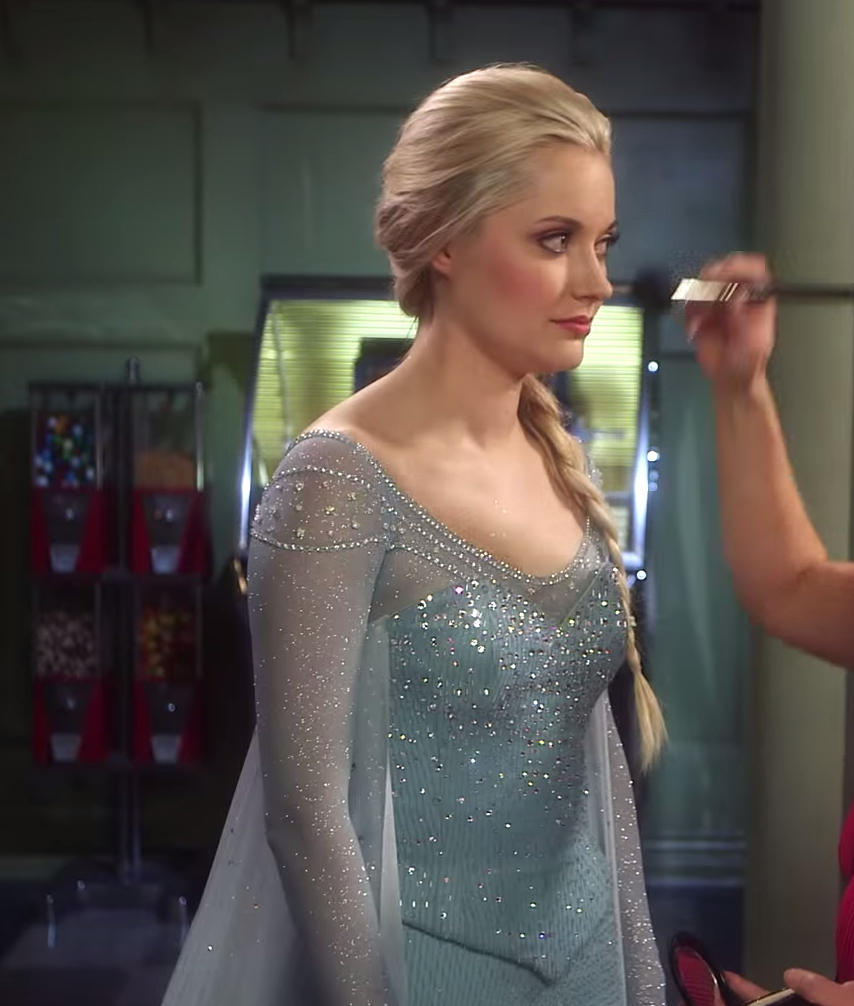
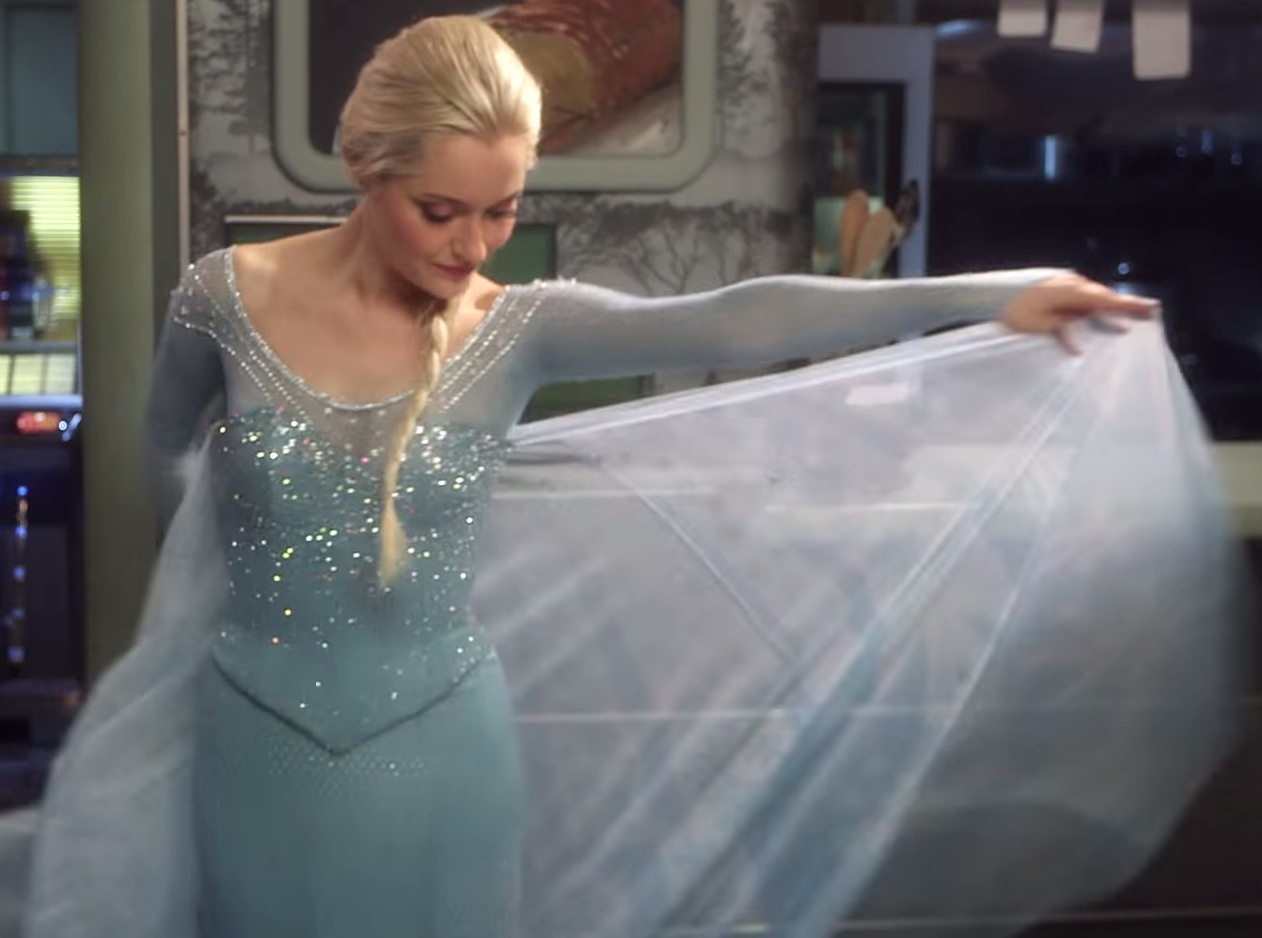
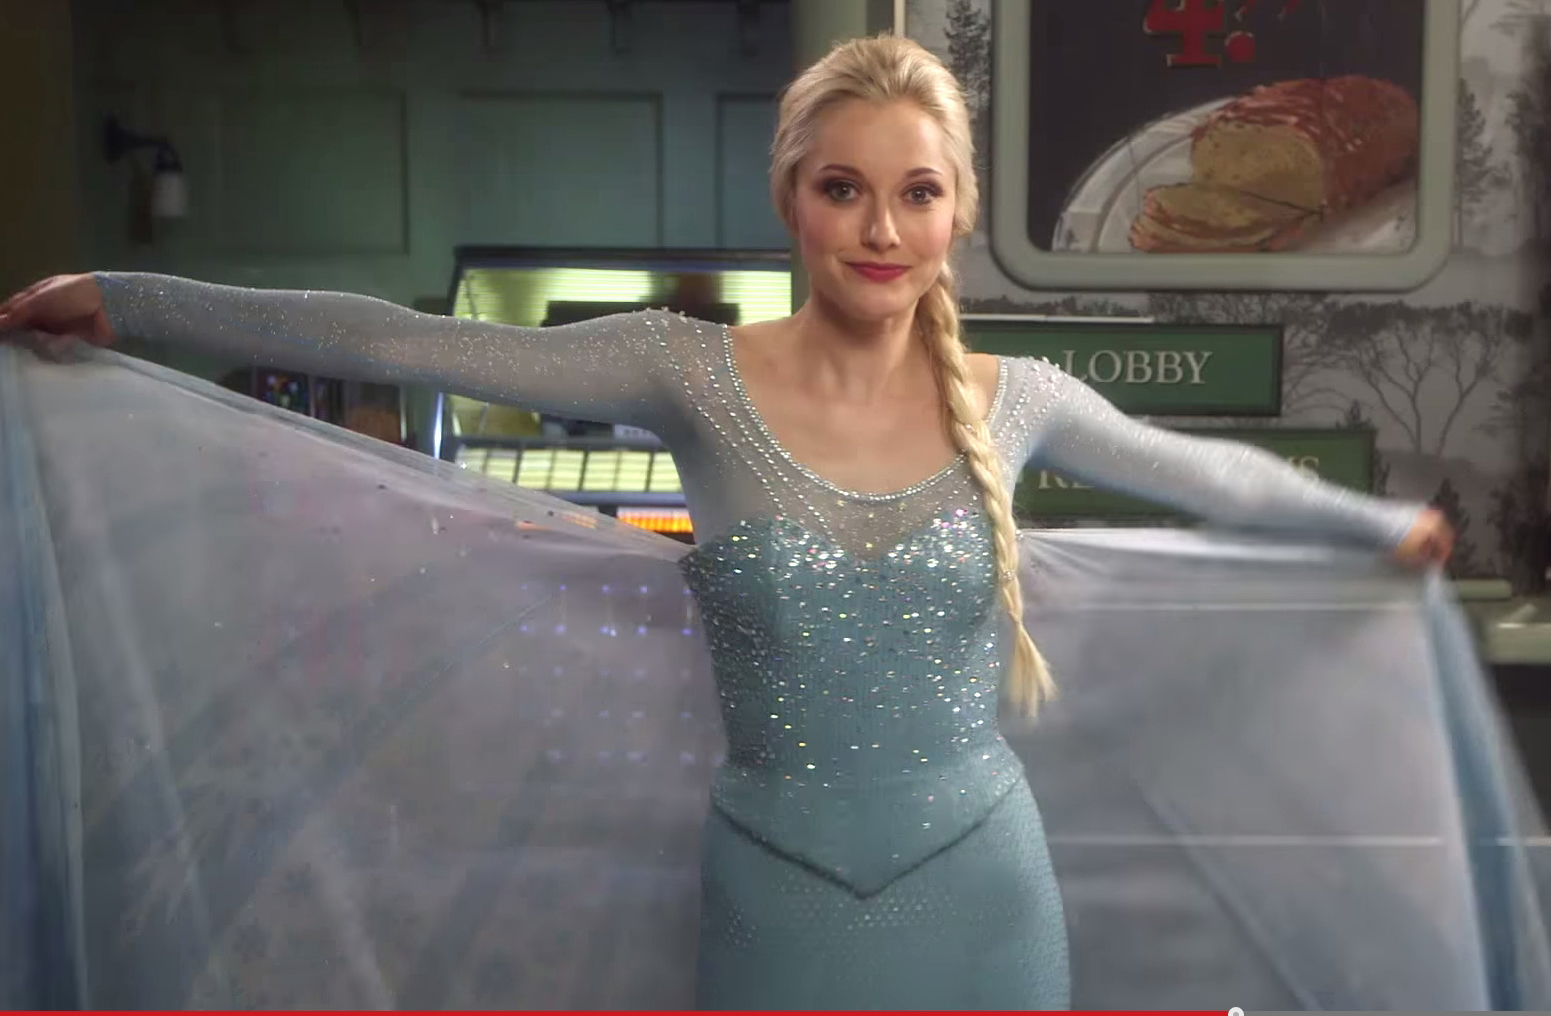
First of all, the gown is in two distinct parts that blend so well. A boned and fully supported bodice over a lined skirt- fitted but with great drape. The fabric of both parts are made with the same fabric as a shell and all of the same pale cool blue:
Materials:
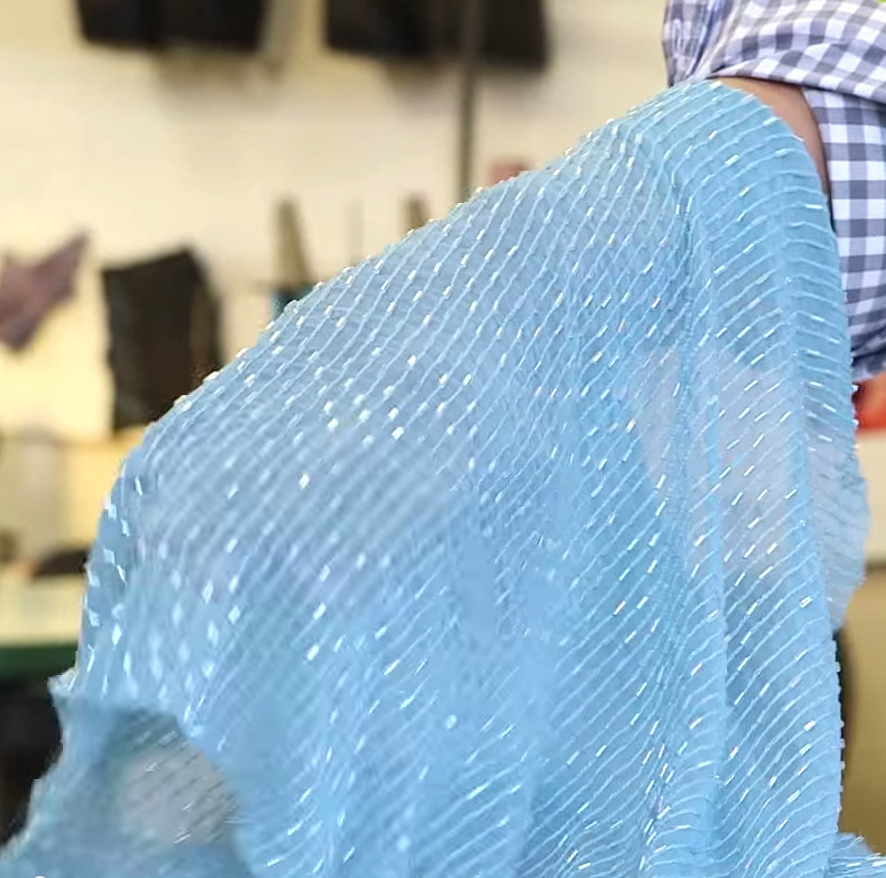
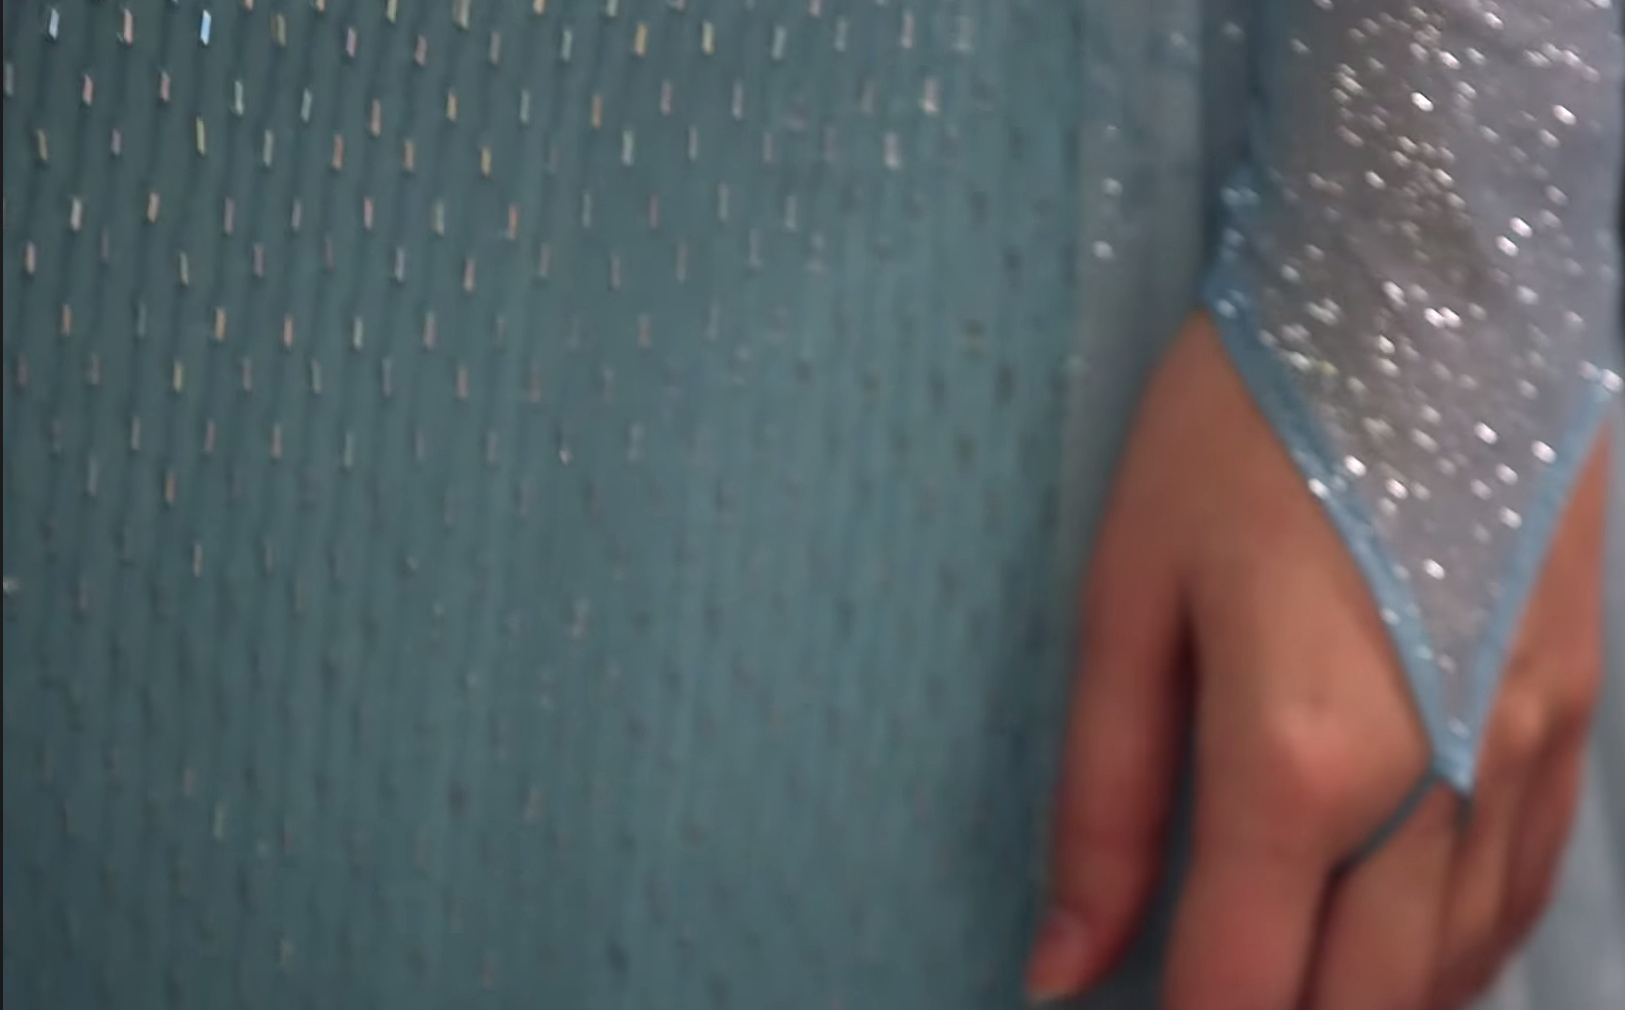
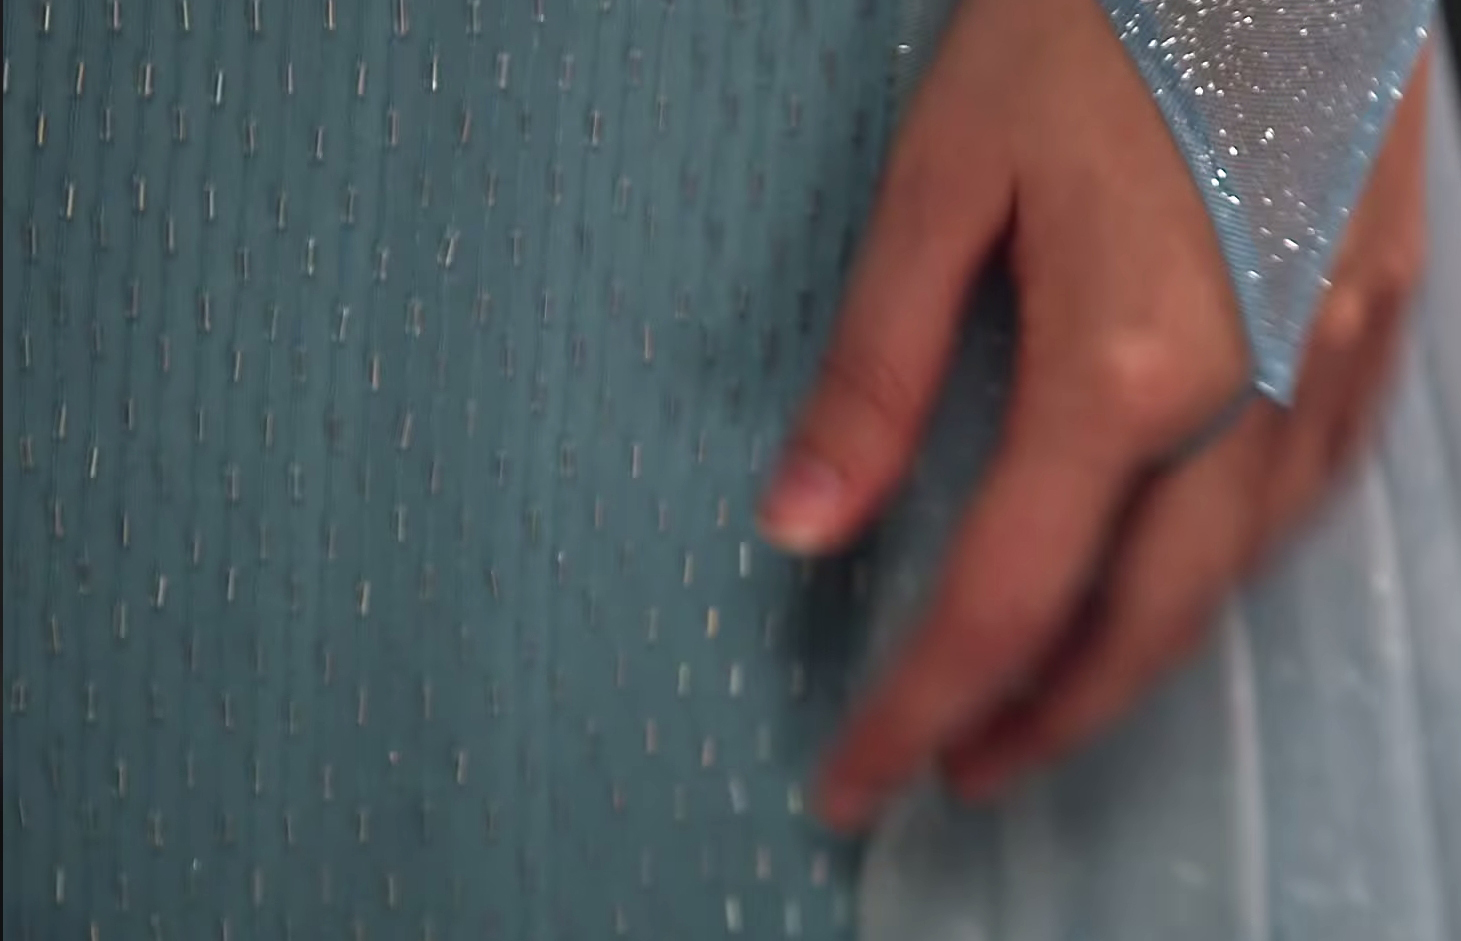
As mentioned the body of the gown is overlayed with a sheer chiffon over a fully supported bodice and gently flared skirt. The cape and undershirt are made from a silvery knit. Not confirmed as being the dame fabric however stills show the cape is unhemmed at the sides (and some rolling of the side hem) and there is the same speckled silver effect. They may not be the same but they are very similar.
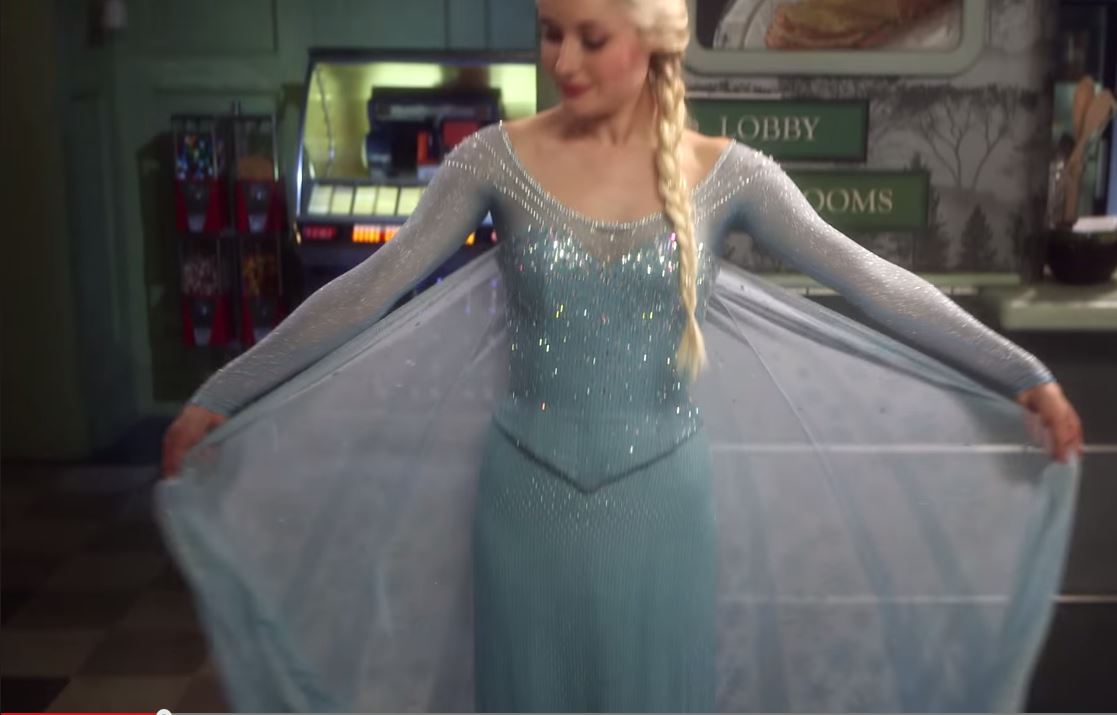
The beaded fabric is silk chiffon with a regular repeat of lines of chain stitch holding clear Ab bugle beads. The AB (Aurora Borealis) effect gives extra dimension to the refracted light and helps blend in the kind of sparkles of the skirt with the bodice- the bodice has many flat rhinestones of a variety of sizes.
The bugle beads are of a regular size and alternate in placement in each row.
The sheer bodice fabric is a slightly warmer tone of blue with a fine silver thread knitted in. It is a mesh but is knitted for a close fit and with very fine and narrow seam allowances.
The sheer bodice has chain rhinestones at the neckline (flat silver backs in a clear-white plastic base) and individual stones scattered over the bodice. The rhinestones on the bodice and cape are a mix of flat silver backed as well as AB coated flat round sew on types.
The shoes are a pearlescent blue leather with a satin finish.
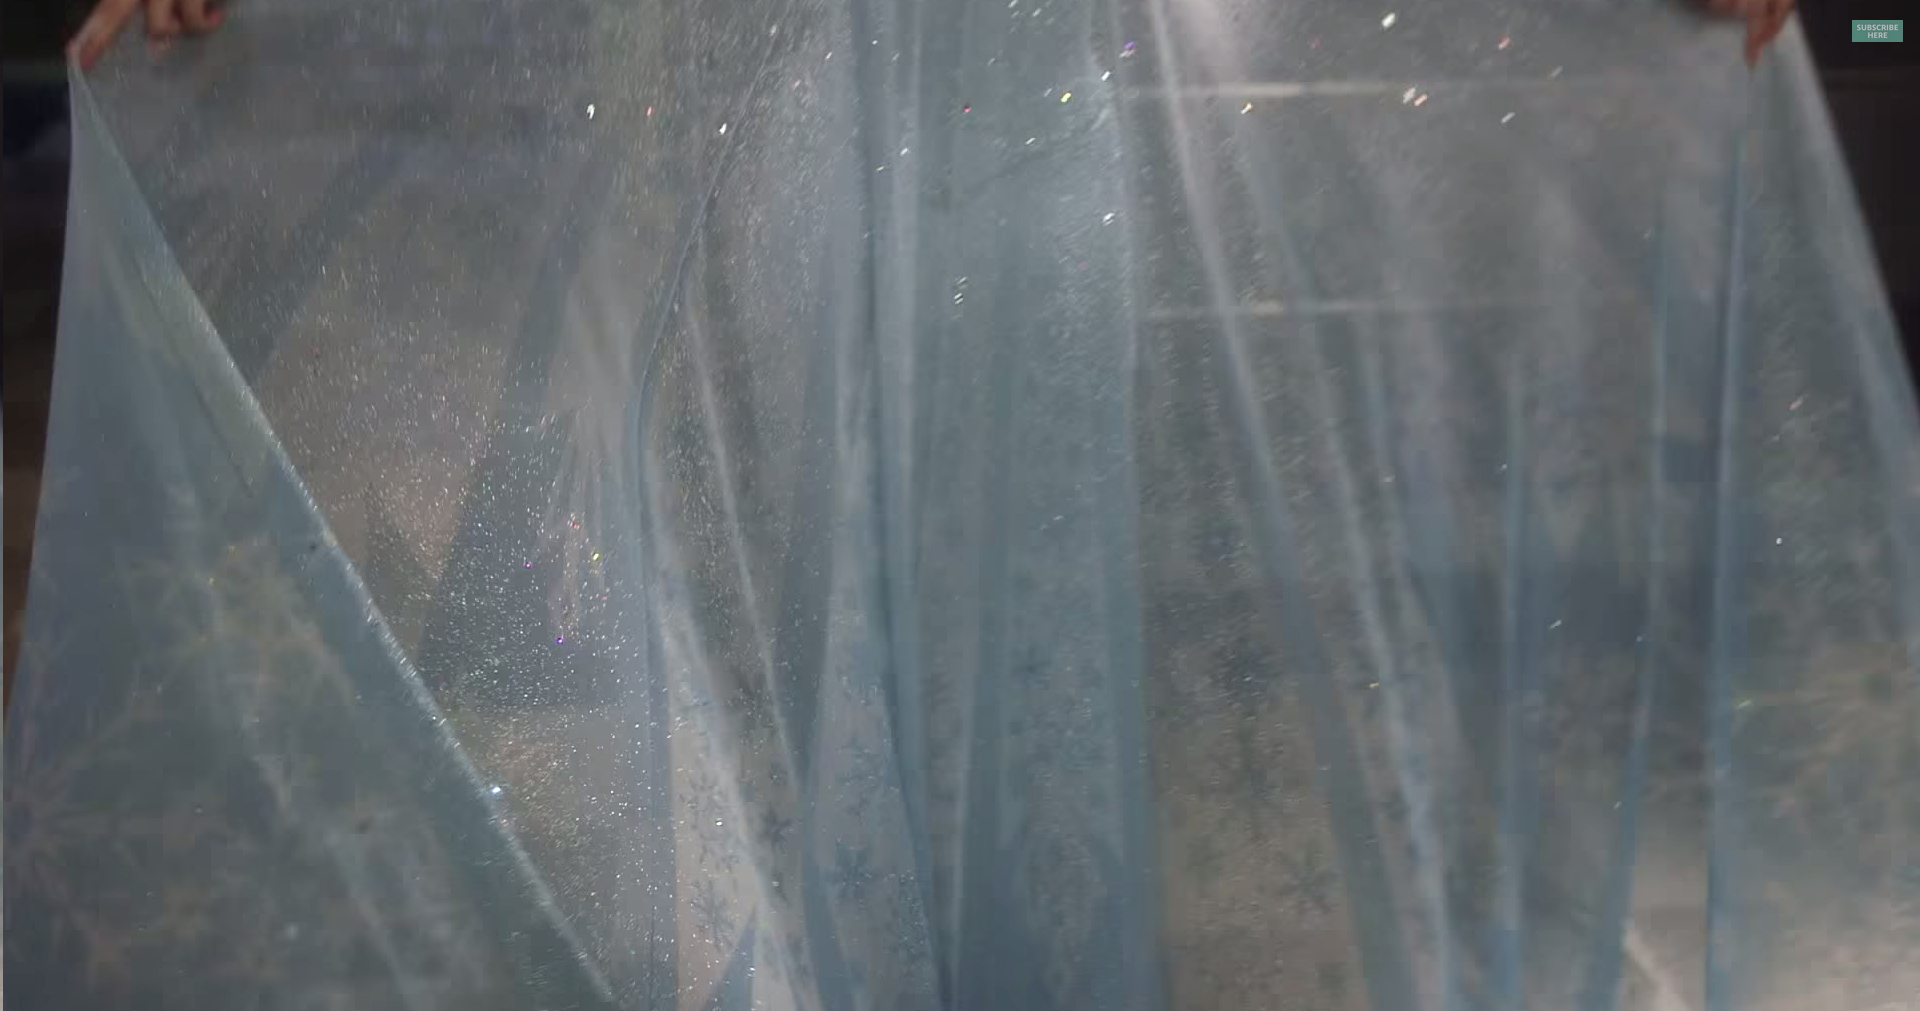
The cape is sublimation dyed, so is likely a silver/white base colour and the blue is printed on. Sublimation dyeing uses a dye rather than paint so this makes the most sense.
Bodice:
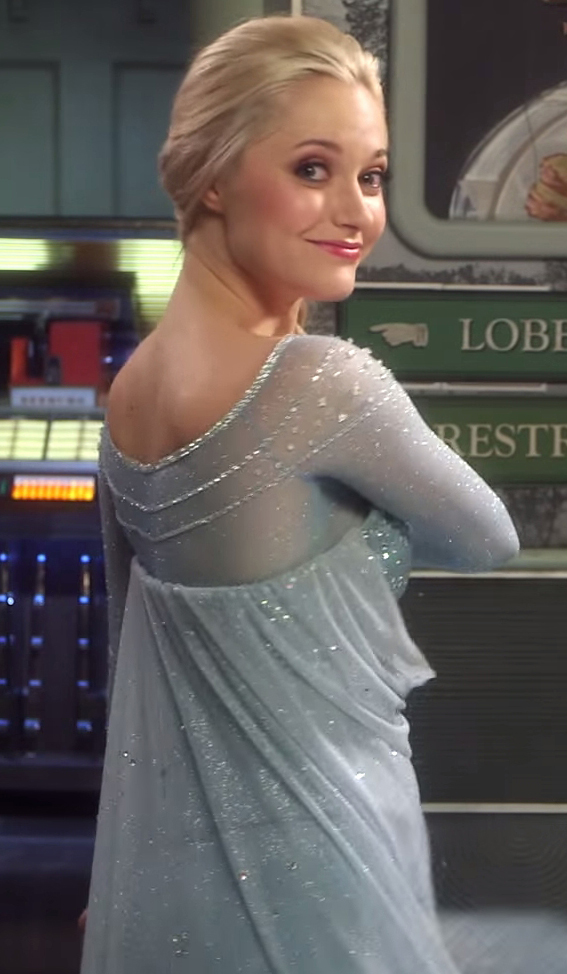
The bodice has an underlining to the sheer fabric and is fully shaped and supported. It is slightly bigger at the top of the bodice to allow for movement. It is possible to see the width when the actress raises her arms.
The fabric shell is underlined to support the sheer fabric, this is obvious at the bust seams where there are no seam allowances visible.
The fabric shell however appears to not be boned, but a separate lining does appear to hold the bodice up. There is no boning visible.There appers to be a waist tape to hold the bodice in place as well as accentuate the hourglass effect of the bodice.
The back of the bodice dips in to a short V while the front is deeper but less sharp. The bodice also sits lower on the hips than the original film version, in part as it is more flattering and in part makes for a much more stable bodice that can be more easily fitted.
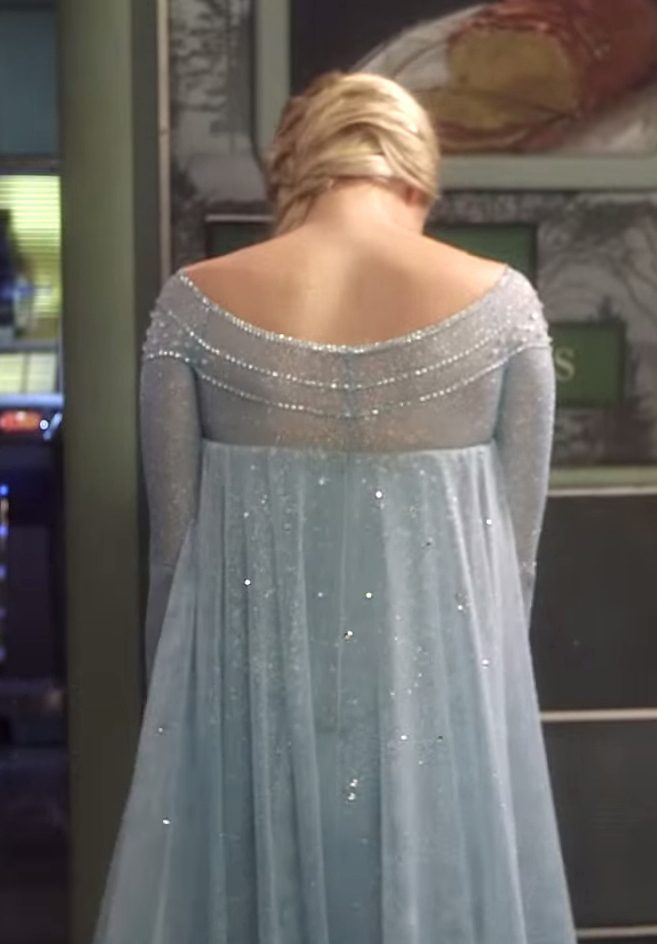
The bodice back is considerably lower than the front and the fastening appears to be a zip up the centre back and hidden by the cape.
Cape:
The cape is a good half circle in basic shape but made from gores that taper from the bodice to the hem. The seams are incredibly fine and narrow and there are three at least. It is very gently eased to the top of the bodice and draped based on the stretch of the upper curve and the flare of the seams. The hem extend from the sides to the back into a train, it is considerably shorter than the film version
Undershirt:
Like the film it has seams that follow the diagonal lines of a raglan sleeve, leaving the shoulder and top side of the arm seamless. it is likely the undershirt is a bodysuit as there s a clear centre back seam but no room for an invisible sip. It also stays very well in place and with no wrinkles under the arm. This suggests it is anchored well, which is most easily achieved in a stretch knit with a bodysuit/leatard type fit.
Just some screen caps, fabric and seam details.
To note especially:
The bugle beads are chain stitched, which makes me think cornely machine but I think there are more suited machiens that can do multiple rows at a time.
the v points will have a facing of bias fabric most likely
the bust has some amazing shaping, note the curve comes back on itself over the bust and there is a dart to the outside of it as well.
The cape has at least three seams for flare, and much of the edge is eased not gathered
Also note, the shredding of the hem of the skirt. That is what happens with this stuff, unfortunately. So if you are going to go the couture fabric route remember that $1000 skirt will shred like the blazes as it was not meant to be dragged on the ground.
Yep, standard width silk chiffon with beads, many lots of dollars for the base fabric but sigh.
Sub dye? Yep, you can get that done many places. Not saying to use the design.. just the method… It’s basically printing, like with an inkjet printer:
Heat and pressure are used to transfer images from an ink jet printed paper negative, to the fabric.
And it is best on polyester fabrics… Not that it will get you the silver print, but you can get full width opaque printing done as well.. *edit* I think the silver is part of the fabric and the sub dye is for the darker blue areas, but if you wind up needing a foil print type effect due to where you are what you have available it is an option. Better done as in industrial job than trying to weed sheets of vinyl foil at home…
So kind of the opposite of what people have been doing at home. Sigh, now I want to see if I can get a similar effect on my net.
And my previous notes:
Wait what’s that? Beaded fabric for the skirt? You don’t say… This is how the skirt has the same weight and yet flow as in the movie. The beads pull the fabric smoothly over the hips and then the weight makes the hem swish but also not flick about. I think it’s a standard chain stitch with the double cut bugles spaced evenly, and alternating. I haven’t seen the exact fabric but it is the standard method of doing beaded fabric.
Just to give an idea of how how much this would actually be to reproduce….
Oh check it, raglan sleeve for the sheer top (which Elsa does definitely have) and I love how they committed to the smaller surface decoration on the bodice. Just doing it
I’m a big fan of how these work on TV. And goes to show how moving vs static images change what you see.
And I have my Elsa wig on the way as well as have set aside exactly what layers I want for the skirt and bodice structure. So, I will get Elsa done! but it will be a summer project
Hospital appointment, cortisol test and xrays of feet and hands, done!
So I also went to Spotlight, got more lining for dress two.
Got thread for dress shell, dress lining and sewing sequins.
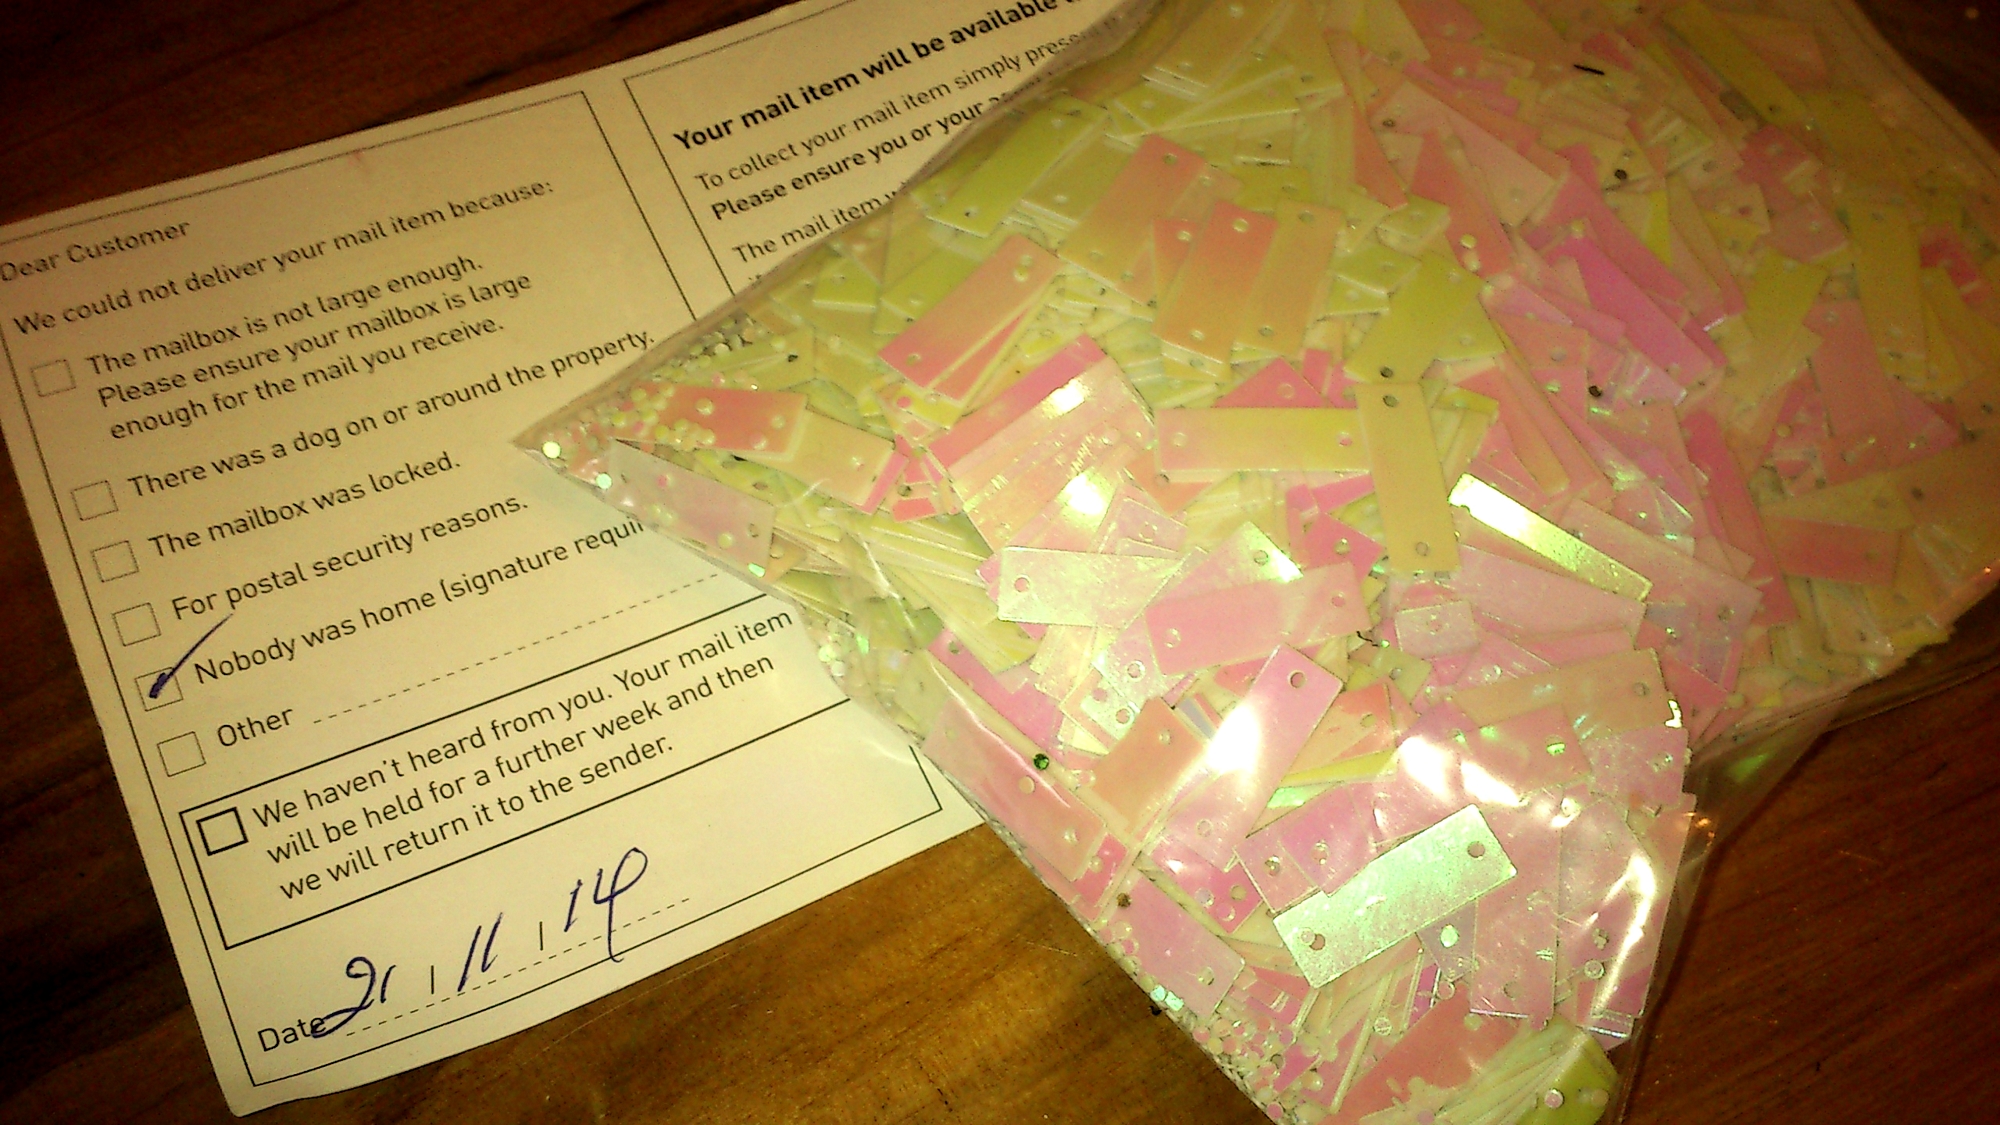
Got sequins to test dye and also glitter in two shades of pearl. To match the two shades of interference powders I’ll be using 🙂 Oh, next step. Transfer all my resolene to a clean container with a lid as I have no idea where the lid actually is. So, to the sequins, then to bed.
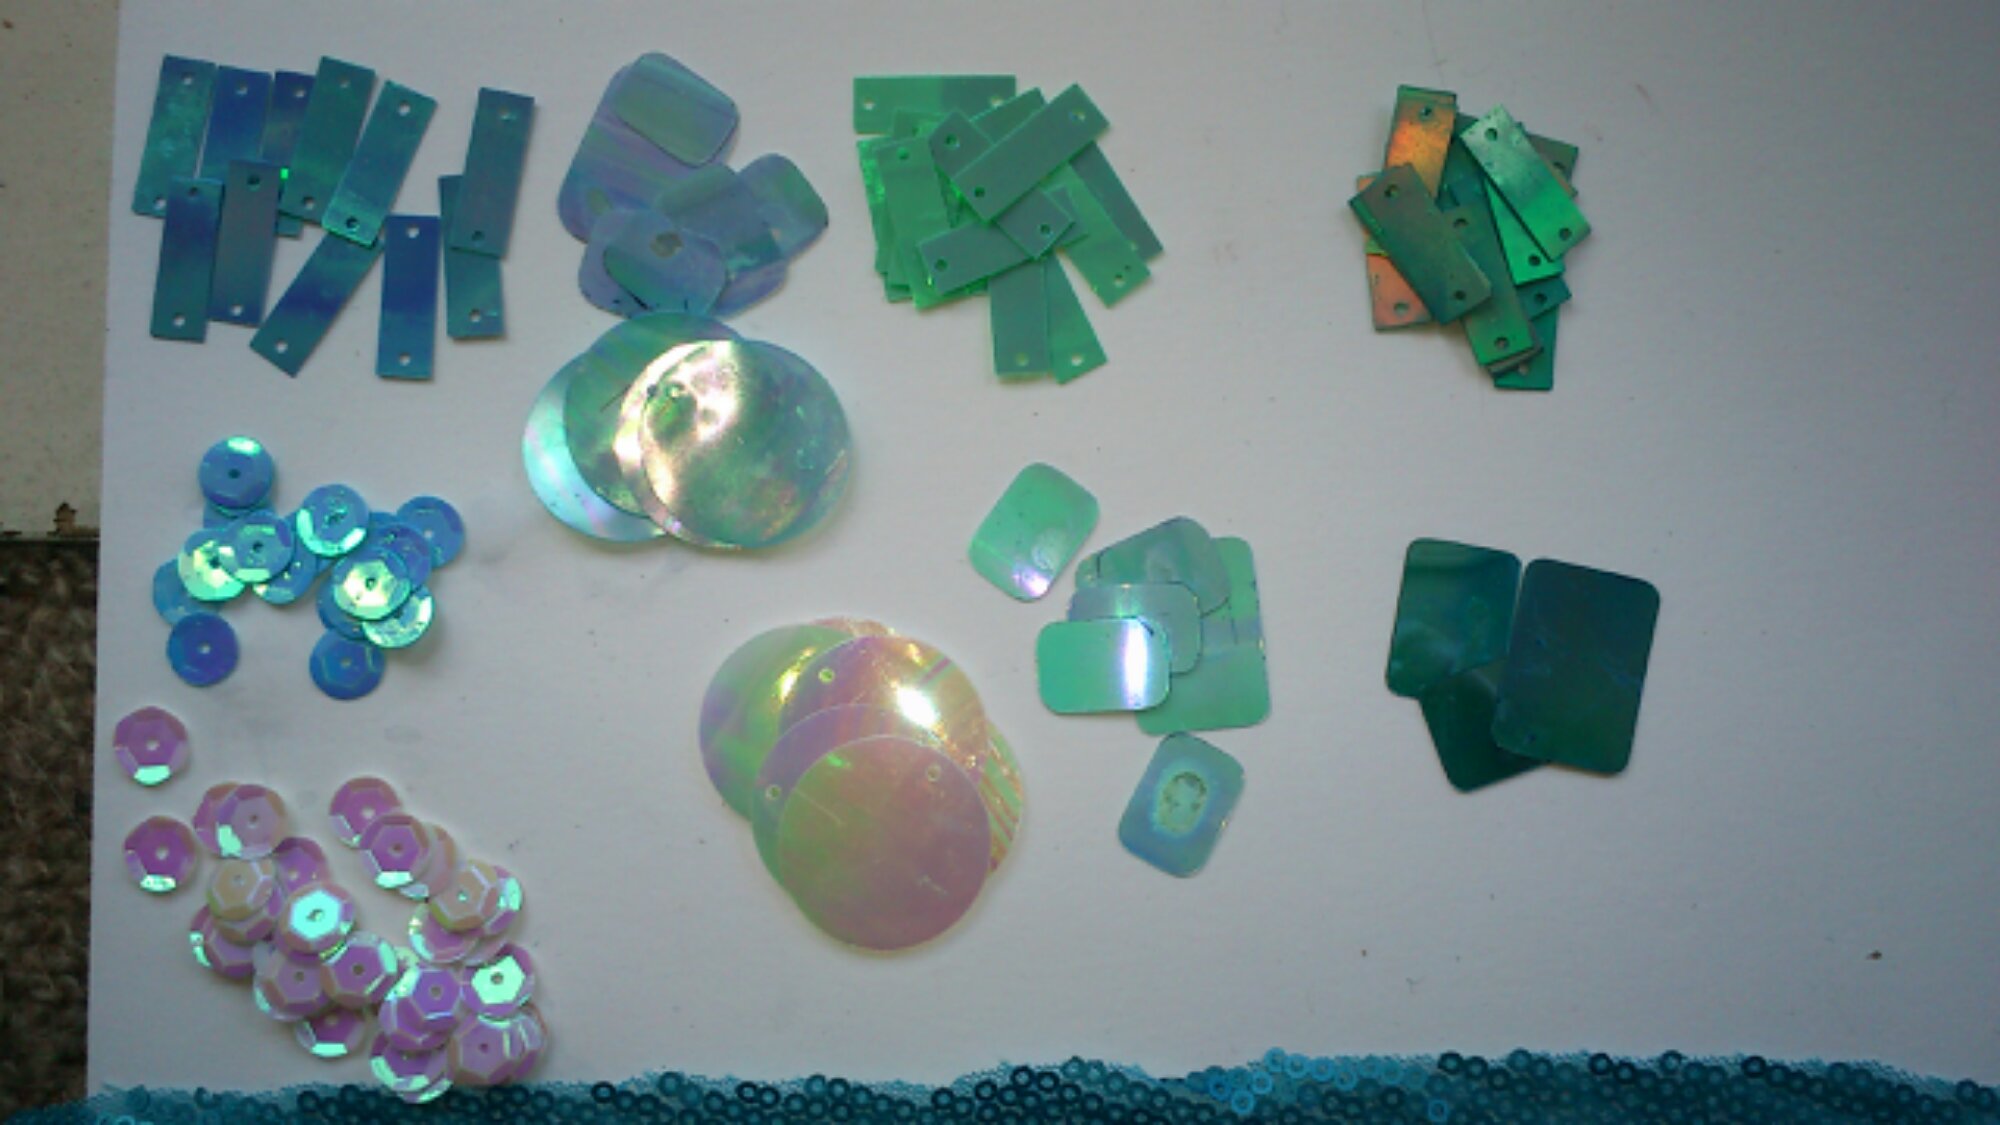
Top; Athena Bead cornflower blue, cornflower blue Josey Rose sequin film, aqua green Athena Bead, ditto overdyed with iDye poly Turquoise.
Middle; Sullivan’s (29032- 9mm cup ivory with coating) dyed ditto, Maria George clear with coating 20mm sequin dyed ditto.
Bottom; Sullivan’s cup undyed, Maria George undyed, Elizabeth Craft shimmer sheet (iris) ditto Turquoise.
Turquoise 3mm matte sequin mesh.
So I now just need to decide between film or ready cut sequins.
But over all I now most recommend solid pet/pvc sequins cut or uncut in white/ivory/clear and dye them to colour. It’s paler than anything easily available and so easy to get your materials stockpiled!
Luckily I have had heaps of experience with both parts in terms of drafting and draping 🙂 Key things to note are:
Most commercial patterns are a good start, however they almost universally make backs too deep. It looks lovely on a dress form but on a human it winds up a secondary anchor point. There are two, generally speaking- at the waist and under the bust. These are where you can put circles of elastic and they will stay mostly in place. In the case of the former because there is rigid bone above and below (ribs and hips) and in the latter there is gravity/friction from breast tissue that also acts as a physical barrier.
Of course this is far from universal and speaking as someone who has one anchor point in actuality it still helps to work out where they both are for any support layers- hidden stay tape, where you can a padding etc.
So, the back; extend and widen. You can use inner stay elastic to hold the back in place and then let the bodice float over that, but this is the secret to victorian corsets- they rise higher in the back than the front. That is in part due to the rigid boning keeping the shape from displacing vertically. This eliminates the old bra line issue 🙂
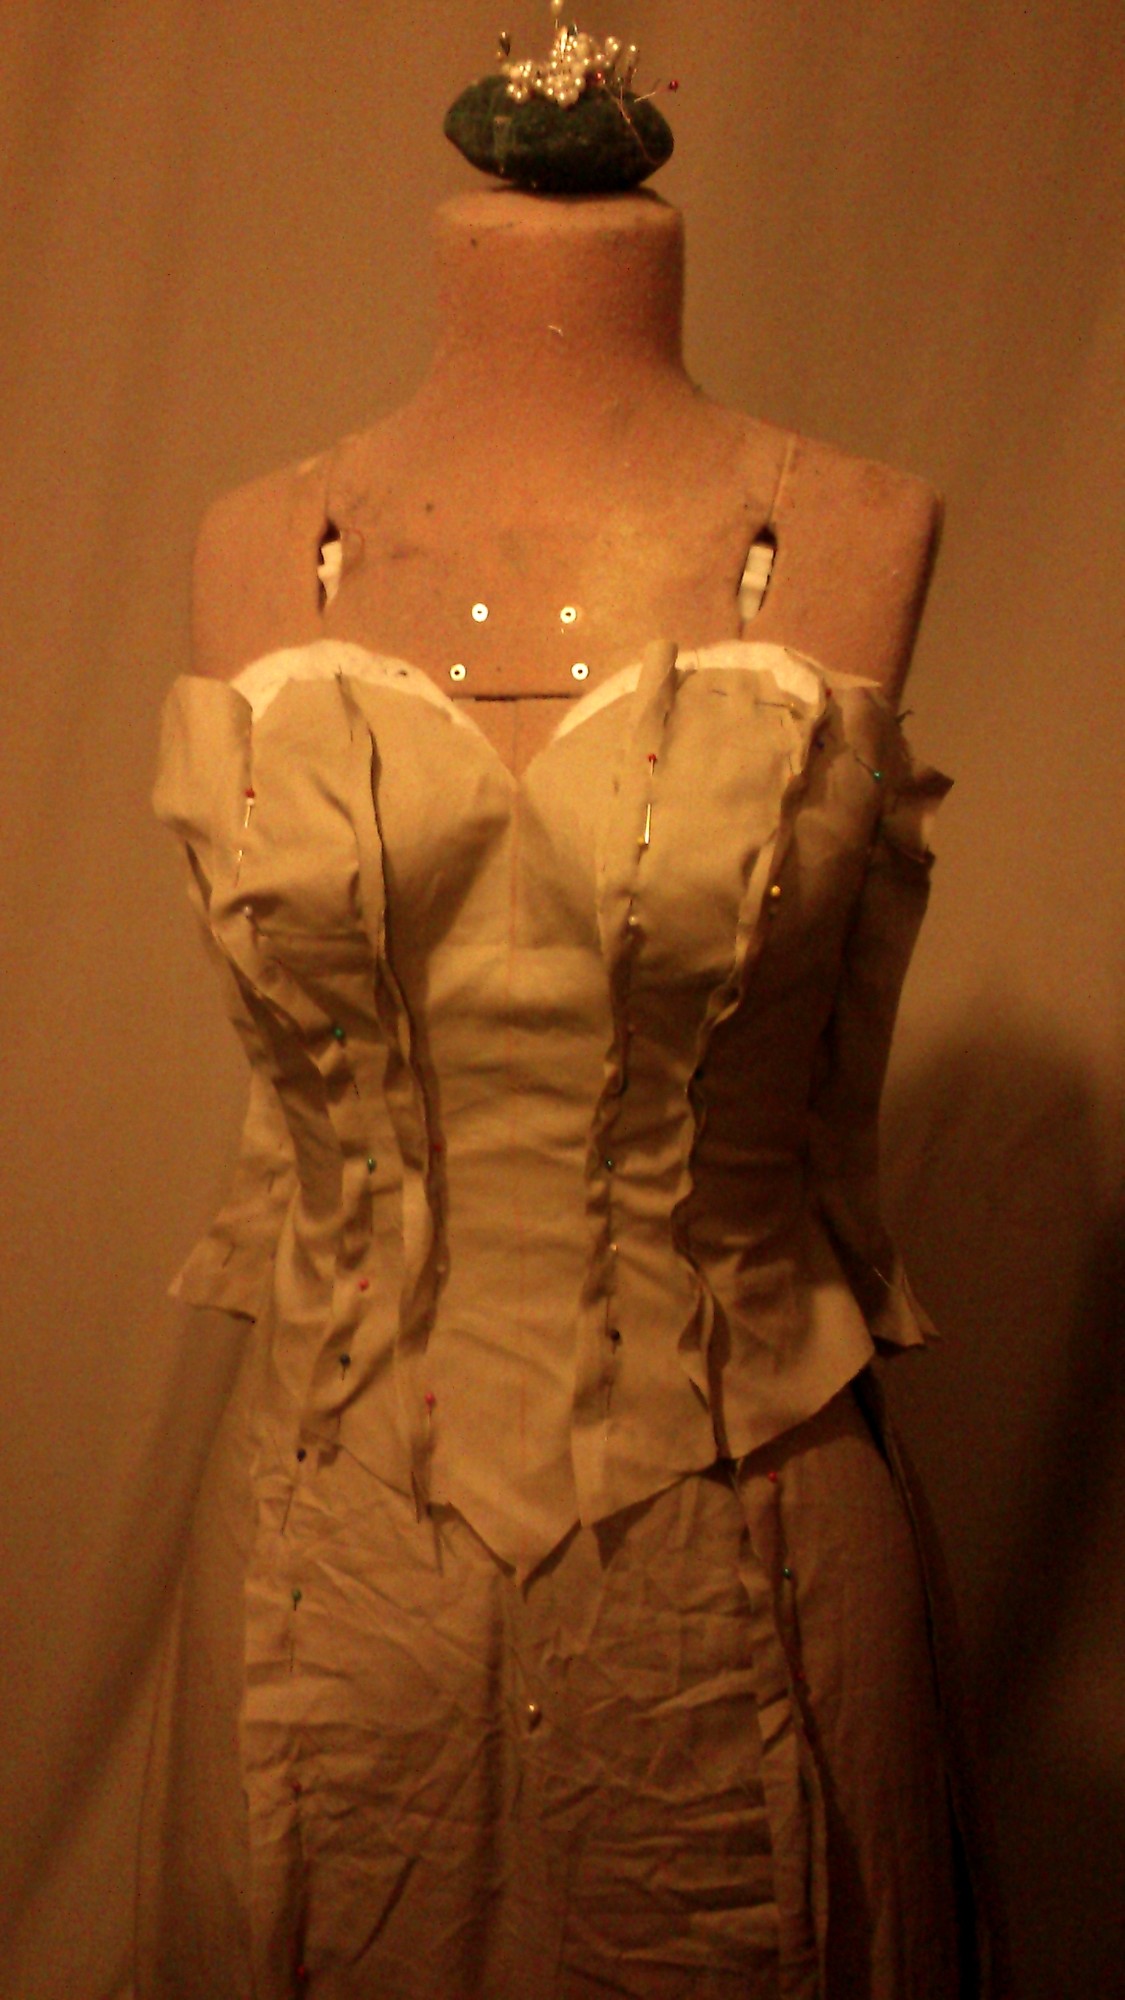
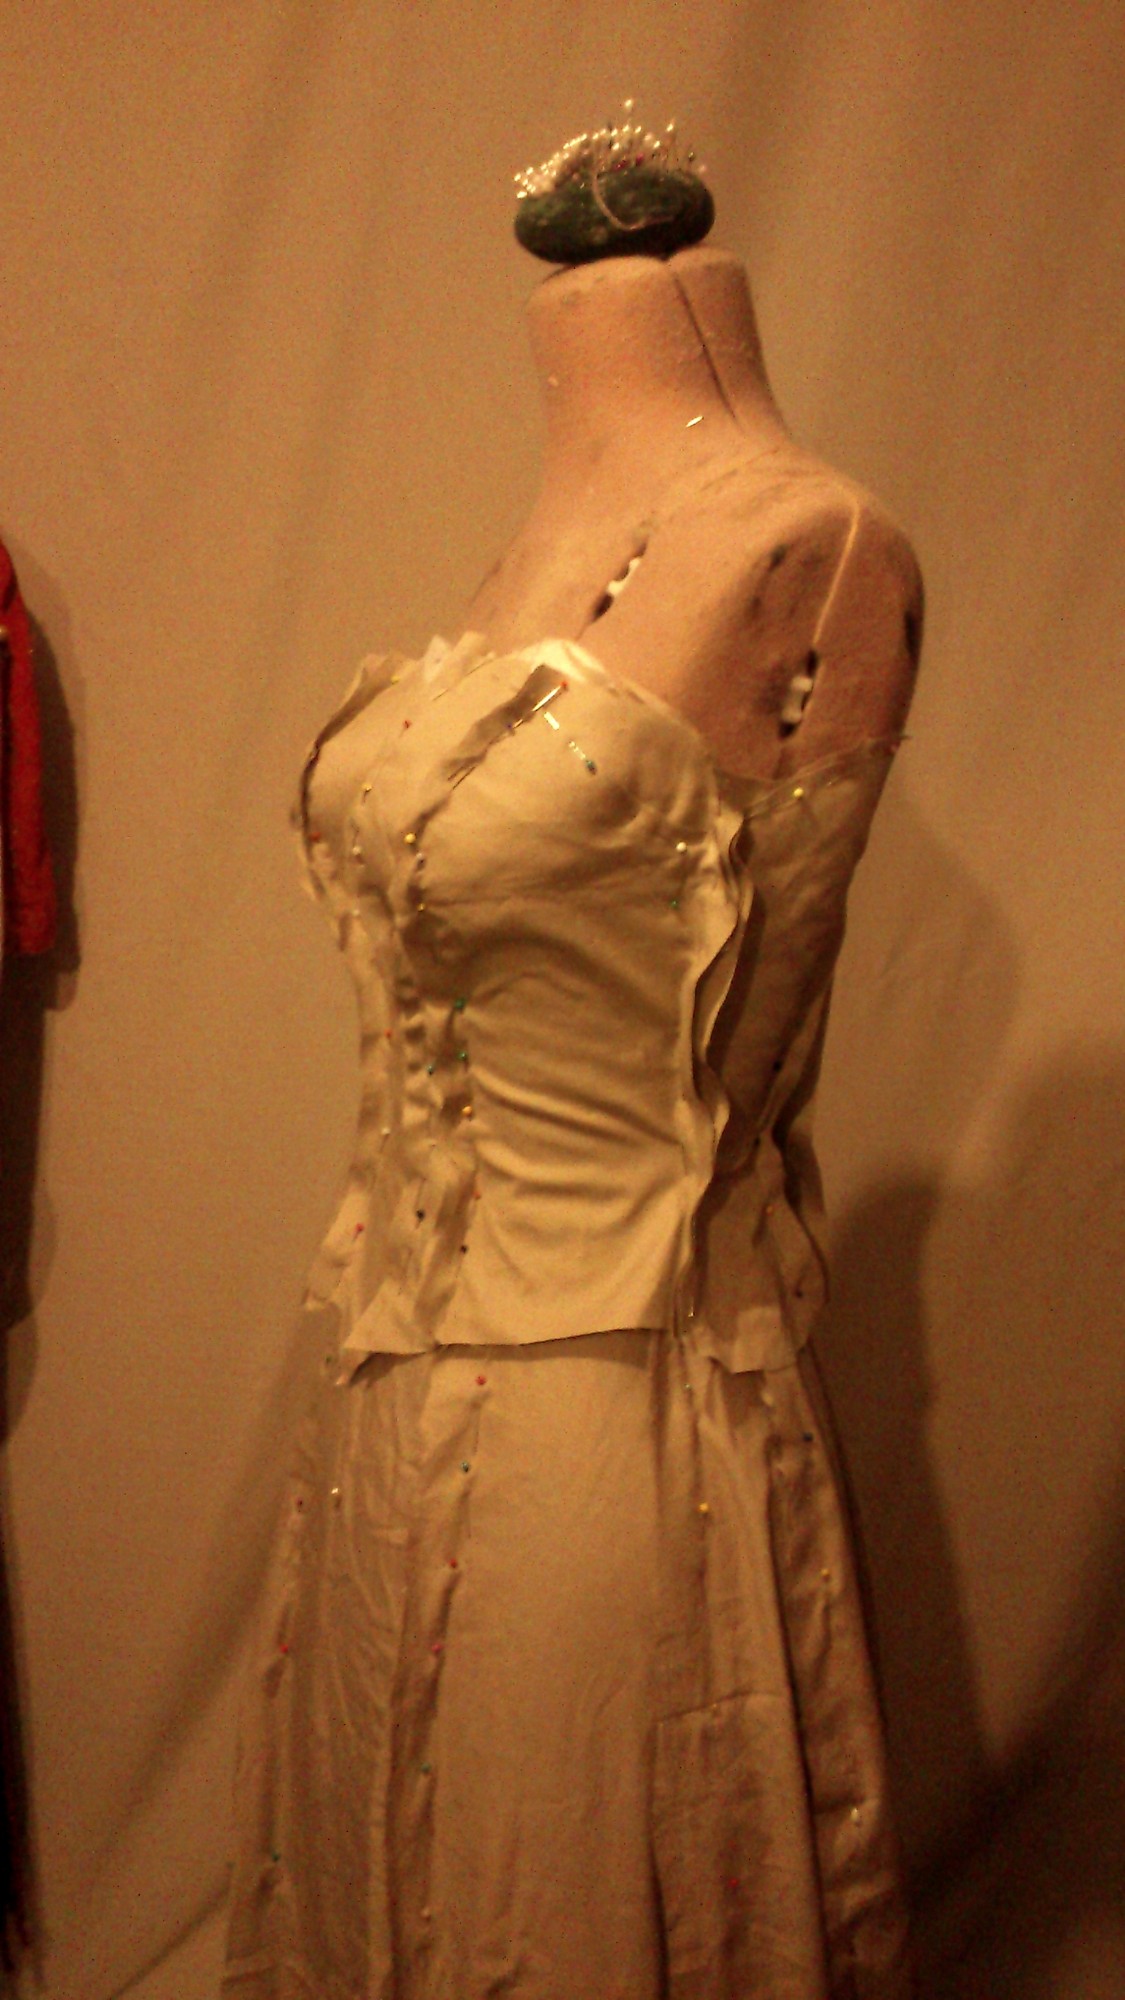
Anyway, the bodice I draped here started as a rectangle of fabric and I put in extra padding on my form at the bust so that I can make the bodice to fit over that then padd the inside to shape. But I really need a foundation to at least start cutting my fabrics and find the most natural places to take in or let out as needed.
Oh and no, that is not yet the final shape. It’s close because I’ll do as everyone else has and ignore how the bodice actually sits right at the waist at the back and sides and only dips below at the front. Why? It’s not entirely flattering. Elsa does not have big hips and yet even she looks distinctly hourglass because the shape pulls over the hips making them more prominent.
I need to decide on accuracy over flattering so I will need to get started asap.
Oh and further to the above and to the previous post about shapewear- I did find one glorious bridal gown at Savemart. It’s the perfect example of how the inner of a high end gown is a very different shape to the outer. It was however a really good example of how bulky our modern formal wear is. I have an 1890s bodice that is fairly typical of the time and even with velvet it does not add much bulk. The stays (flat steels) are super thin, my steel boning is about 3X the thickness.
The corsets I have handled have likewise been much thinner yet as sturdy. Apparently it is in part down to our modern fabrics just not being as strong as in the past (which means we wind up using bulkier fabrics for the same strength). I do think there is a tendency to use bulky material to begin with. The fuzzy boning cover material is one example. It’s on underwire as well. You don’t need it.
My poor camera is straining at the sides, it is resetting and the camera decides to not focus and to incidentally not zoom. Oh it shows as having zoomed but the actual photo? No. I may just reboot the thing.
From my motel room last weekend.
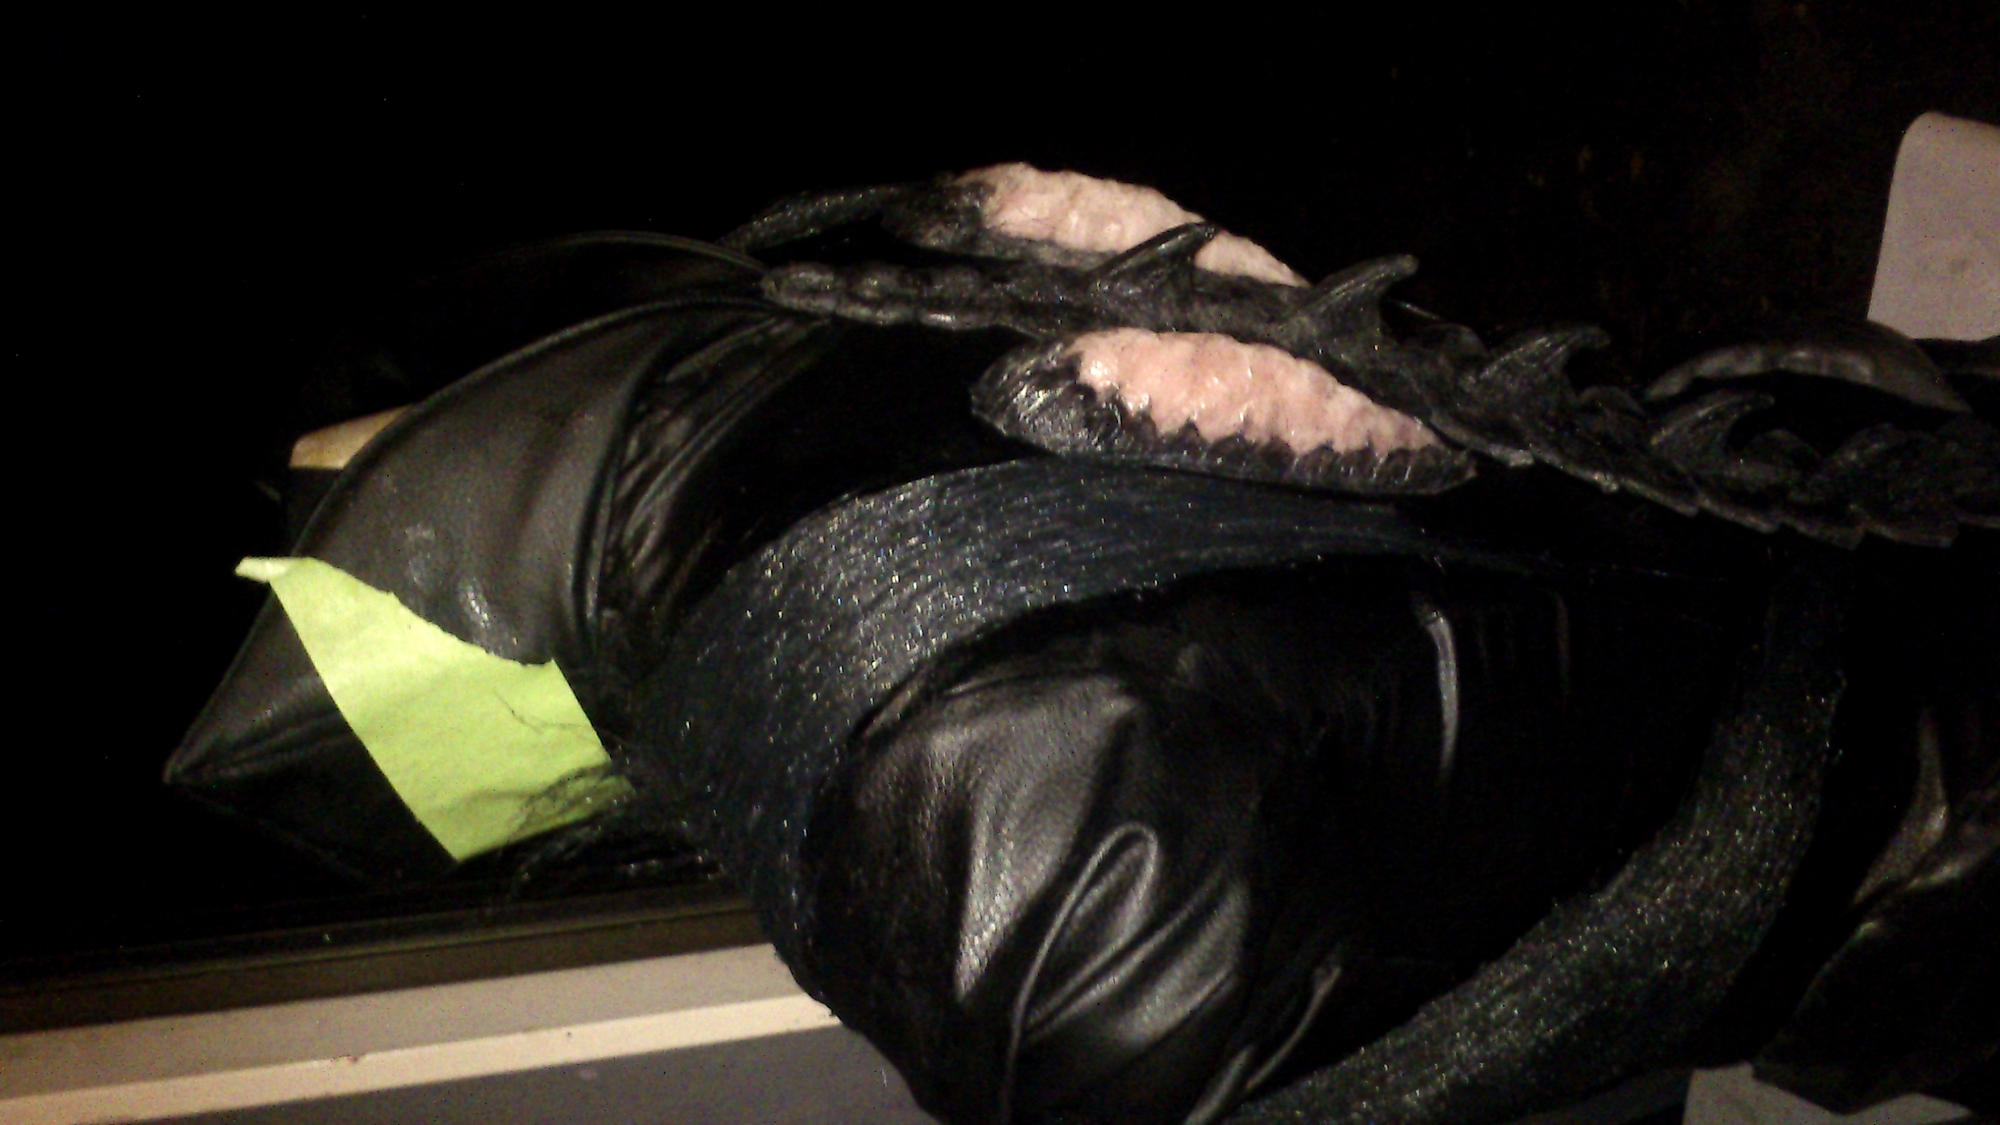
As for the costume- I want to do the full train (now confirmed to be a full train- not sure why it was CG’ed in to a cape and robe) and narrow the shoulders and shorten the back. Also, because I wear it over the spine, I will need to do a little stay tape across the top to hold the collars in place. I have just whipped the pleated collar to the gown anyway (I’ll get photos of my engineering exploits as I redo these parts).
But I love my bird ring. It is a really nice piece of jewellery.
And super happy about not wearing prosthetics, though I will do a more careful pull at a later date. I will remold them with proper channels for run off and carefully paint a super thin layer. And may actually get them back on my head cast, just be more precise about shapes.
It took a few days of forced sleep and a bit of support but today felt like a real day finally.
A proper wrap up later but for now just a few notes, tiny ones but that made big difference.
Wigfashion on ebay. Recommended. Highly. Super highly. Small note though: definitely get the wigs with the tiny widow’s peak. Even if you don’t have one it balances the whole fake hairline better. In photos by others the hairline smooths out anyway.
Do clip as close as possible to the wig hairline (or if you ventilate the front a bit more to account for it.) I did about 5mm. Perfect when actually glued in place (I had time for Fauxriel, not for the others.) And mostly hidden when I was able to put securing pins in the front.
Also the hairline itself is quite deep. I had to fold the edges under to pin near my ears- so yes, these wigs are adaptable to high or low hairlines. I’ll need to cut my wigs to shape as the weight pushes my ears out (as per my Carlotta escapades!)
Circle lenses. OMG. OMG. I know there have been horror stories but as a veteran wearer of lenses they are no worse than the monthly lenses I had prescribed for years. Treat them as you should and with the right fitting and proper care and especially with regards to hydration (do not ever wear lenses straight from the bottle! Use lubricating drops not lens solution on your eyes!) and fit (these are larger so you must have the right base curve) and they are about the same risk.
I have had lenses tear on my eye. One tore right in half as I took my first blink. And they were purchased from my optician. So lenses are a risk to begin with.The lenses are thicker than the new generation of lenses- my eyes prefer them, but I am potentially in the group that benefit from bigger lenses (sclera lenses potentially.)
I won’t go as far as recommending them but I was wearing the Geo Mimi Princess in apple green all weekend (with appropriate care and using my eyedrops.) The base curve is superimportant. Super important.
Eyeliner. Note to self: The reason your liner was crap and was behaving like your very old liquid liner is because it was your very old liquid liner. Stop putting pens away at the same time as make up and this may not be an issue again. That goes for your liquid lip pen as well.
Argan oil is the shiznit. Okay so it is in a carrier of linseed and that is probably all you need but hey. Oil is finally your friend.
Silcon adhesive. Works for eyelashes and wig lines. Faster setting than PA and more flexible than.. the other stuff. Which I don’t use. Thingy. Spirit gum! And you can carefully pull the glue off the lashes. Yes the glue is solvent based but the speed of drying means that has evaporated off before you get to your eye. I used a cuticle tool (shortened bamboo skewer type) to dip in to the glue and sweep across the underside of the lashes. Seriously super fast. Only one issue where I tried gluing over a patch of skin that was still covered in moisturiser.
Skin prep is key. I did nearly nude make up for Fauxriel and Christine. It would have worked really well if I had my liquid lip base (as in lip stain) and proper eyeliner.
But I think we can call the “Photo Ready” line a success. I used the colour correcting primer and transluscent powder.
Found royal blue satin to line my fabric and boy does it make the sequins pop green!
But of course this is only seen at the hem, so i will need to still get the green on the sequins as per my vidéo in Feb.


what brand silicone adhesive do you use?