viscountess:
neimhaille:
viscountess:
JEREMY STOLLE DOING A PHANTOM COSTUME VIDEO WITH PHANTOM COSTUMES FEATURING PHANTOM COSTUMES.
Spazzing… see, see multiples of the Blue Dress bodices on top skirts on bottom. Just how it was backstage at Sydney 🙂 No-one ever believes me when I said there were at least three of each part of each costume and that they were bodice and skirt separates- I got sooo close to touching one of the wedding dress bodices… but we were being led to Rob’s dressing room so I didn’t get to play. The staff there were glad someone appreciated all the work thoughXD.
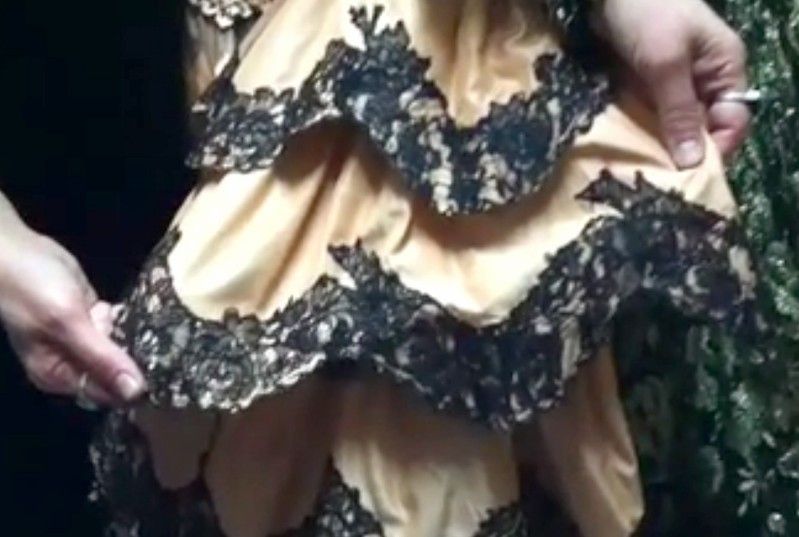
Also close up of SB’s Aminta dress? Love! Especially being able to see the alignment was not quite perfect- possibly a repair? Lace snags, and hand sewing snags.
I will not make the Aminta dress, I will not…. *twitch* I still have my Elissa gown glaring at me as I work on all this sci-fi malarky.
I do think I was wrong about the Hannibal skirts though. I think they may have been done as per the US skirts, there is a fair bit of overlap of details between the two productions.
The next time someone doesn’t believe you, throw a shoe at them. It’s pretty much common sense considering there’s a principal, alternate, understudy, etc. Also for the US versions, if you get a look at the inside, you’ll see little elastic loops in the waistline and short laces on the waistband for quick and easy attachment and detachment.
There were costumes for alts & understudies but also in case of emergencies. Easier to grab a new skirt if a hem tears than try and repair it! The Aussie bodices were all hooked up the back with pants/skirts hooks and eyes. Basically again for quick changes- they were so rigid with interlining and boning that you could hook at waist and neck and they’d be okayish to go on….
My website seems to have died (must tackle my hosts, it started with me not being able to access cPanel now the site itself) but:
From the Midday at The Phantom: (DH+ host, SS+ Suzy Strout)
DH: You have to have replicas of virtually all these major costumes in case something goes drastically wrong.
SS: That’s right. Um Blue Dress we’ve probably got about five full sets of that. Carlotta; all of her outfits- she has six fairly stunning outfits- there’d be probably about six of those that we’ve got back there.
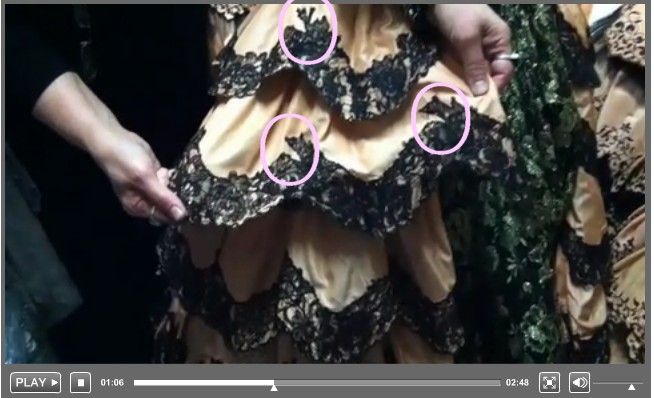
Which part of the lace alignment are you talking about? The only thing I can think of is where the bottom of the bodice meets the first ruffle.
Circled in pink 🙂 Having now screen capped it looks like it was deliberate given there are at least three fairly obvious clips/joins in two rows. A few seconds later and you can see the same notch in the repeat to the LHS of that 2nd row. Just so nice to see it after all these years 🙂 I’ve already graphed up a single repeat of embroidery for the newer versions (a blend of styles), but I kind of dig the old version 🙂 Also I love the netting under the newer B’way ruffles.
I grabbed a full screen cap of it as well…. let’s see if photobucket will keep the full size…

No idea if that is clickable or not, but it is a little smaller than on my computer. Ah well.