More helmet progress
More helmet progress

The textured centre and main strapping resolened in place.
The textured centre and main strapping resolened in place.
Charmeuse at the top (closer to the colour in the flash) new softer but strong net on the right, power net on the left and three Shimmer Sheetz on the bottom: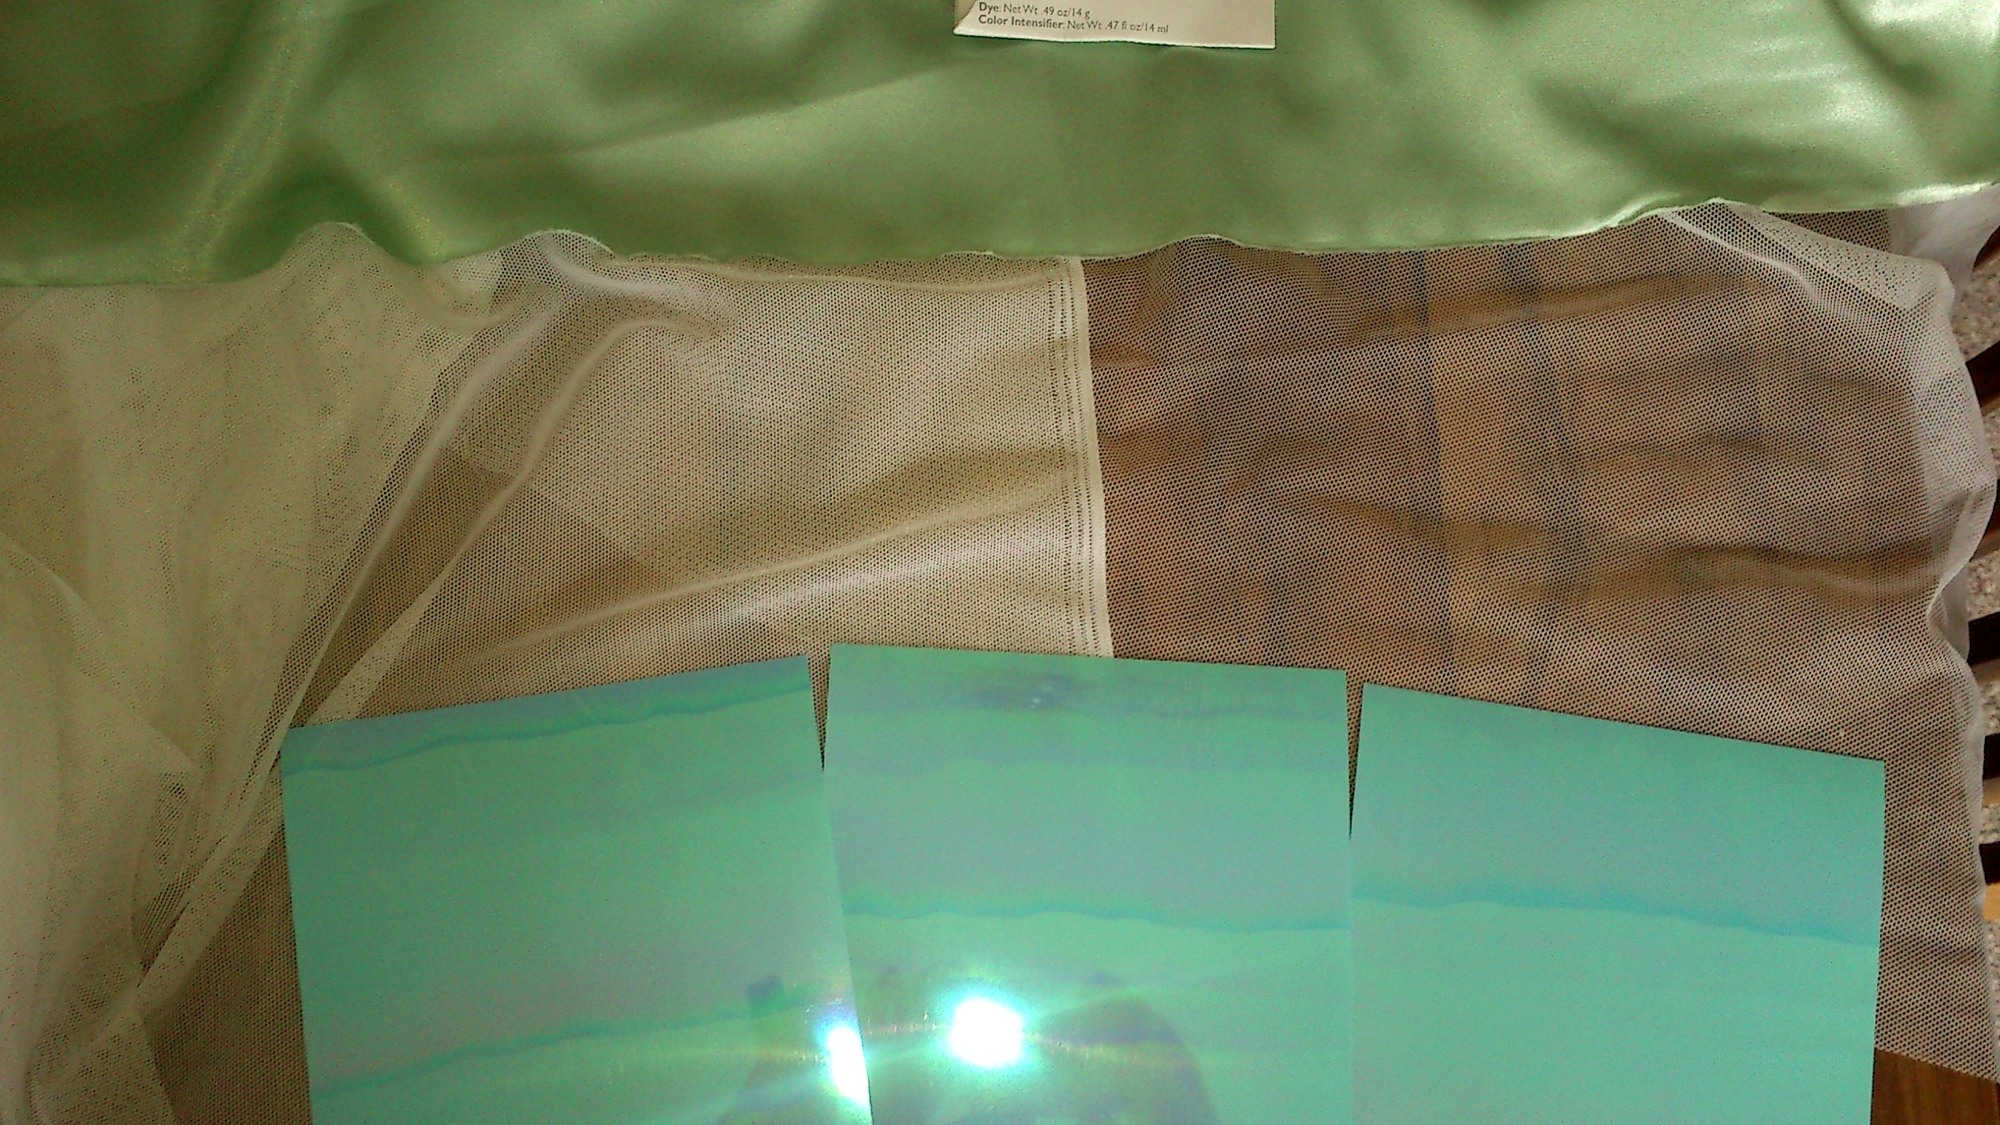
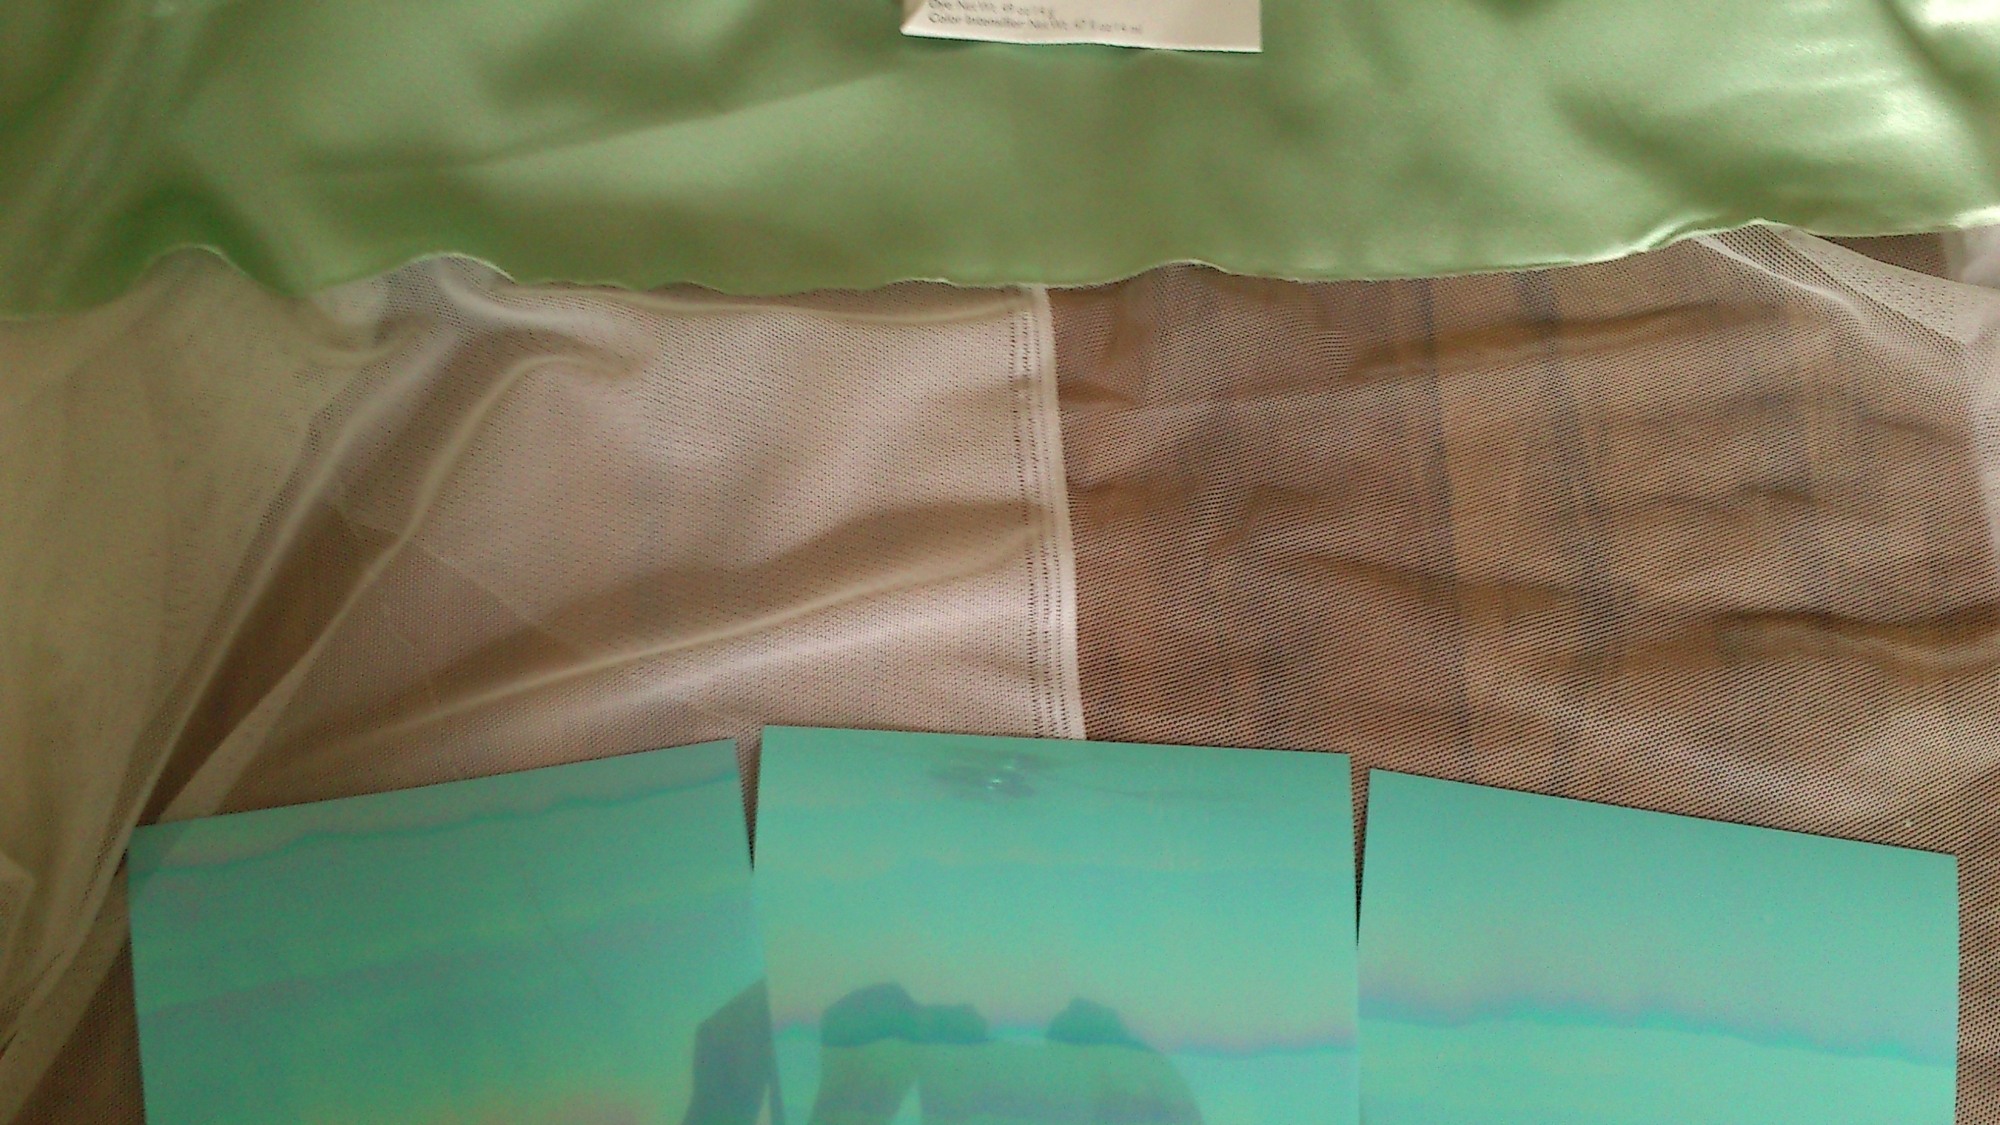
Forgot the link: http://www.ecraftdesigns.com/collections/shimmer-sheetz/products/blue-iris-3-pack
In large sheets like this it’s a bit floppy but easy to cut. I’ve tested a small rectangle. It’s pretty pliable so I’d definitely recommend these for those who want to glue not sew- it will form to body curves pretty well. In the large sheets they can be sanded easily which will give the glue something to stick to.
I’m also now okay with the iridescence in person. It’s not too much, There are those kind of flame lines but I have Plans(tm) on using that as a guide to cut.
Grabbed some photos (ELissa tiara on the top there) without flash and with flash. Without is much closer to the real colour than with:
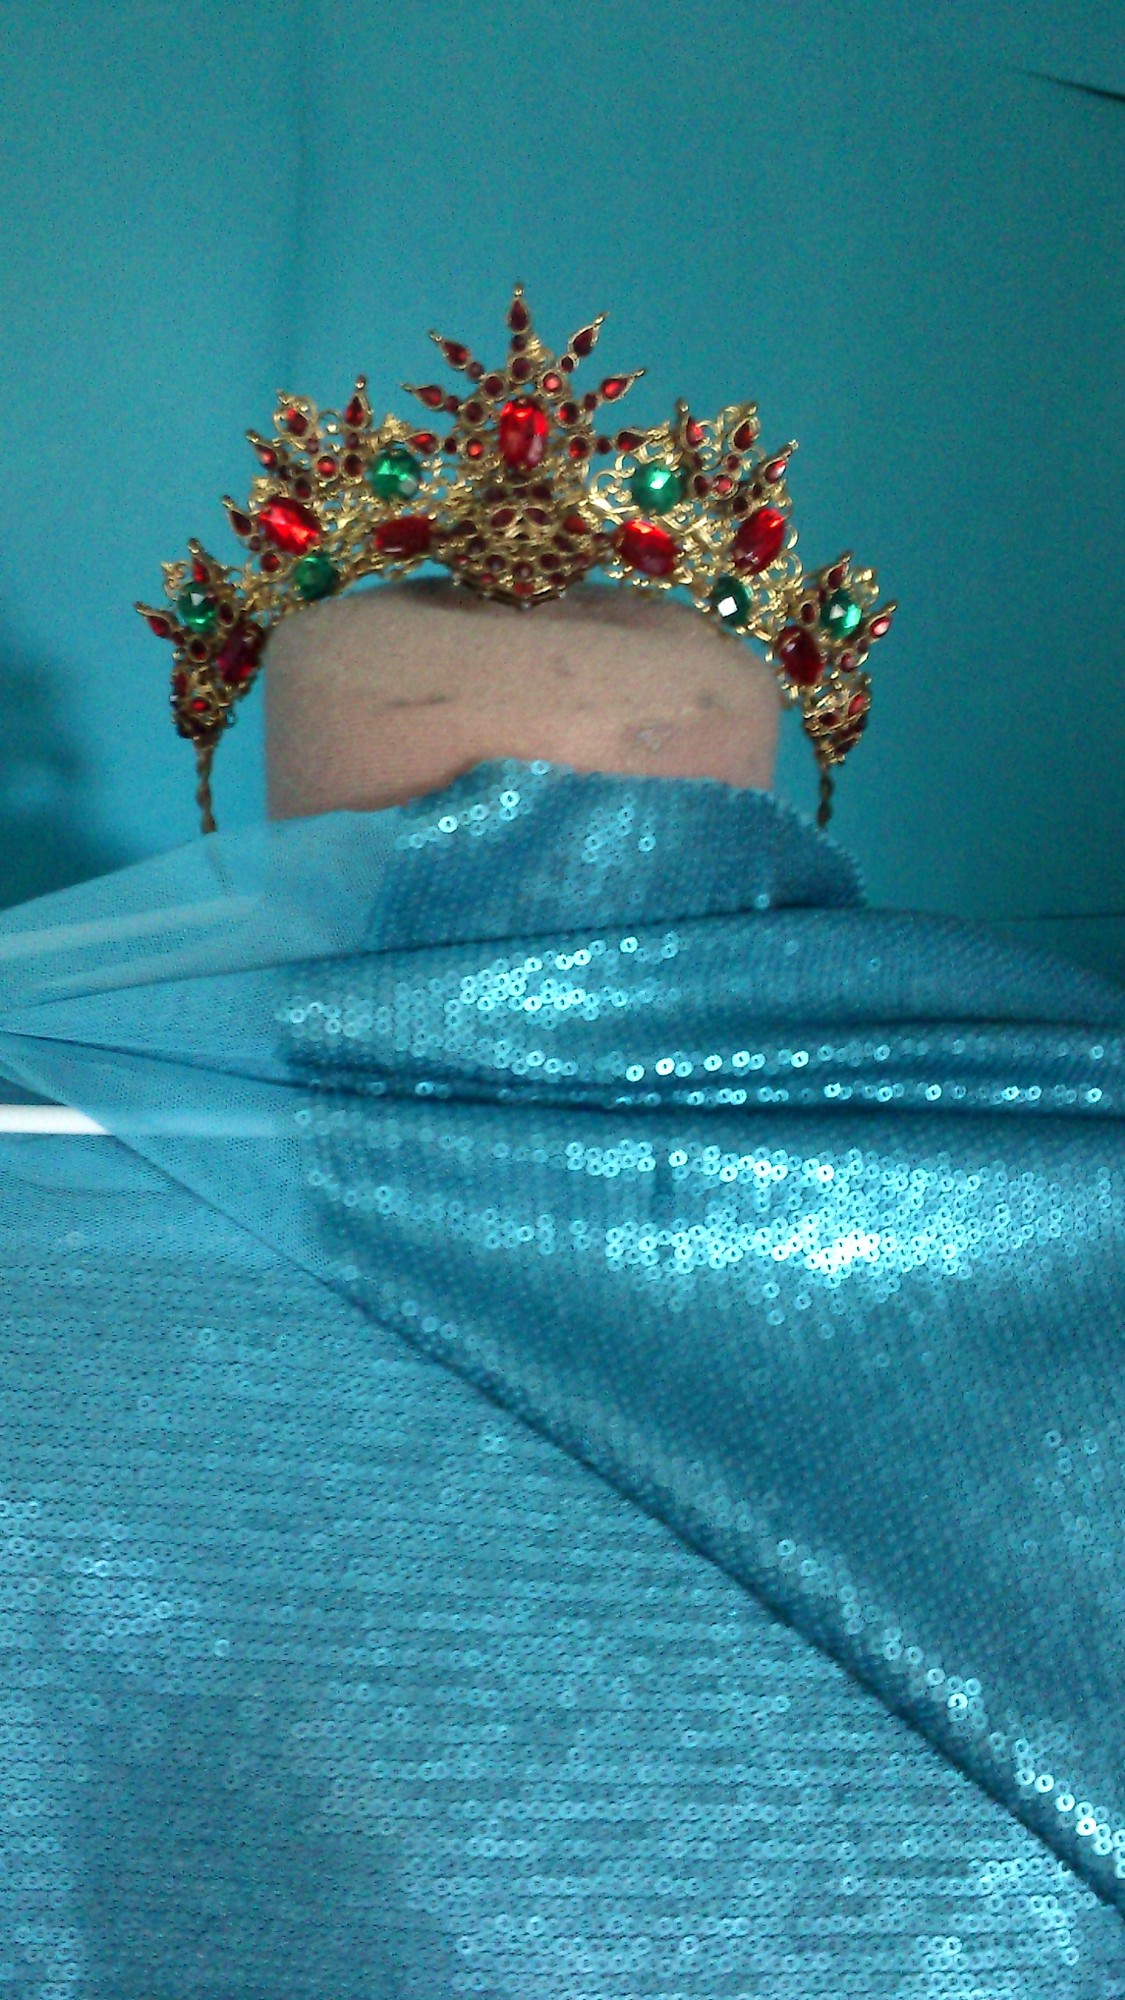
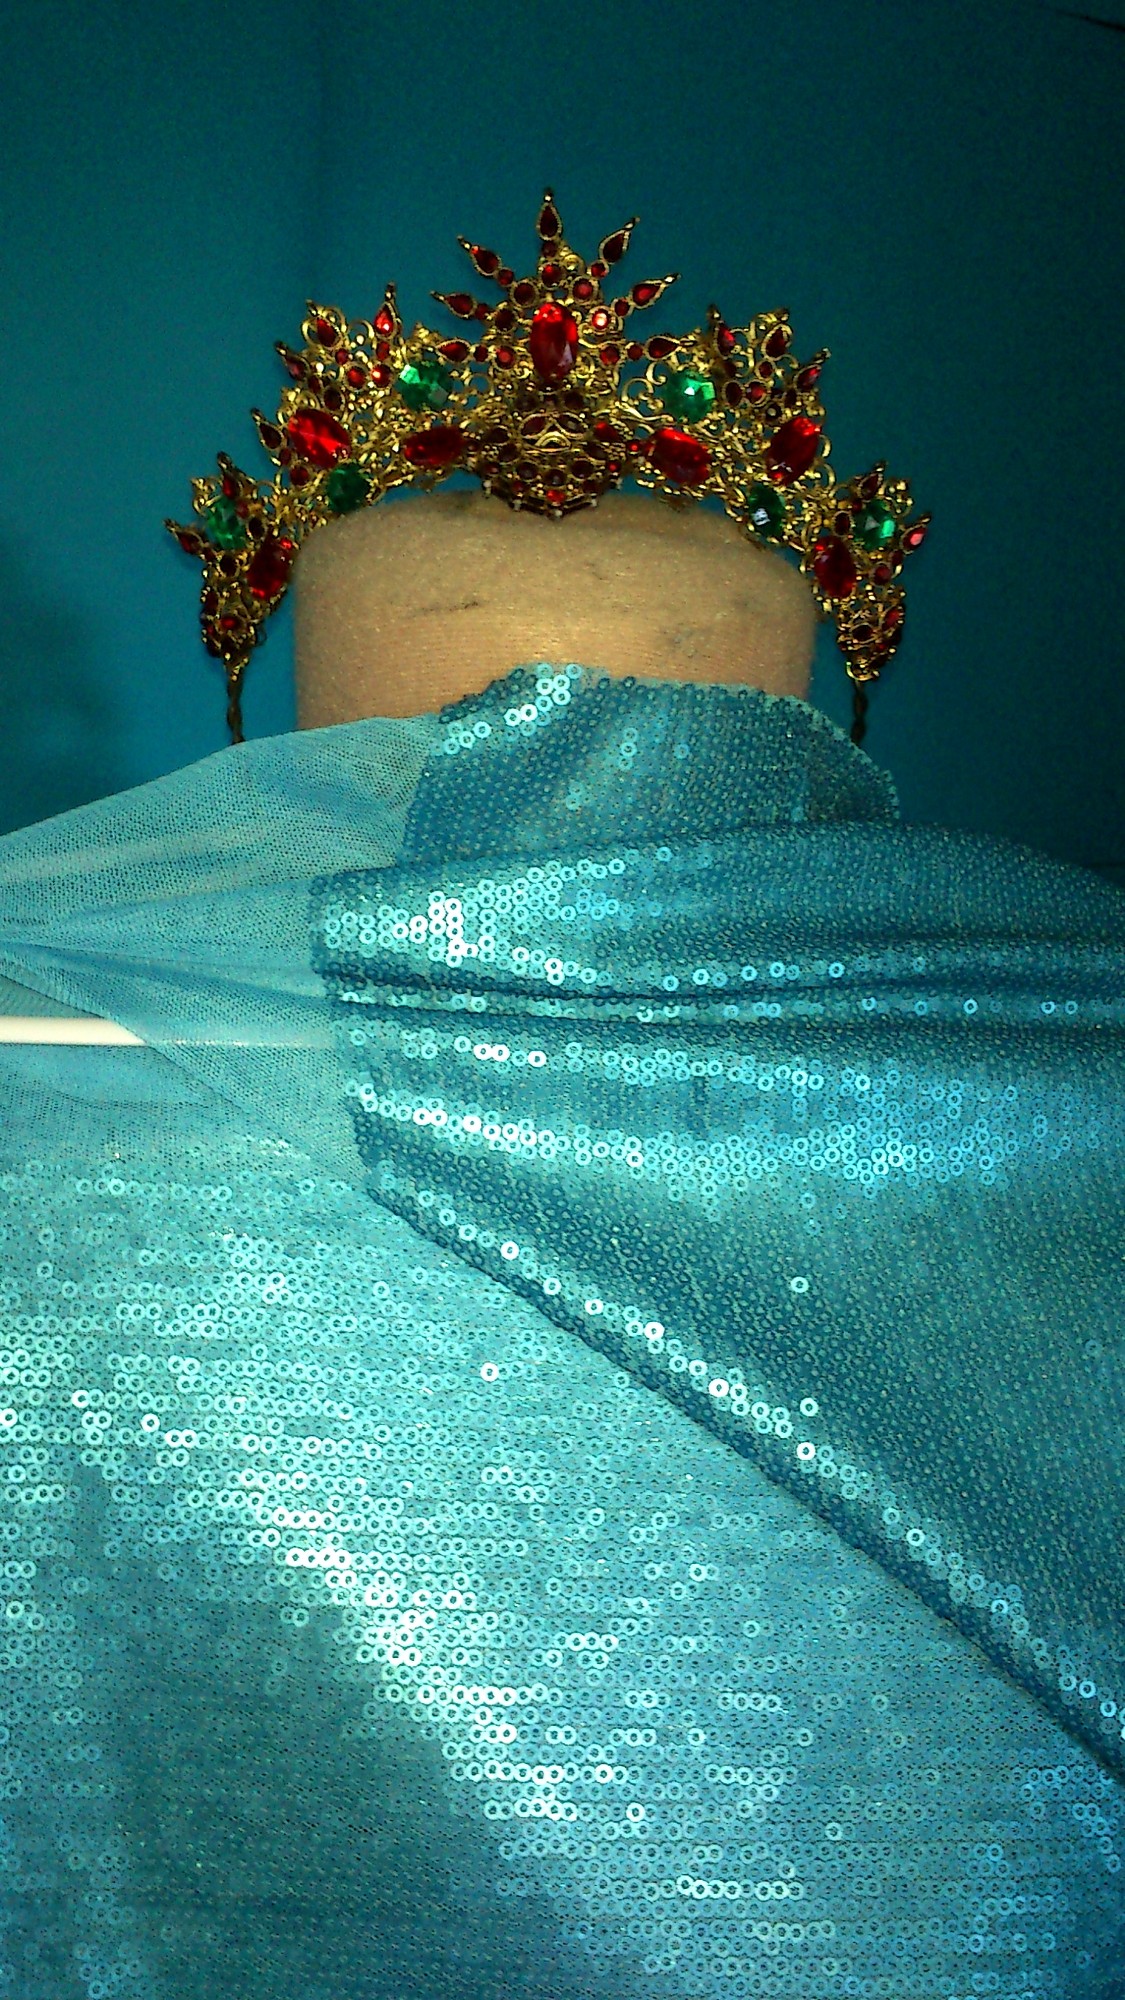
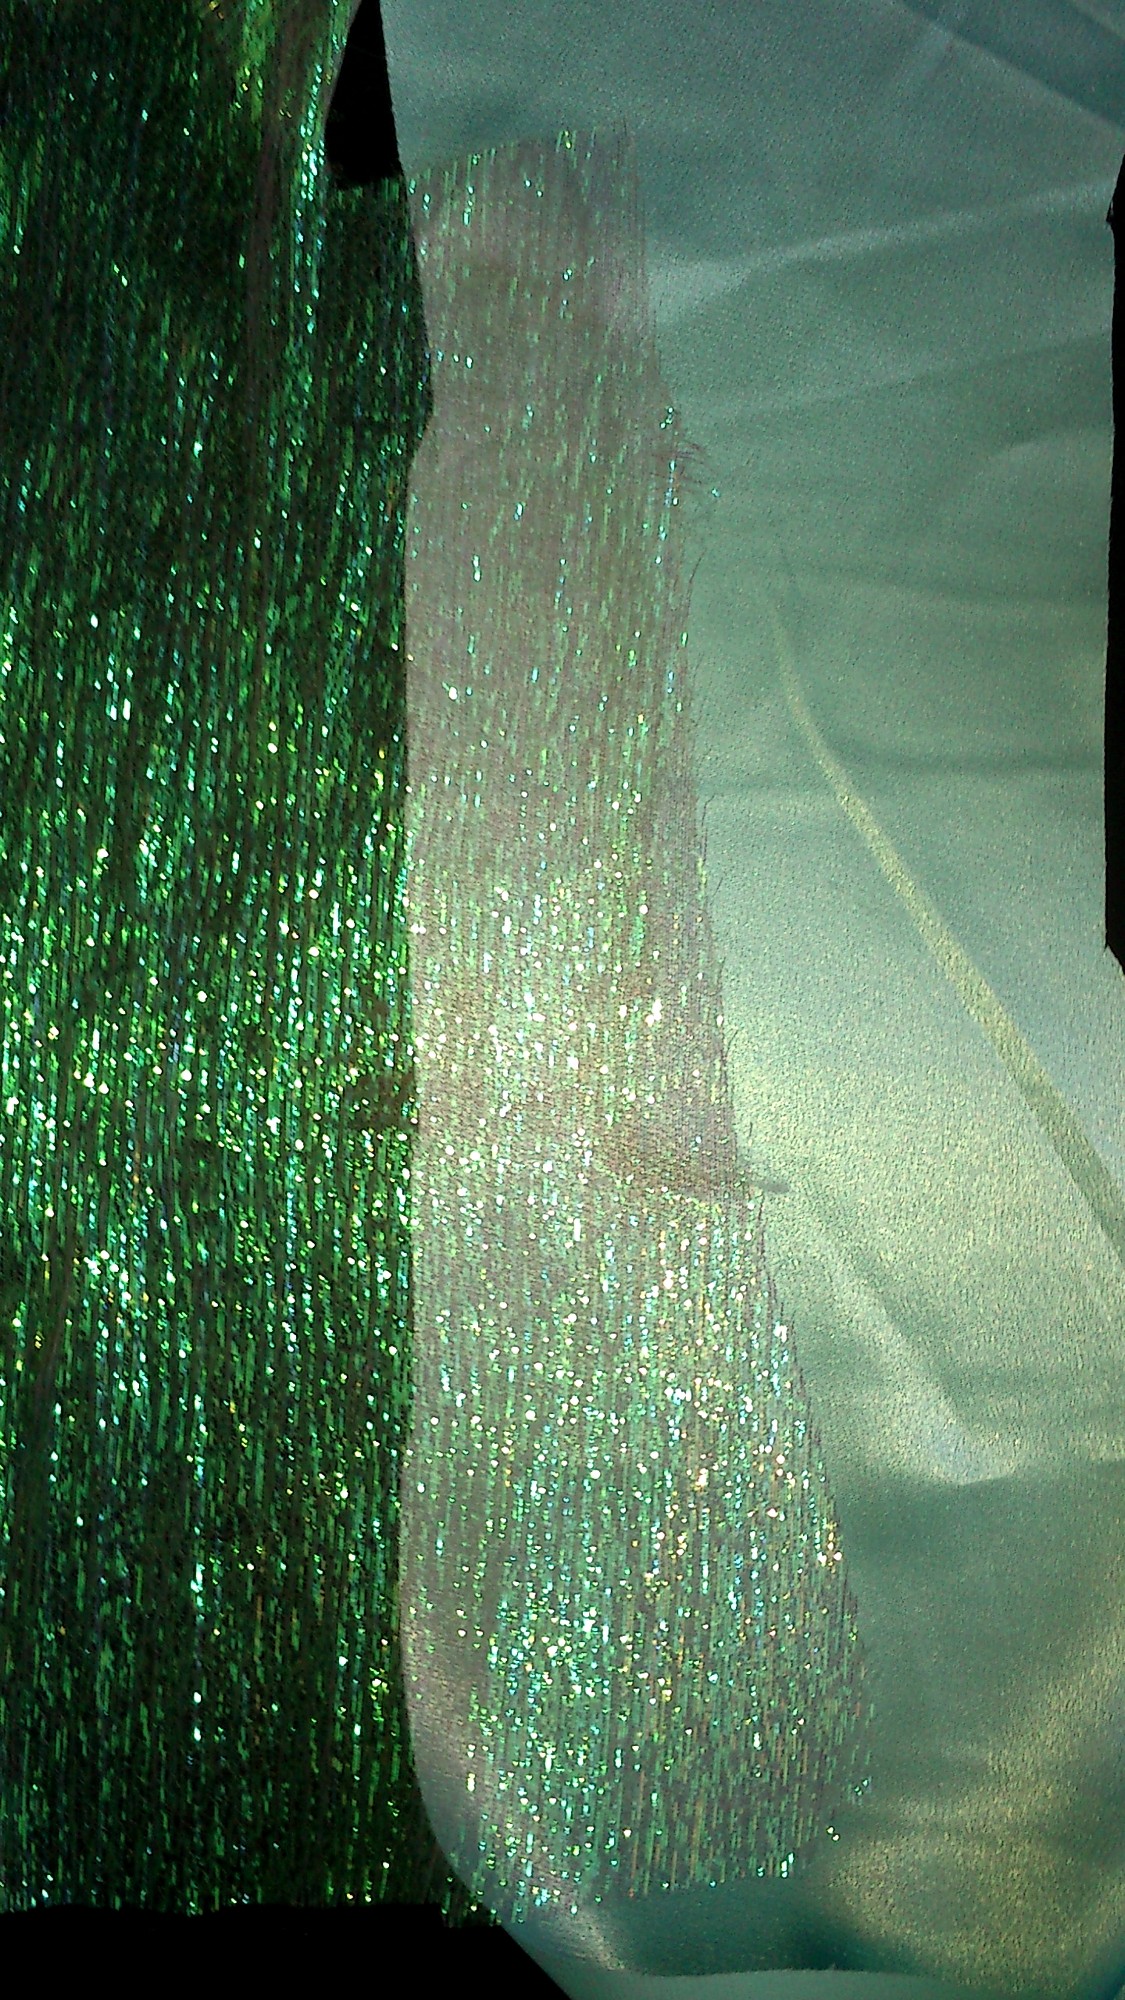
I mean I’d prefer it like it is with the flash… but hey, interference green pigment? I have and here it is tested on the top of the sequins (on the right):
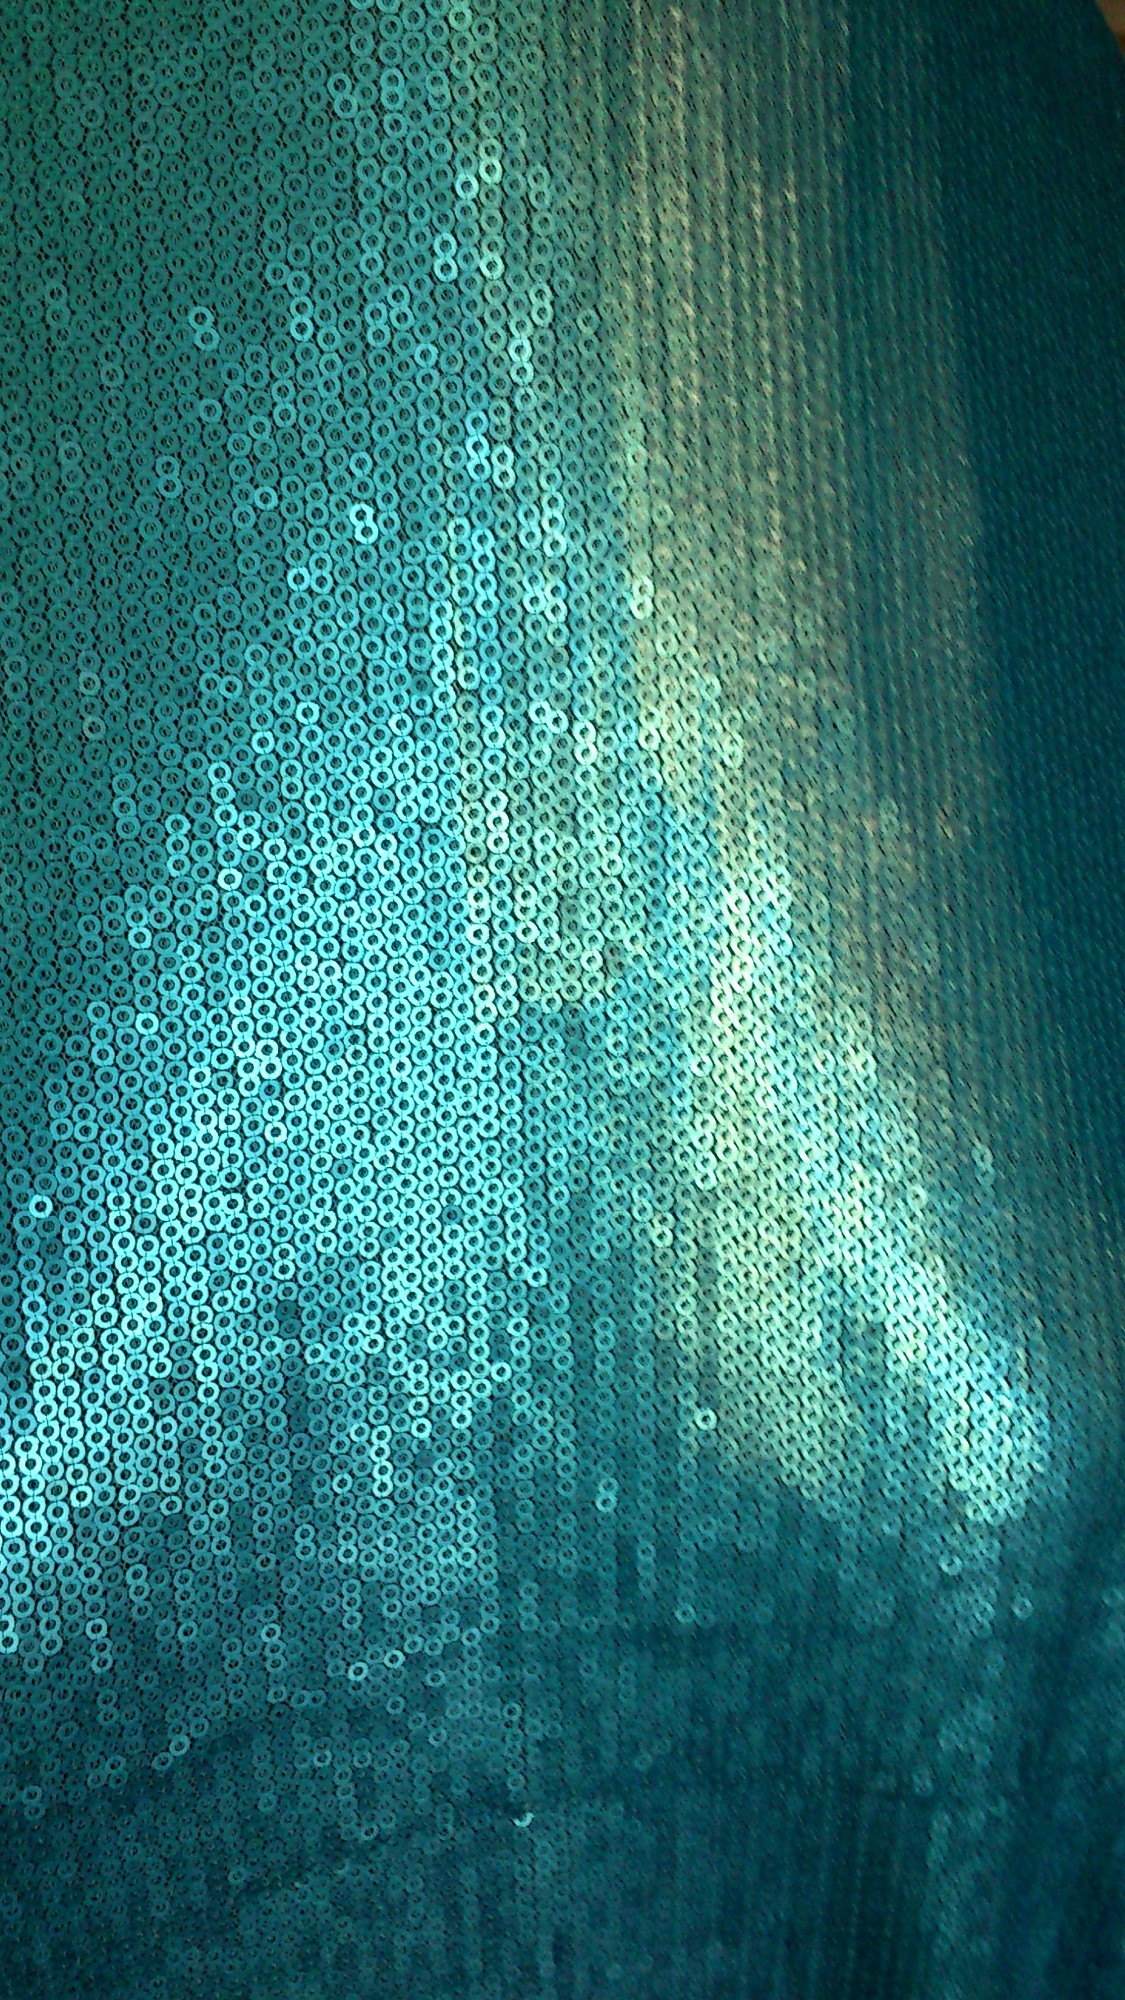
As the sequins are matte this is more likely to work than had I got shiny sequins as I doubt I’d find exactly what I want in terms of colour. Also the low sheen is subtle, it makes the fabric look like 1930s real metal lame.
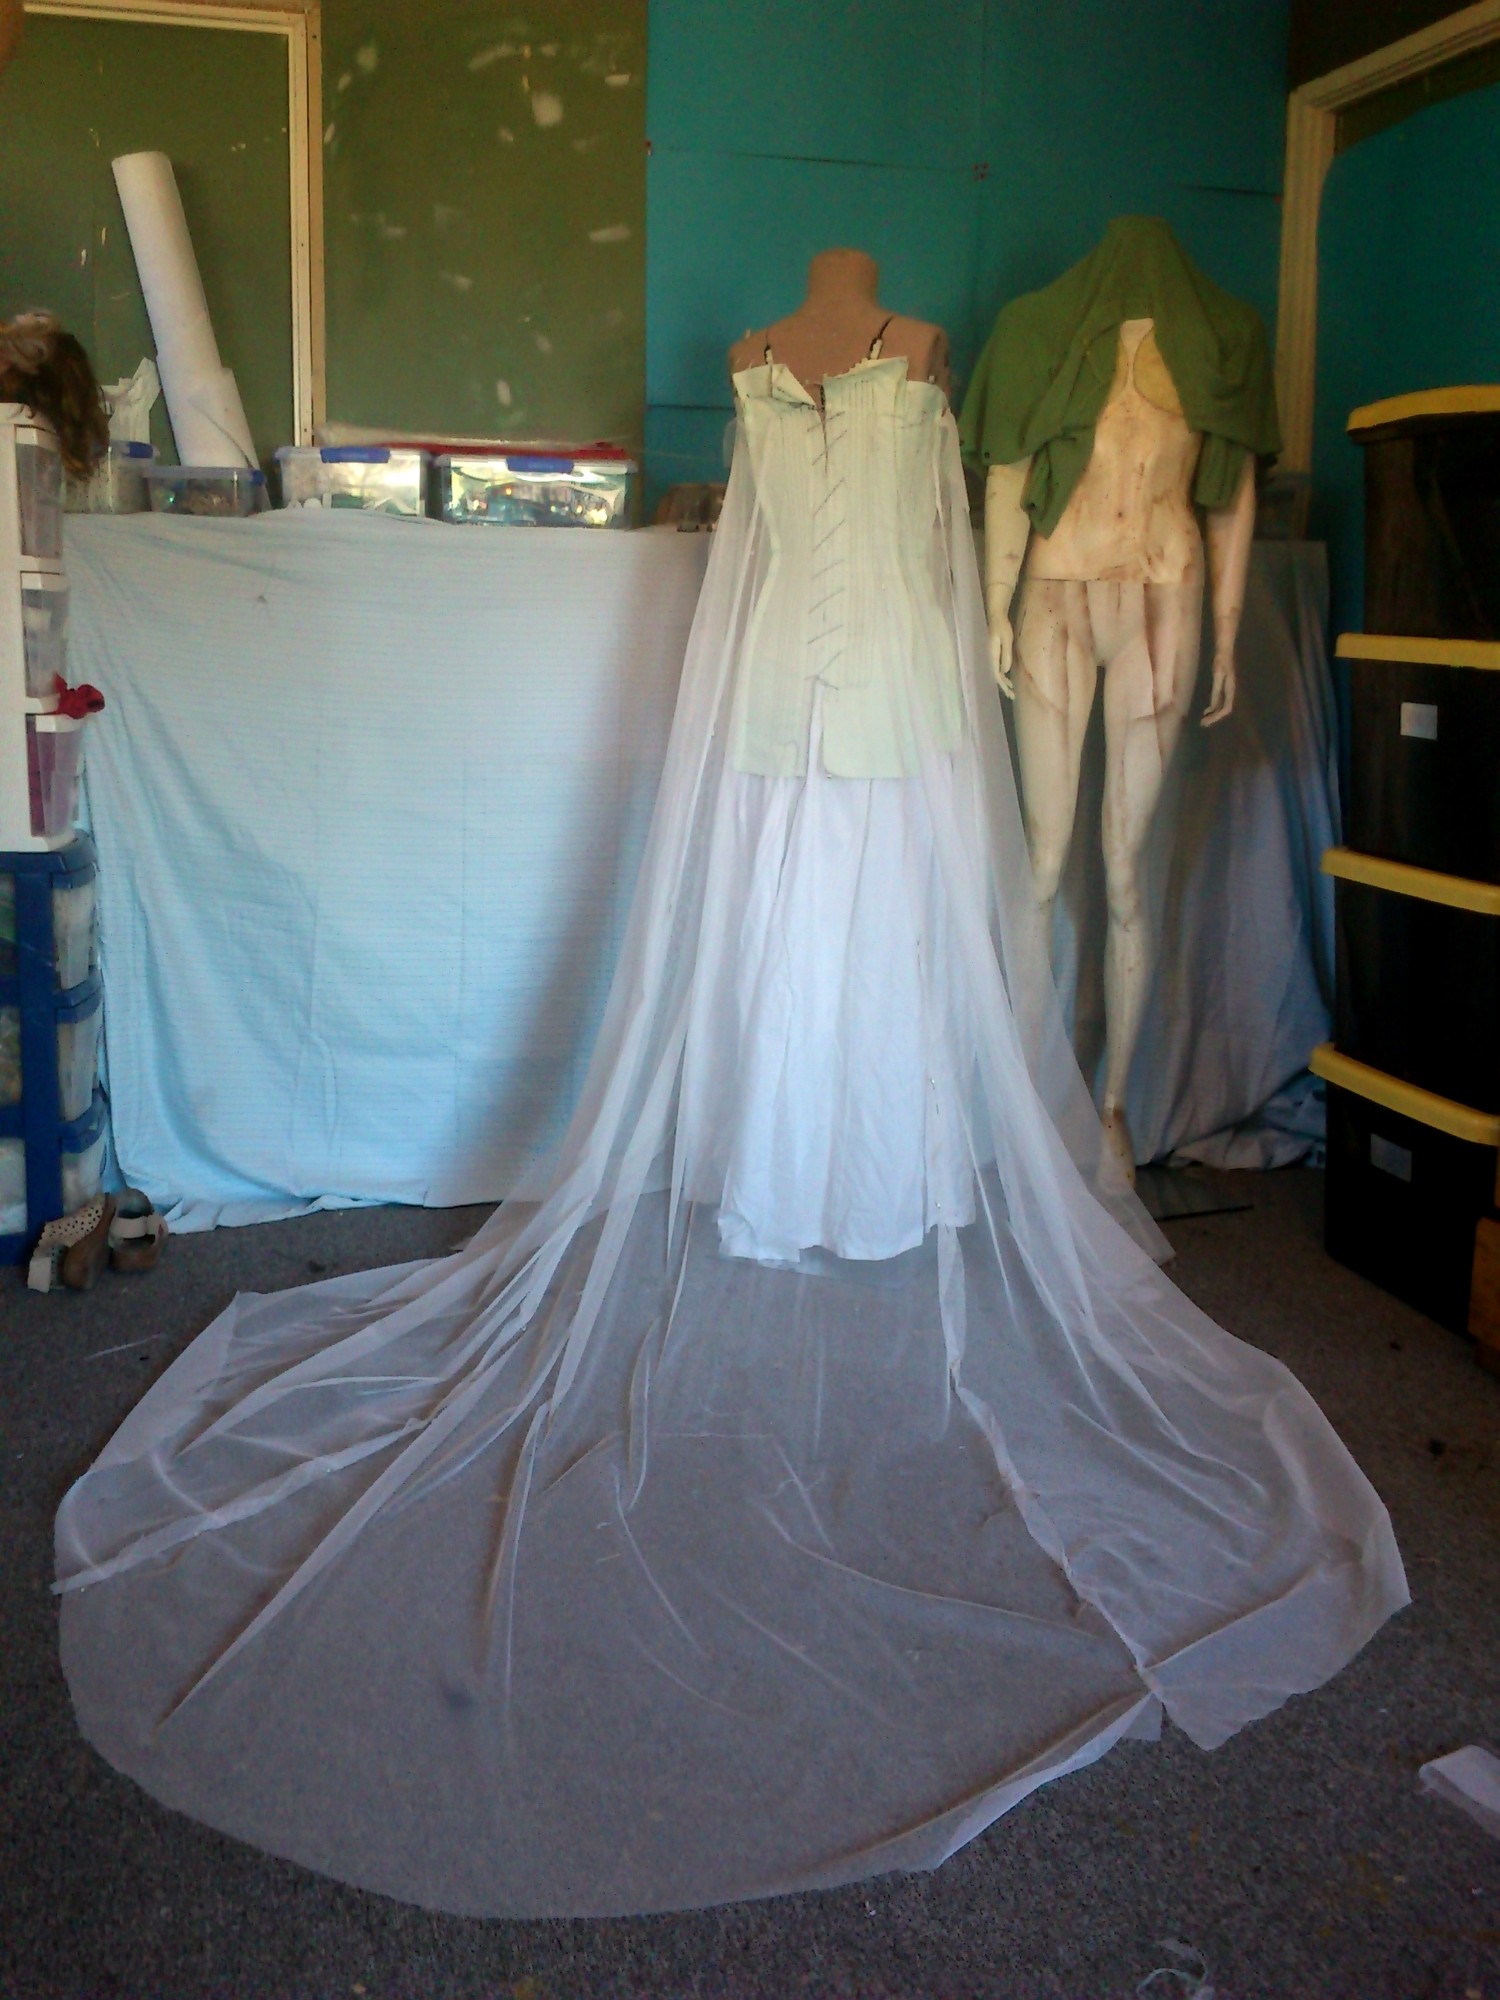
I haven’t snarfled photos from A. or N. yet so dress on the stand is the best 😉
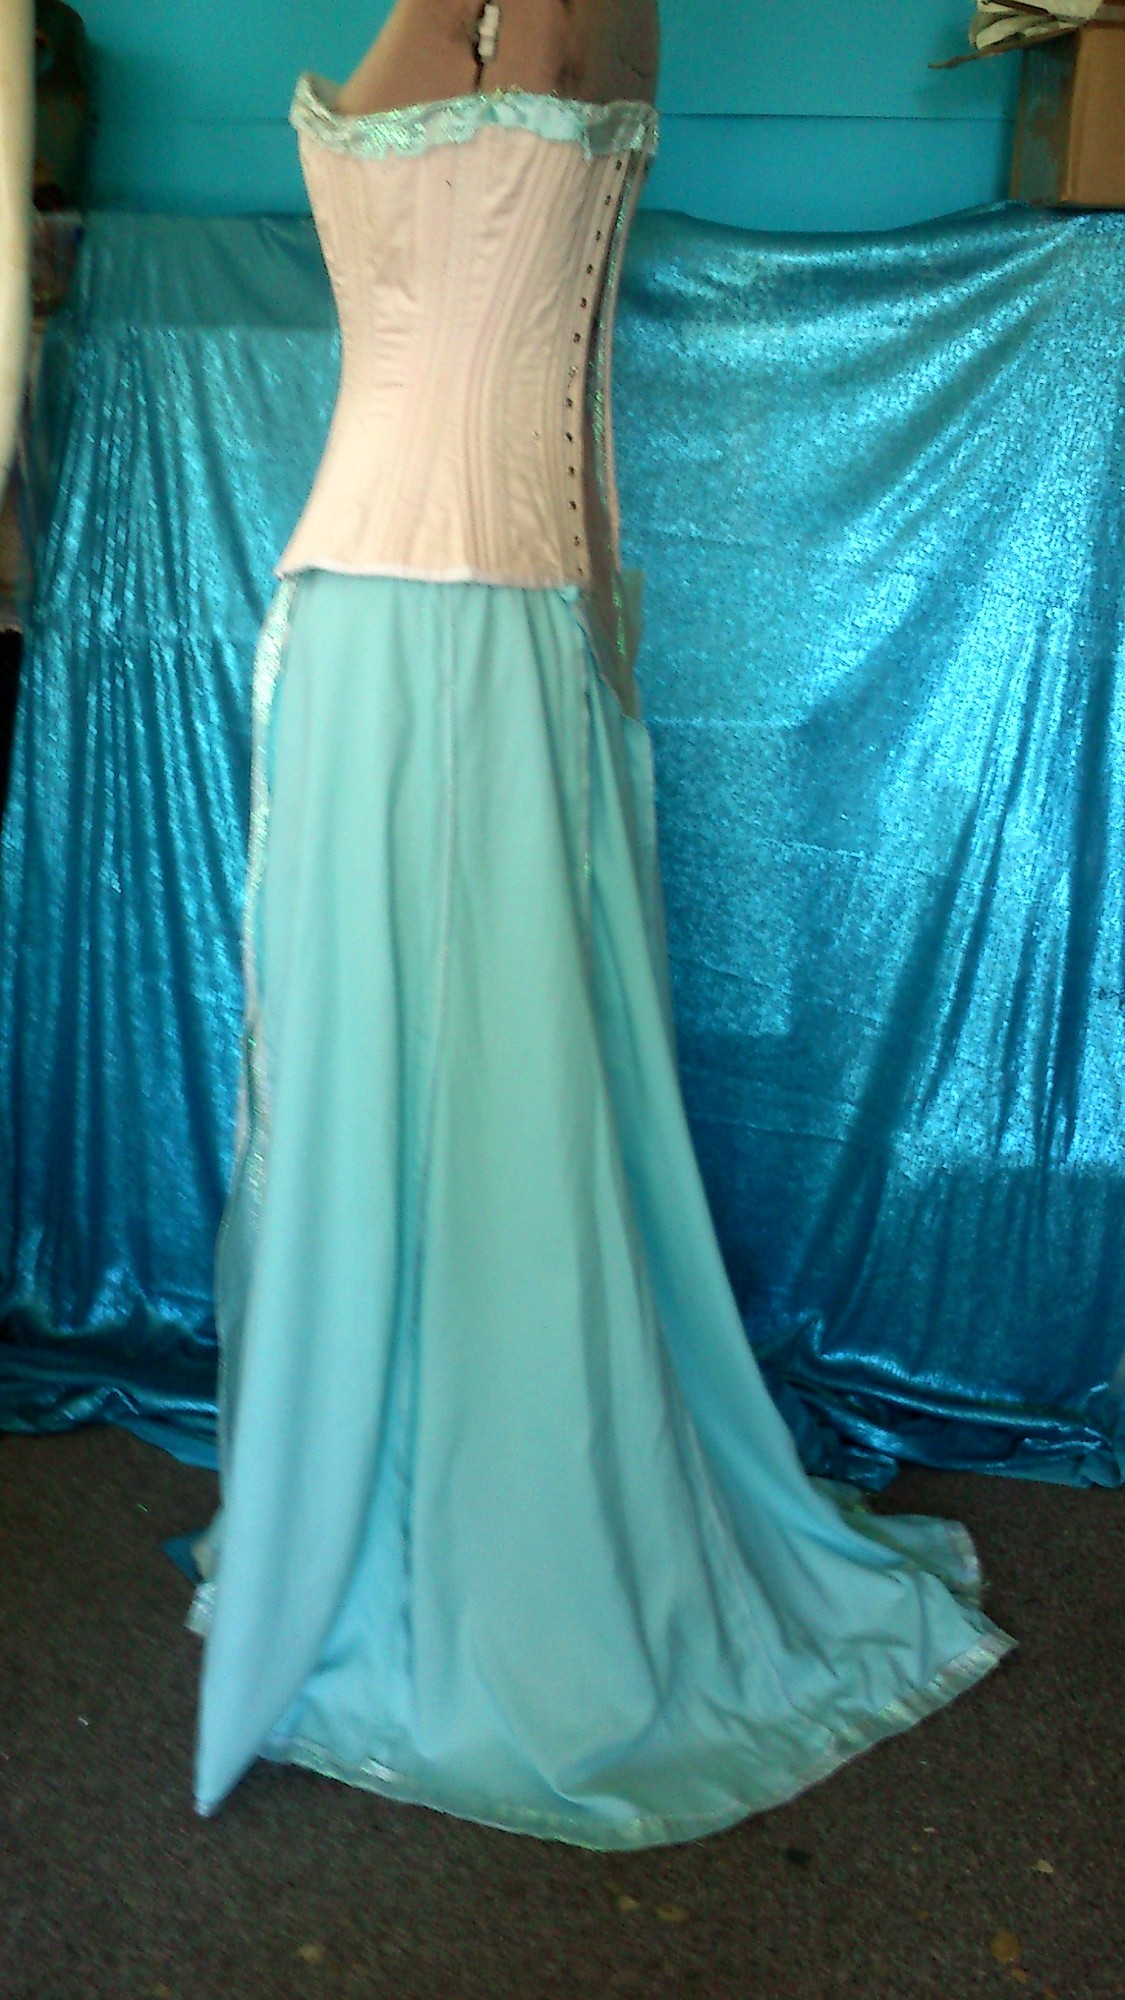
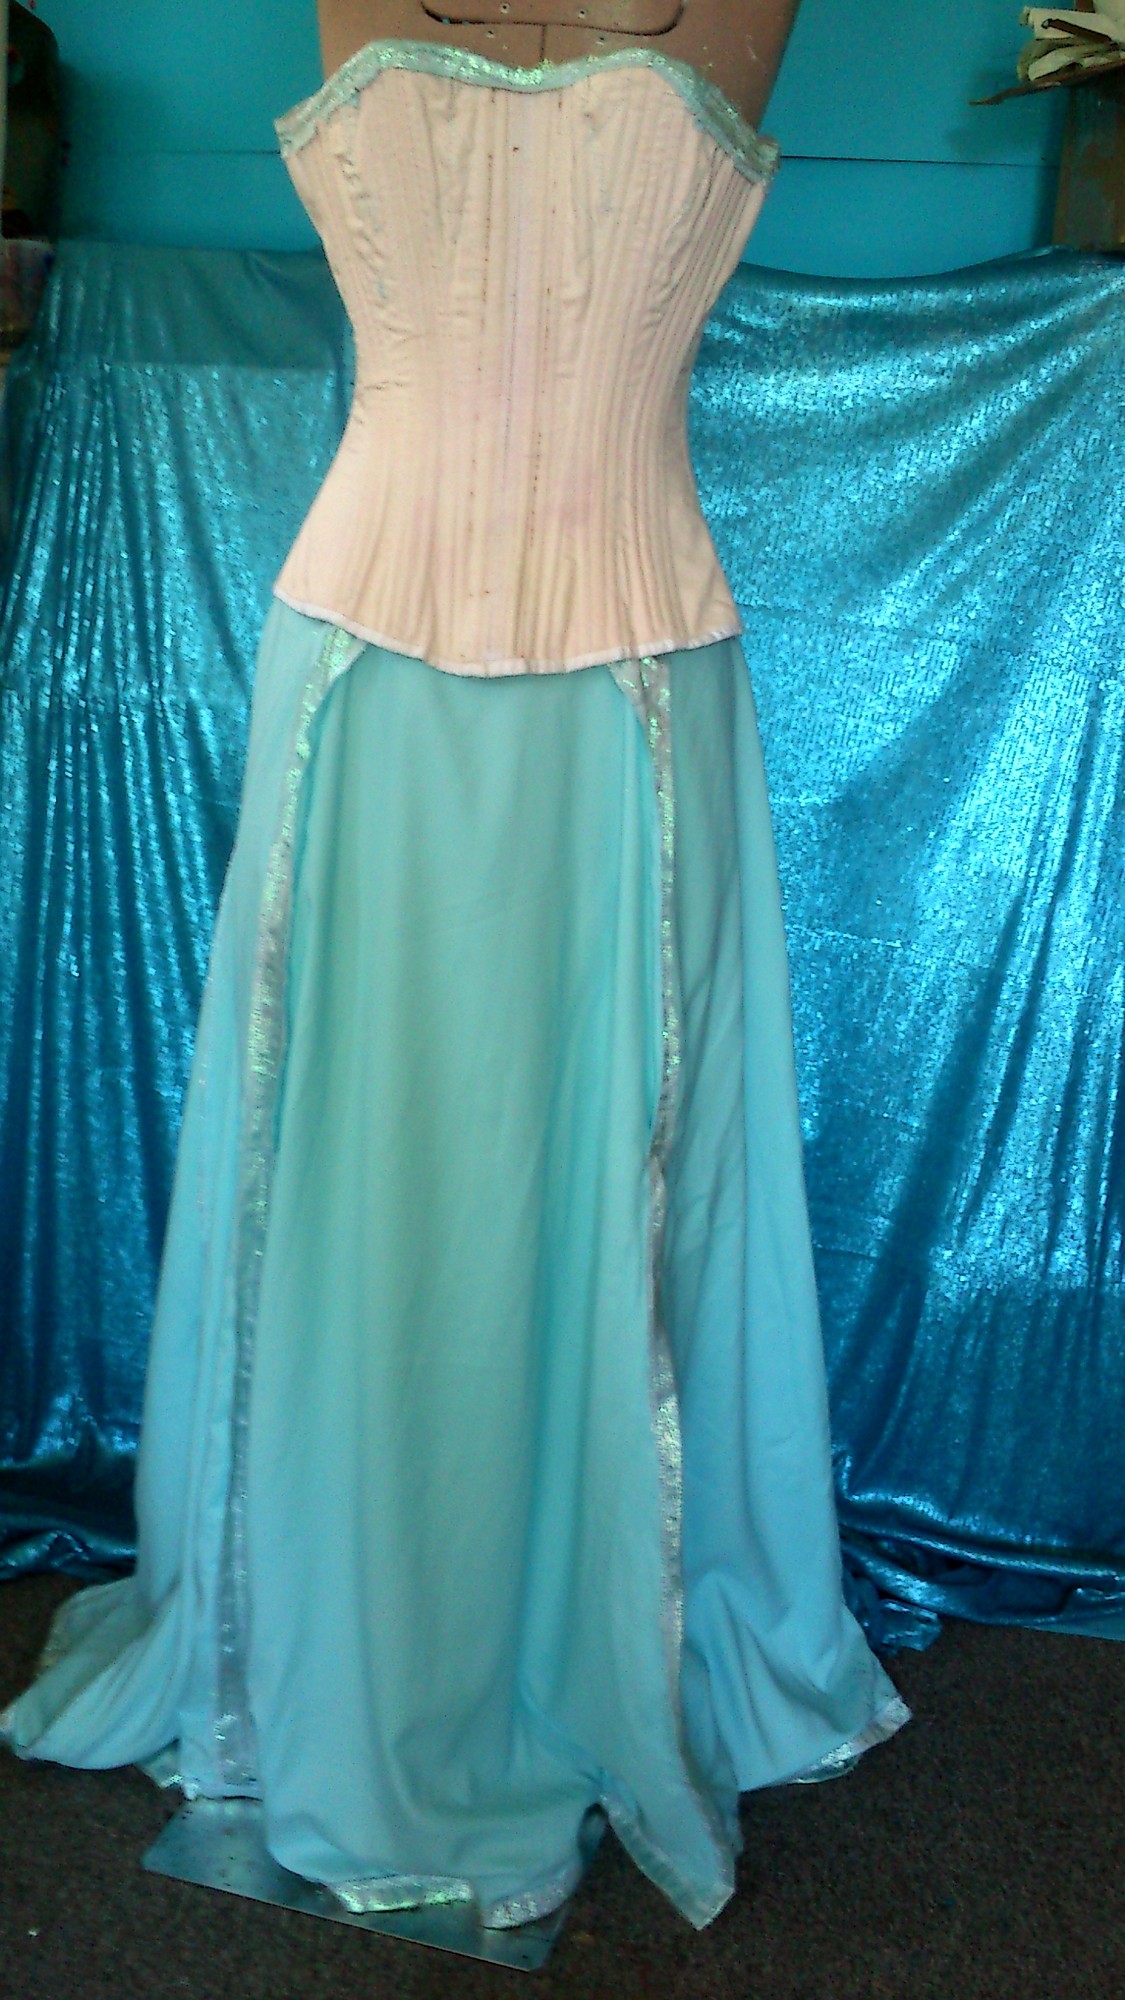
The full gown:

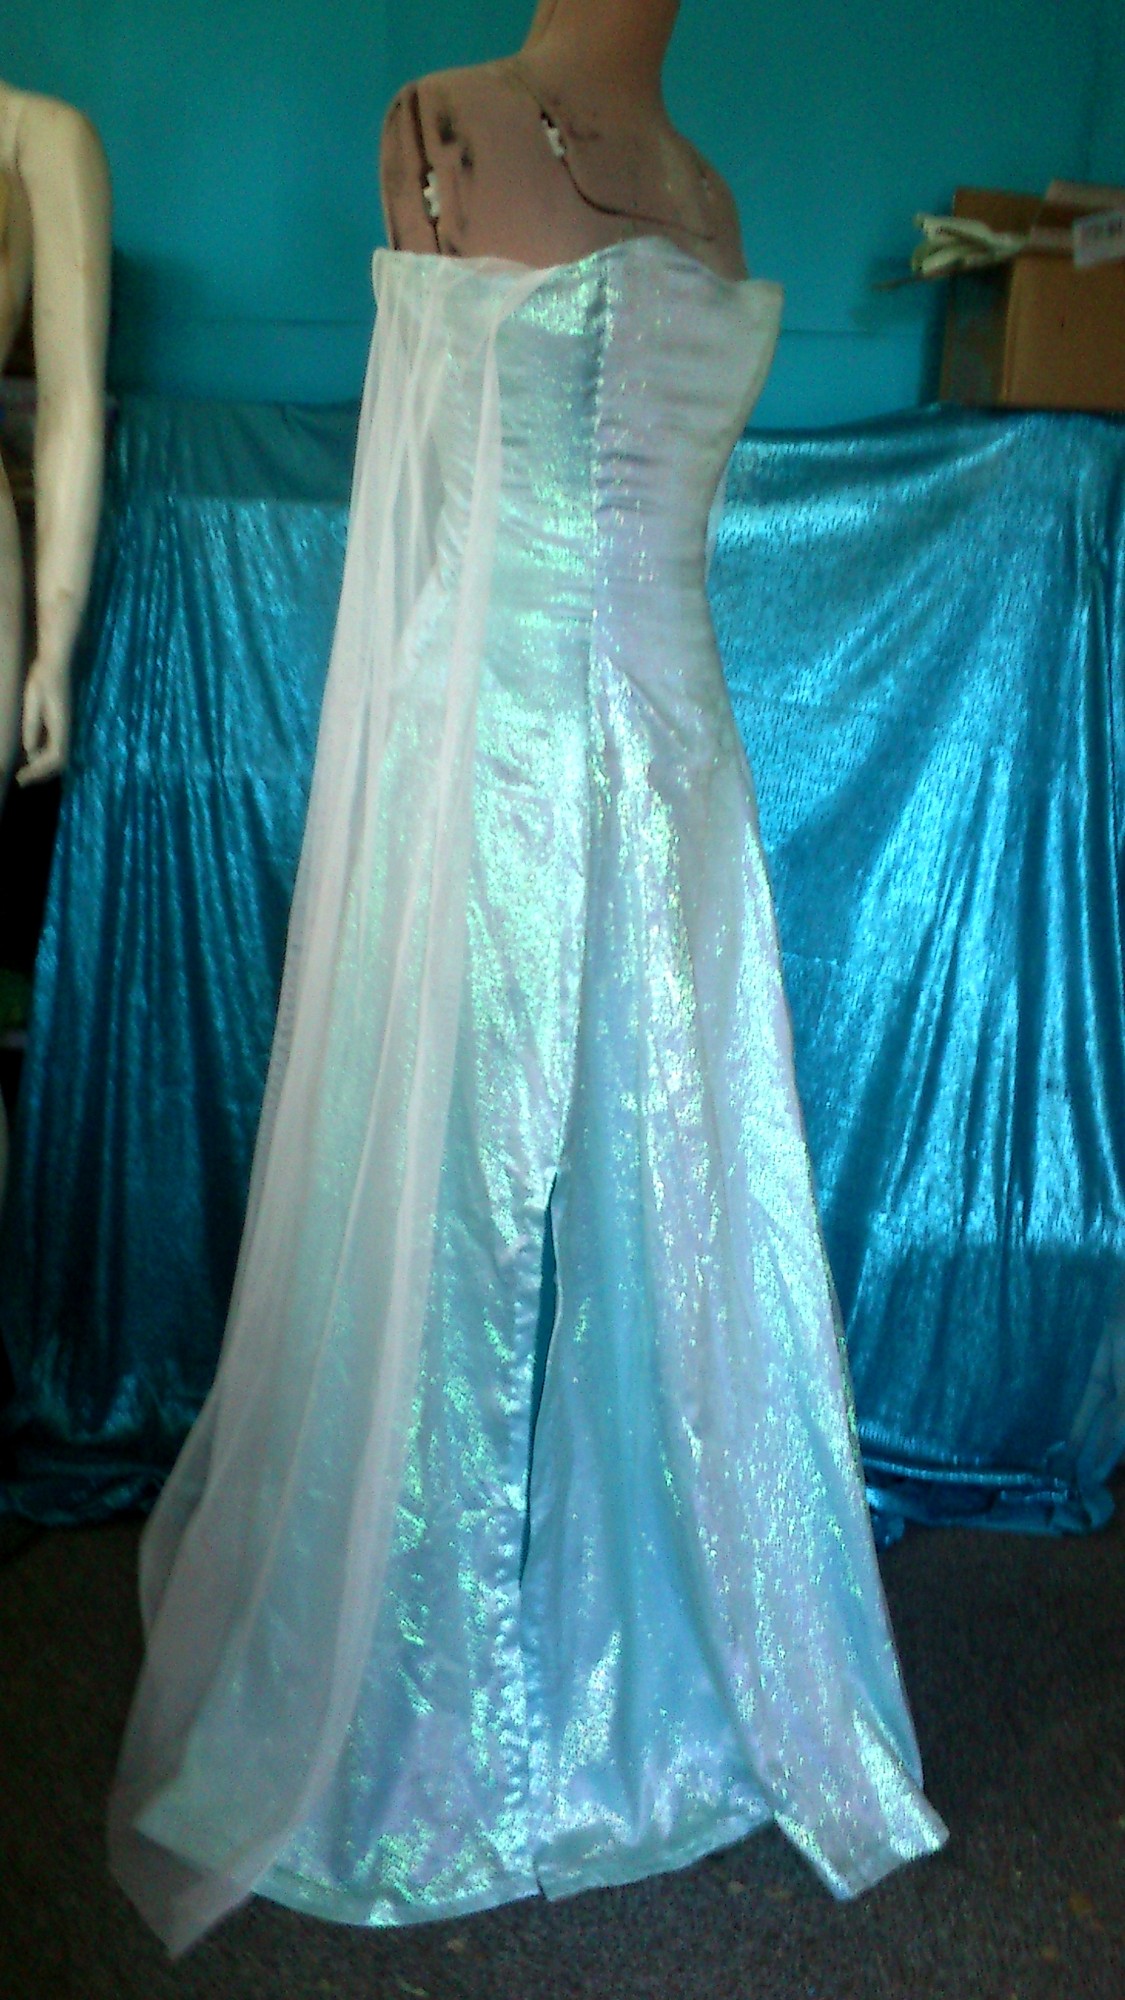
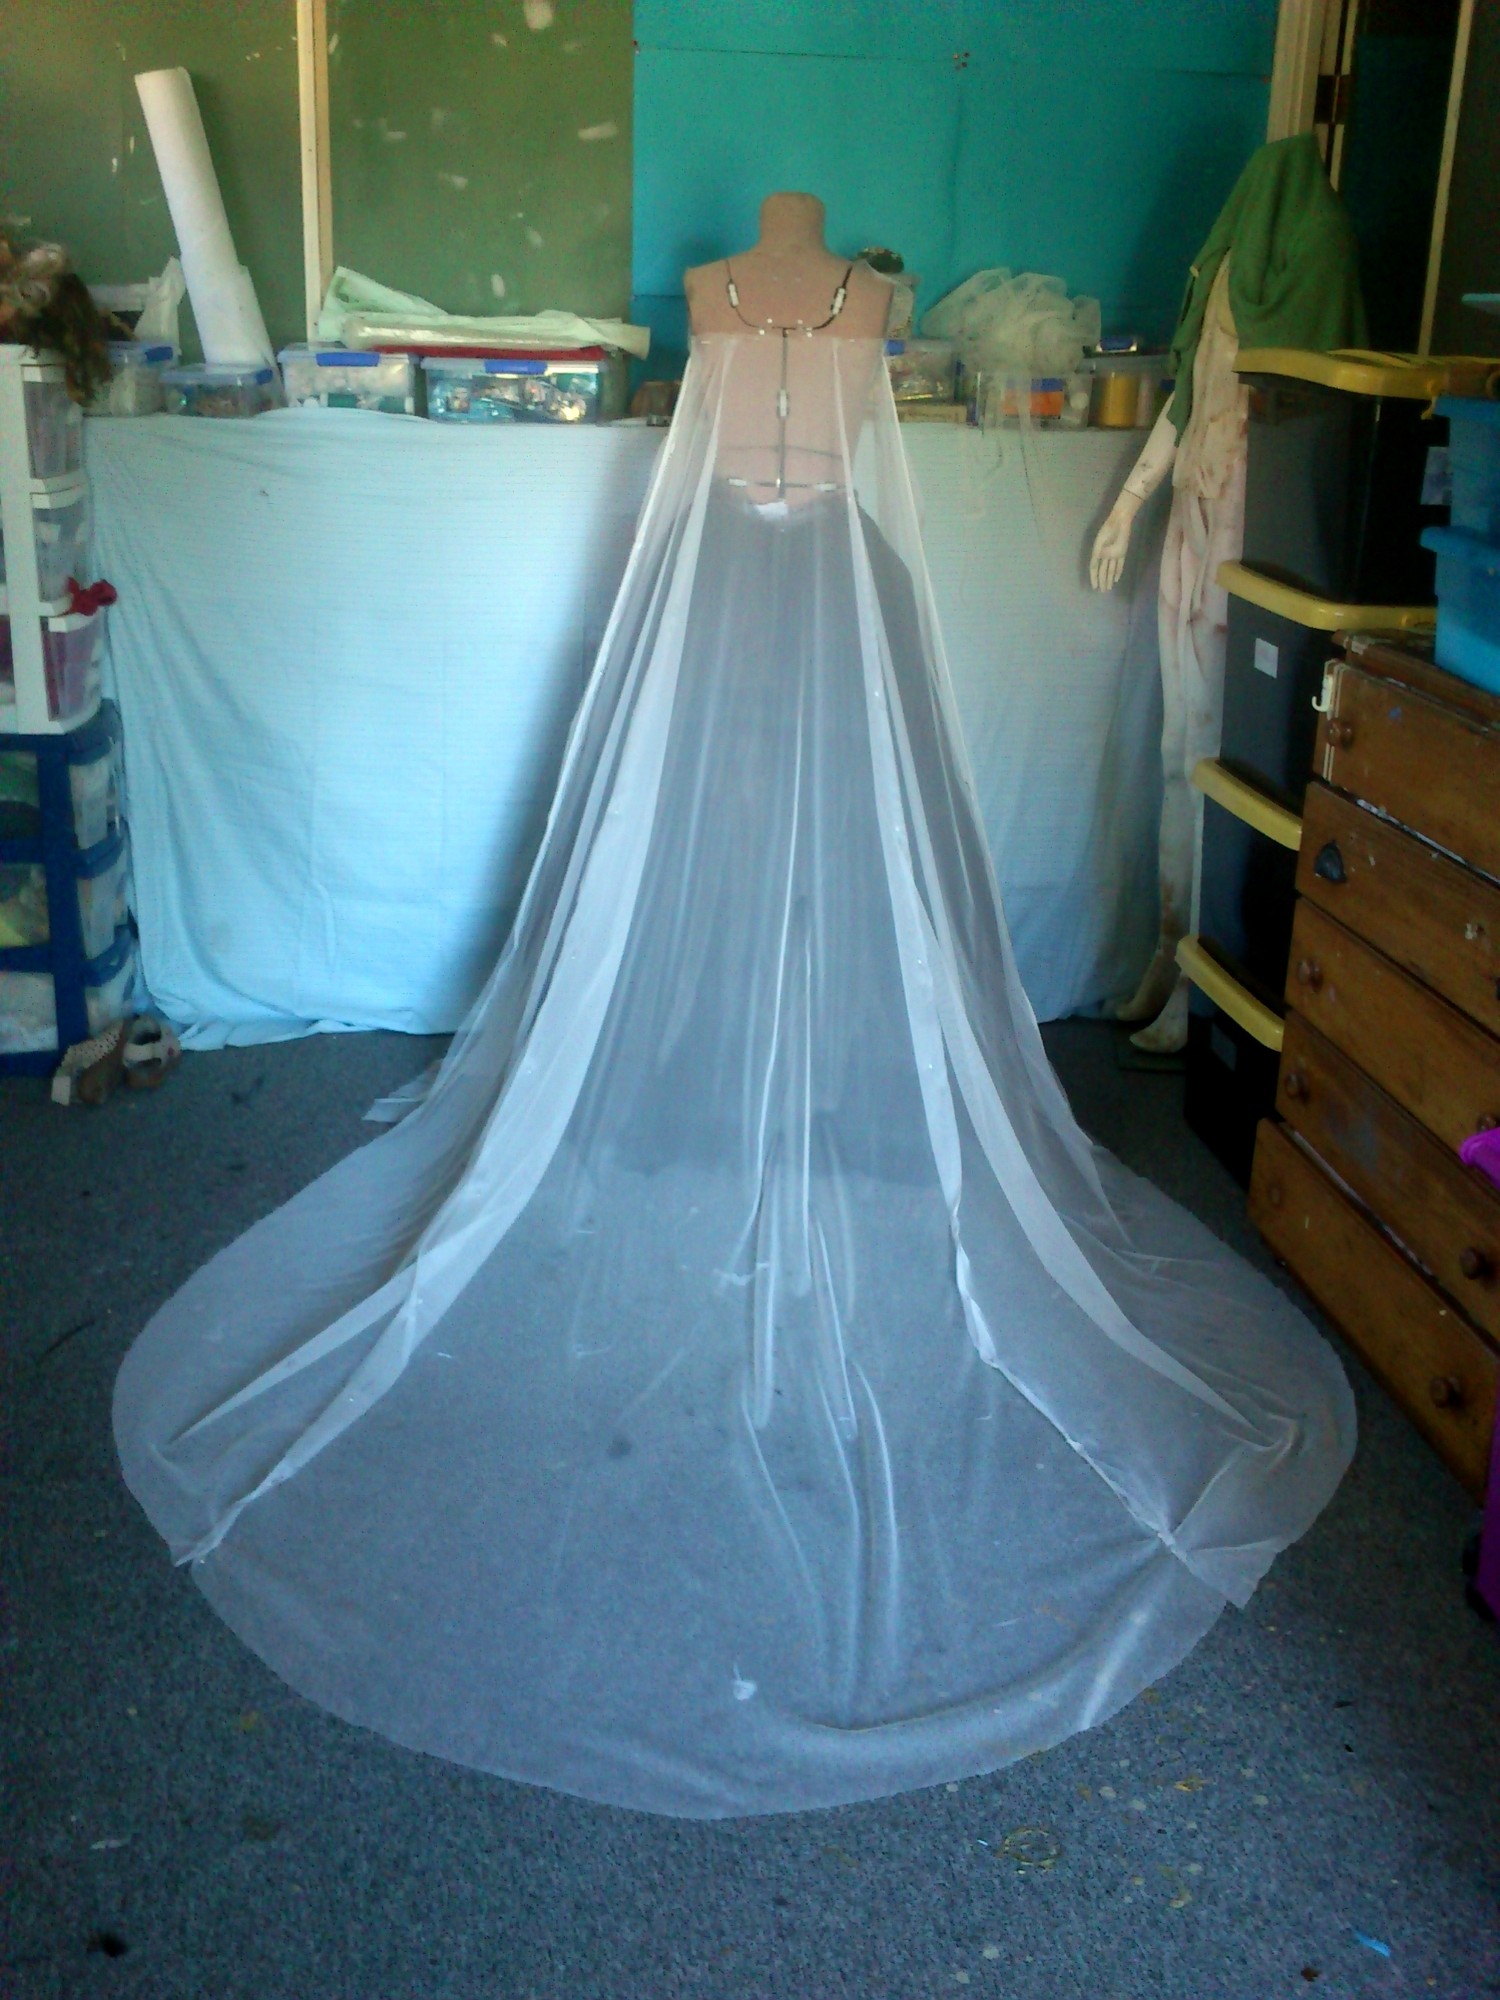
The front half of the gown:
Fabric used, with flash and without. Lovely stretch (crosswise) charmeuse from Moreland and some fairy organza that was yellow/iridescent but went nude/iridescent after a wash in cold water dye that was supposed to be navy blue. But was very purple.

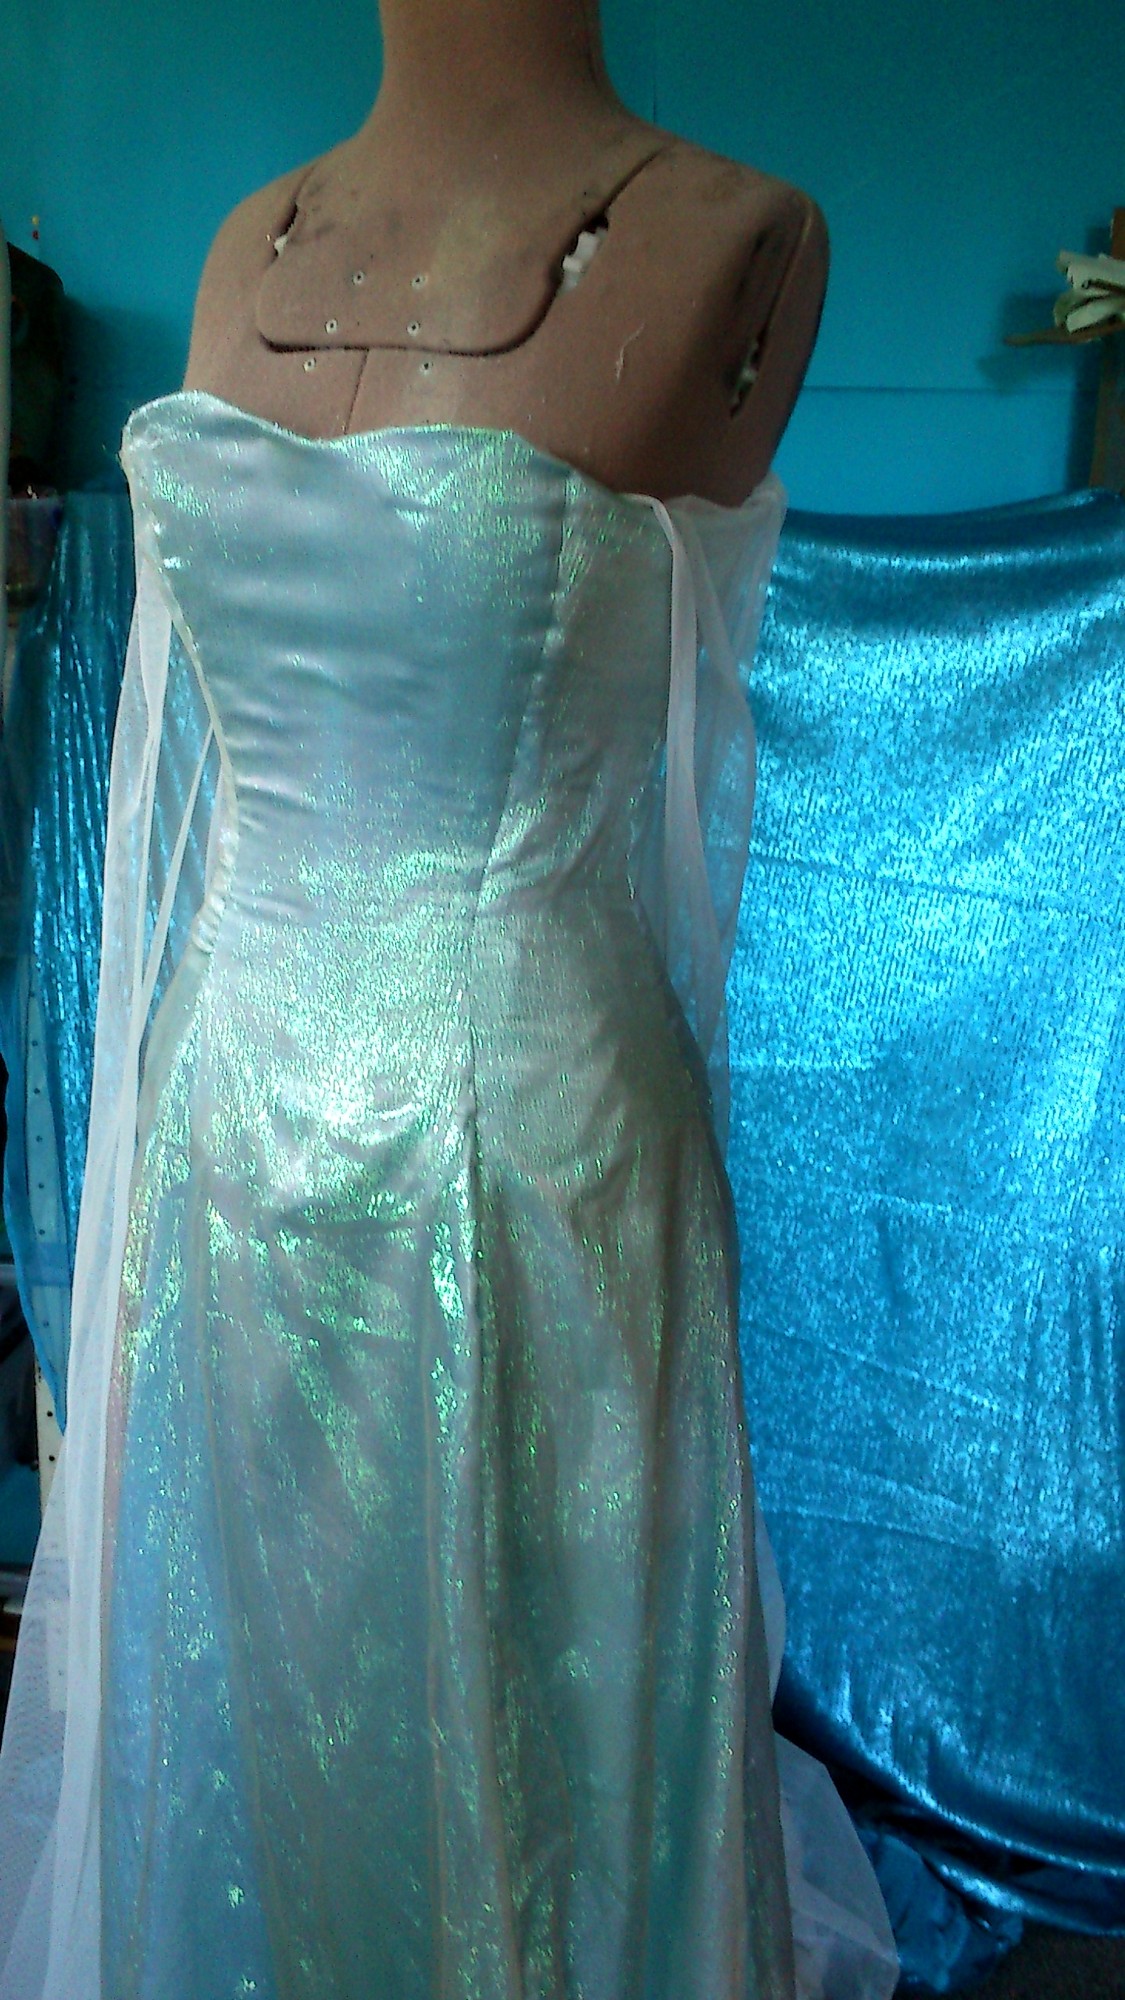
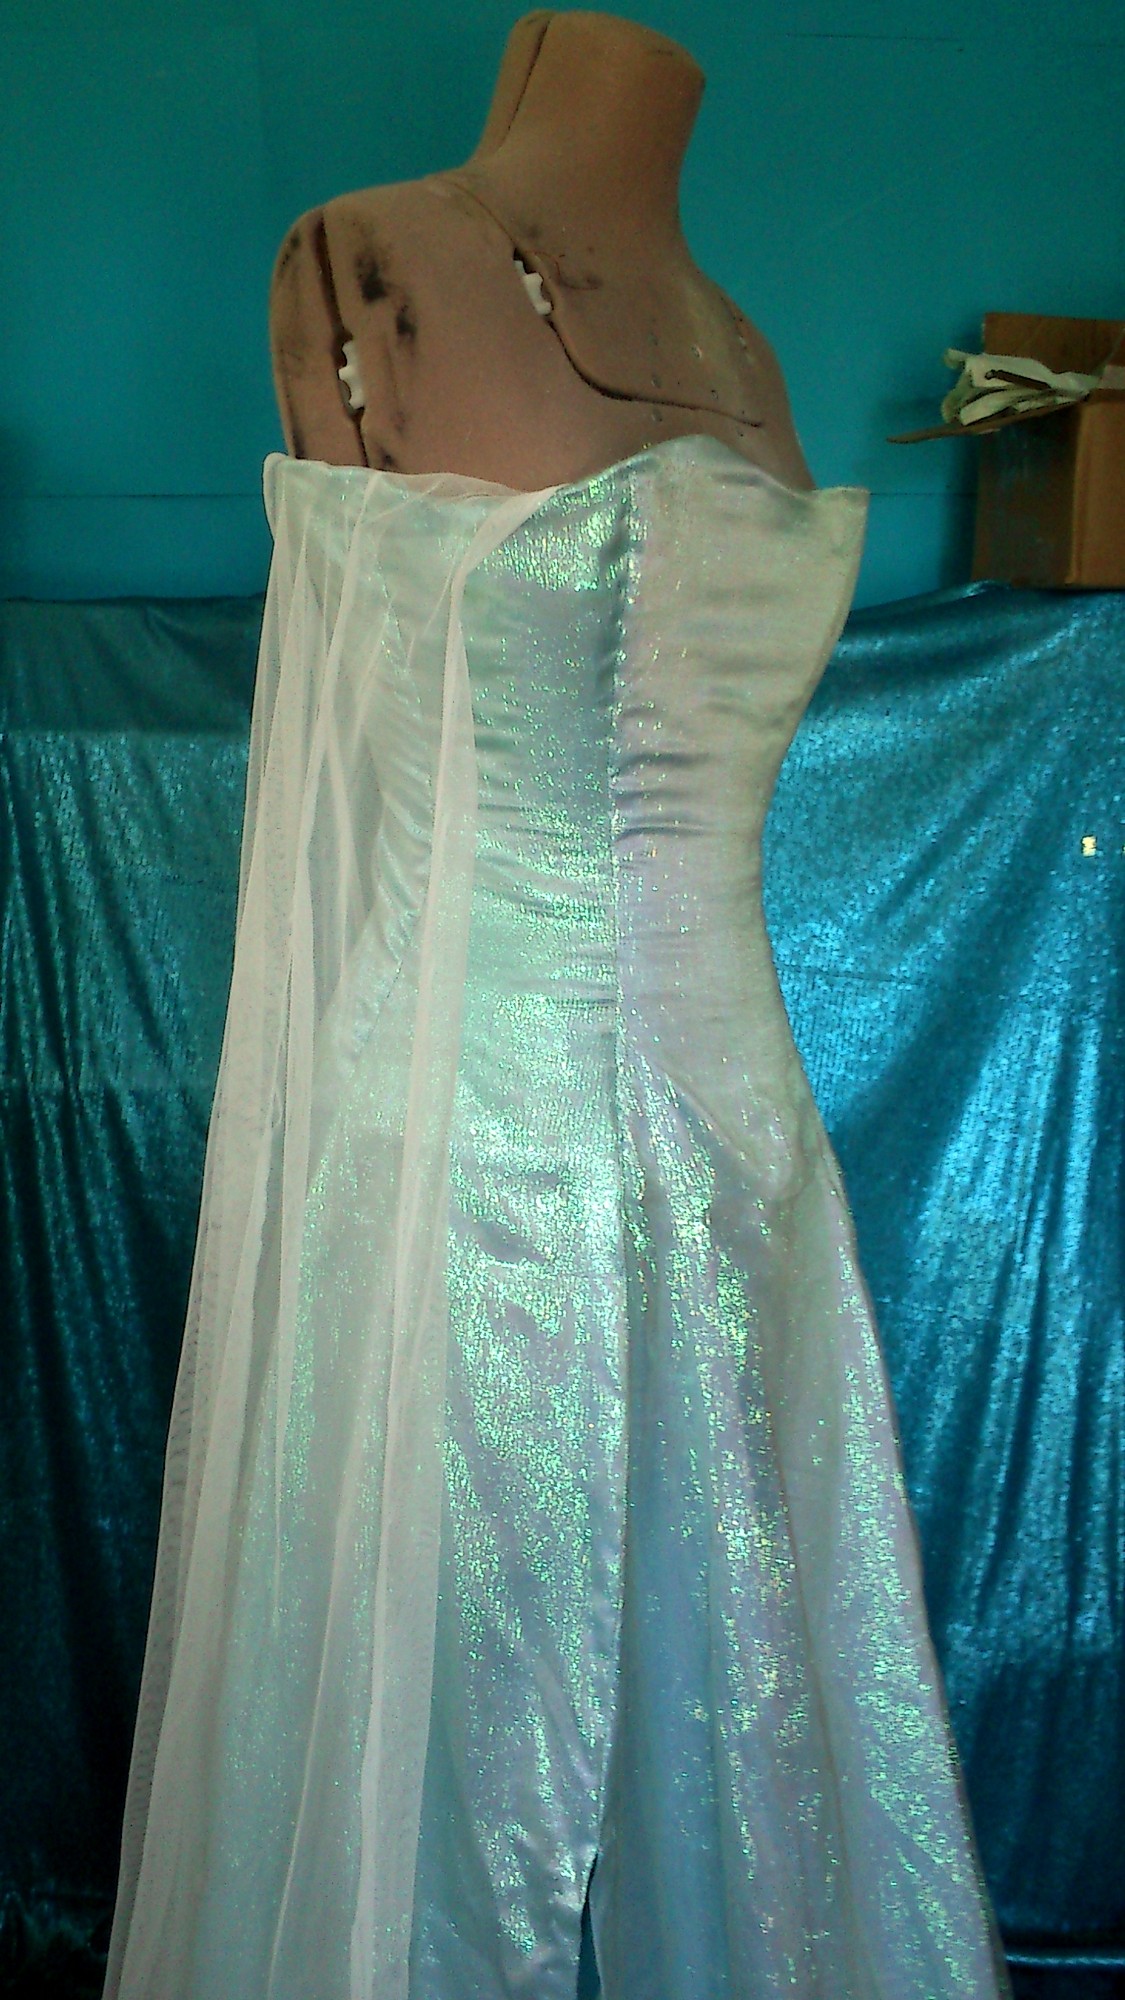
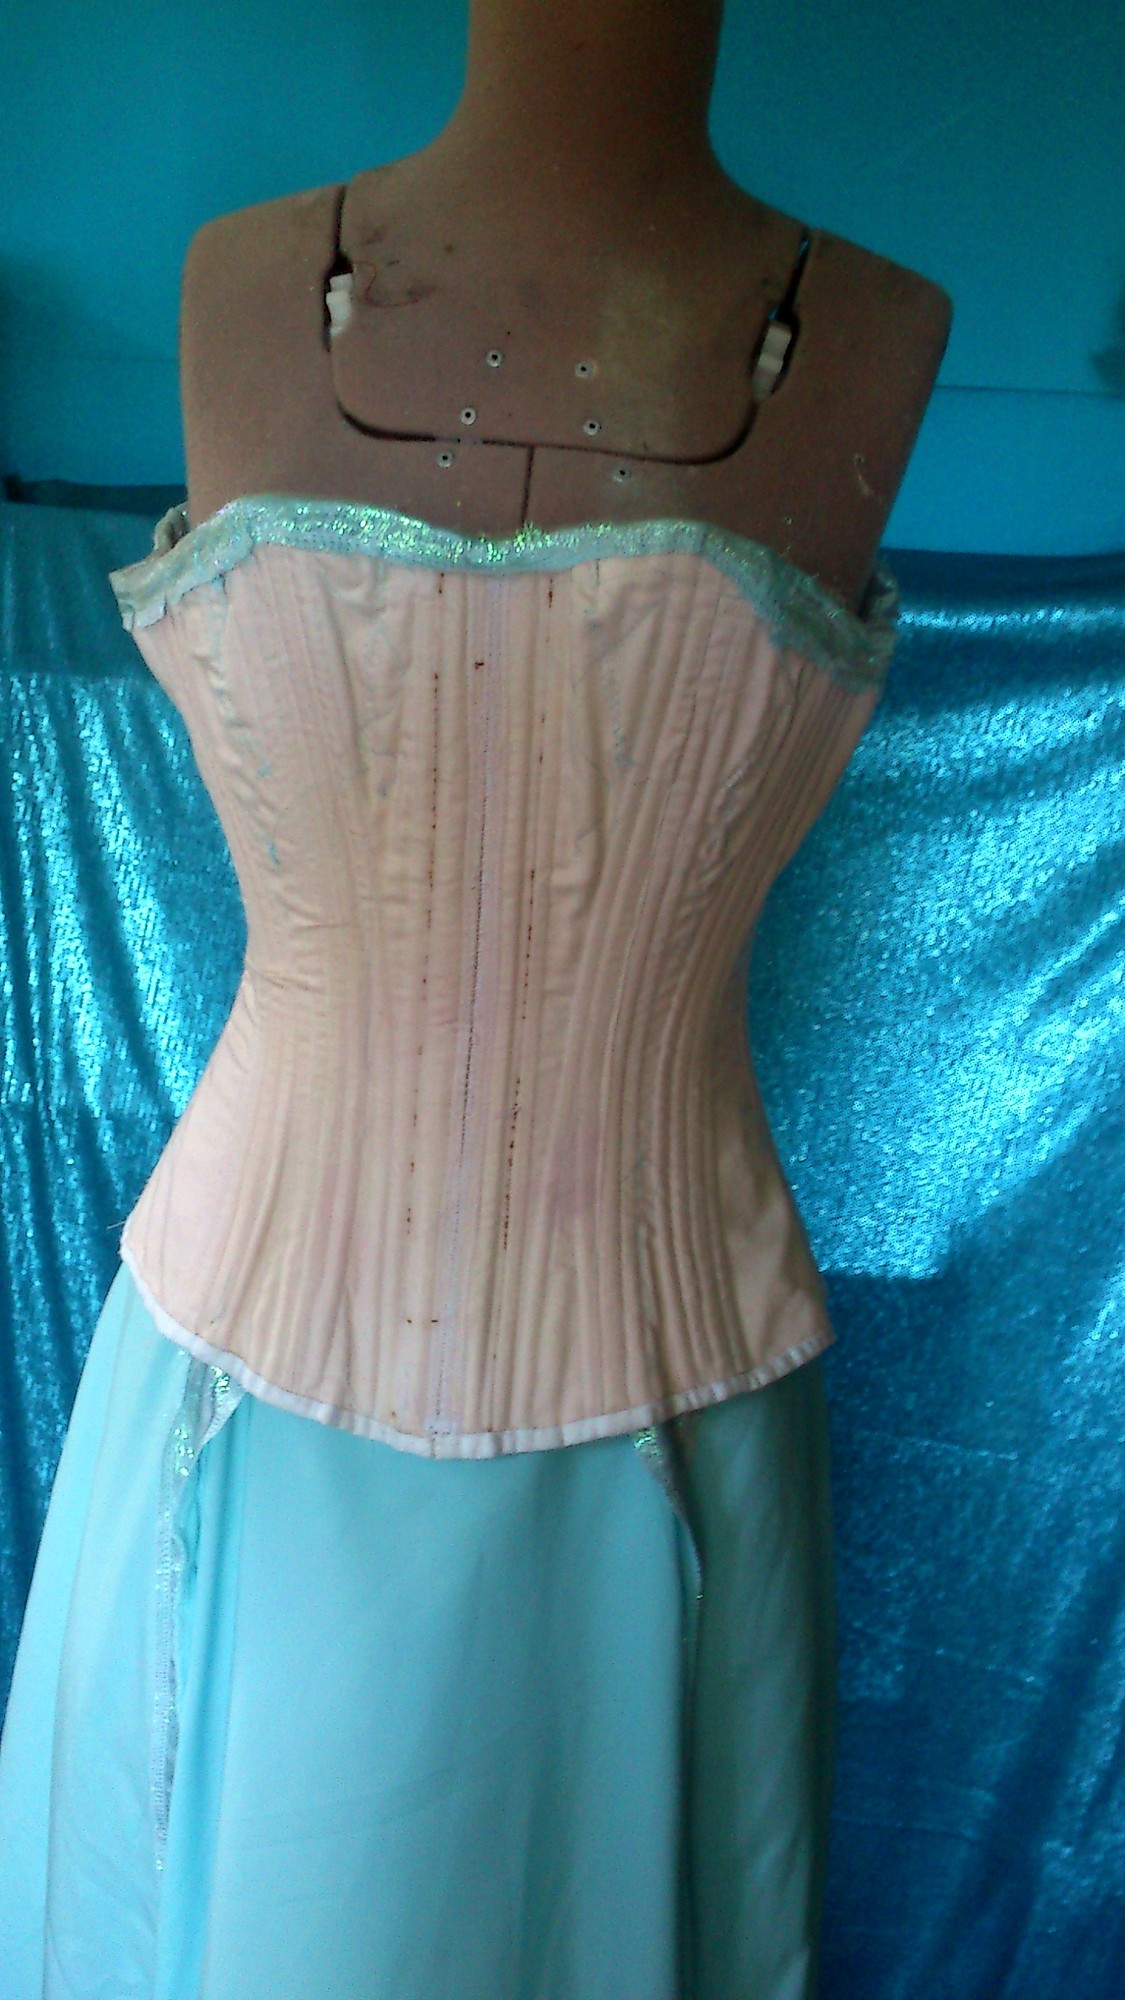
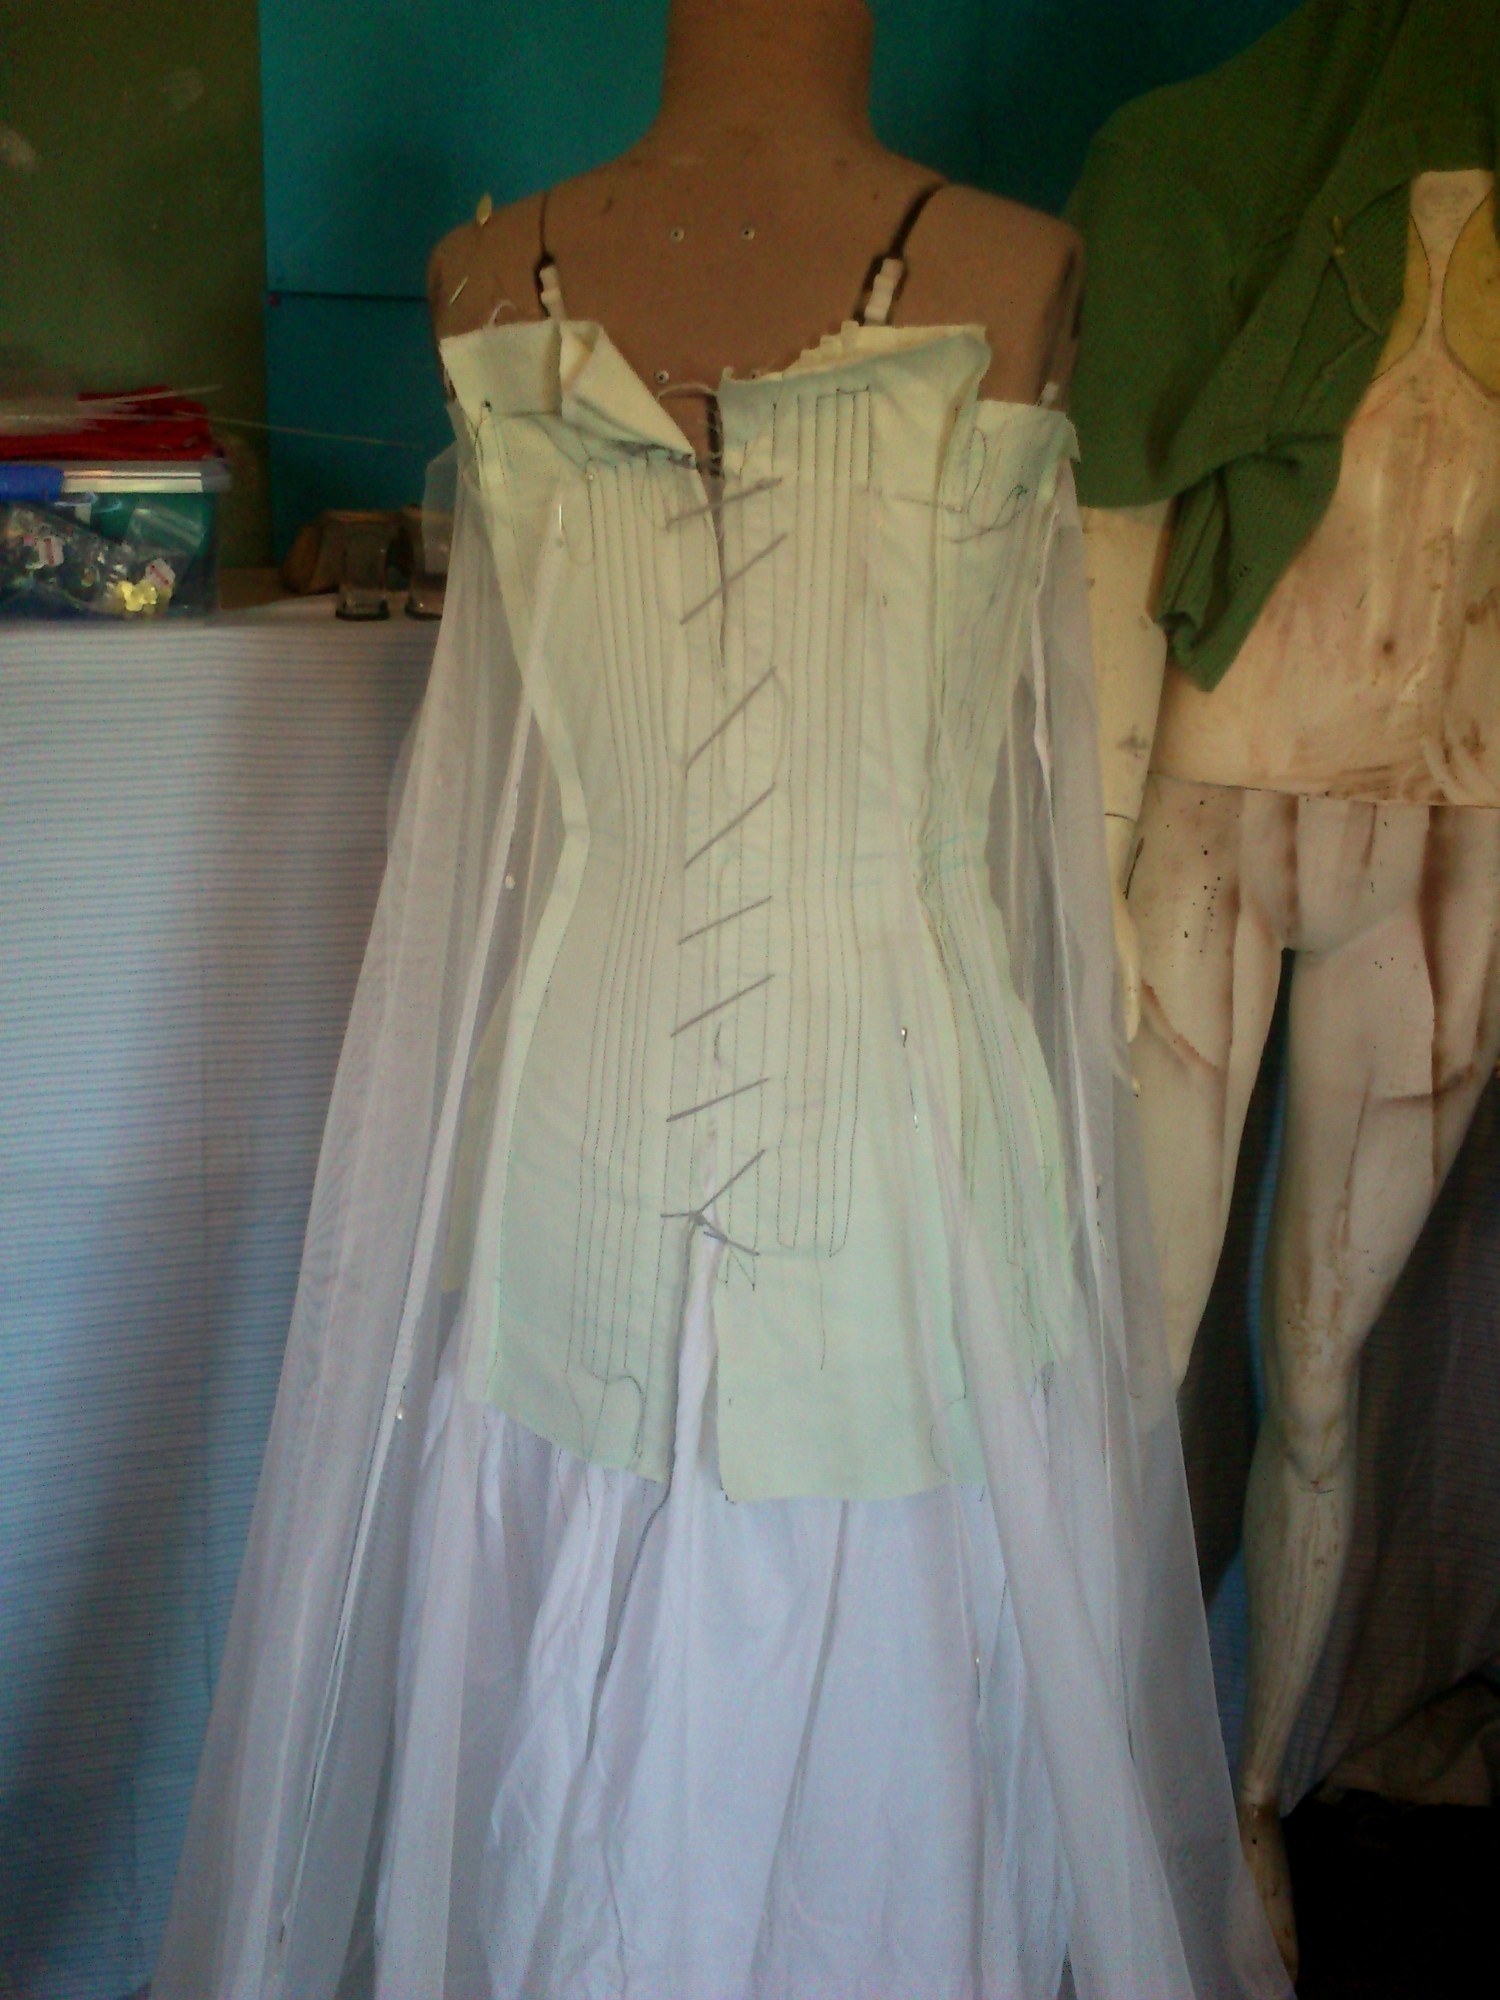
Inside of bodice showing hand sewing of dress shell to the interior corset.
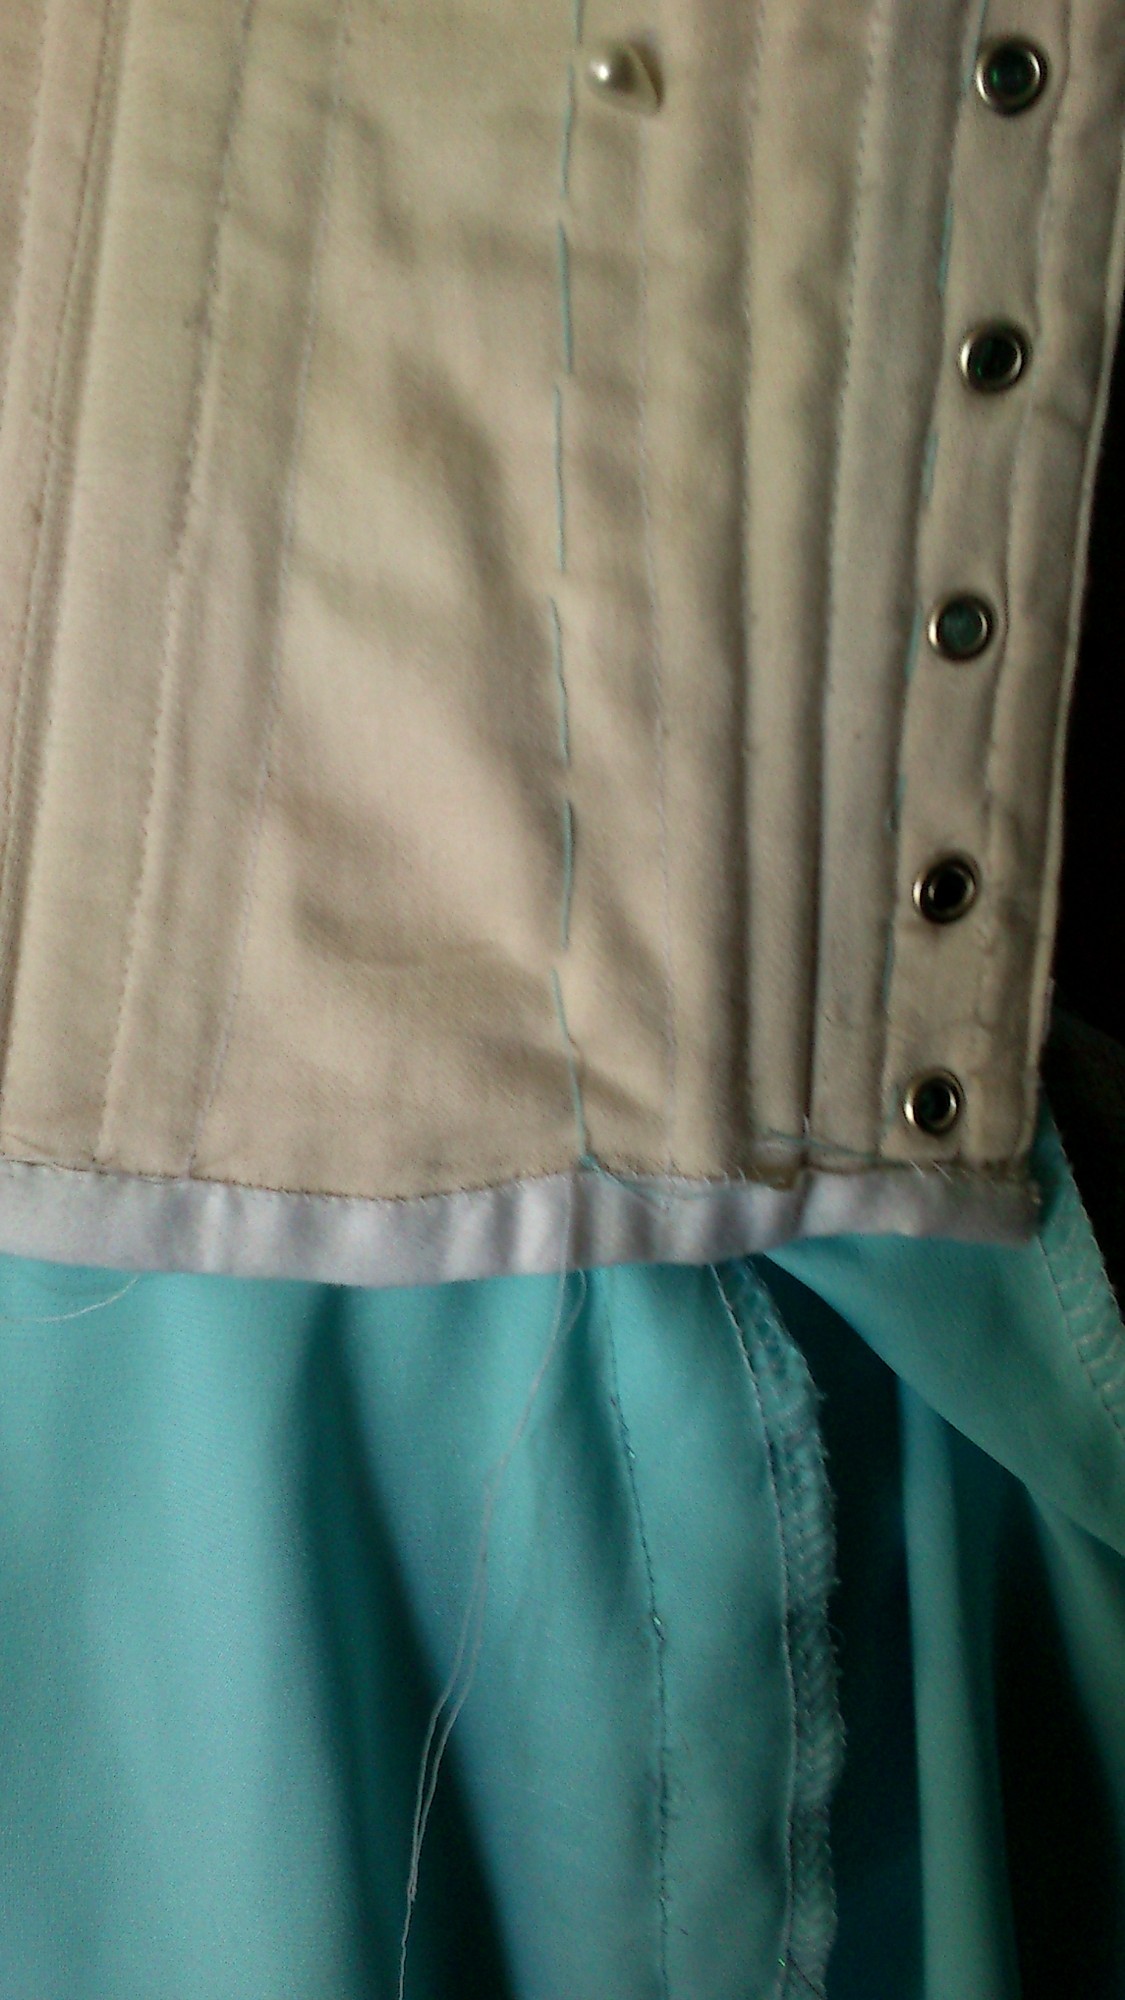
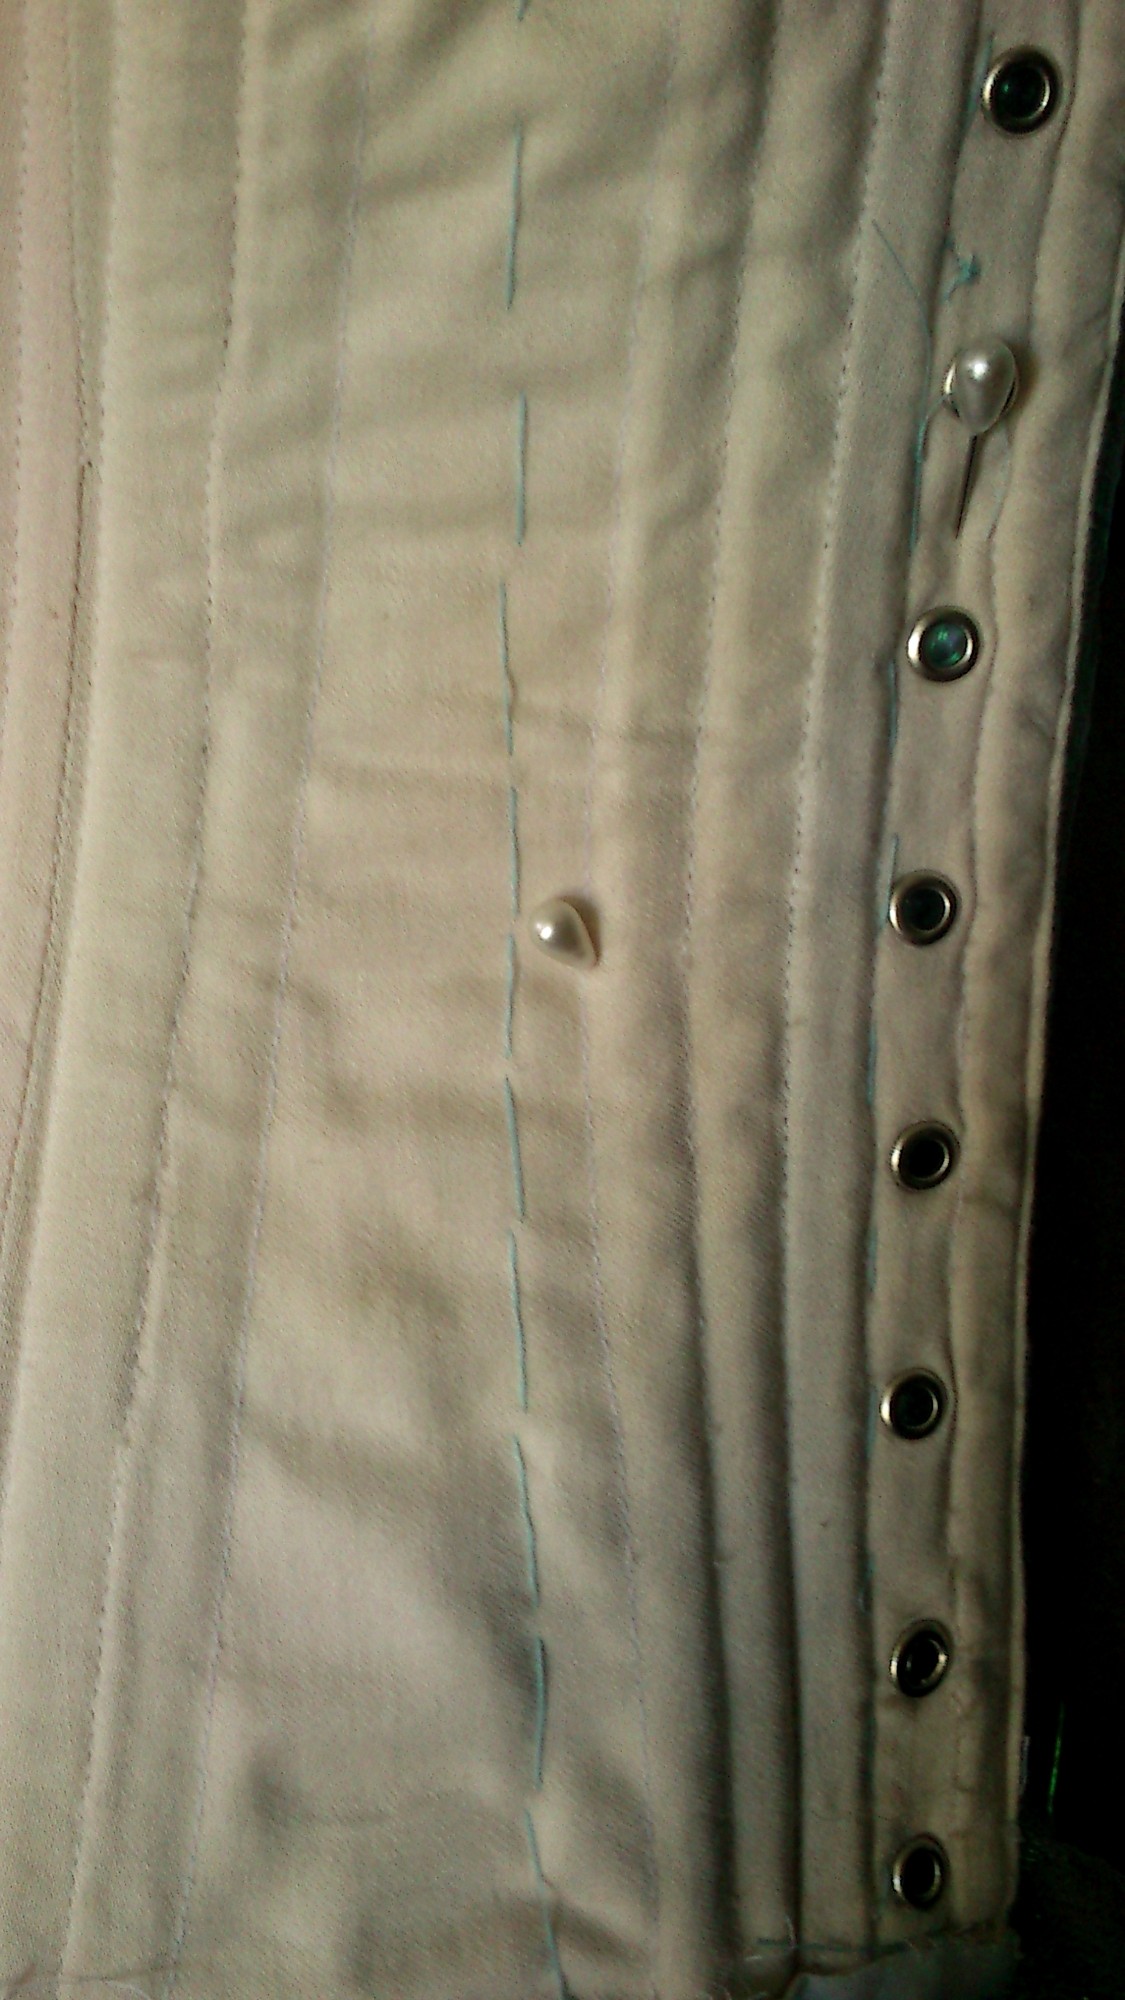
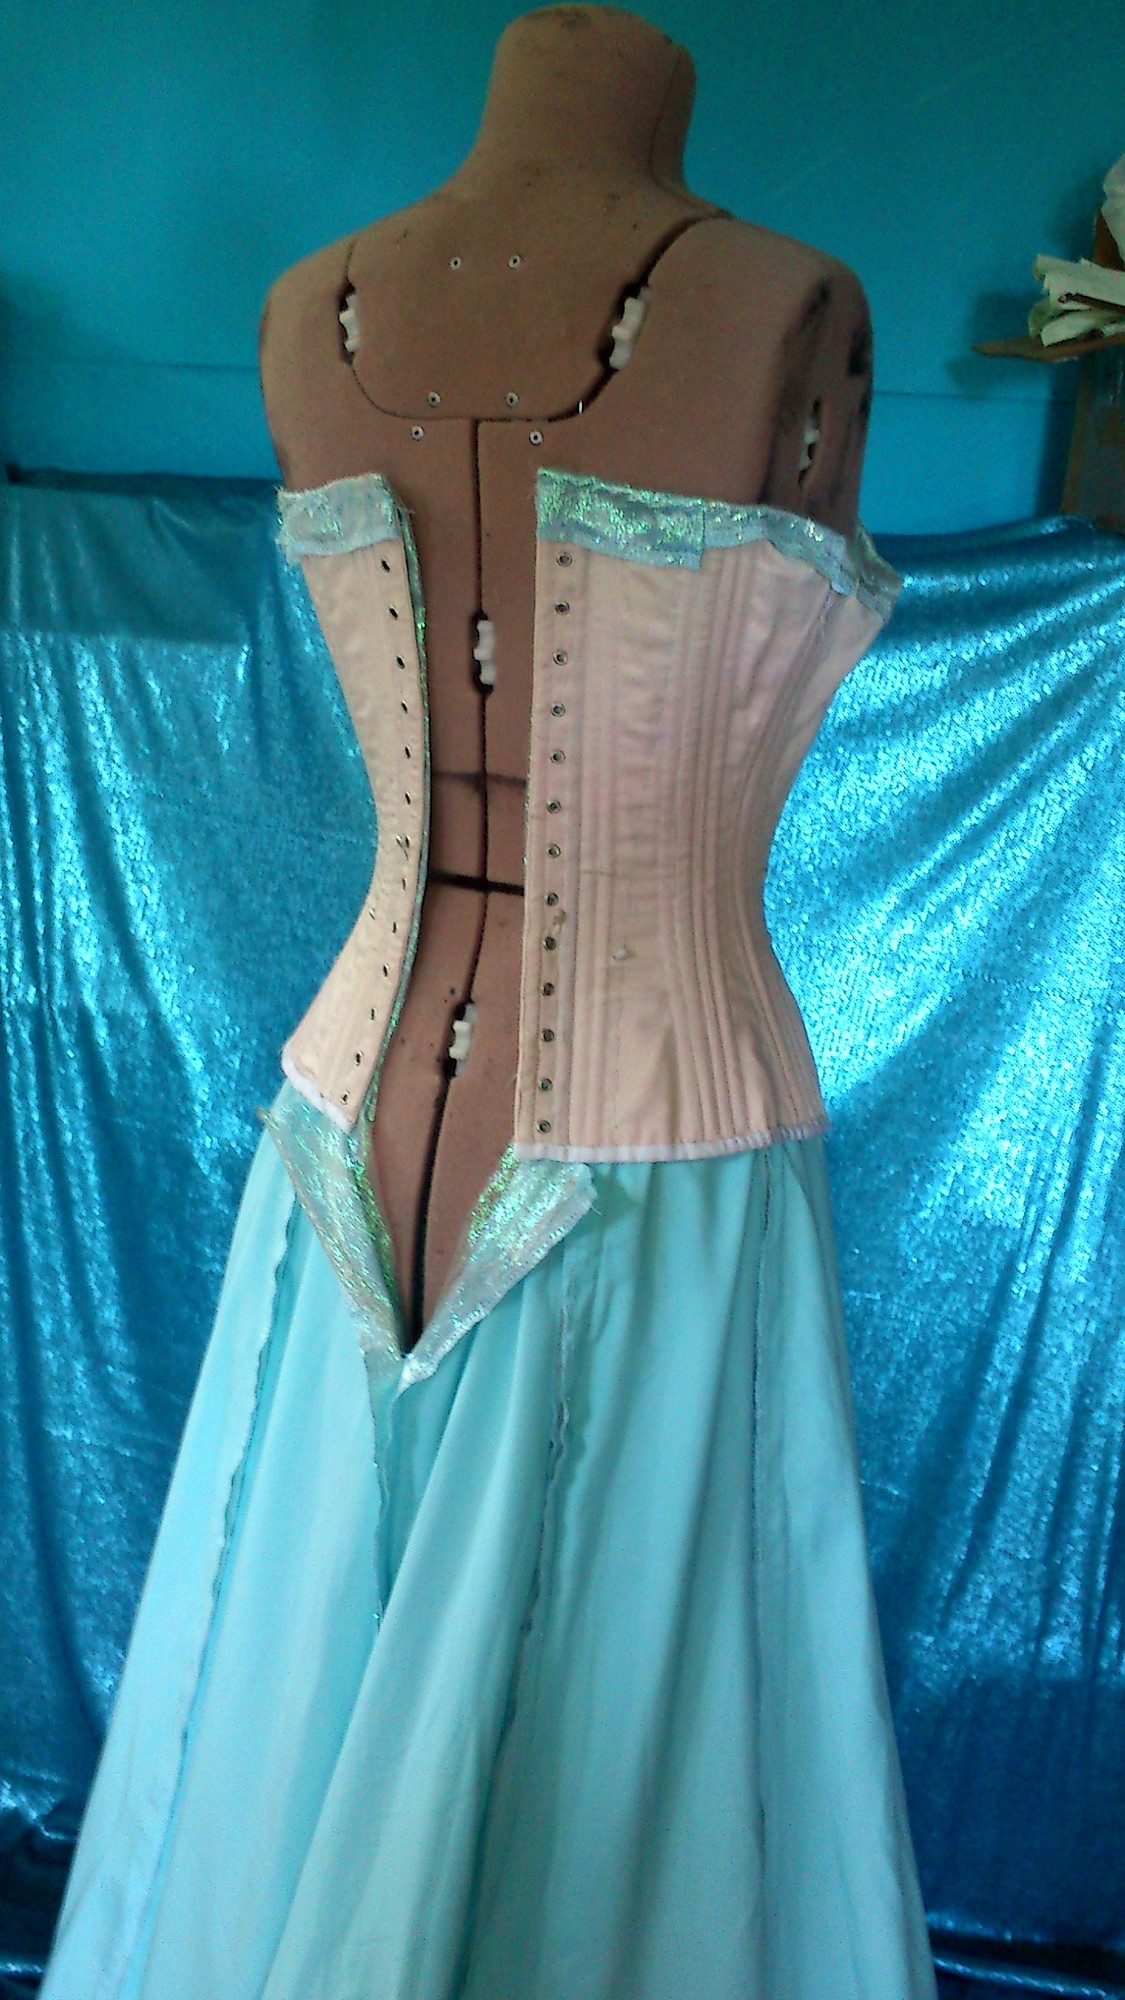
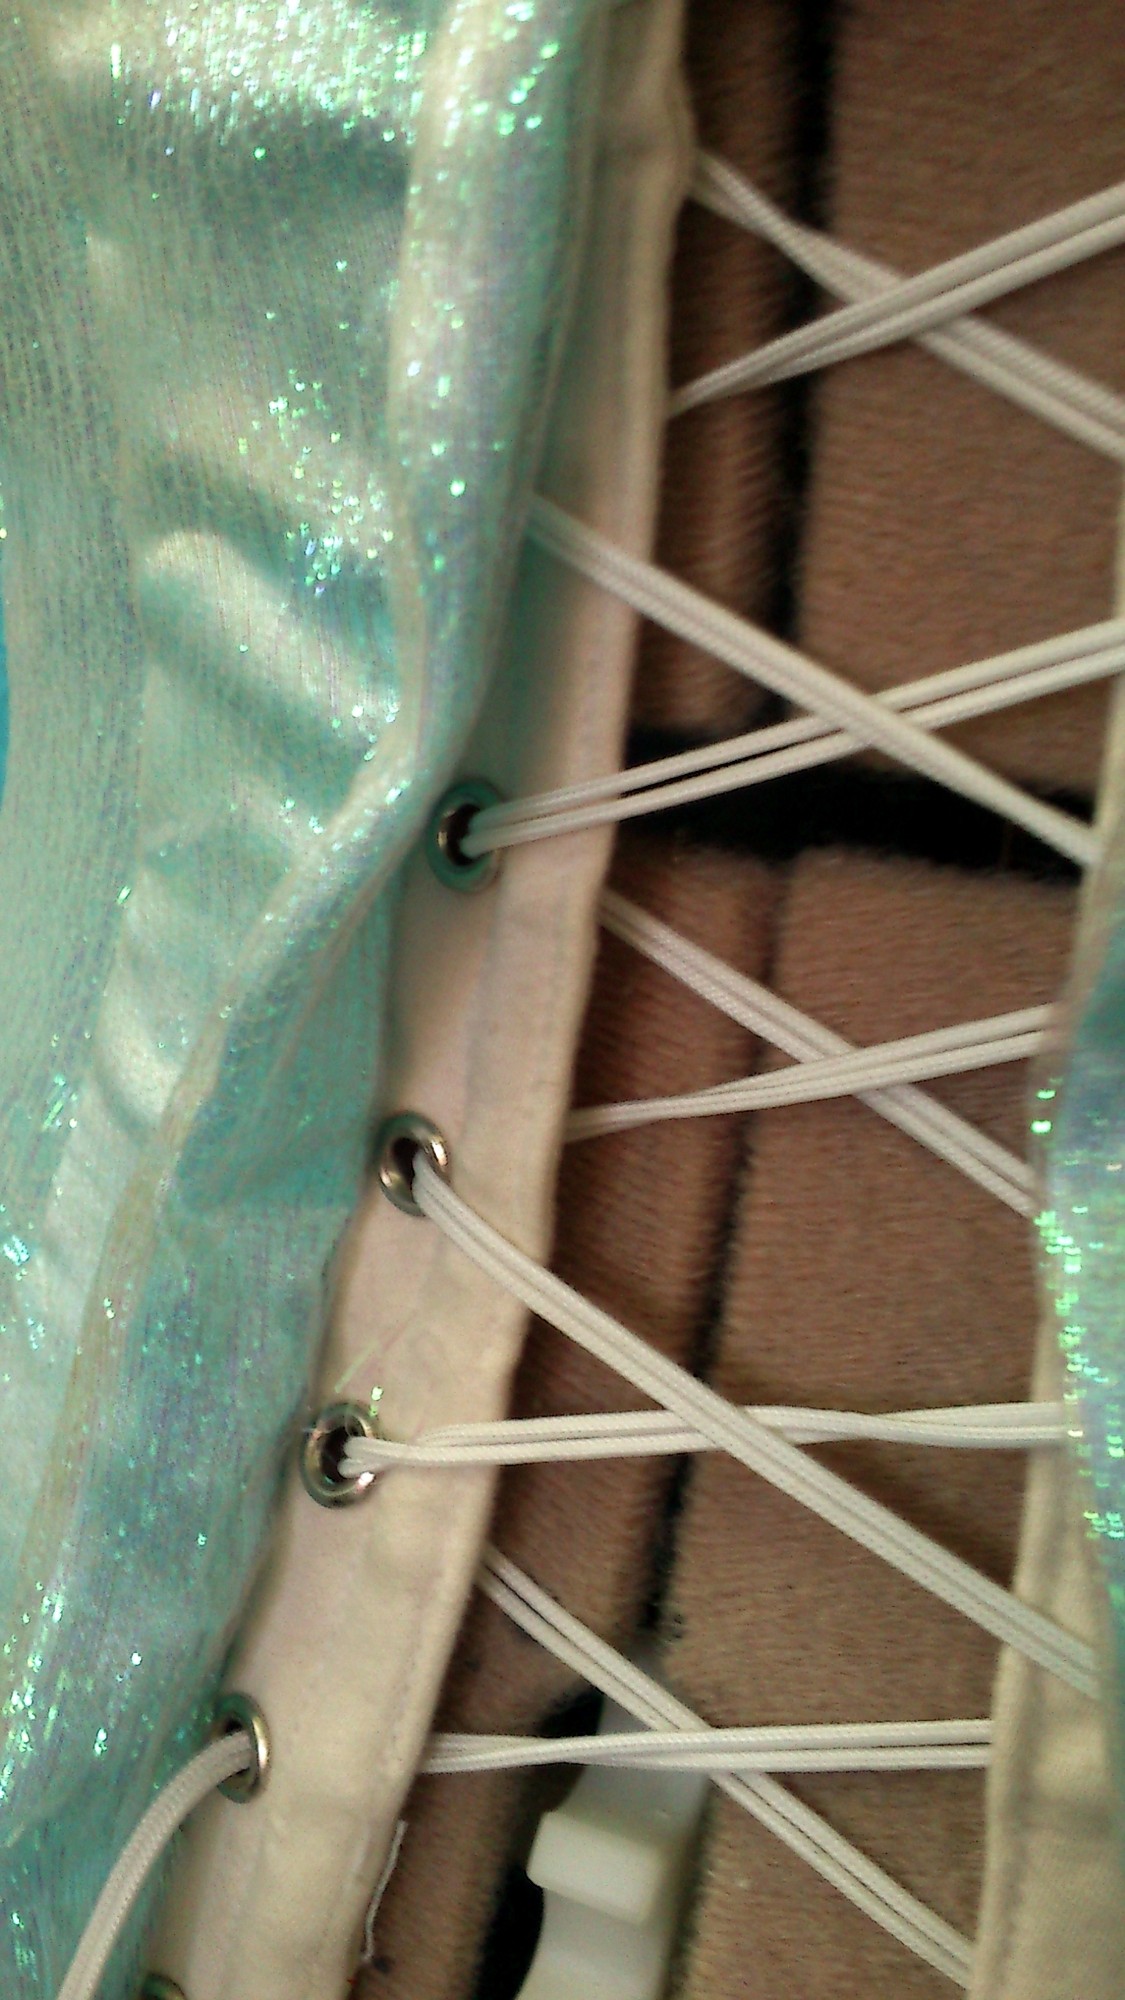
Close up of the lacing on the right side. I turned the shell back and folded it under, and tacked it as close to the eyelets as possible. Not ideal for a gown that is exposed at the back but fine under the cape 😉
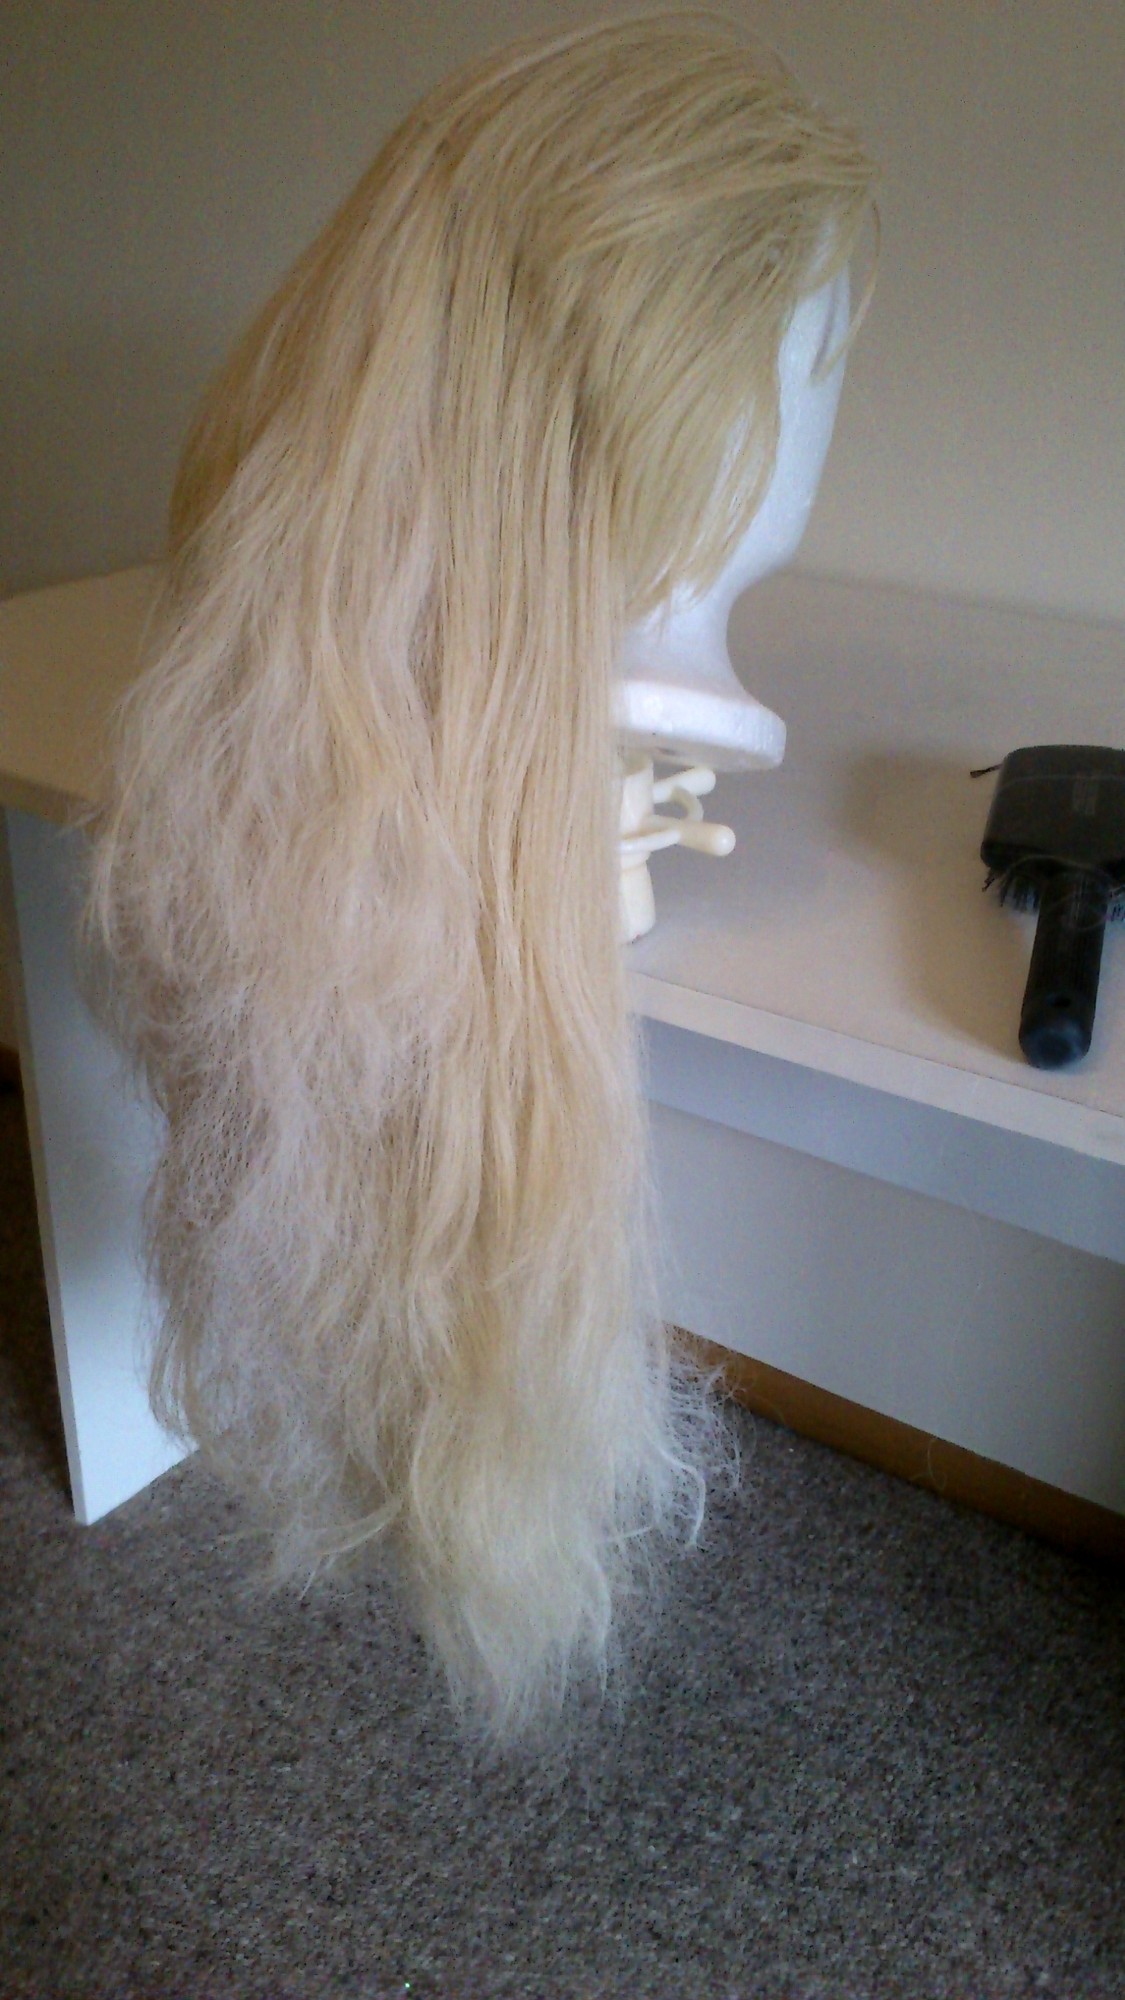
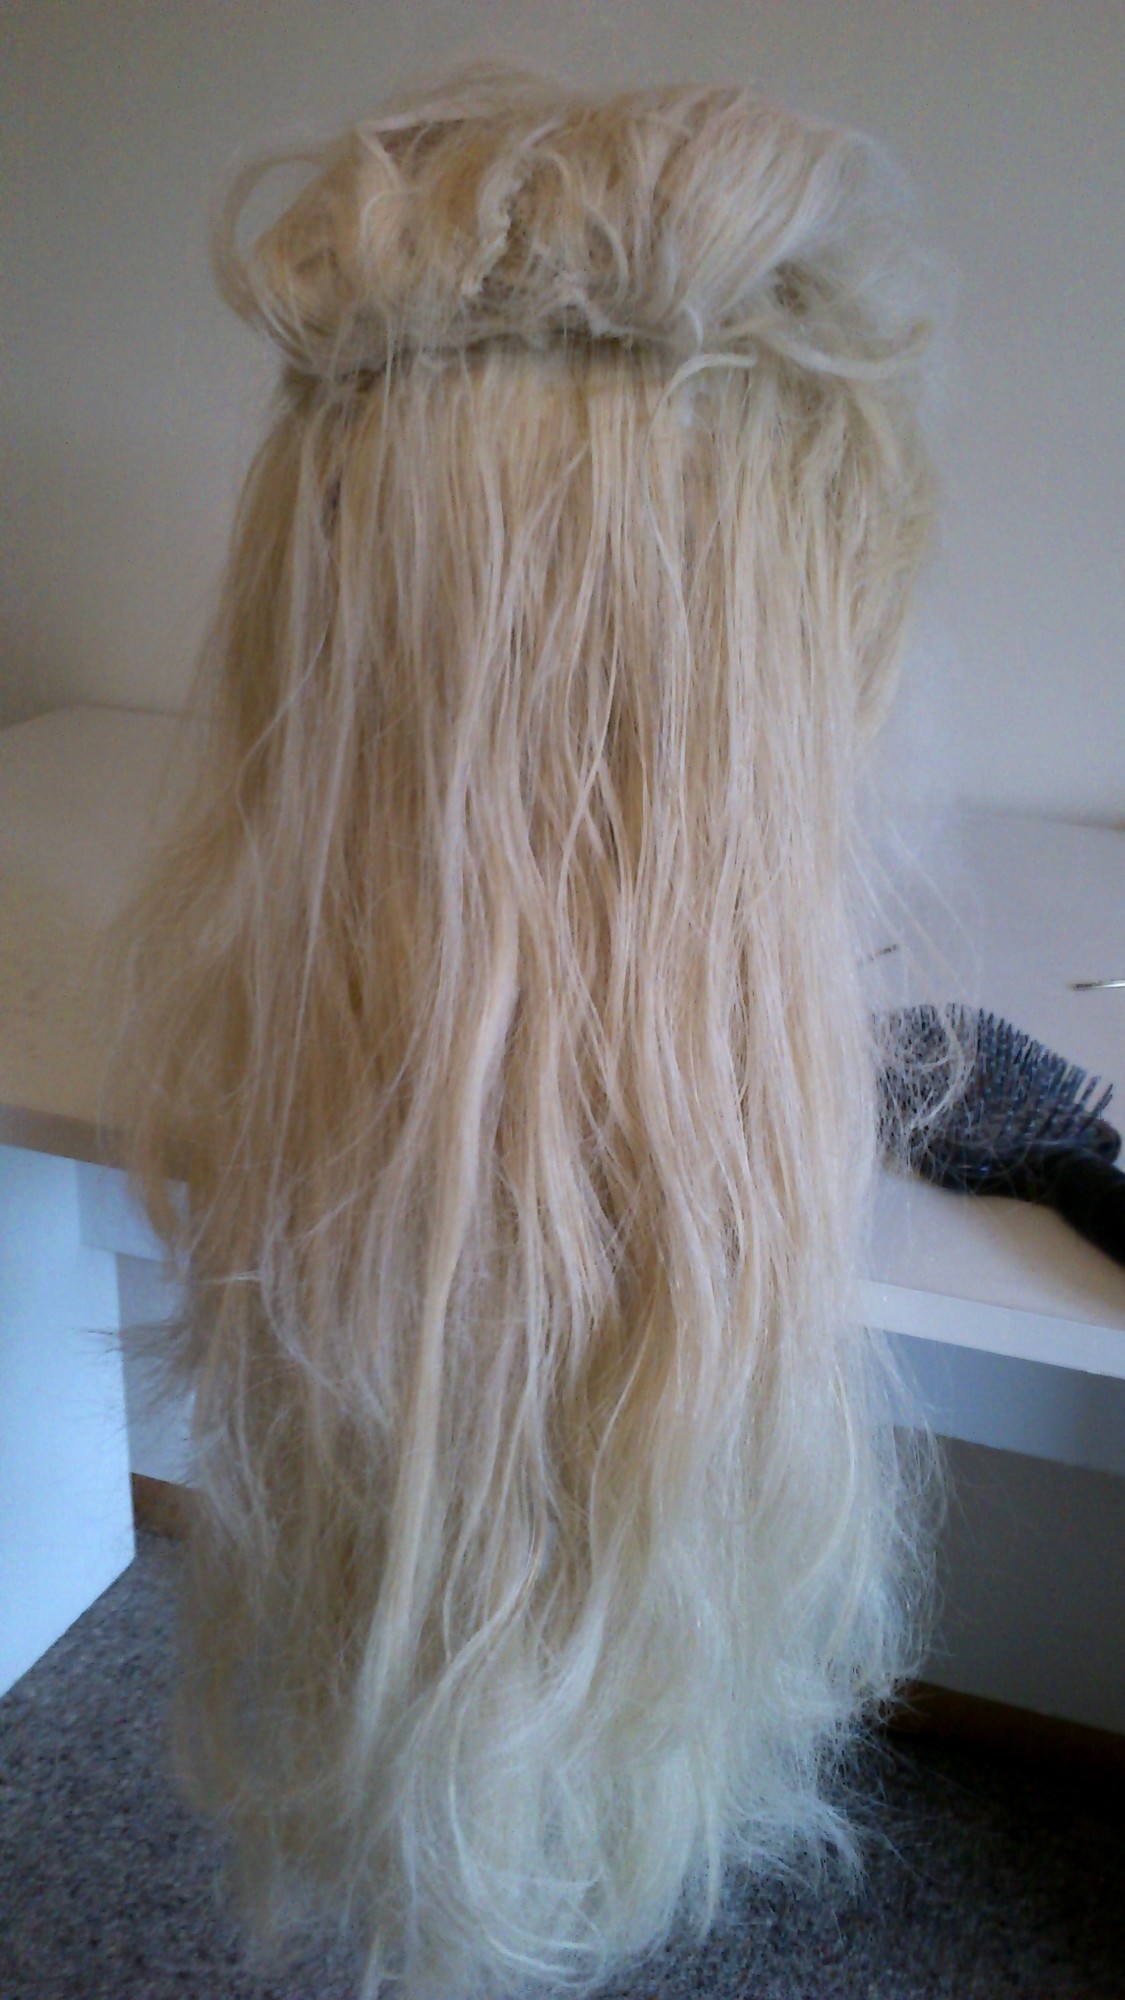
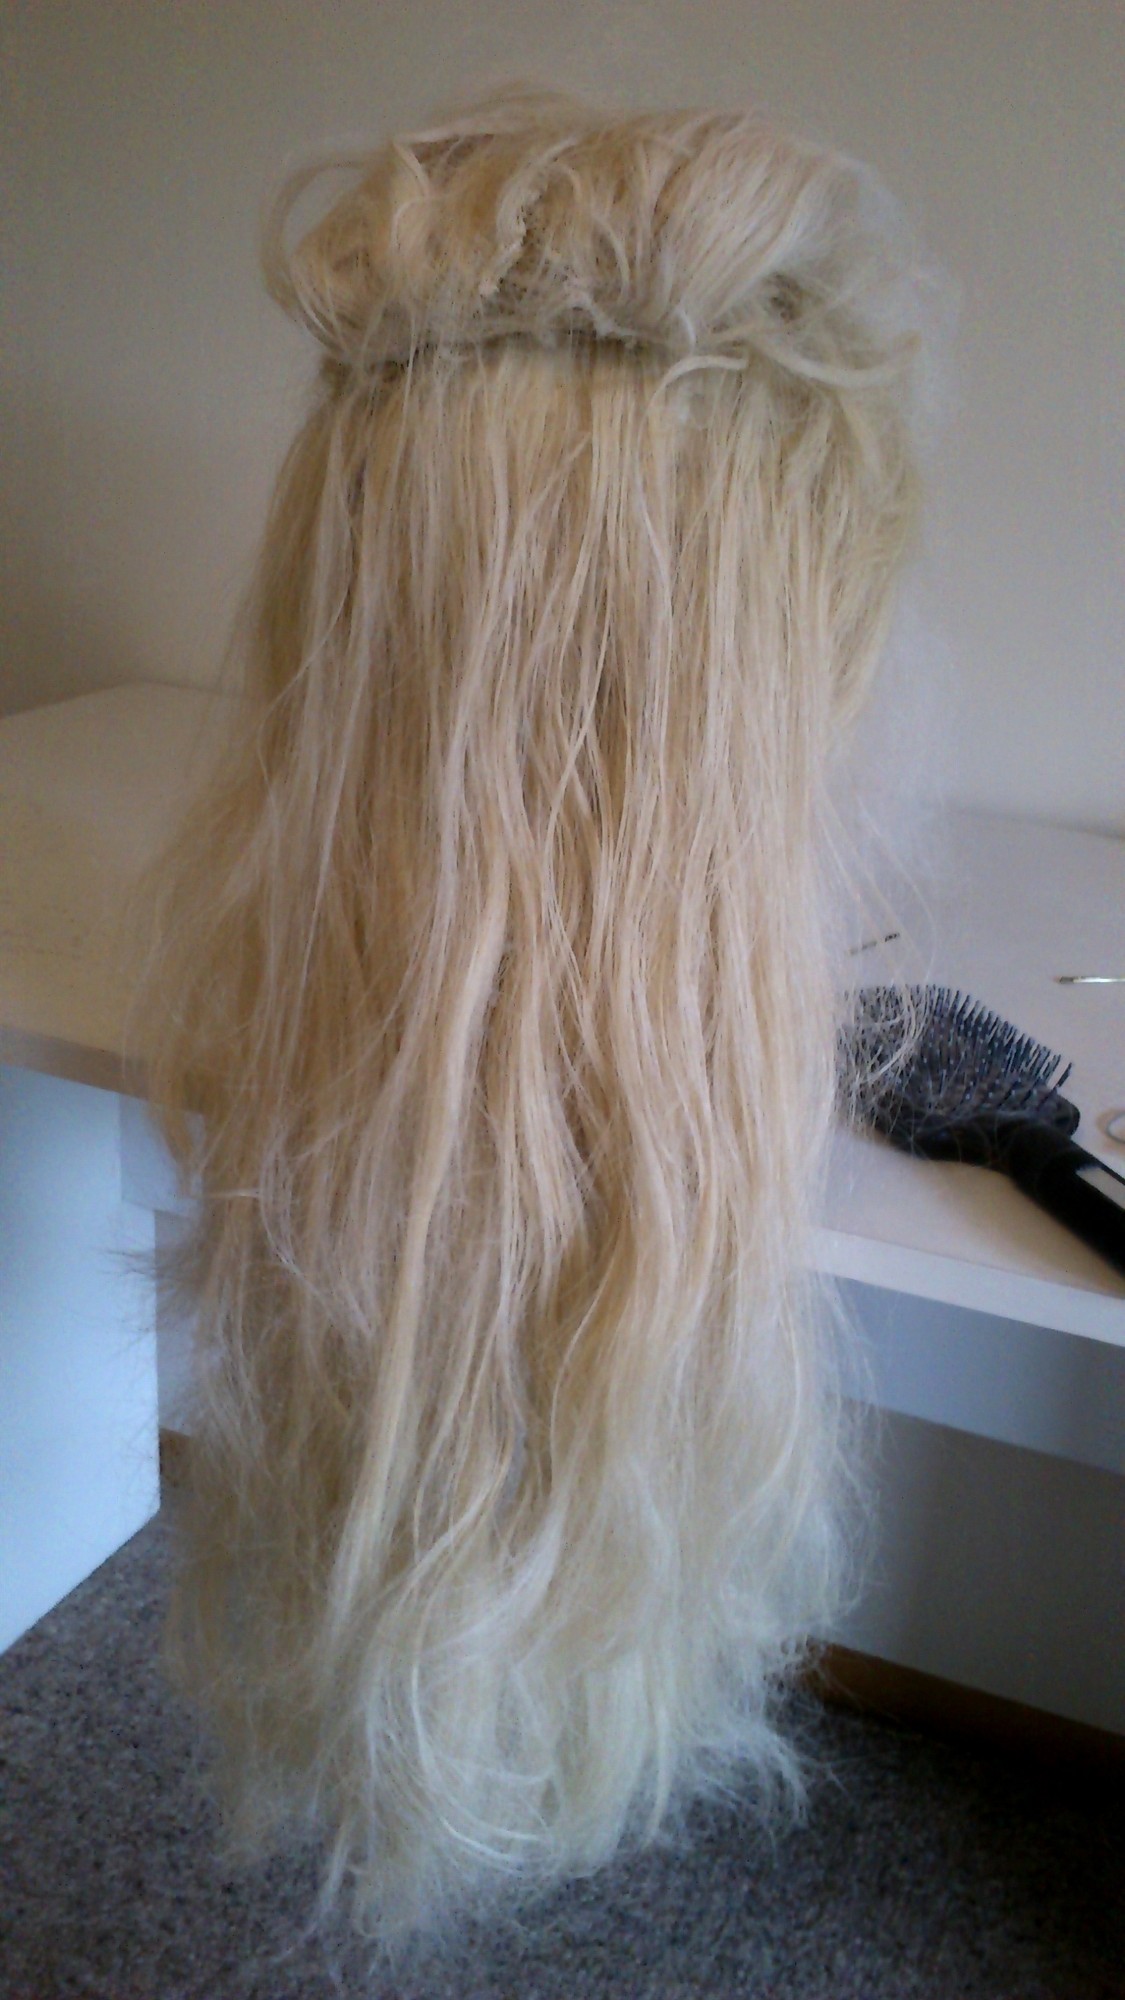
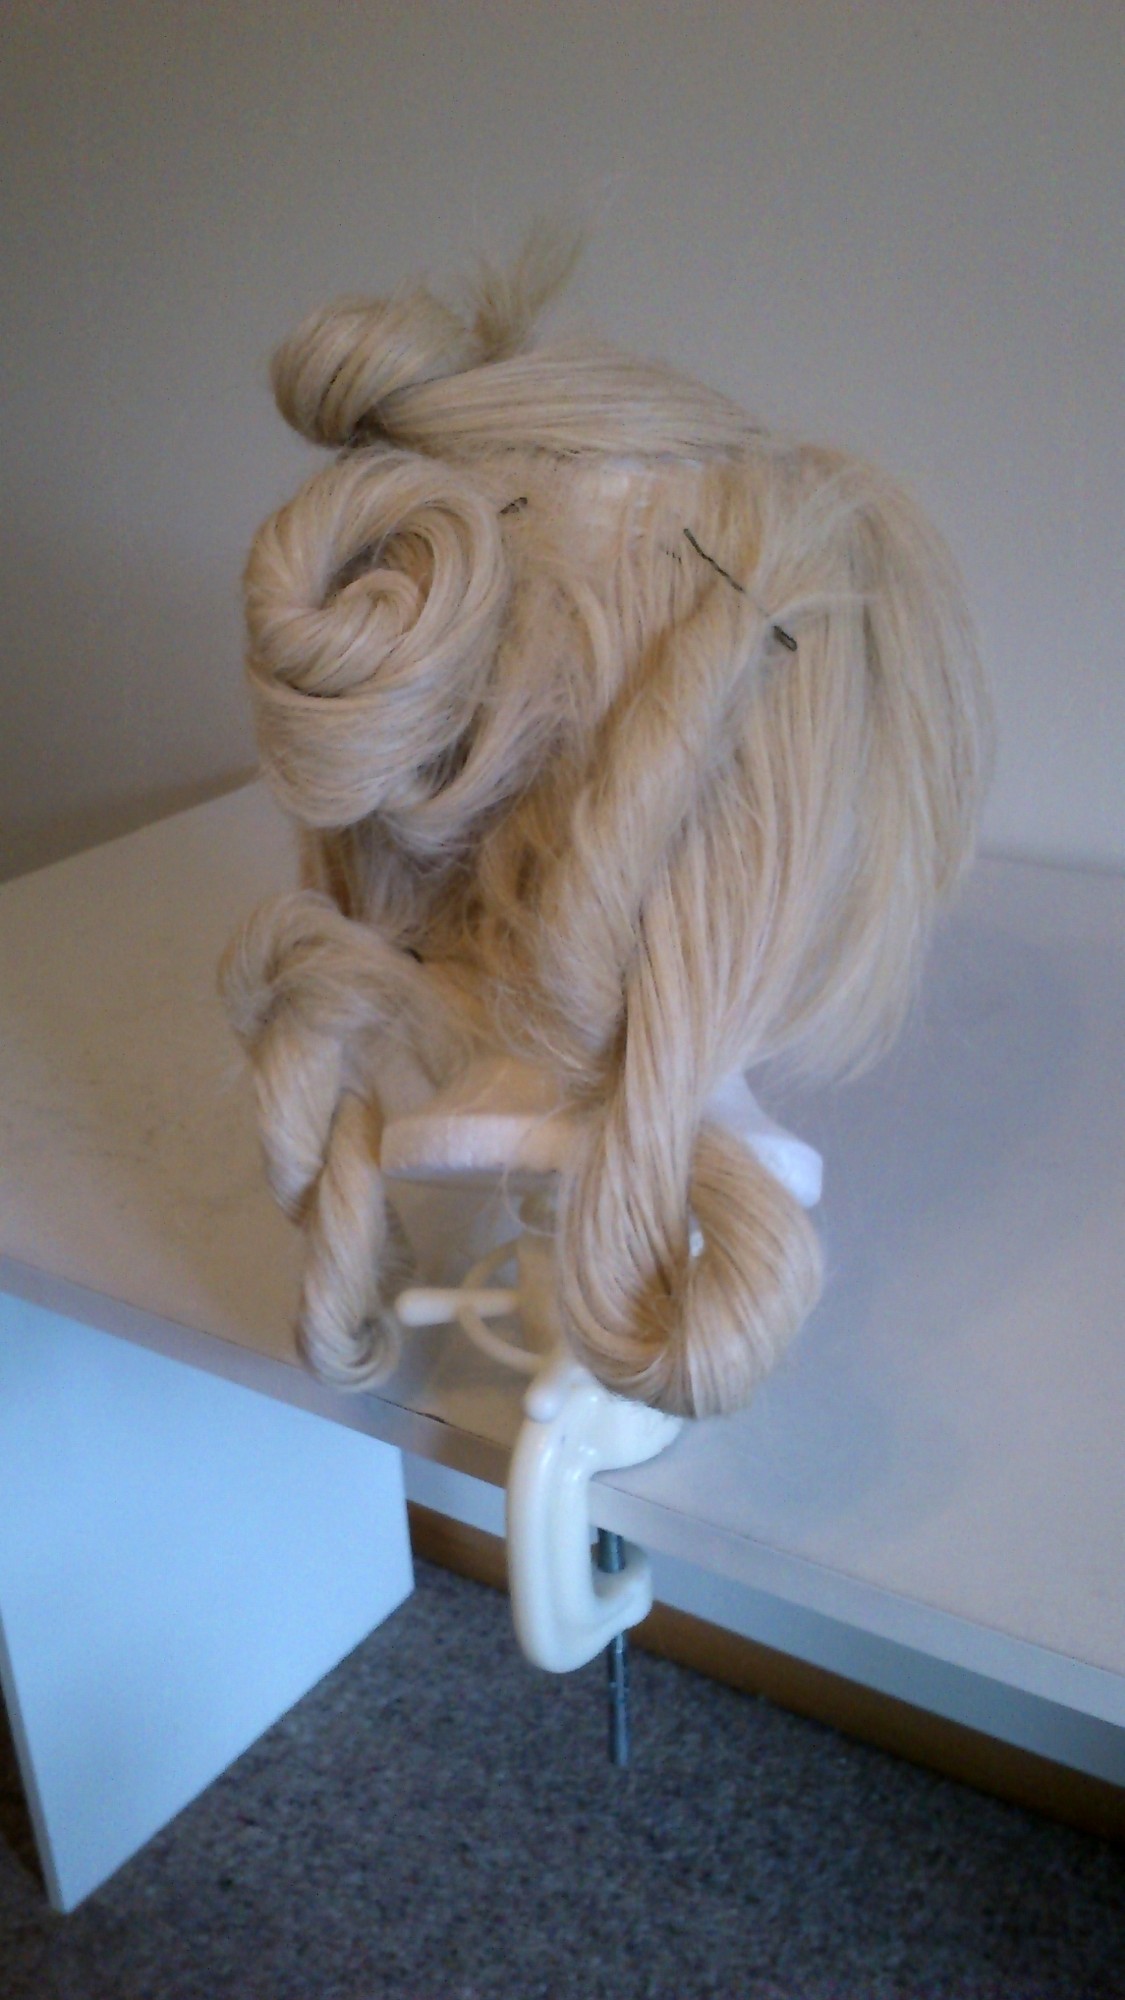
Not a total redo but as it’ll be a while before I can replace the wig I decided to store it nicely which meant I undid the work of yesterday and got photos of this and redoing it. No photos of it on me as I am still bleary and really not a fan of all the downlighting everywhere atm 😉 However new desk makes for a good light bouncer so hooray for reasonable photos!
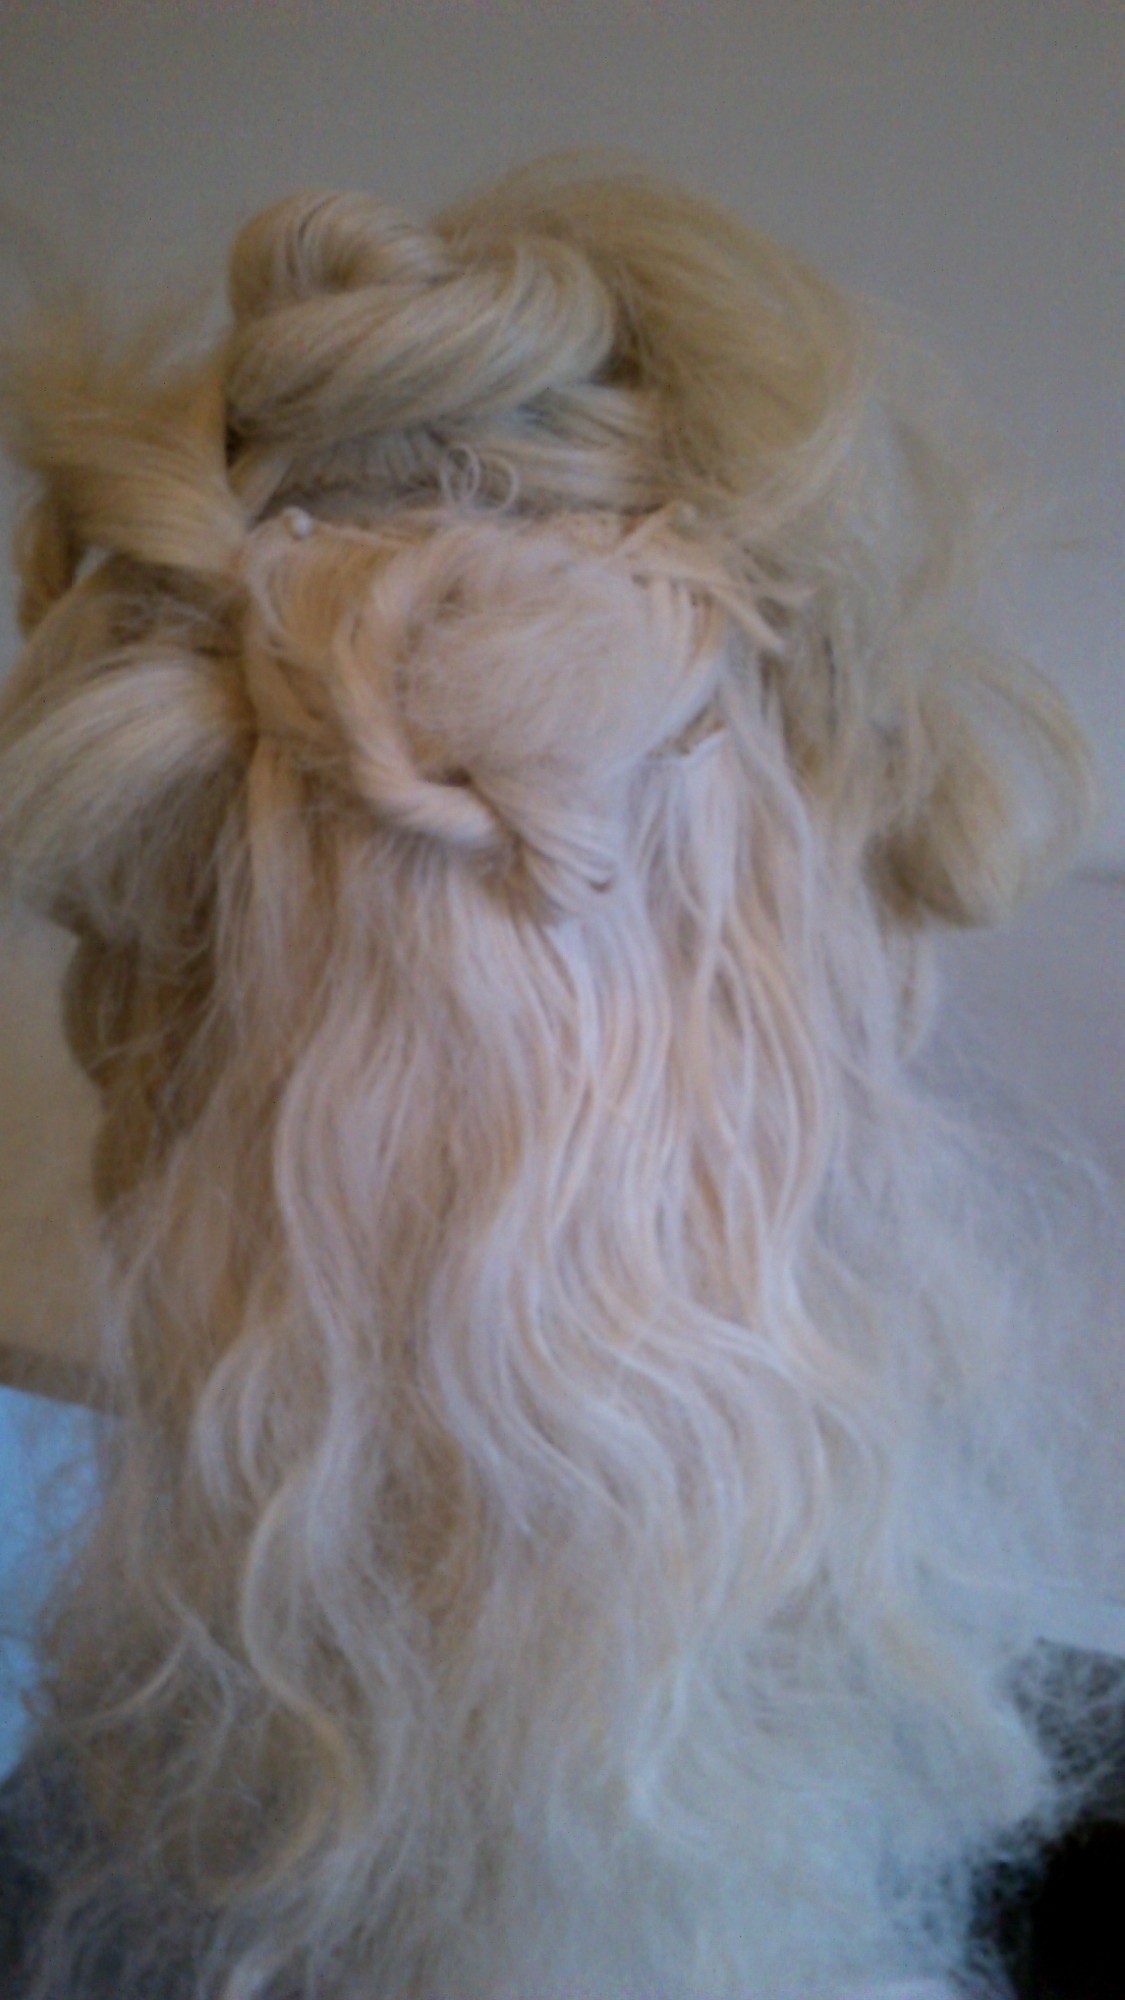
ELsa wig as she was after a full day wear including in the car and the wind tunnel!
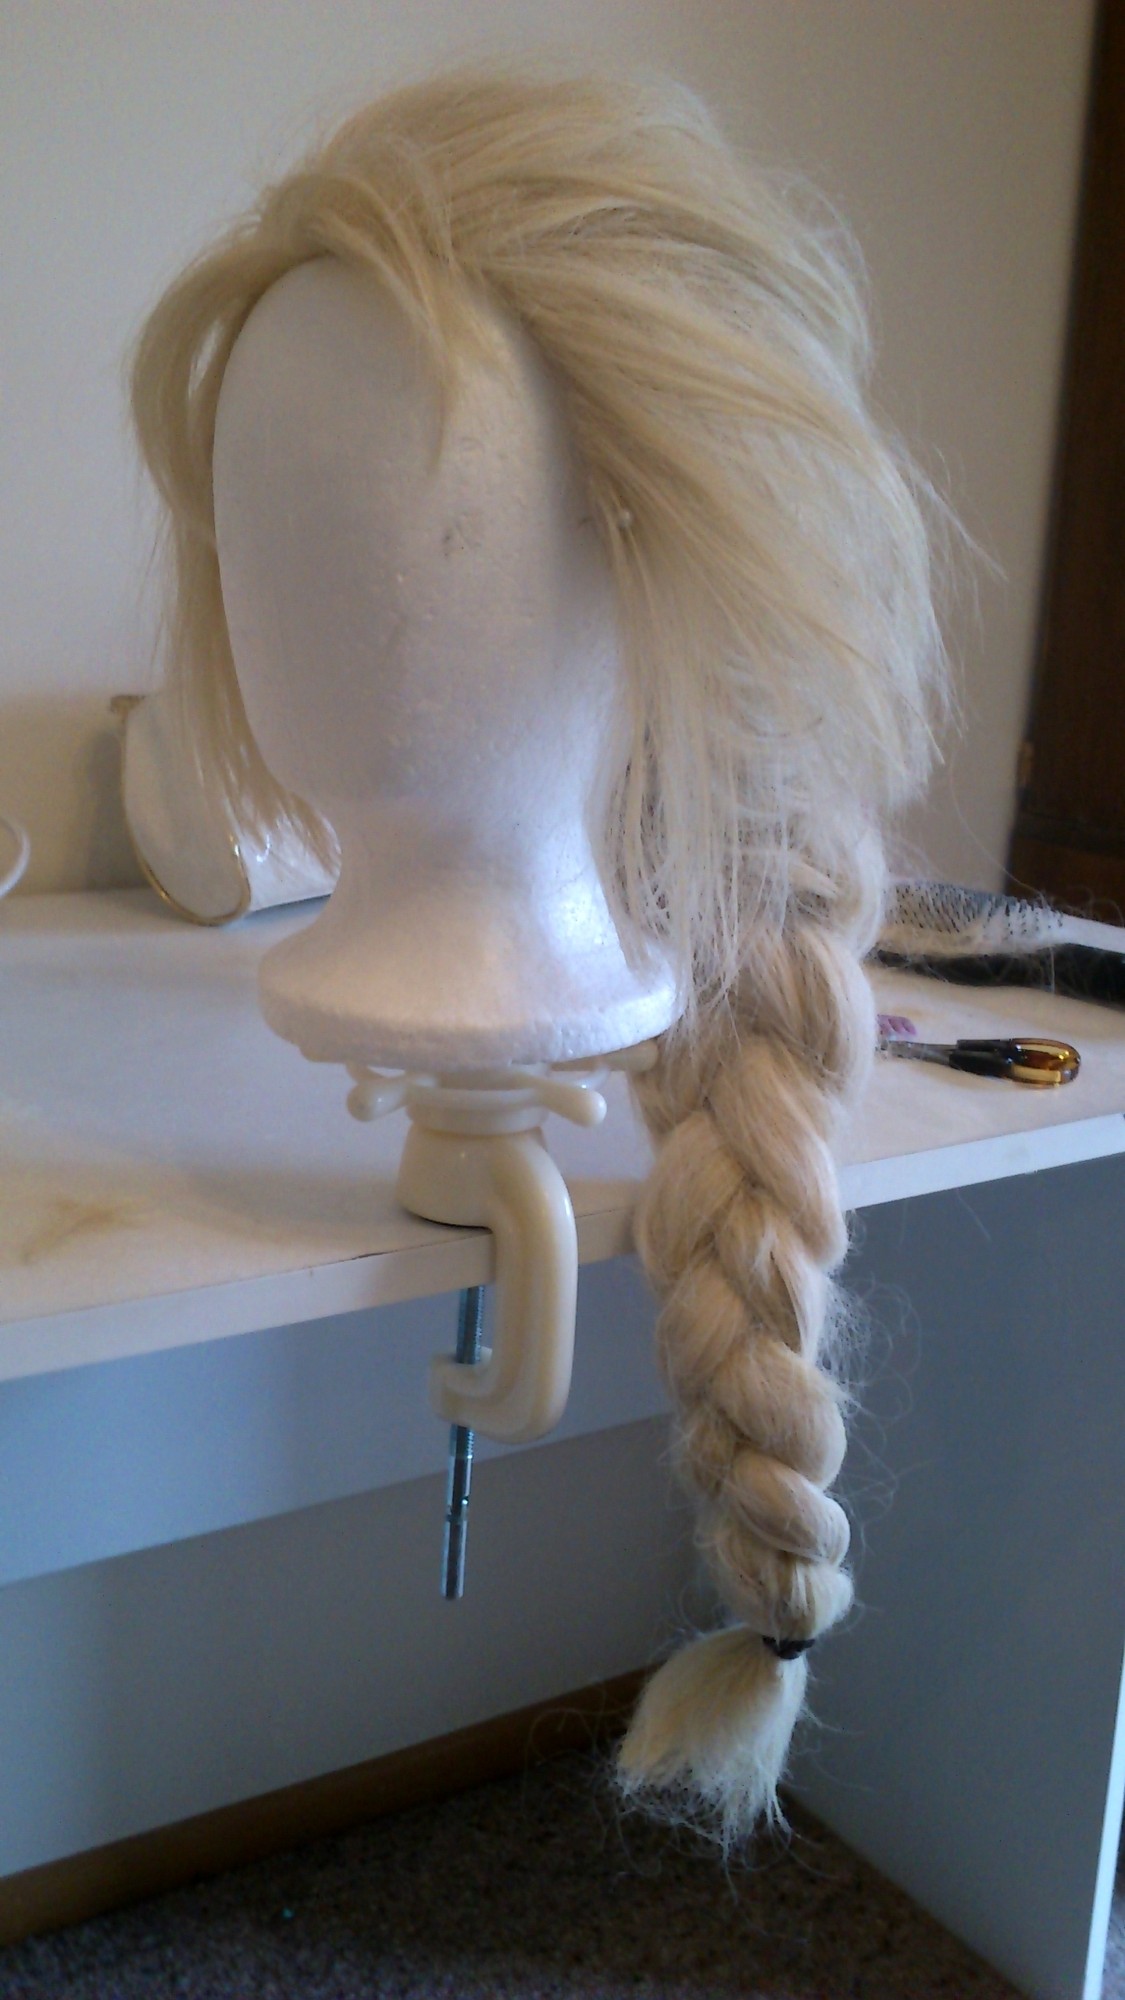


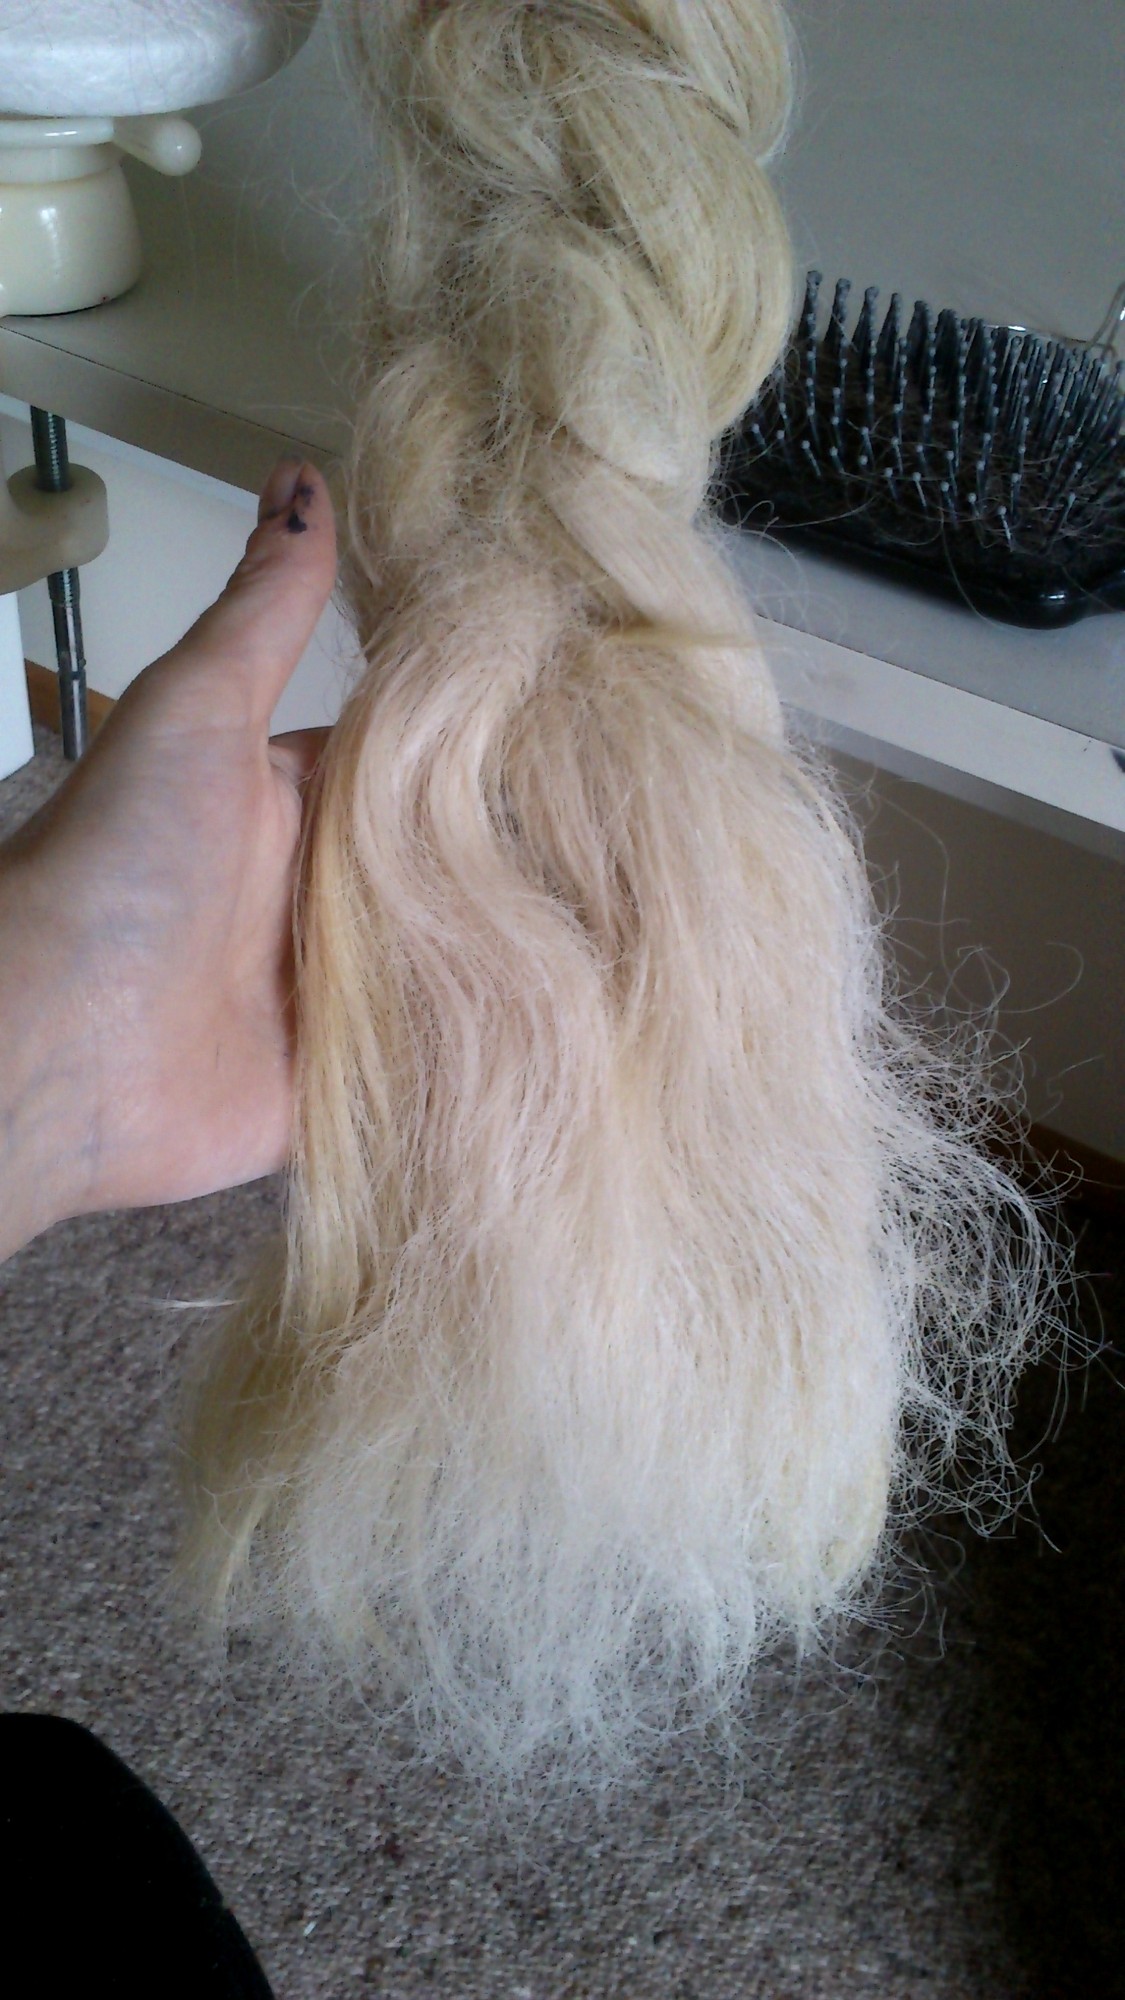
You can see how matted the underside got!
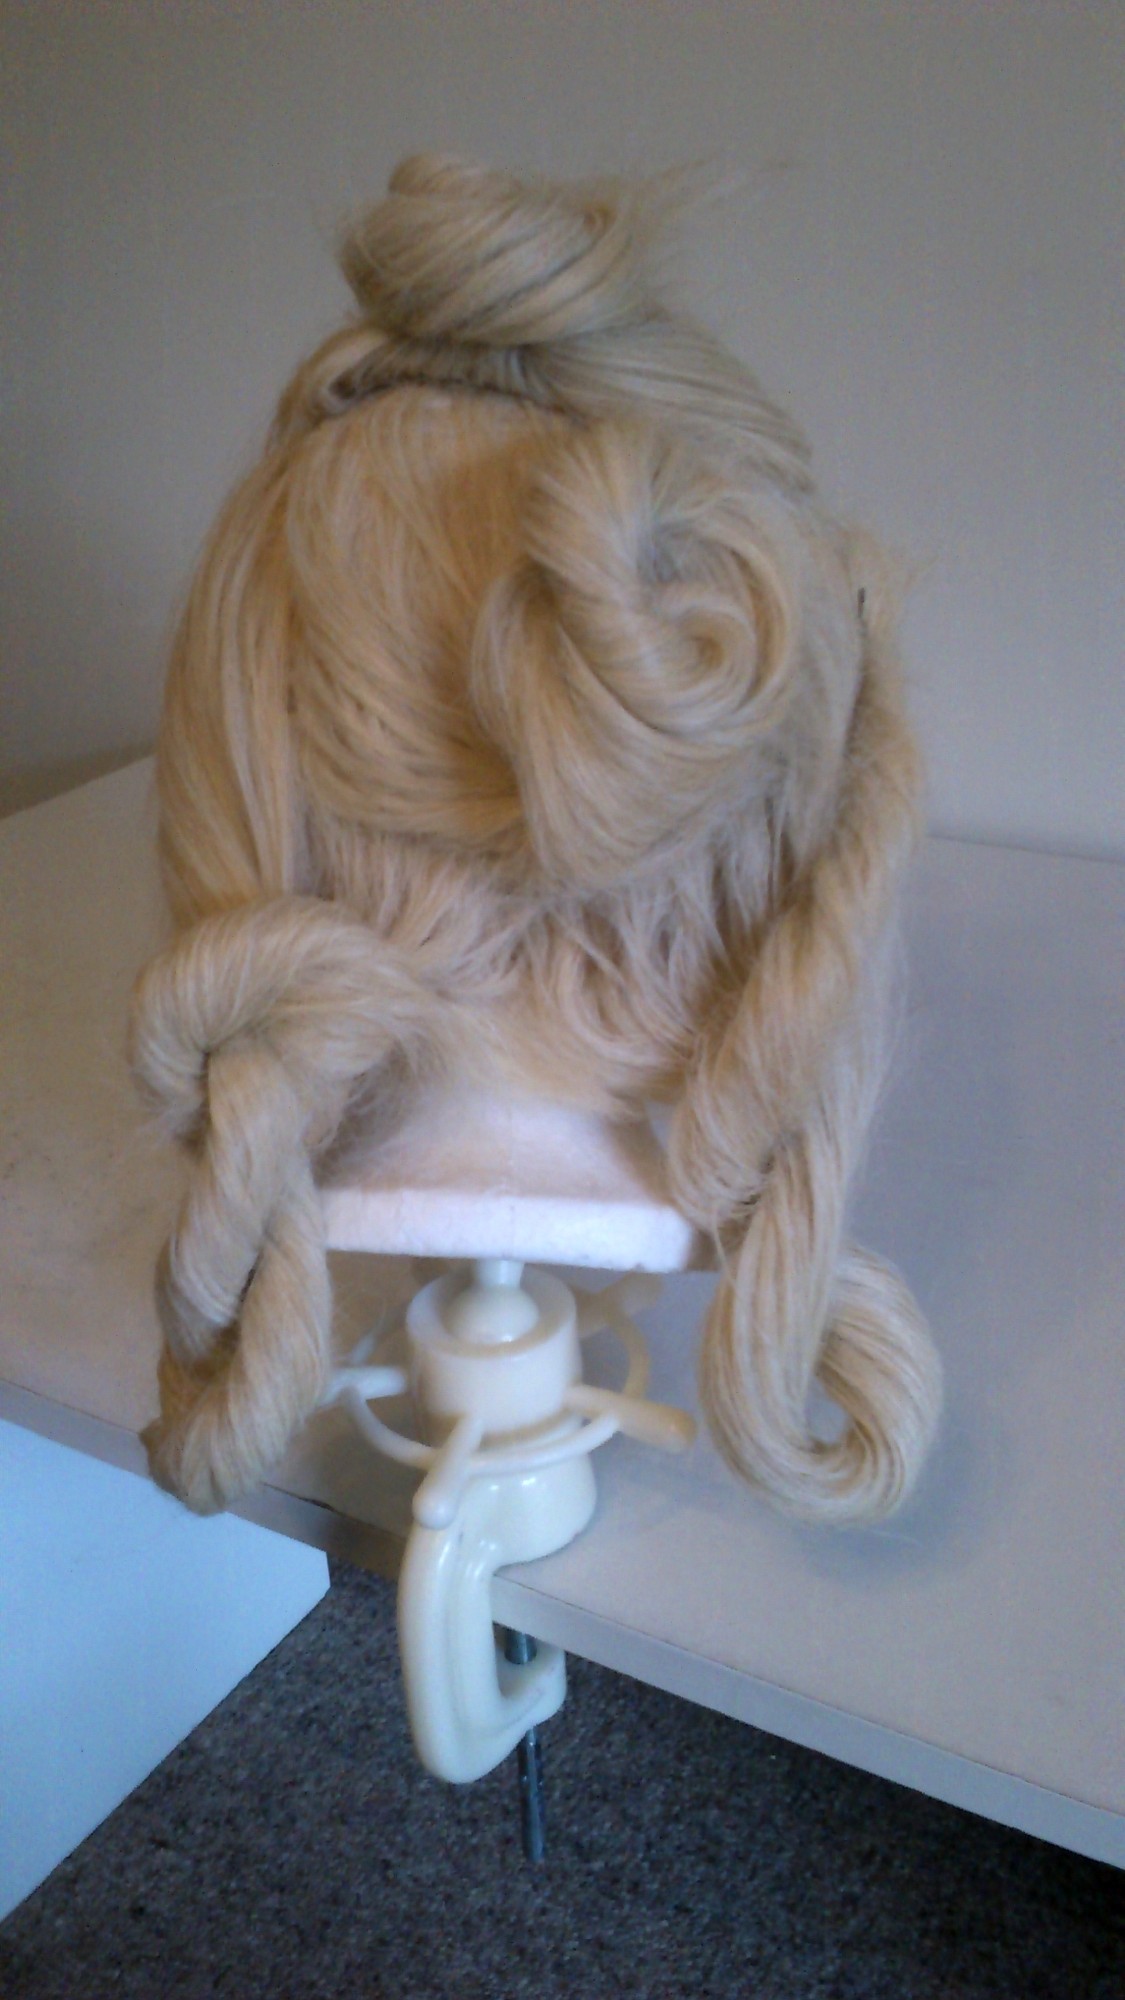
So I started by unravelling the ends and brushing them out as I went. You can see how the two wigs are not perfectly matched at all but by mixing in sections as I went they wre far more subtle. Also very crunchy! Yay for acrylic wig toning but boo for needing high intensity conditioning to counter it.

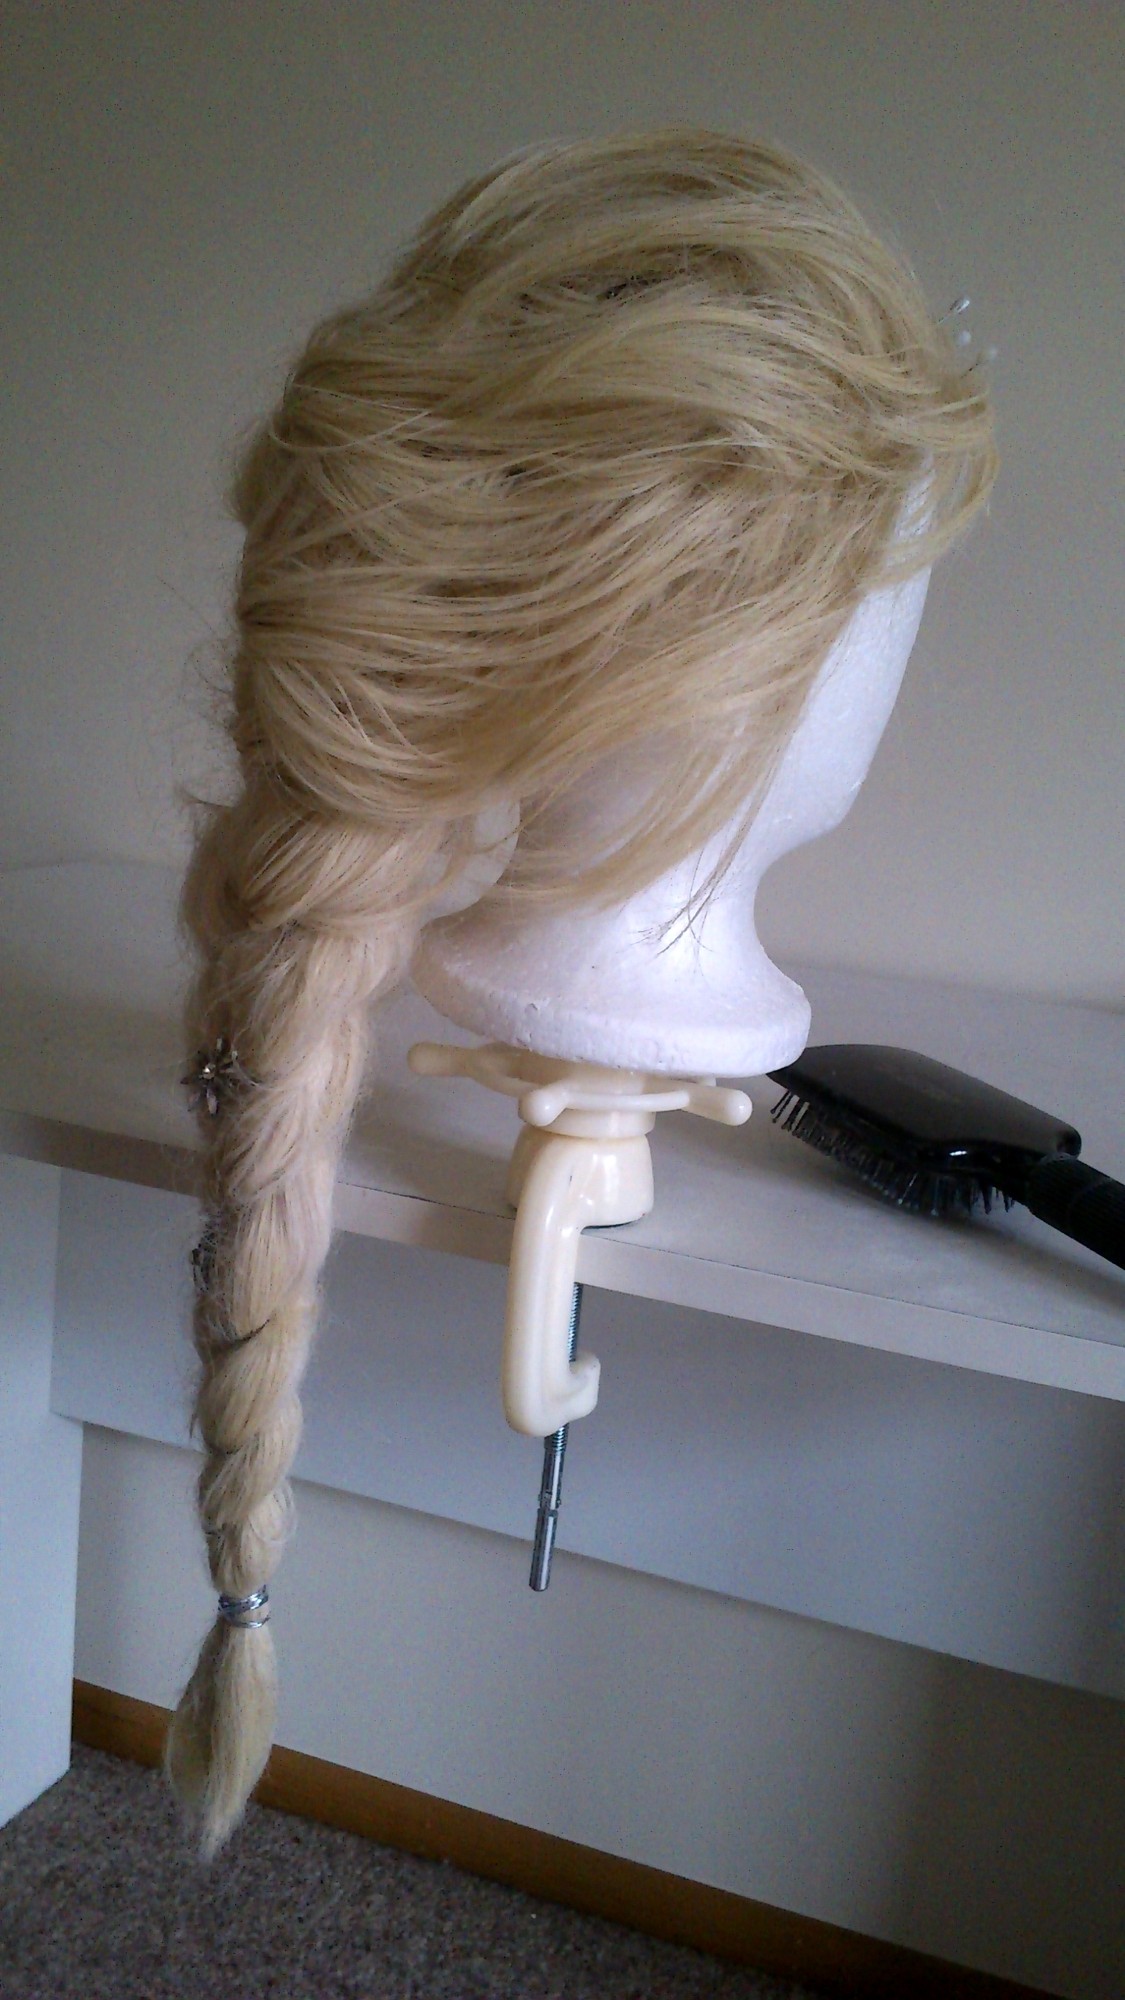
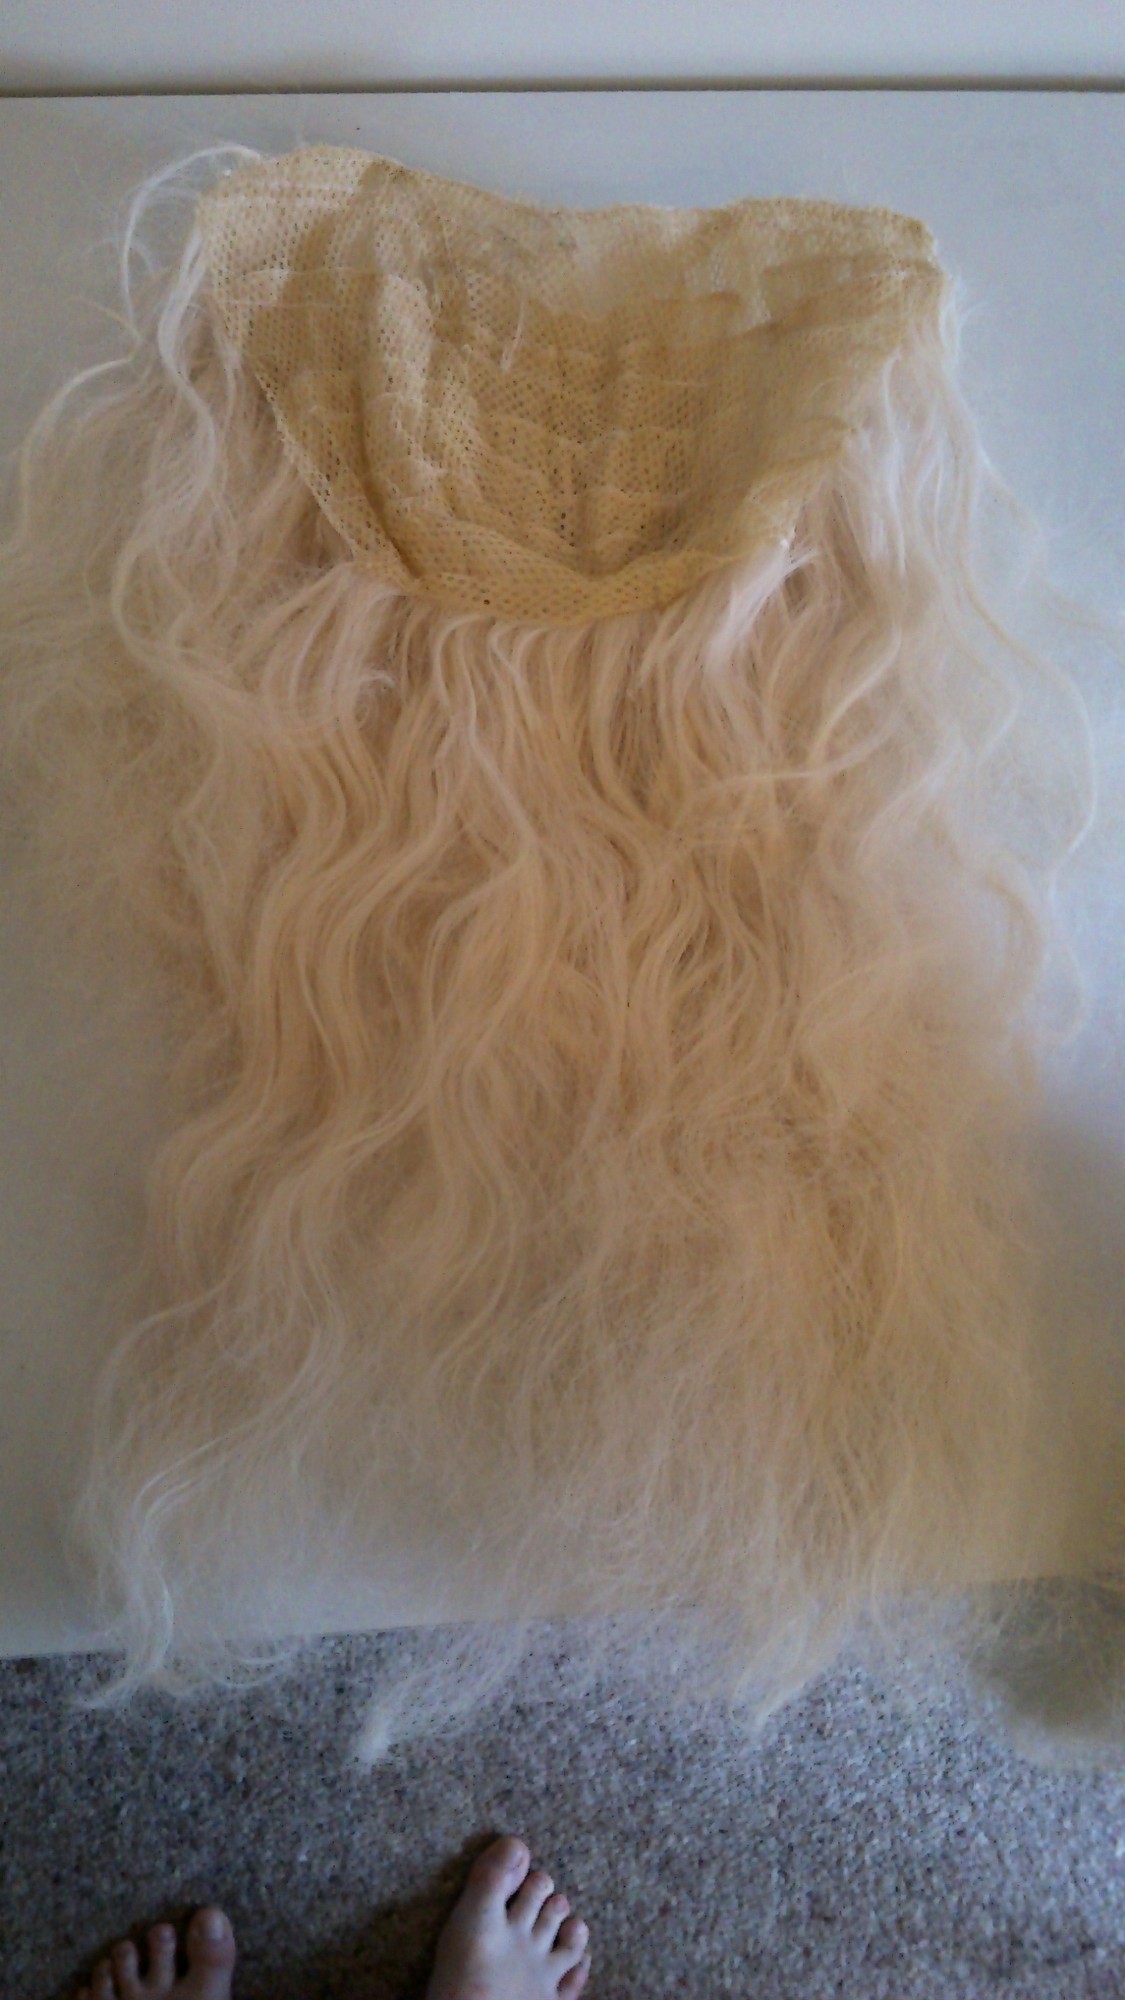
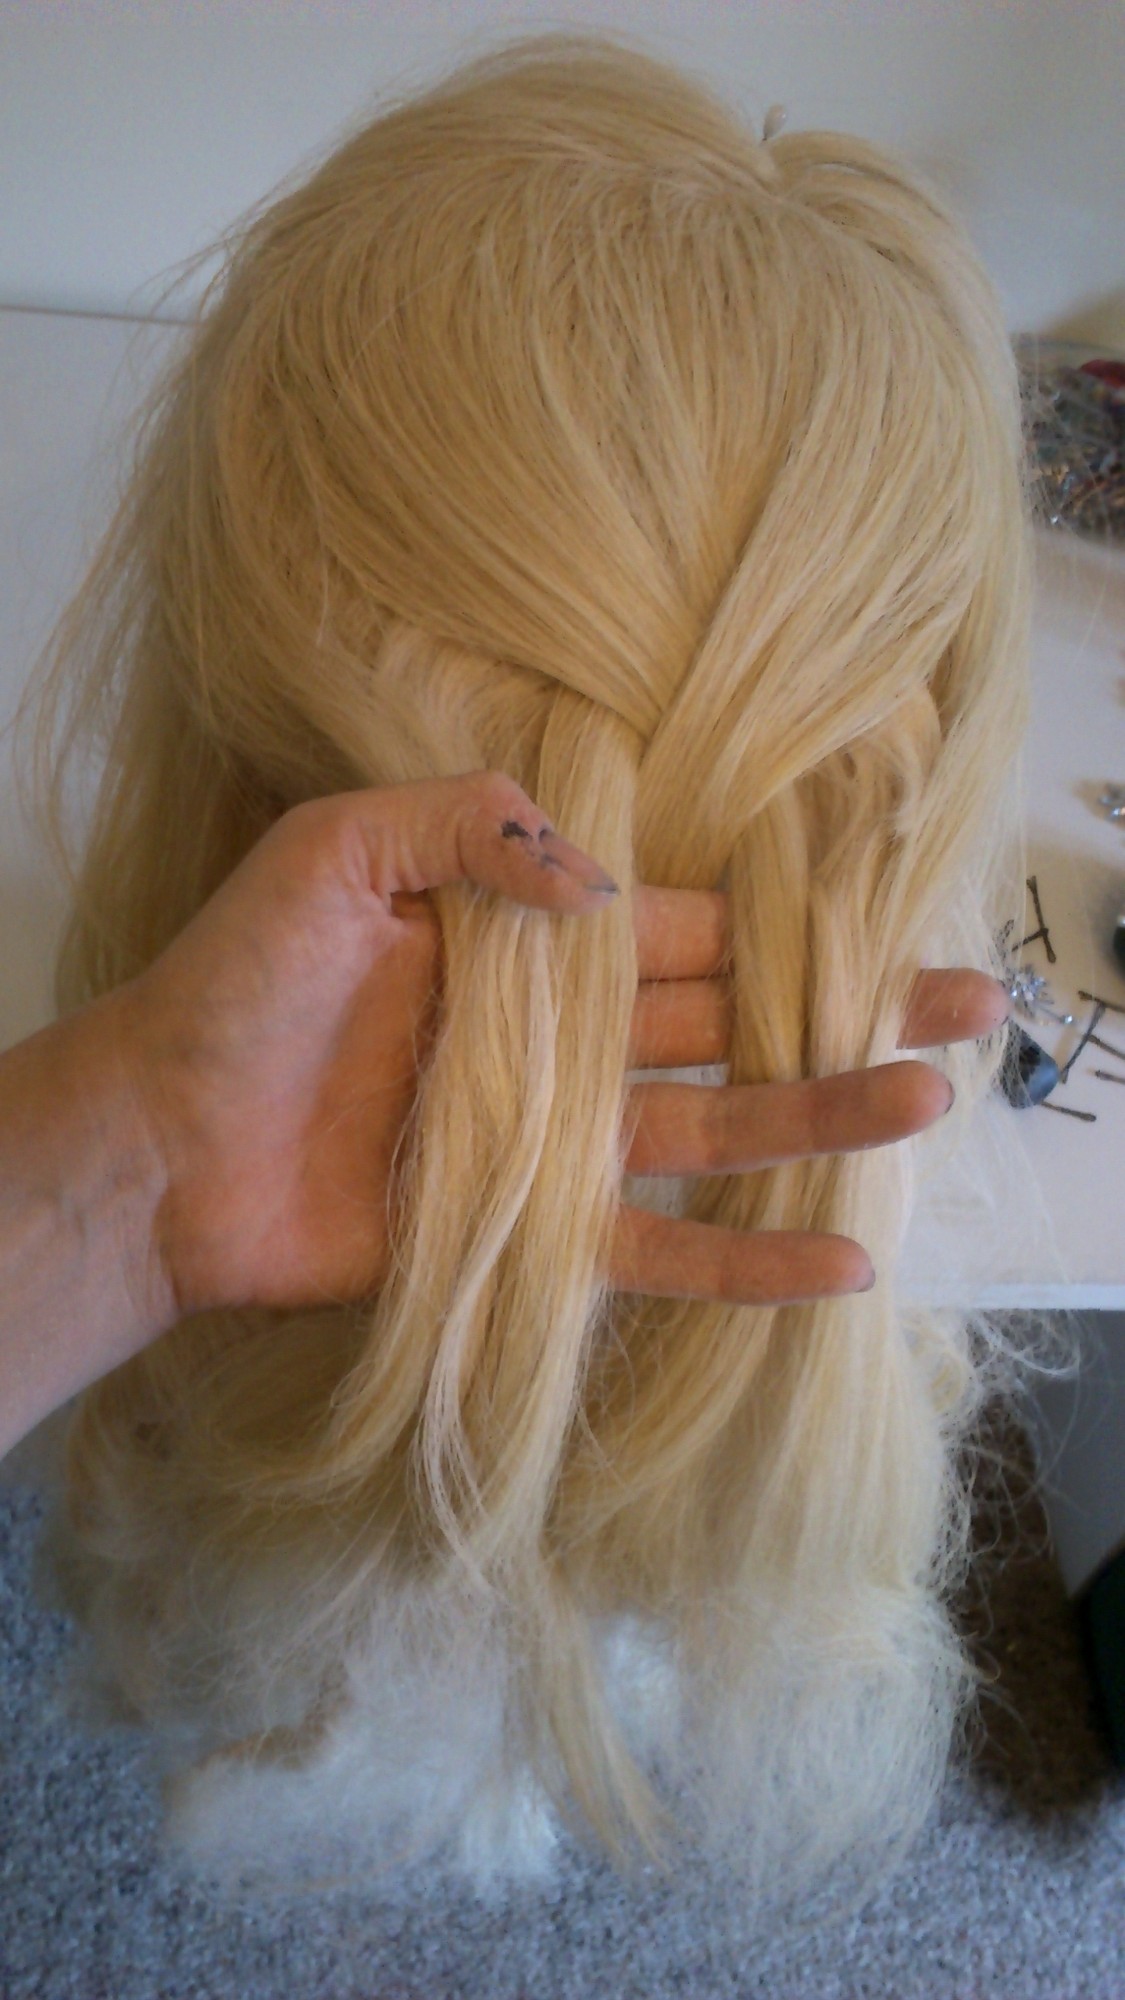
Here you can see how the second wig was simply pinned (pinned not hair pinned) in the crown and the main wig styled over it:

The second wig was simply cut in to a D shape and folded in on itself.

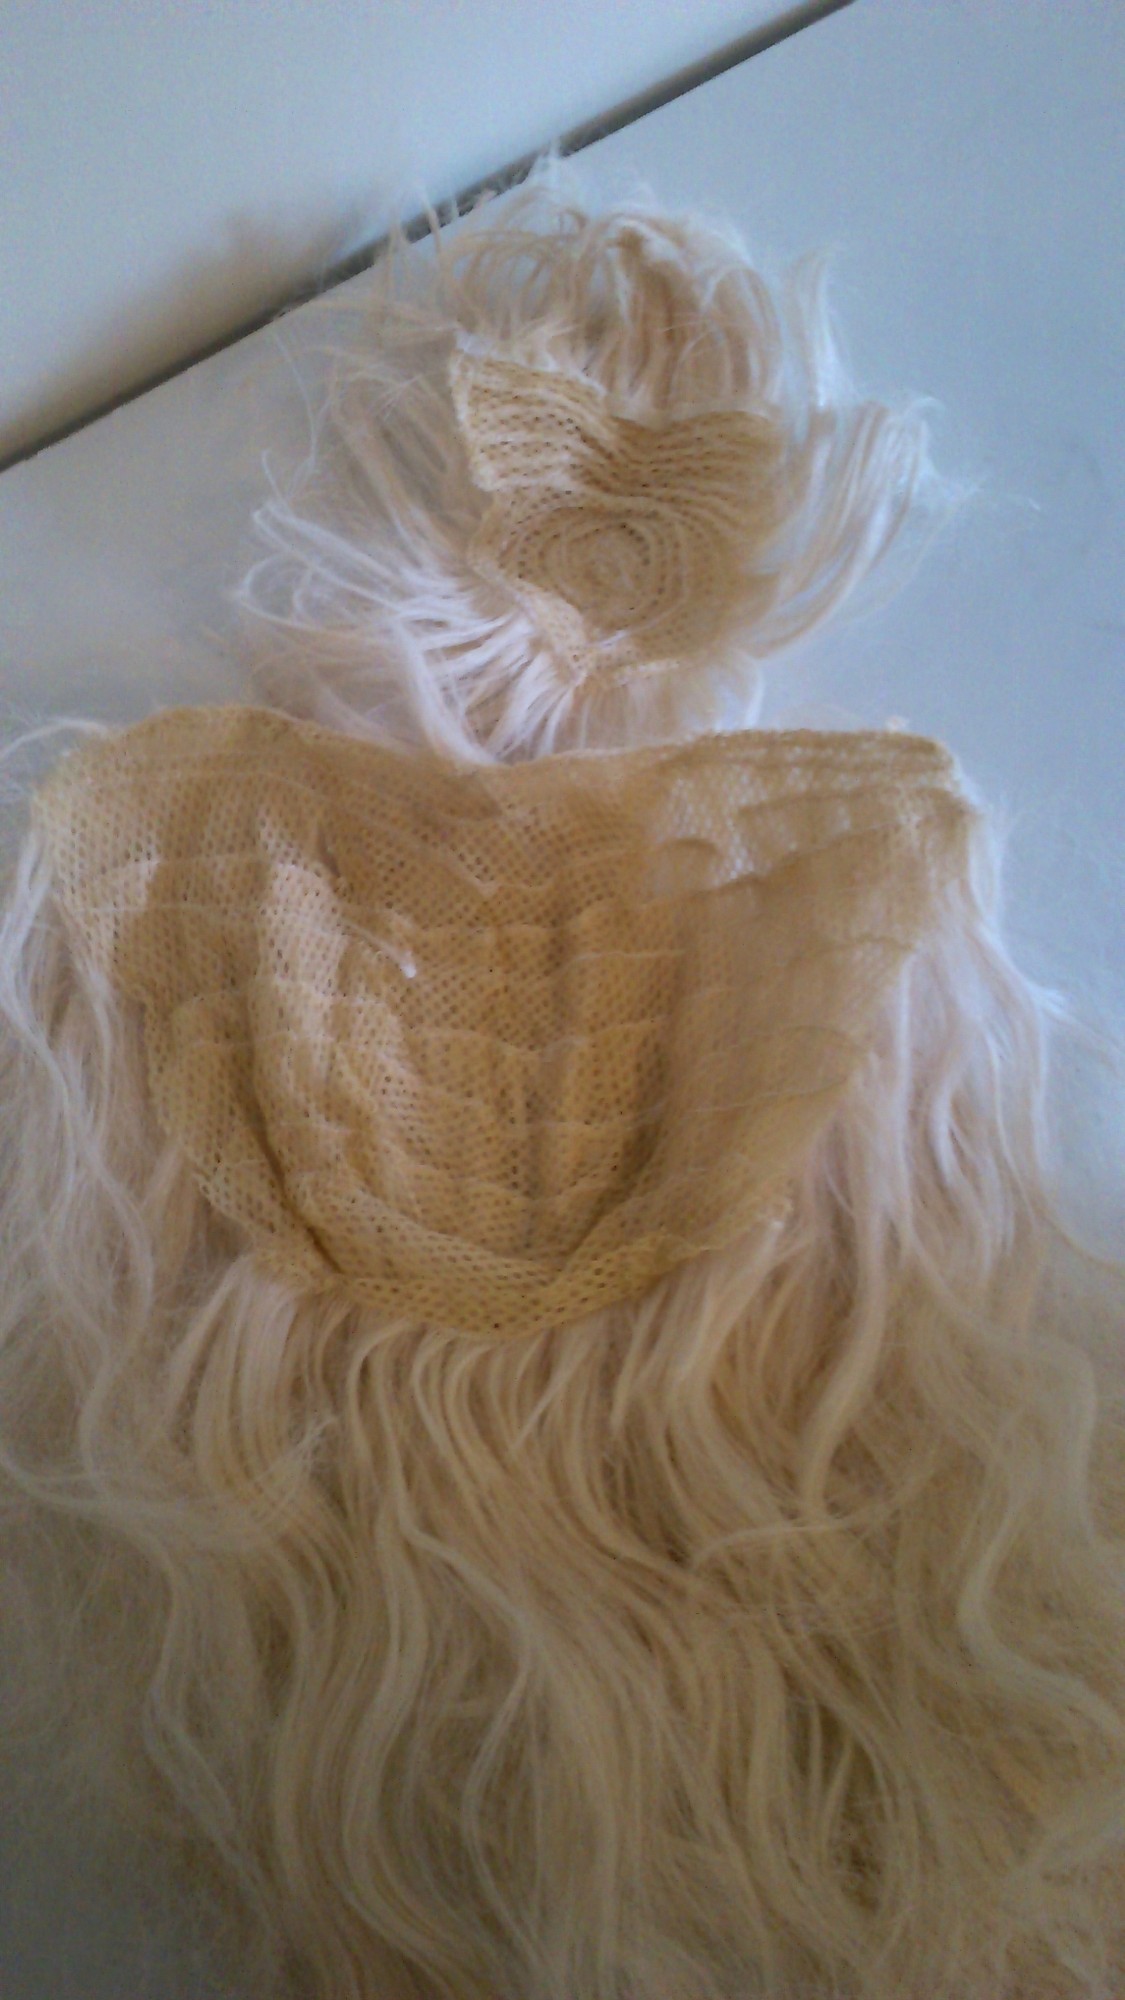

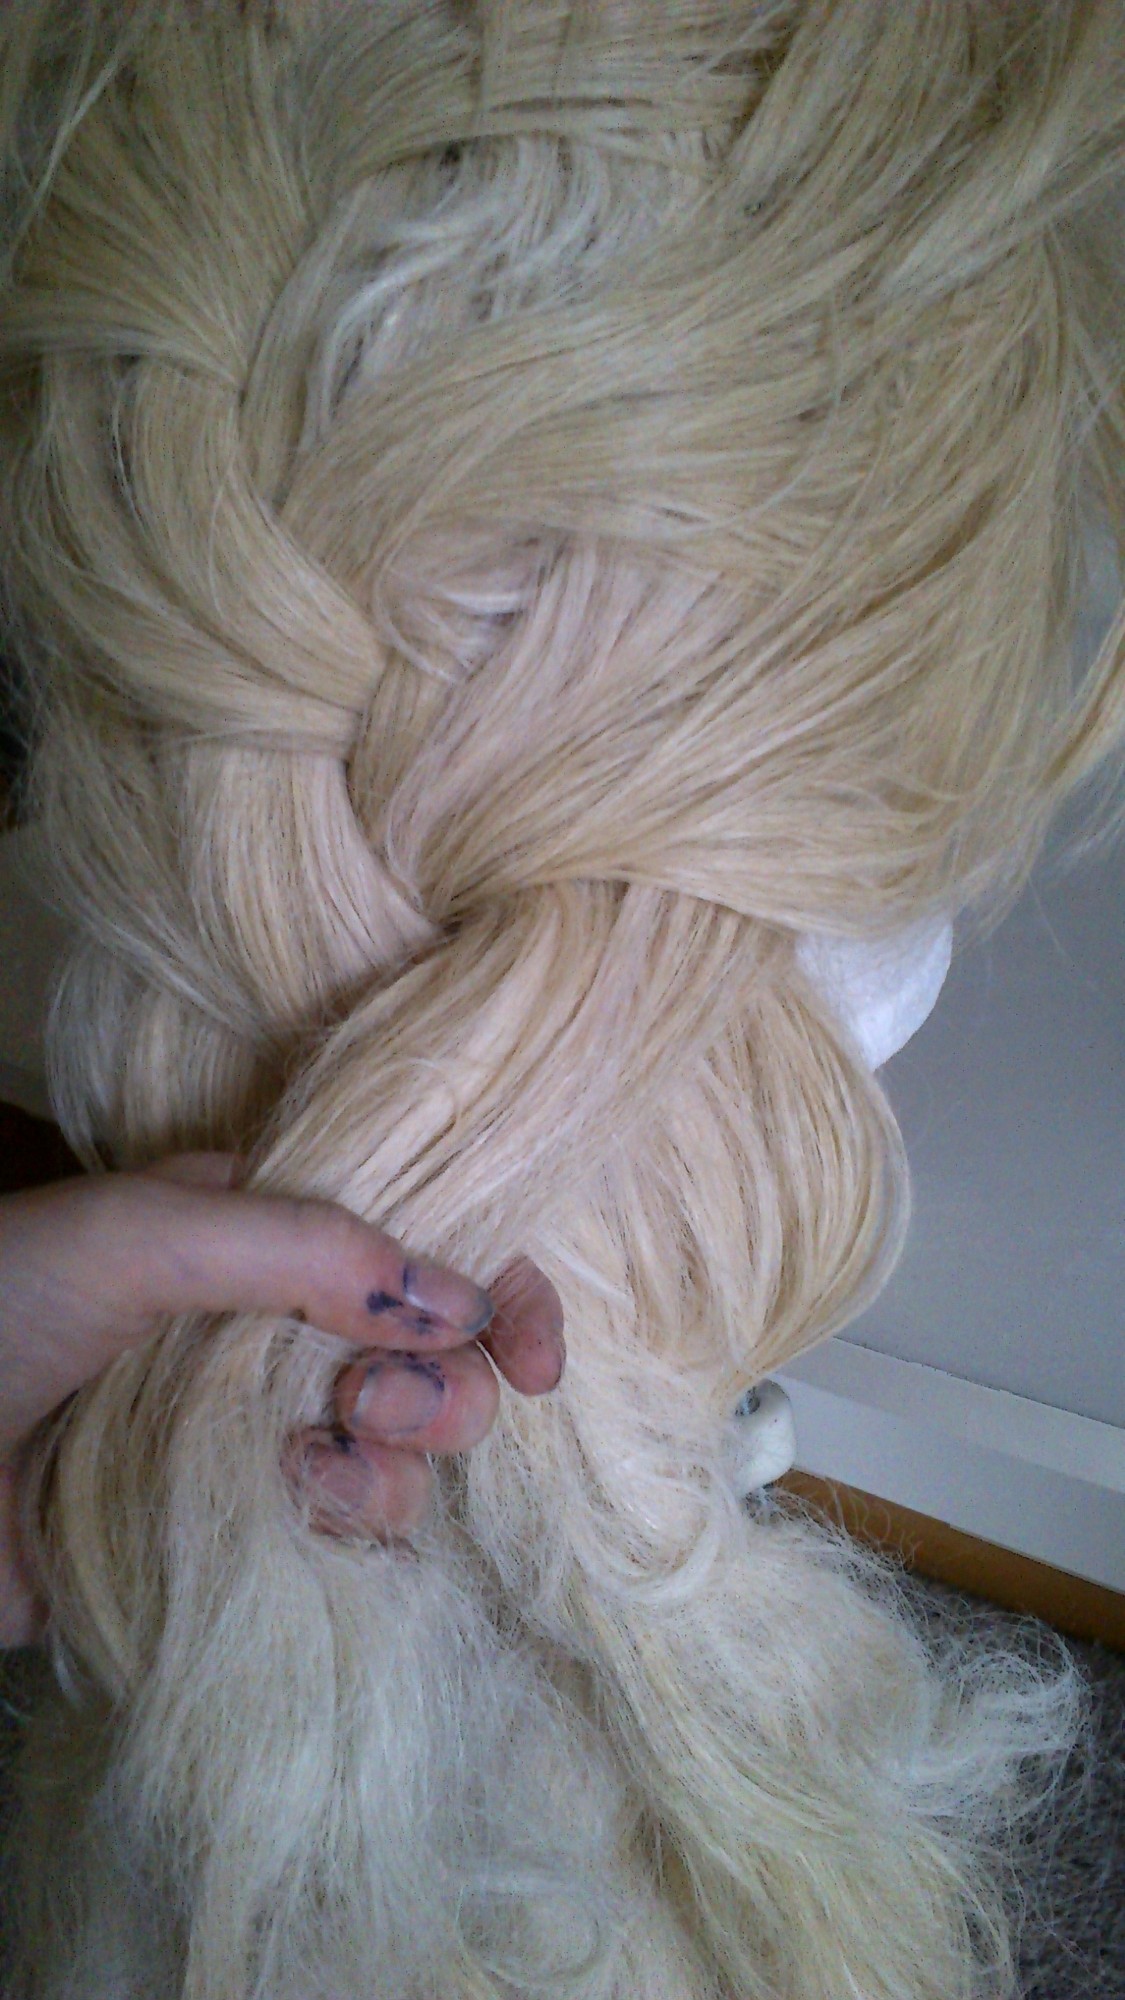
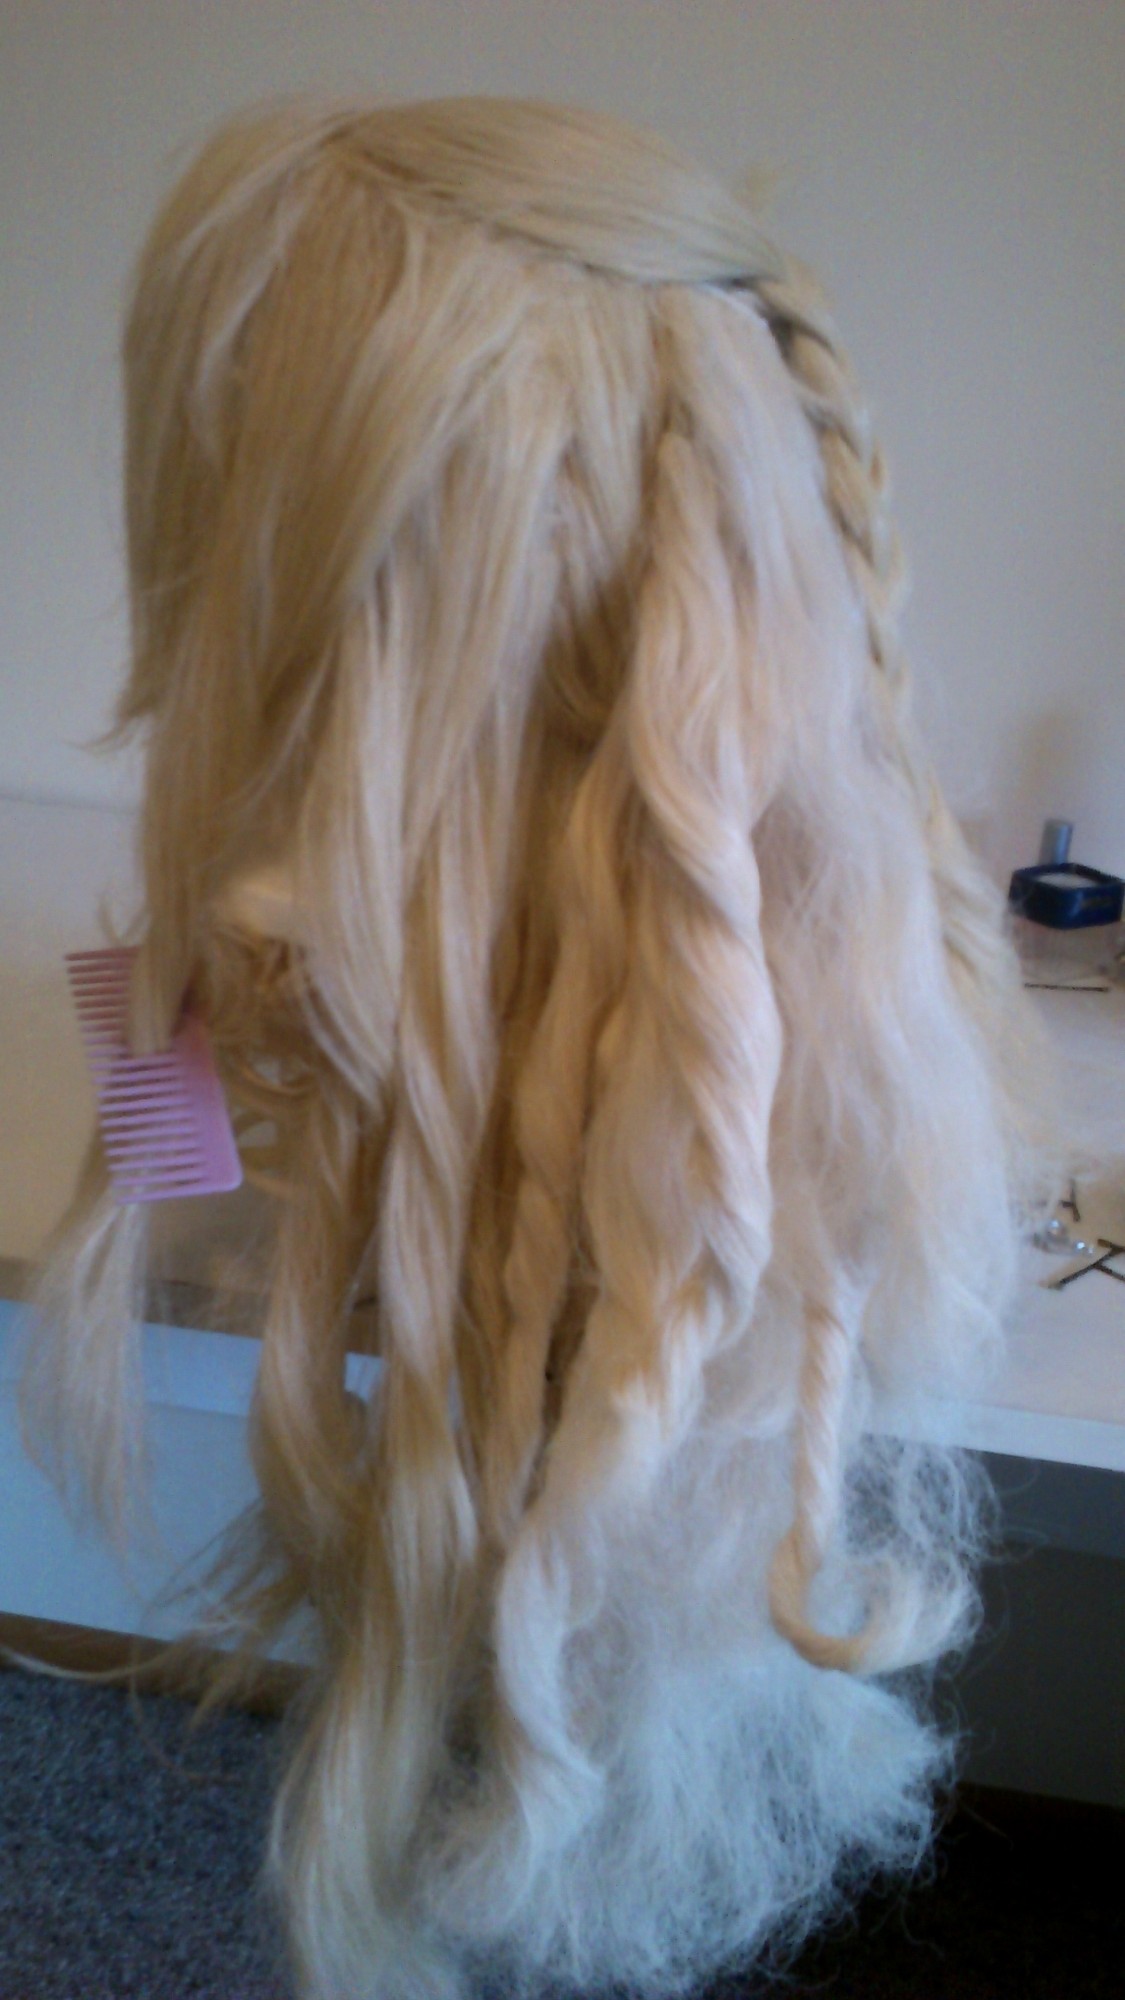
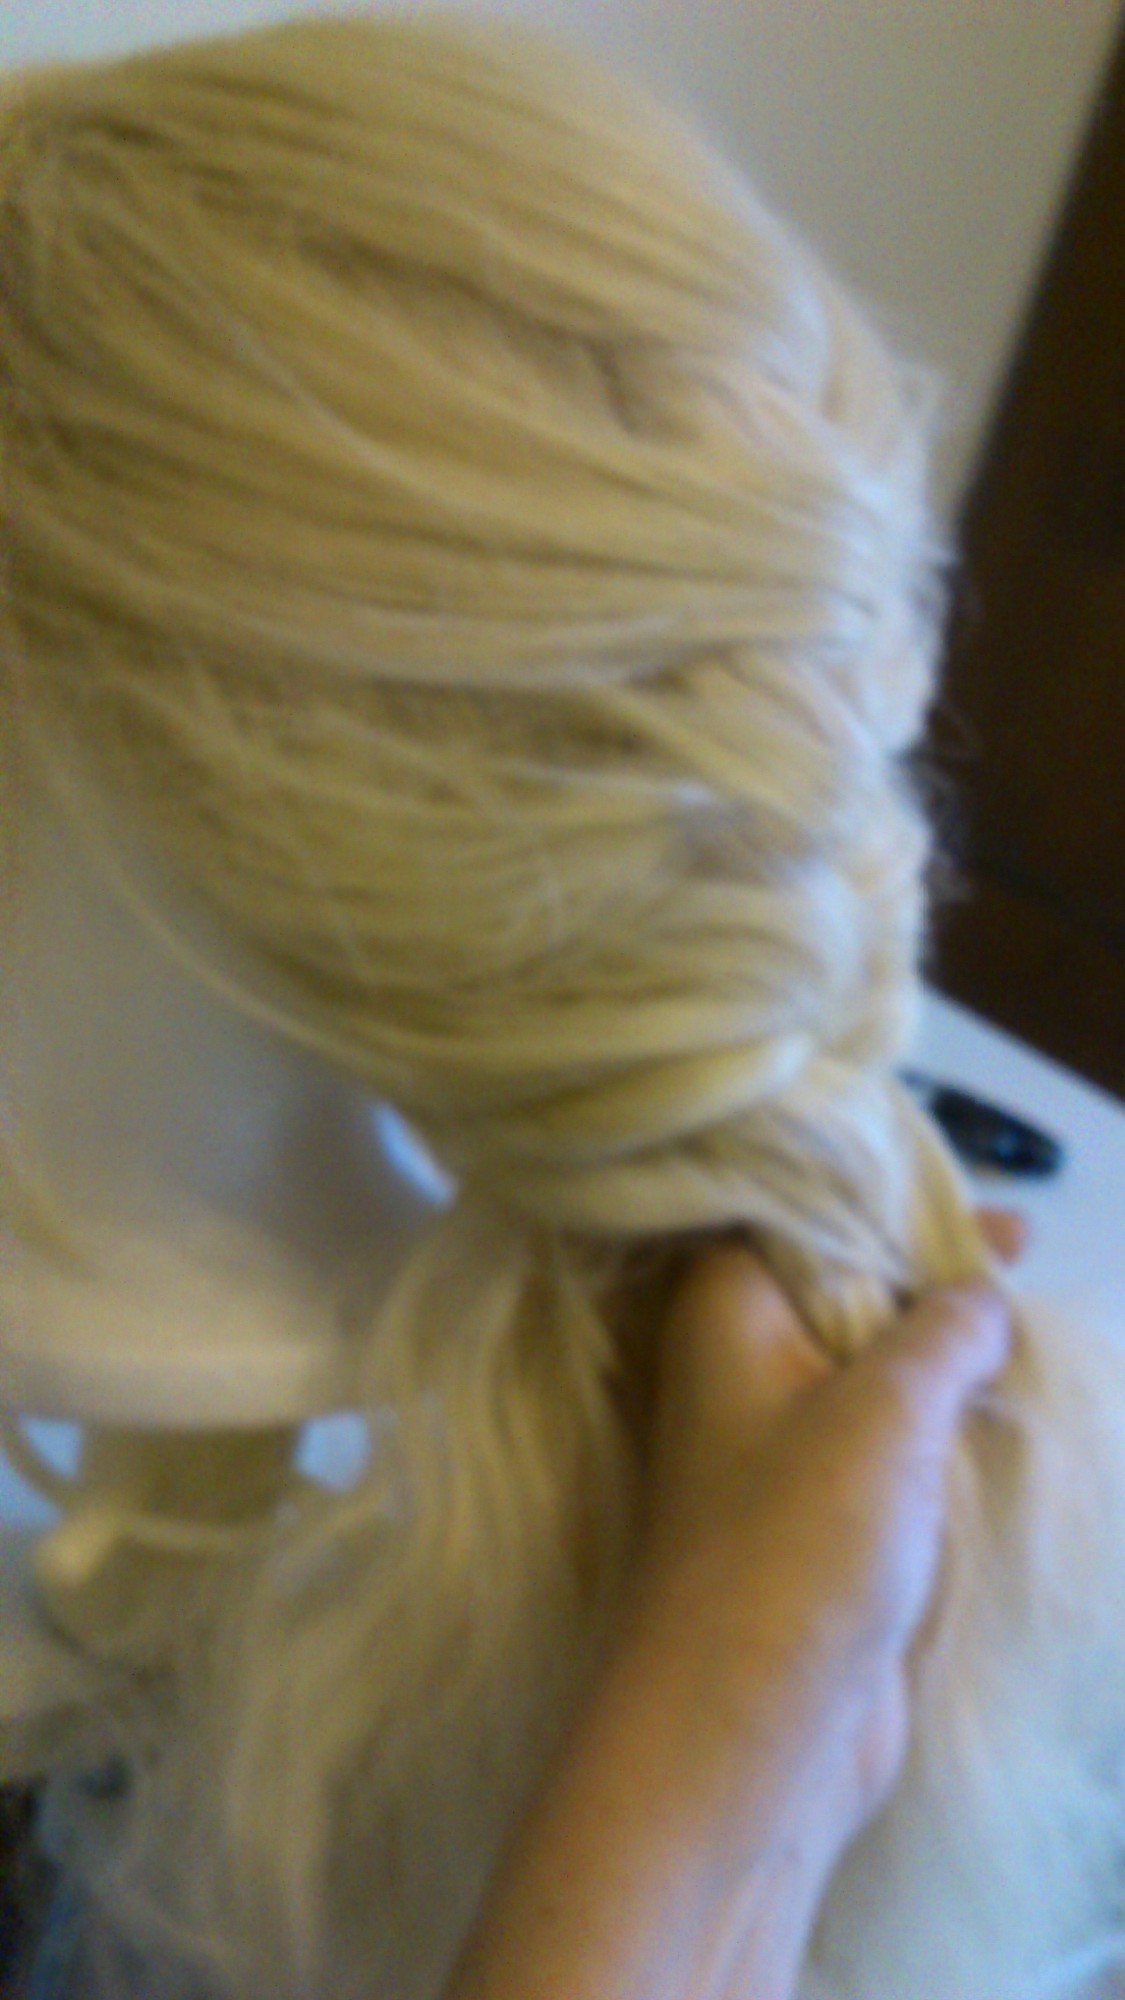
To restyle I sectioned the main wig in to four main sections:
The top where the French Braid started, then the sides which covered the second wig for the French part of the braid 😉 and then the middle bottom section which would fill the tail part of the braid.
The side sections where then divided in to five smaller sections for each step of the French Braid (one side only here) and brushed relatively smooth before being twisted:
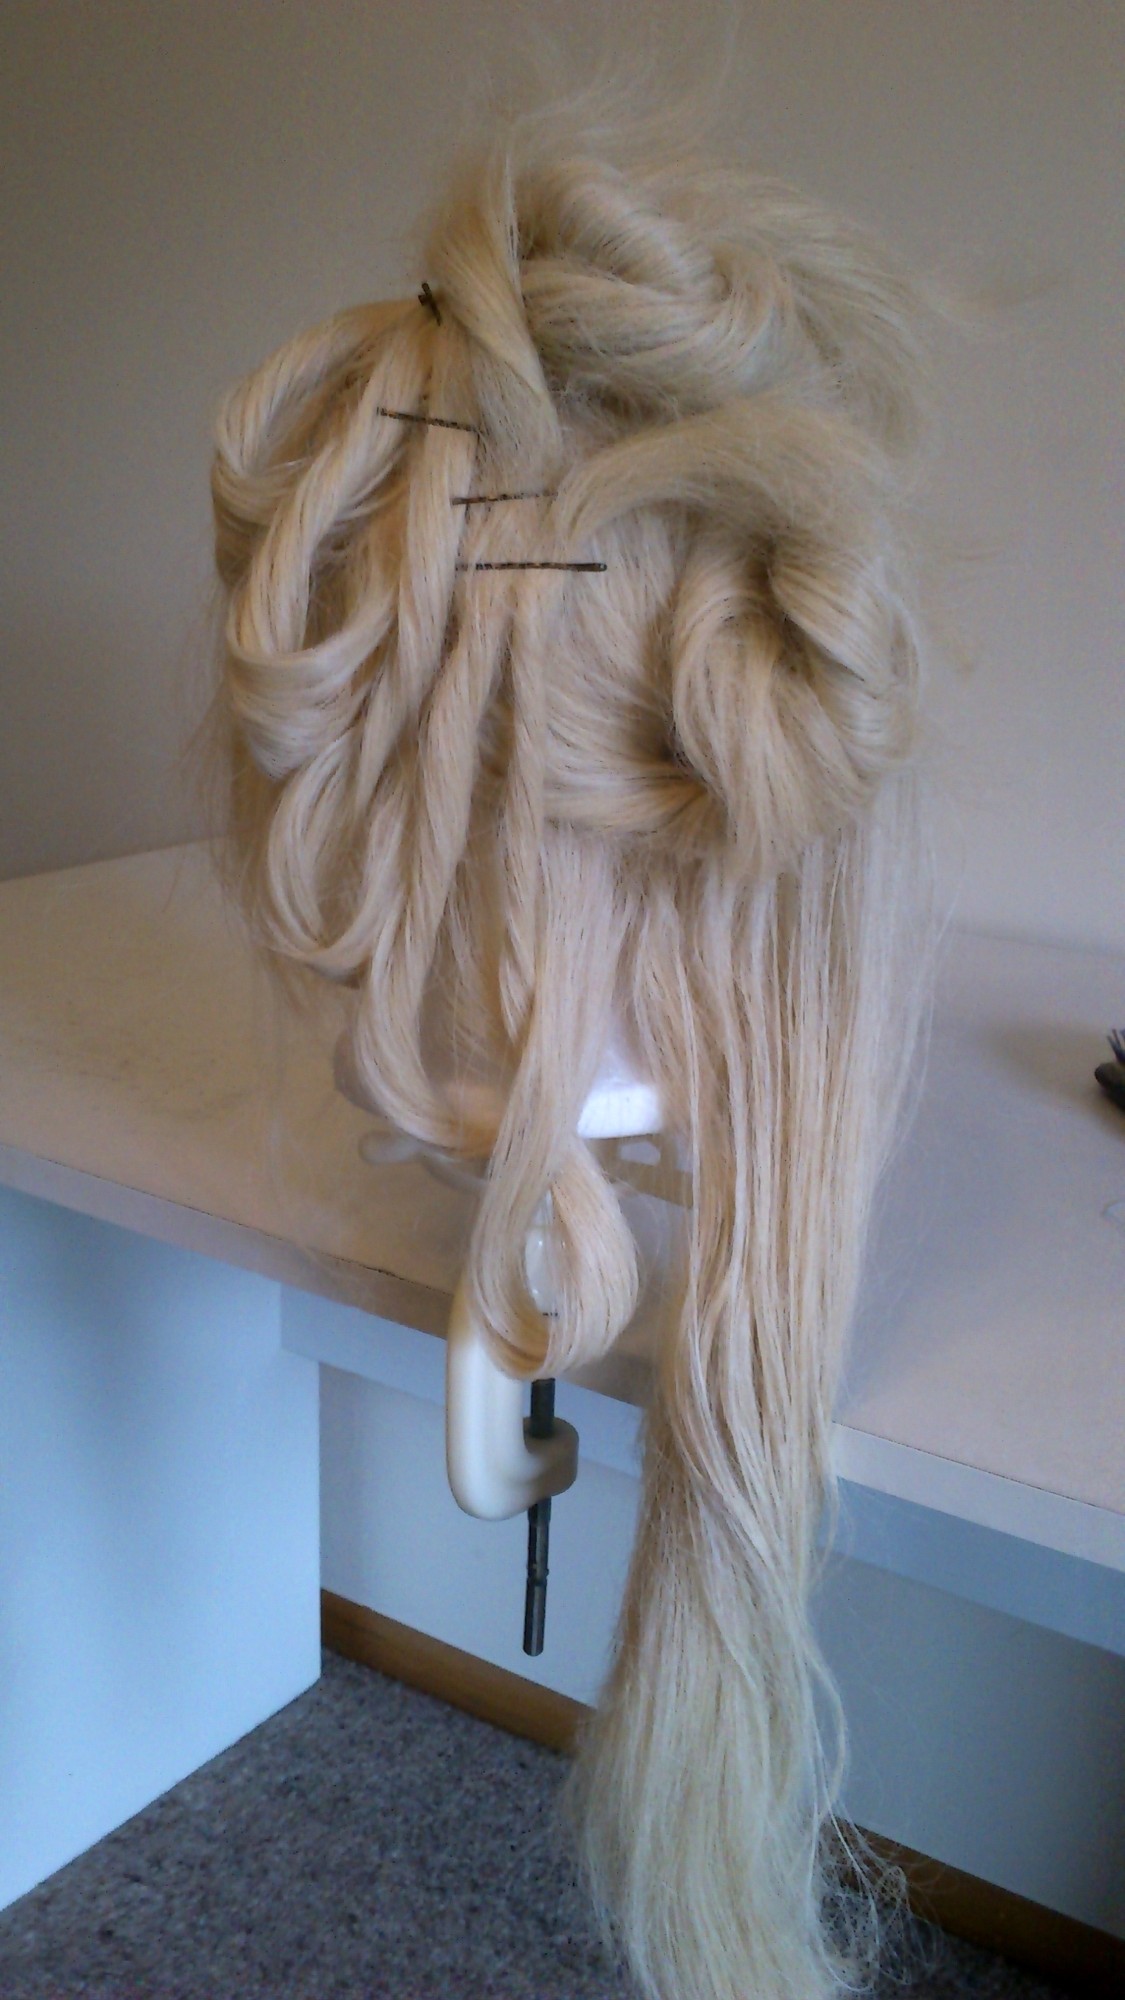
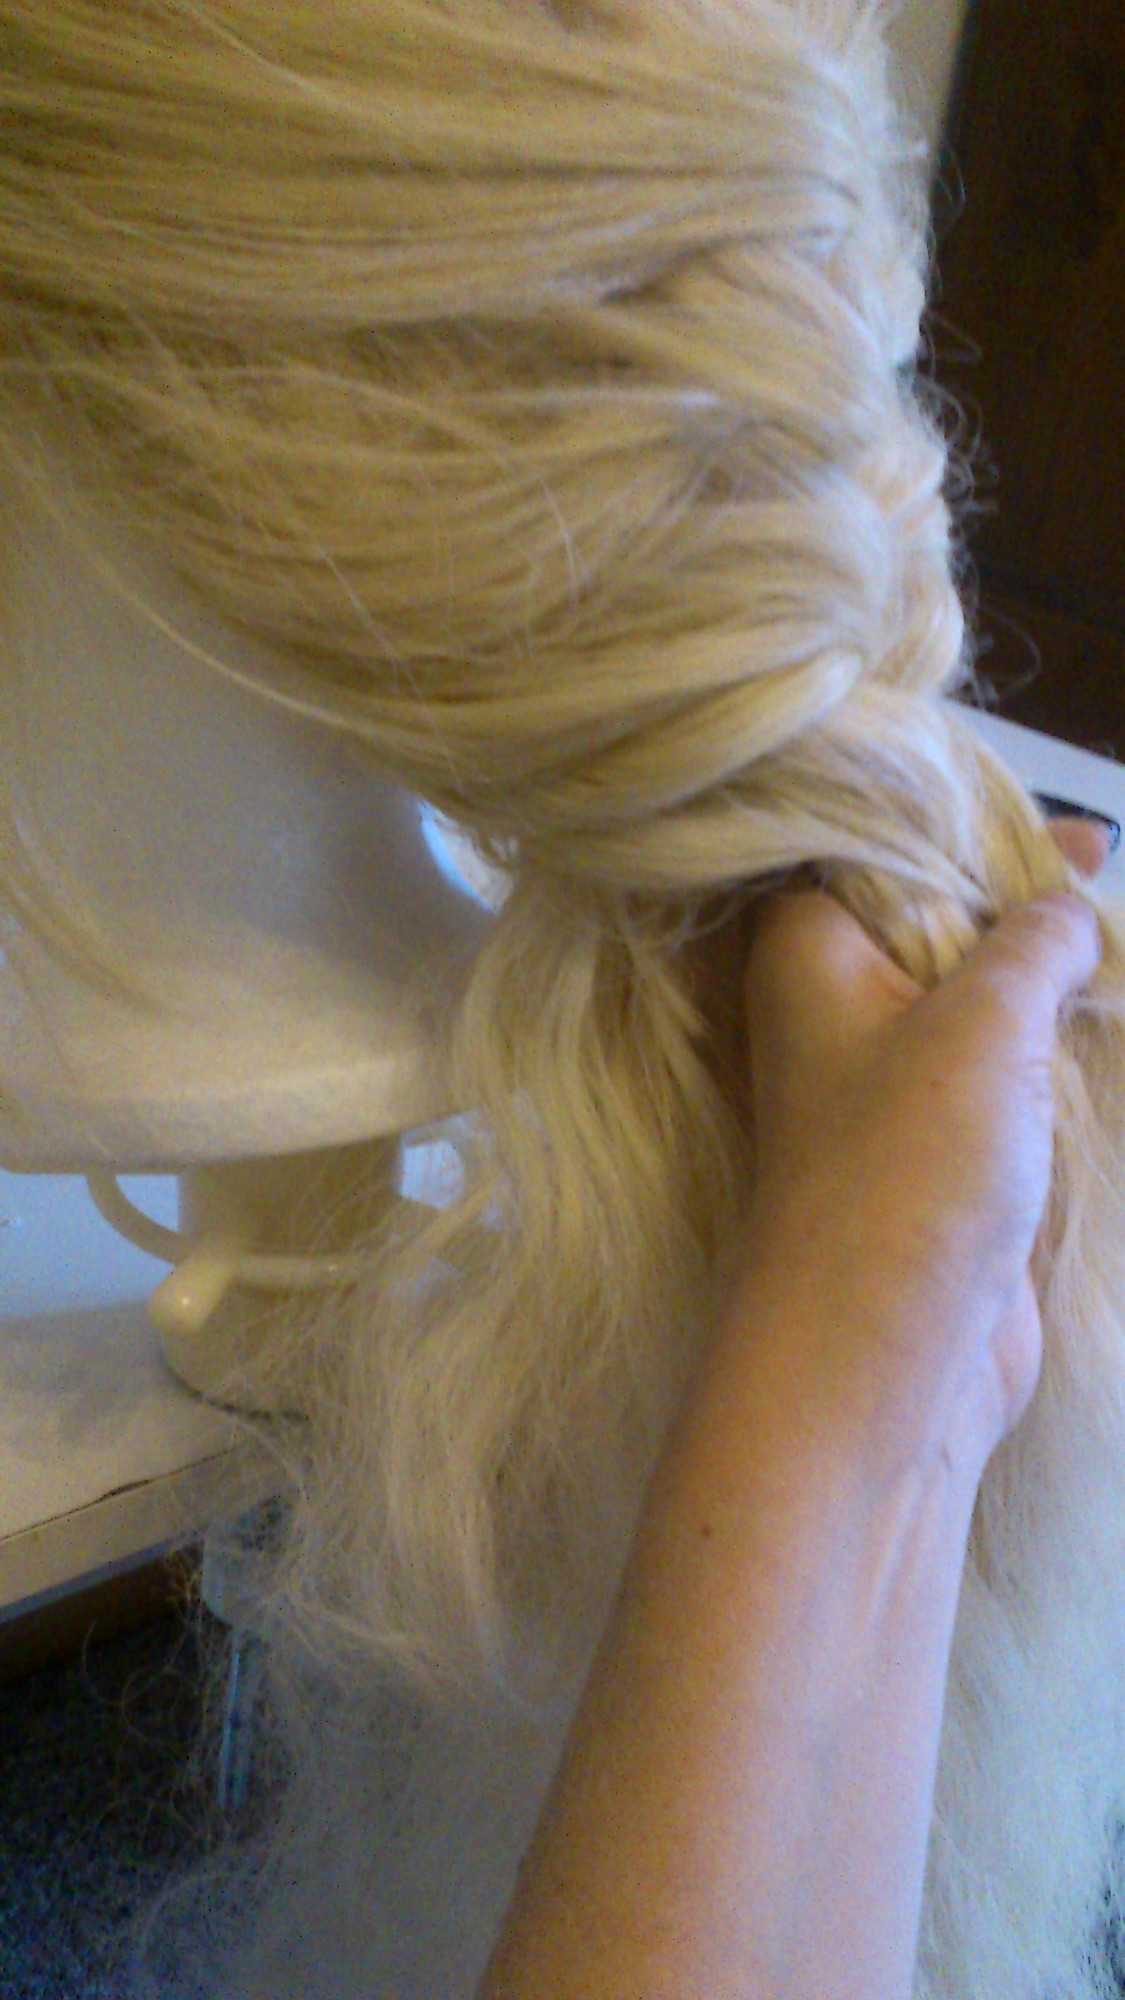
I then pinned the second wig in place and started sectioning it to match the first wig.
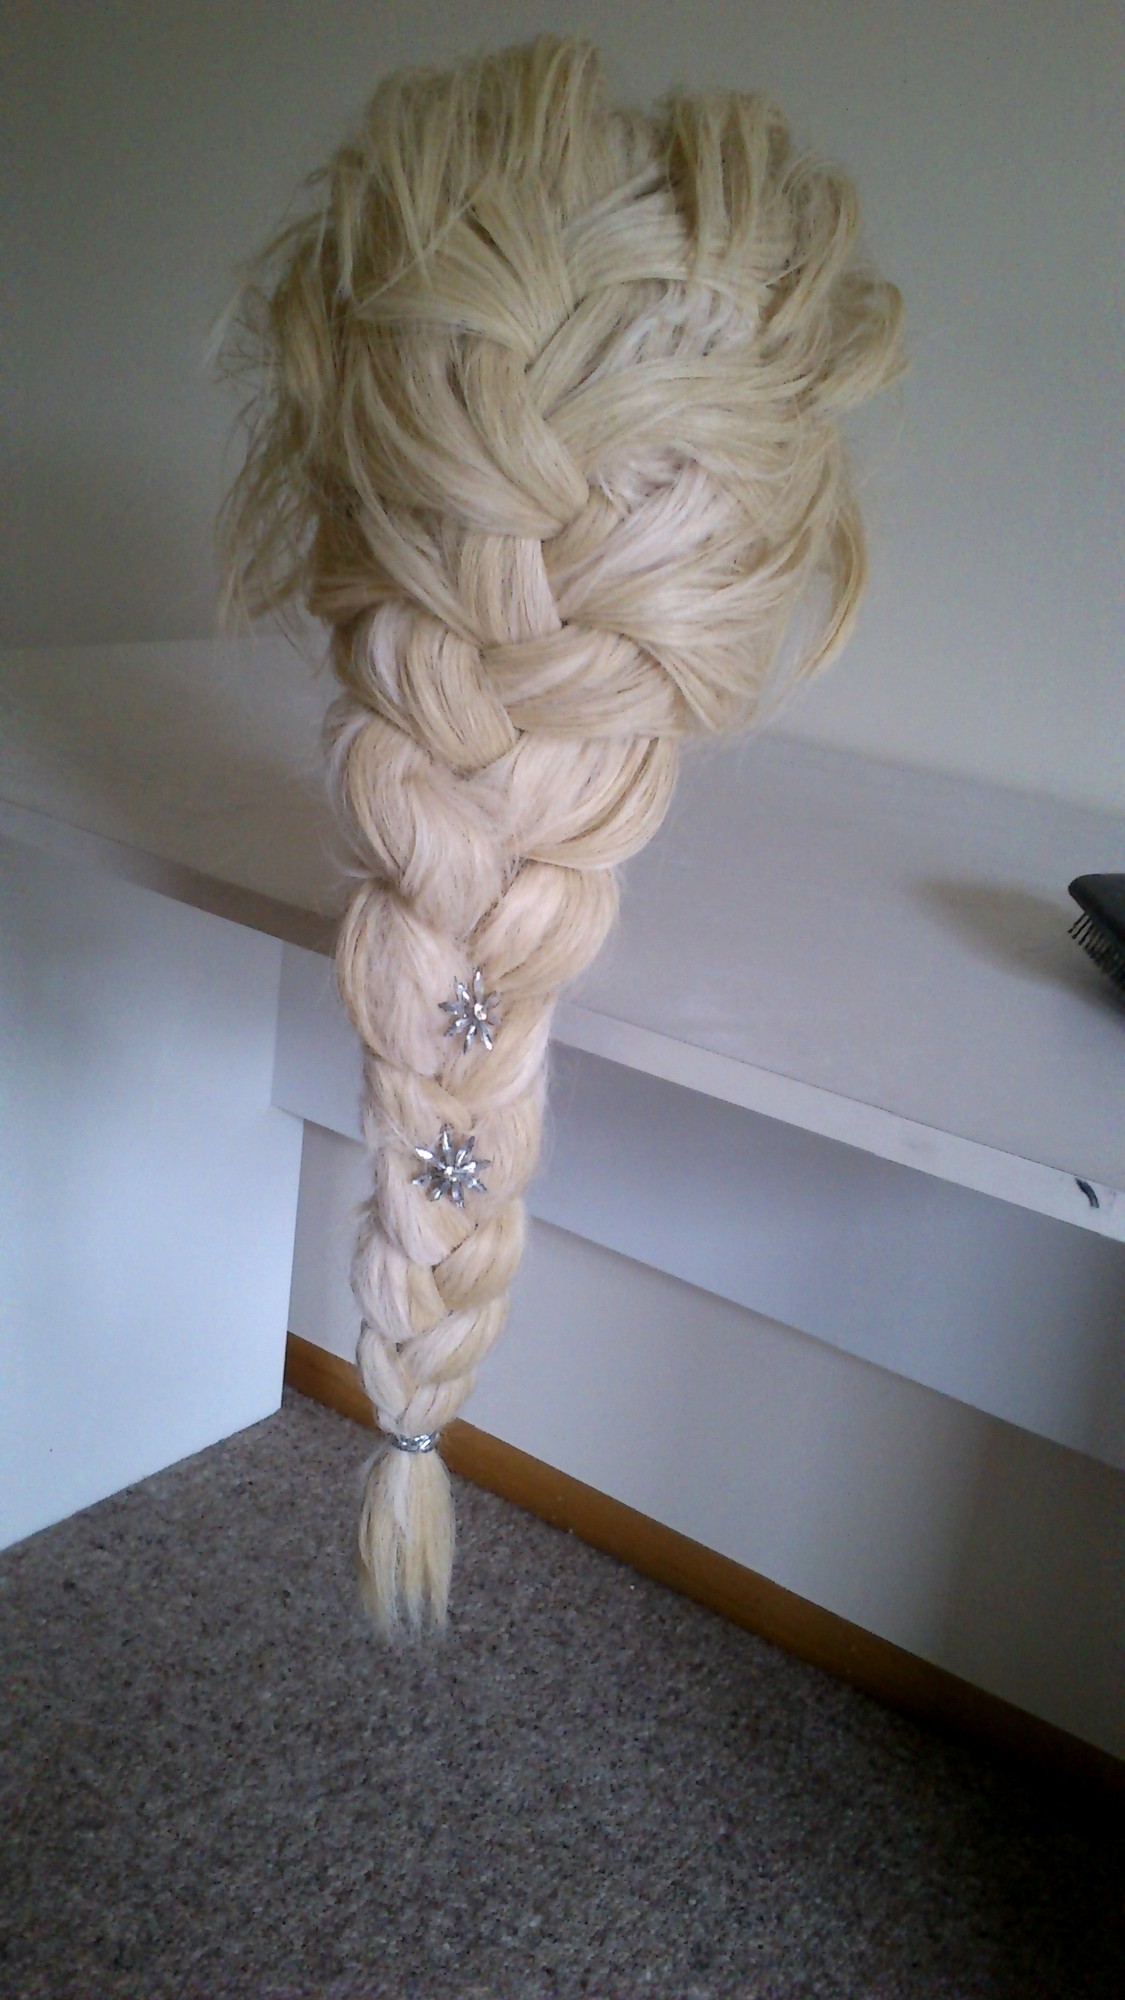
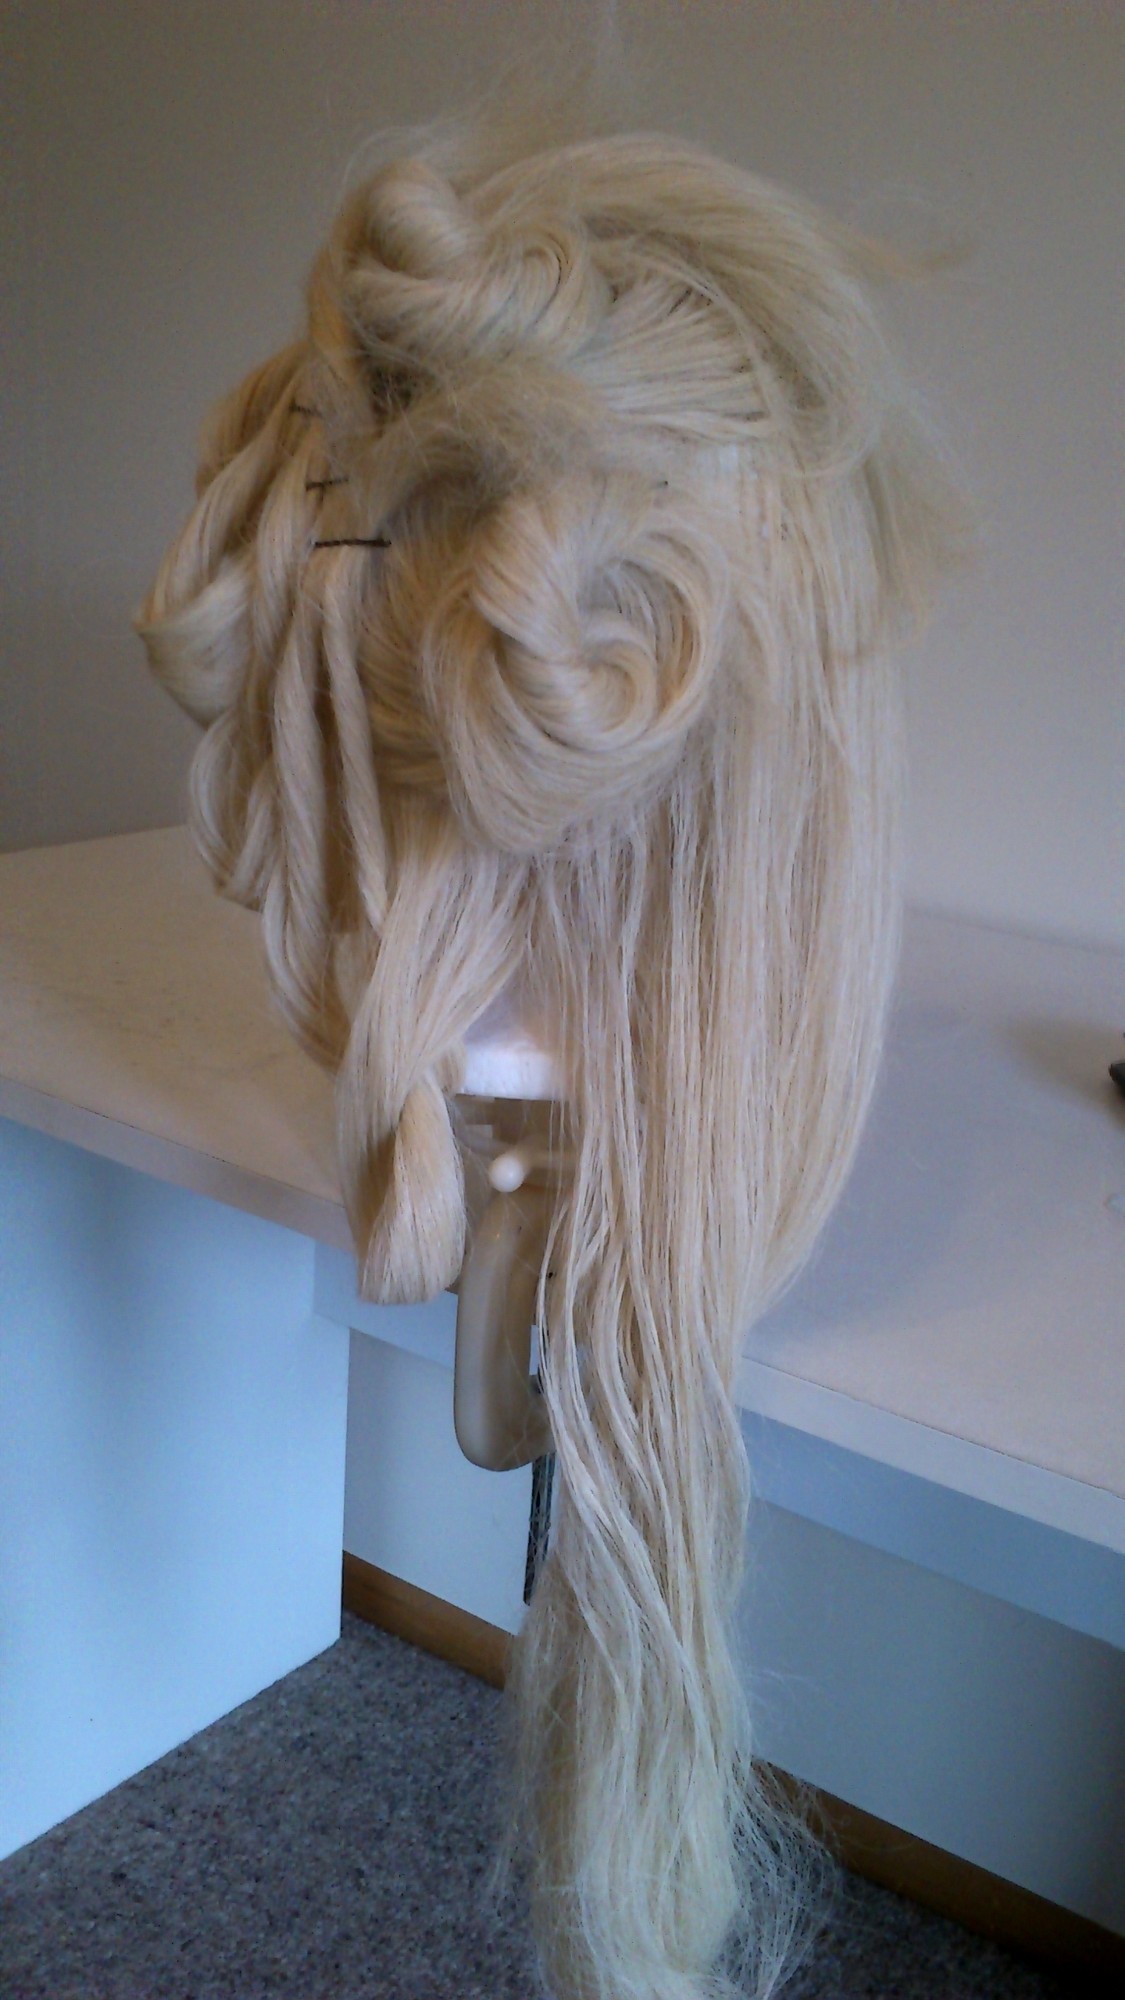
I had to let all the sections loose to be able to hand braid these. Luckily the twisting kept the sections fairly free from each other. I did braid the top section simply to manage these pieces while trying to take photos!
The top section barely starts the braiding before the side and second wig sections start being worked in.
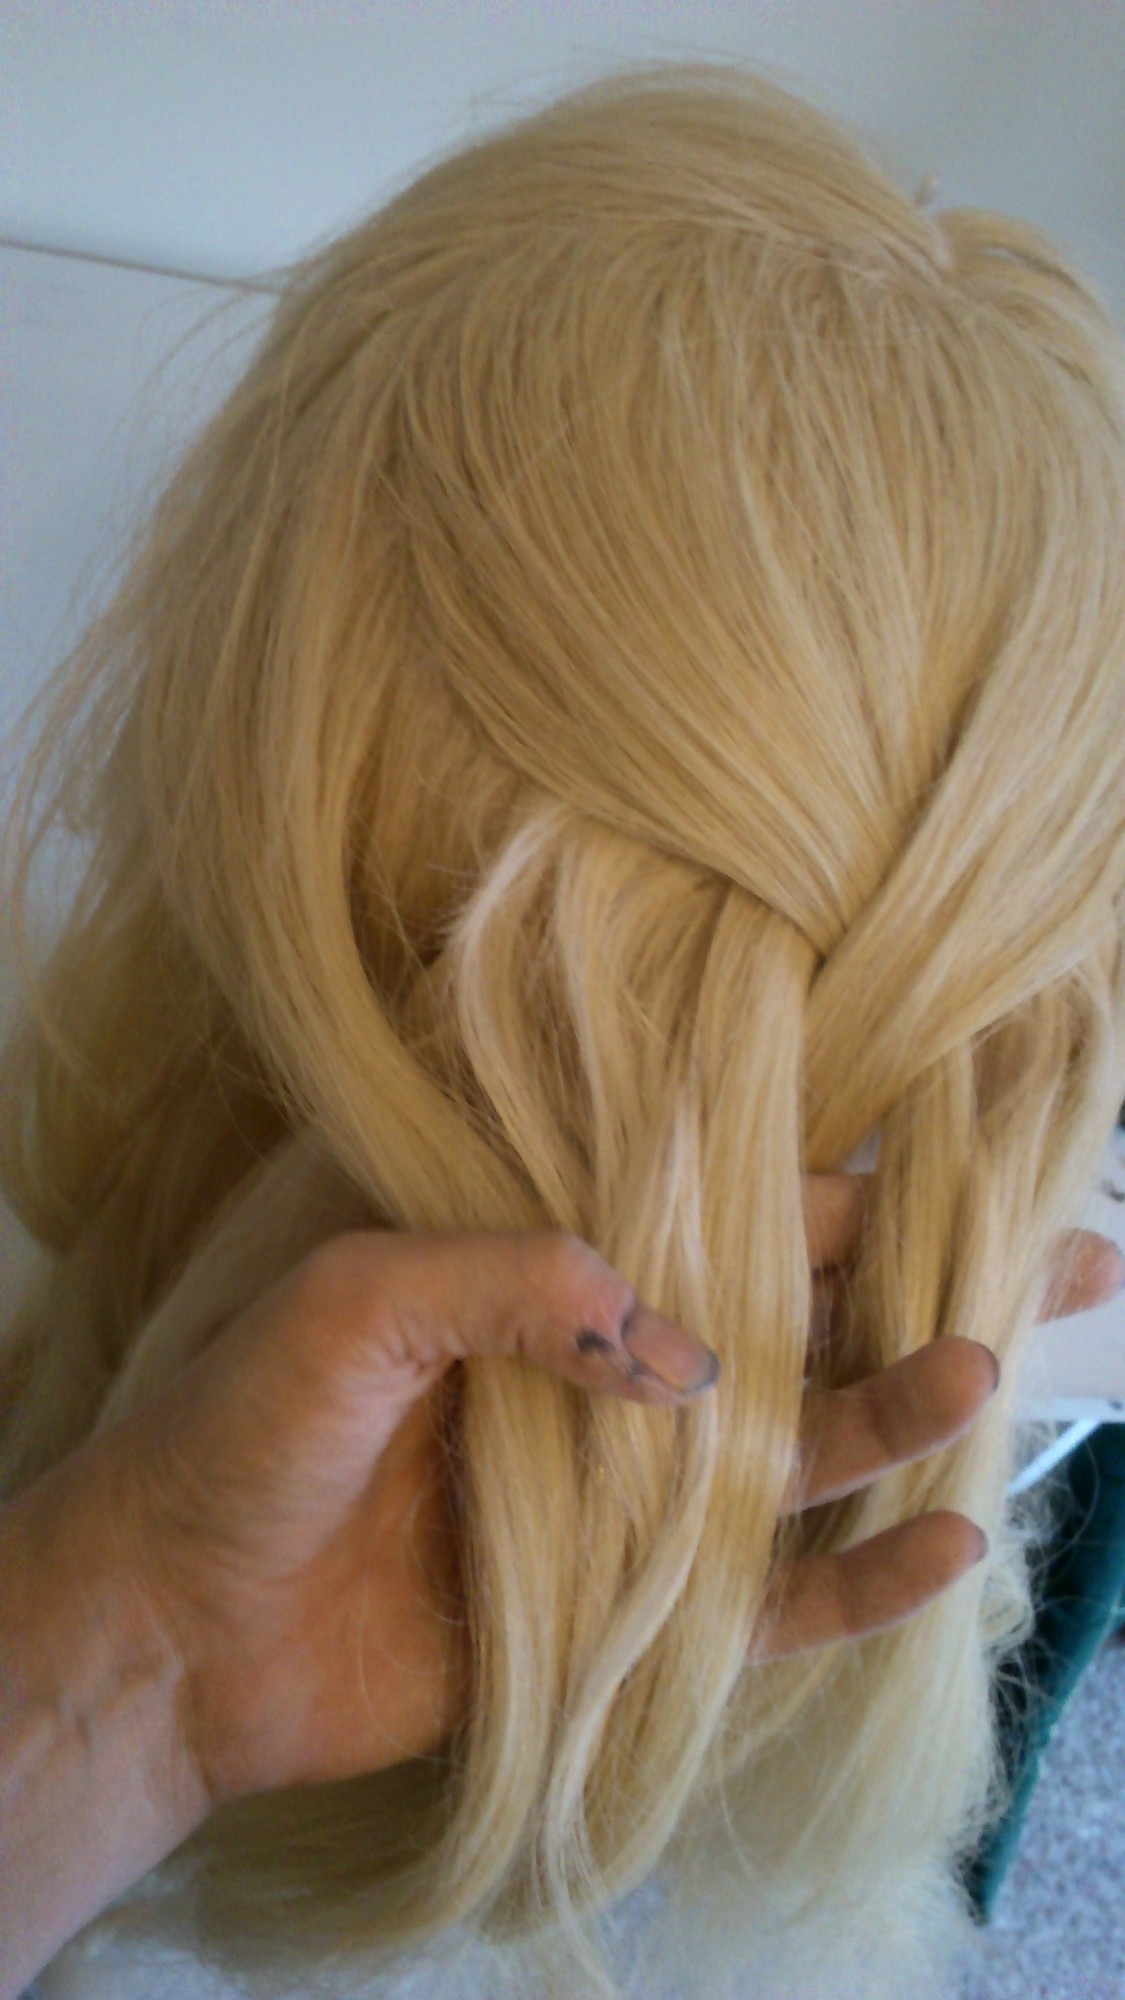
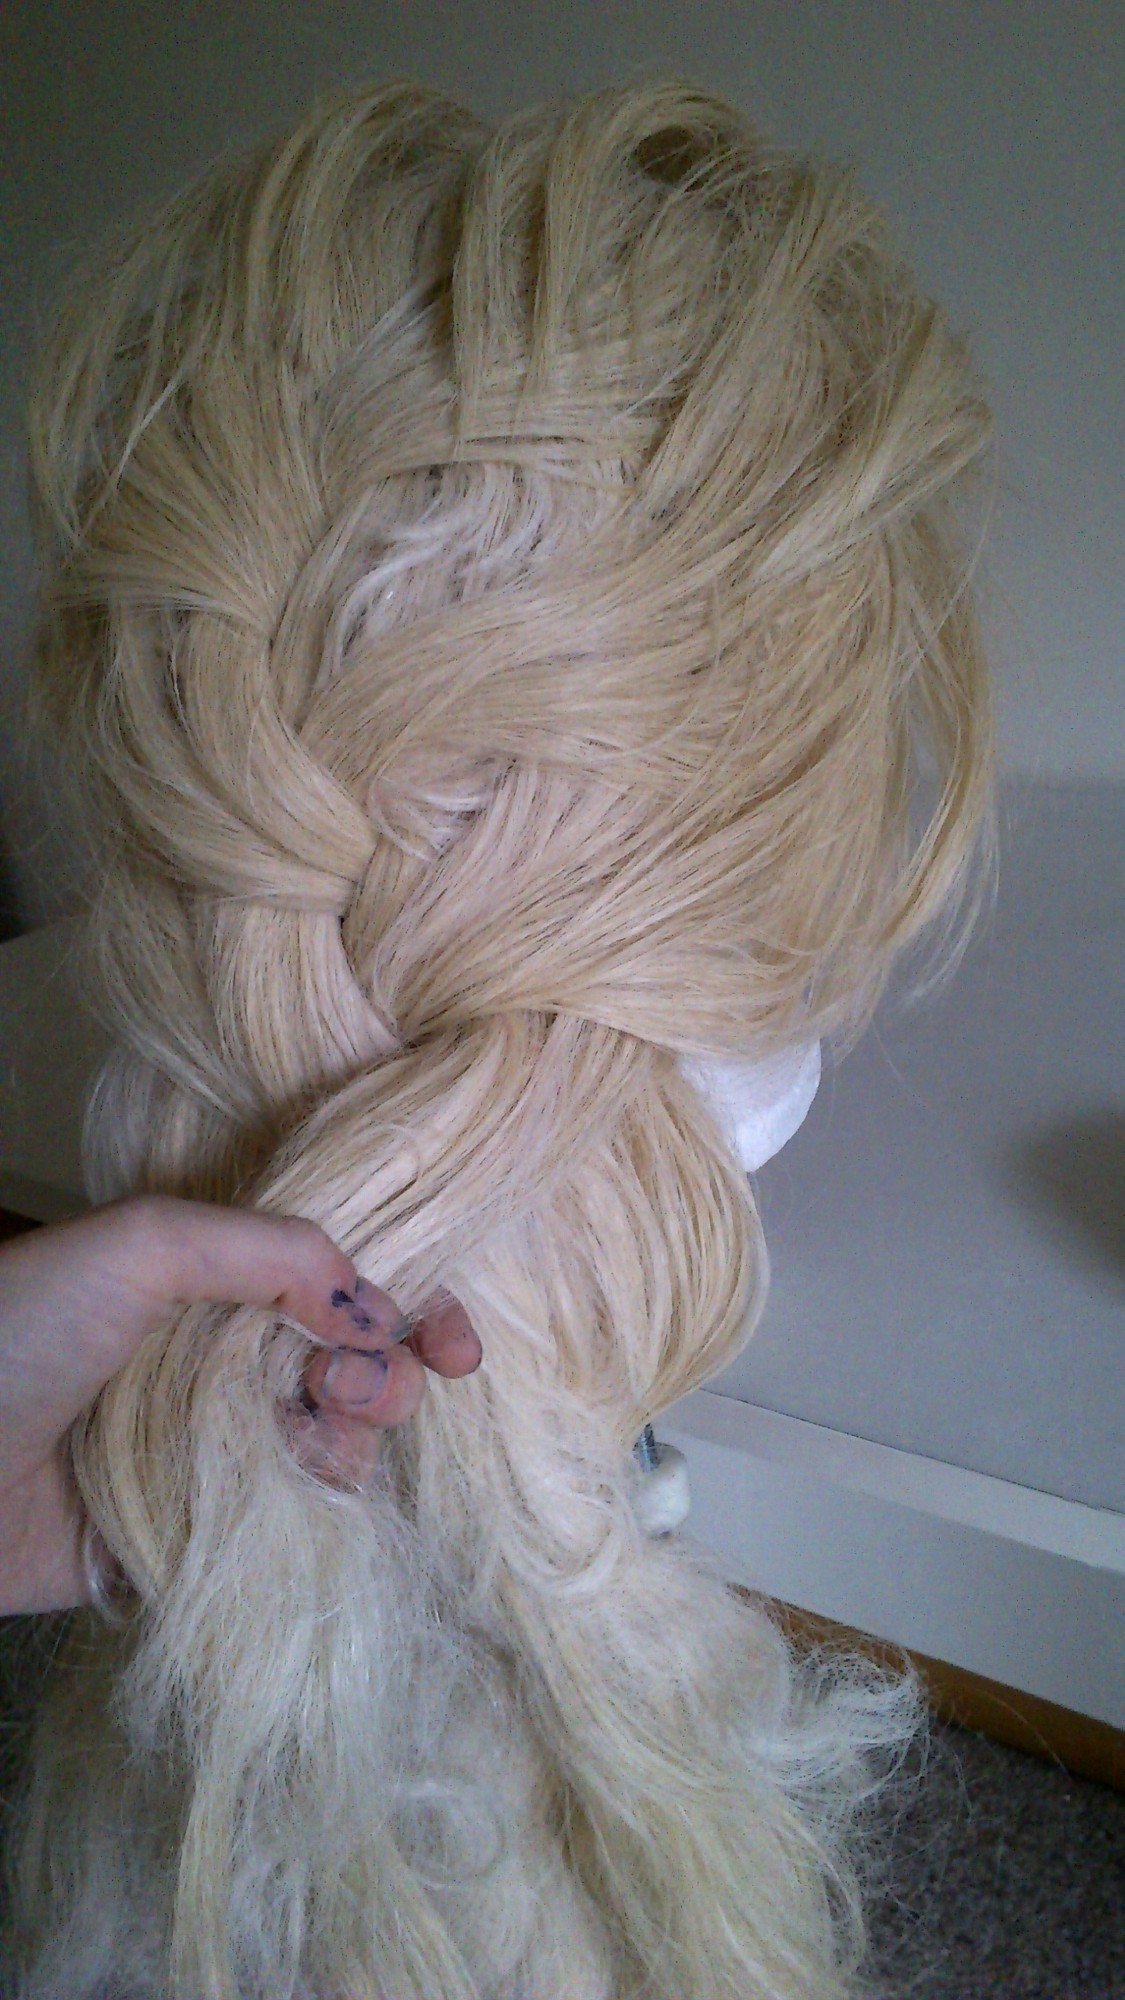
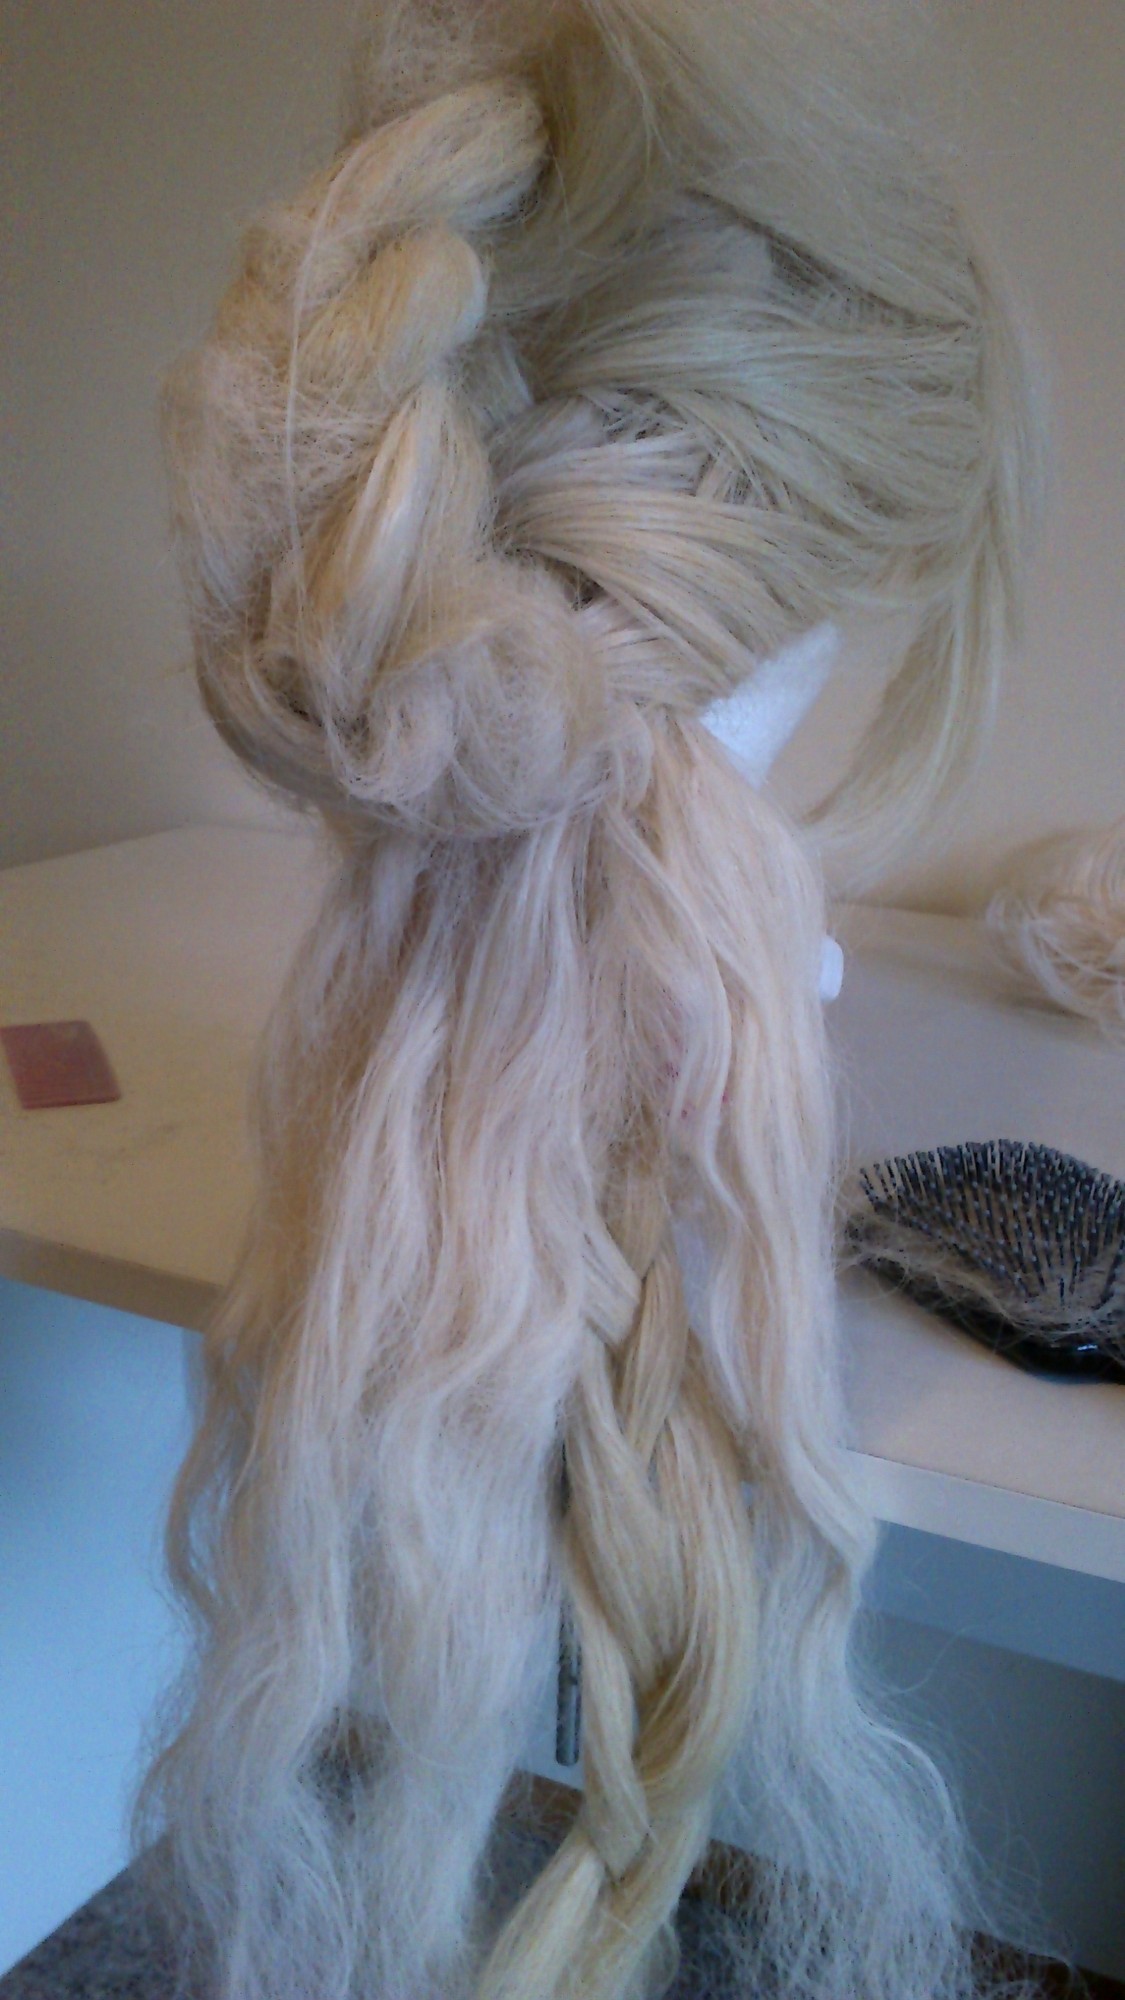
Sorry for the sudden jump to a nearly completed braid! These are difficult to hold and gets photos and remember which section is the top most while working with so many different components.
Once the side sections were all in I braided the length to keep it manageable while dealing with the last of the tail sections (the middle bottom of each wig). So I divided these remaining sections into three equal parts and then brushed them and then undid the temporary braid and brushed that.

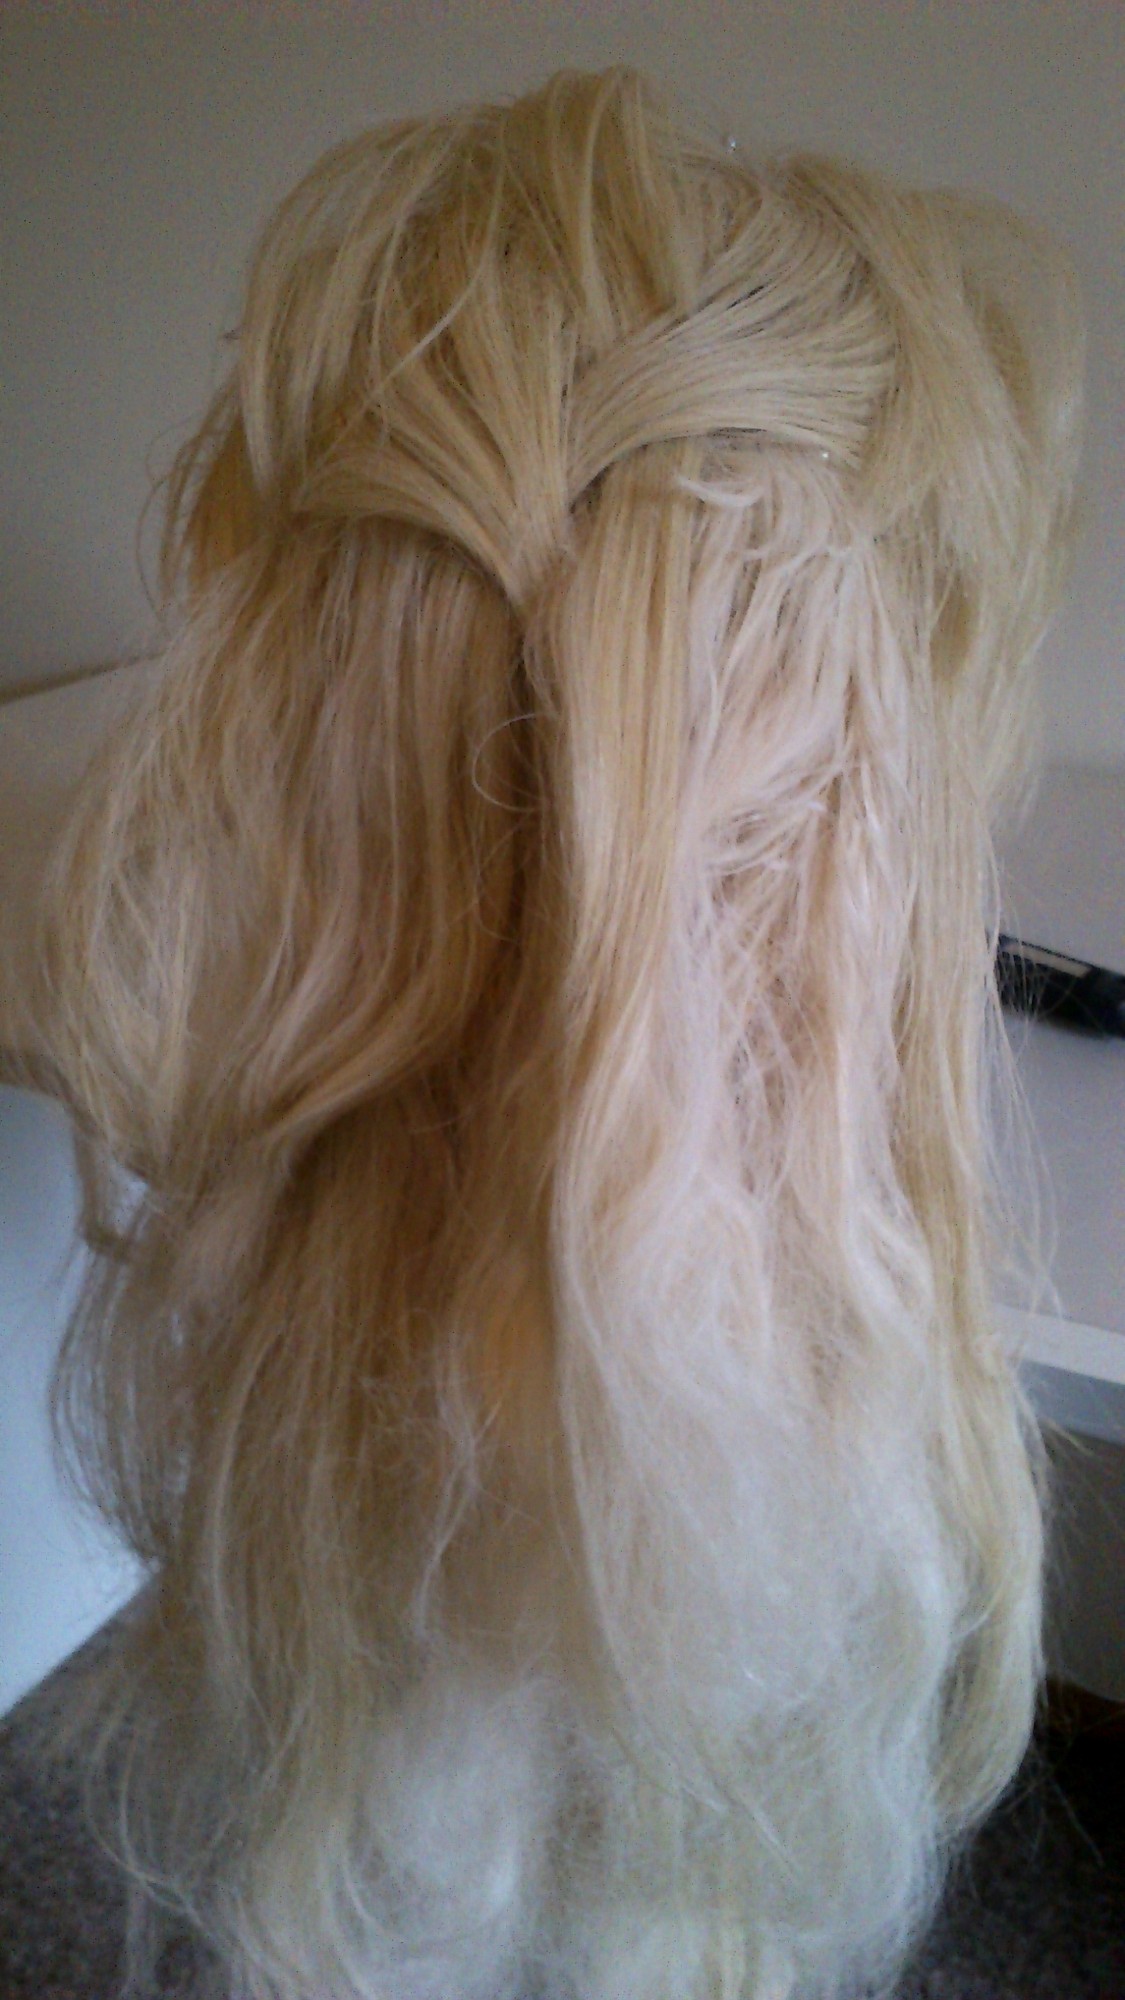
Et voila, a restyled Elsa wig to keep nice and tidy until I find a softer option 🙂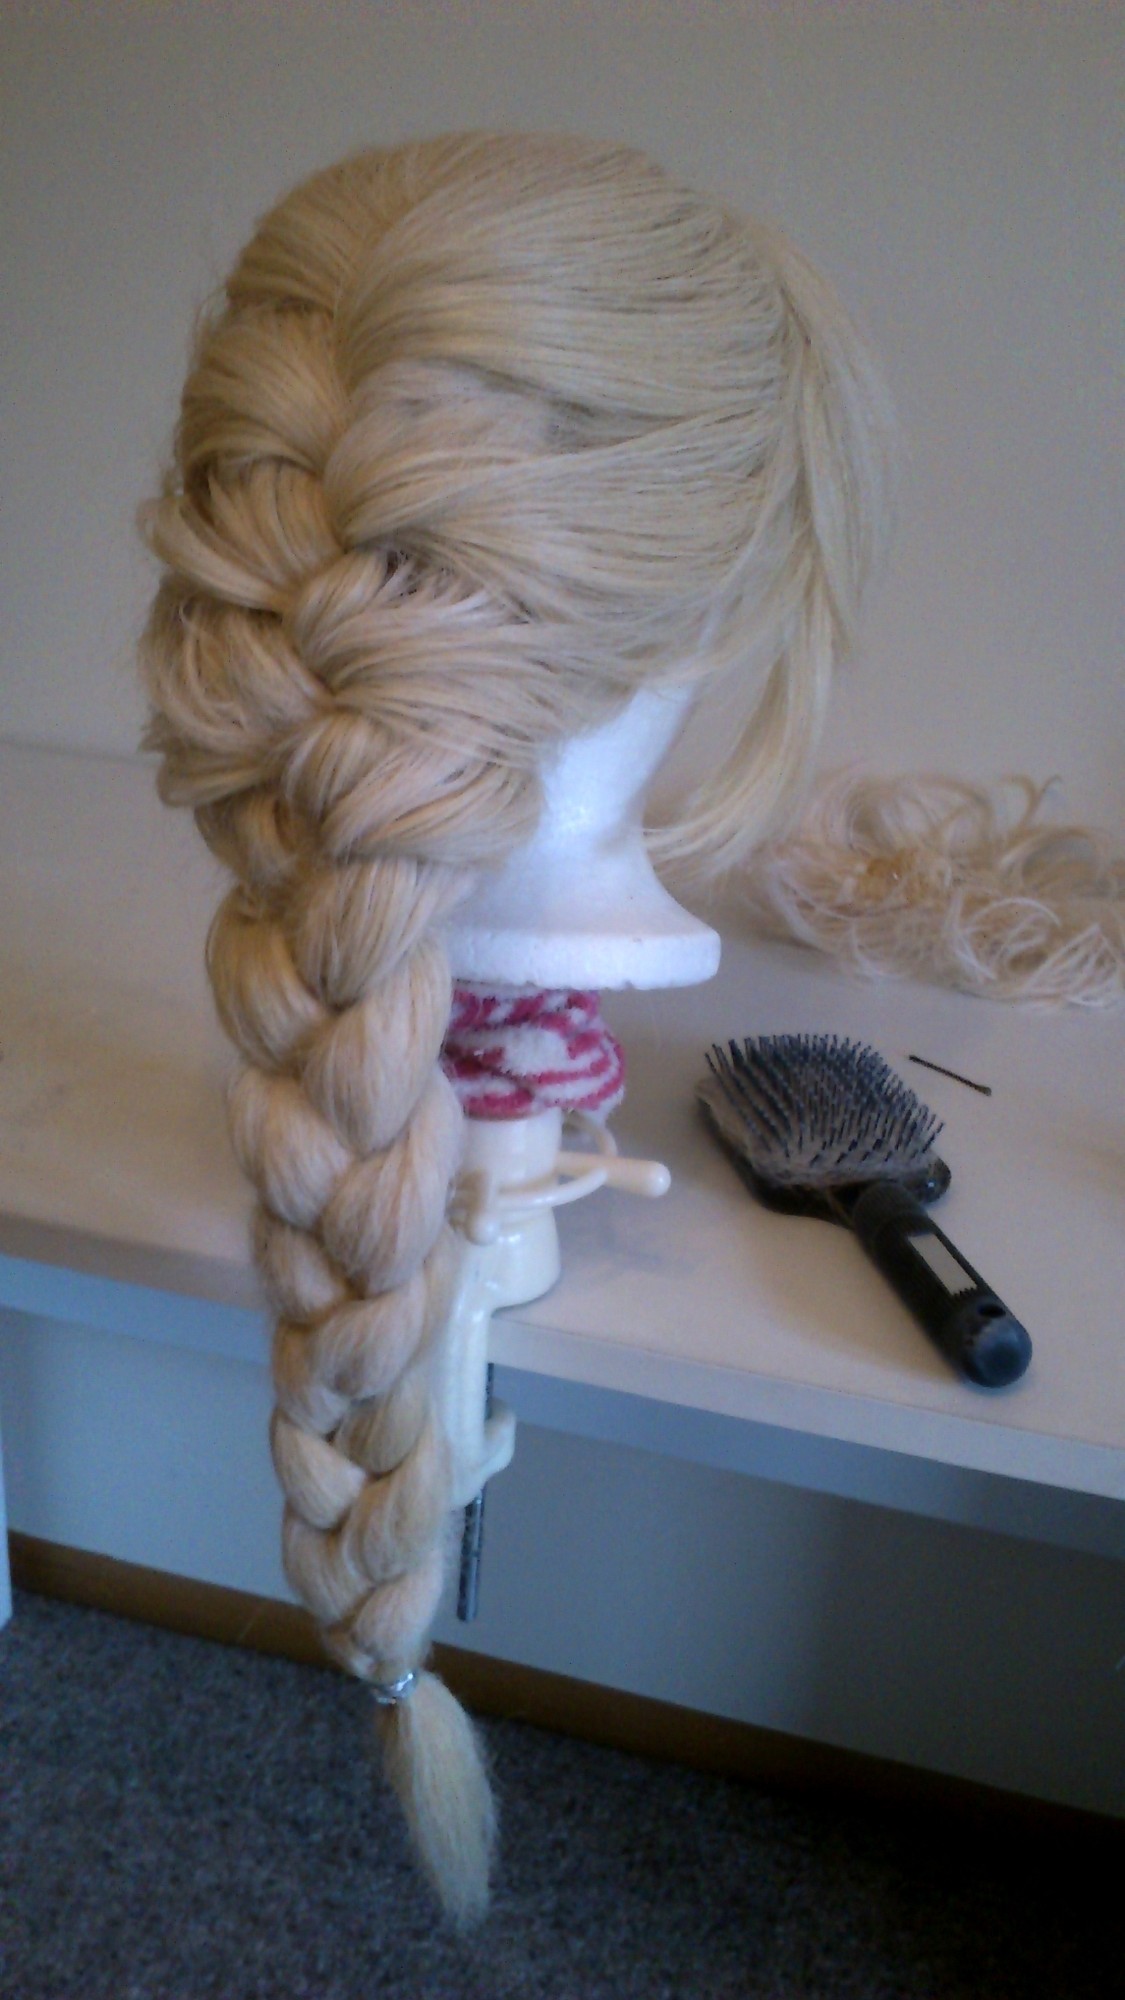
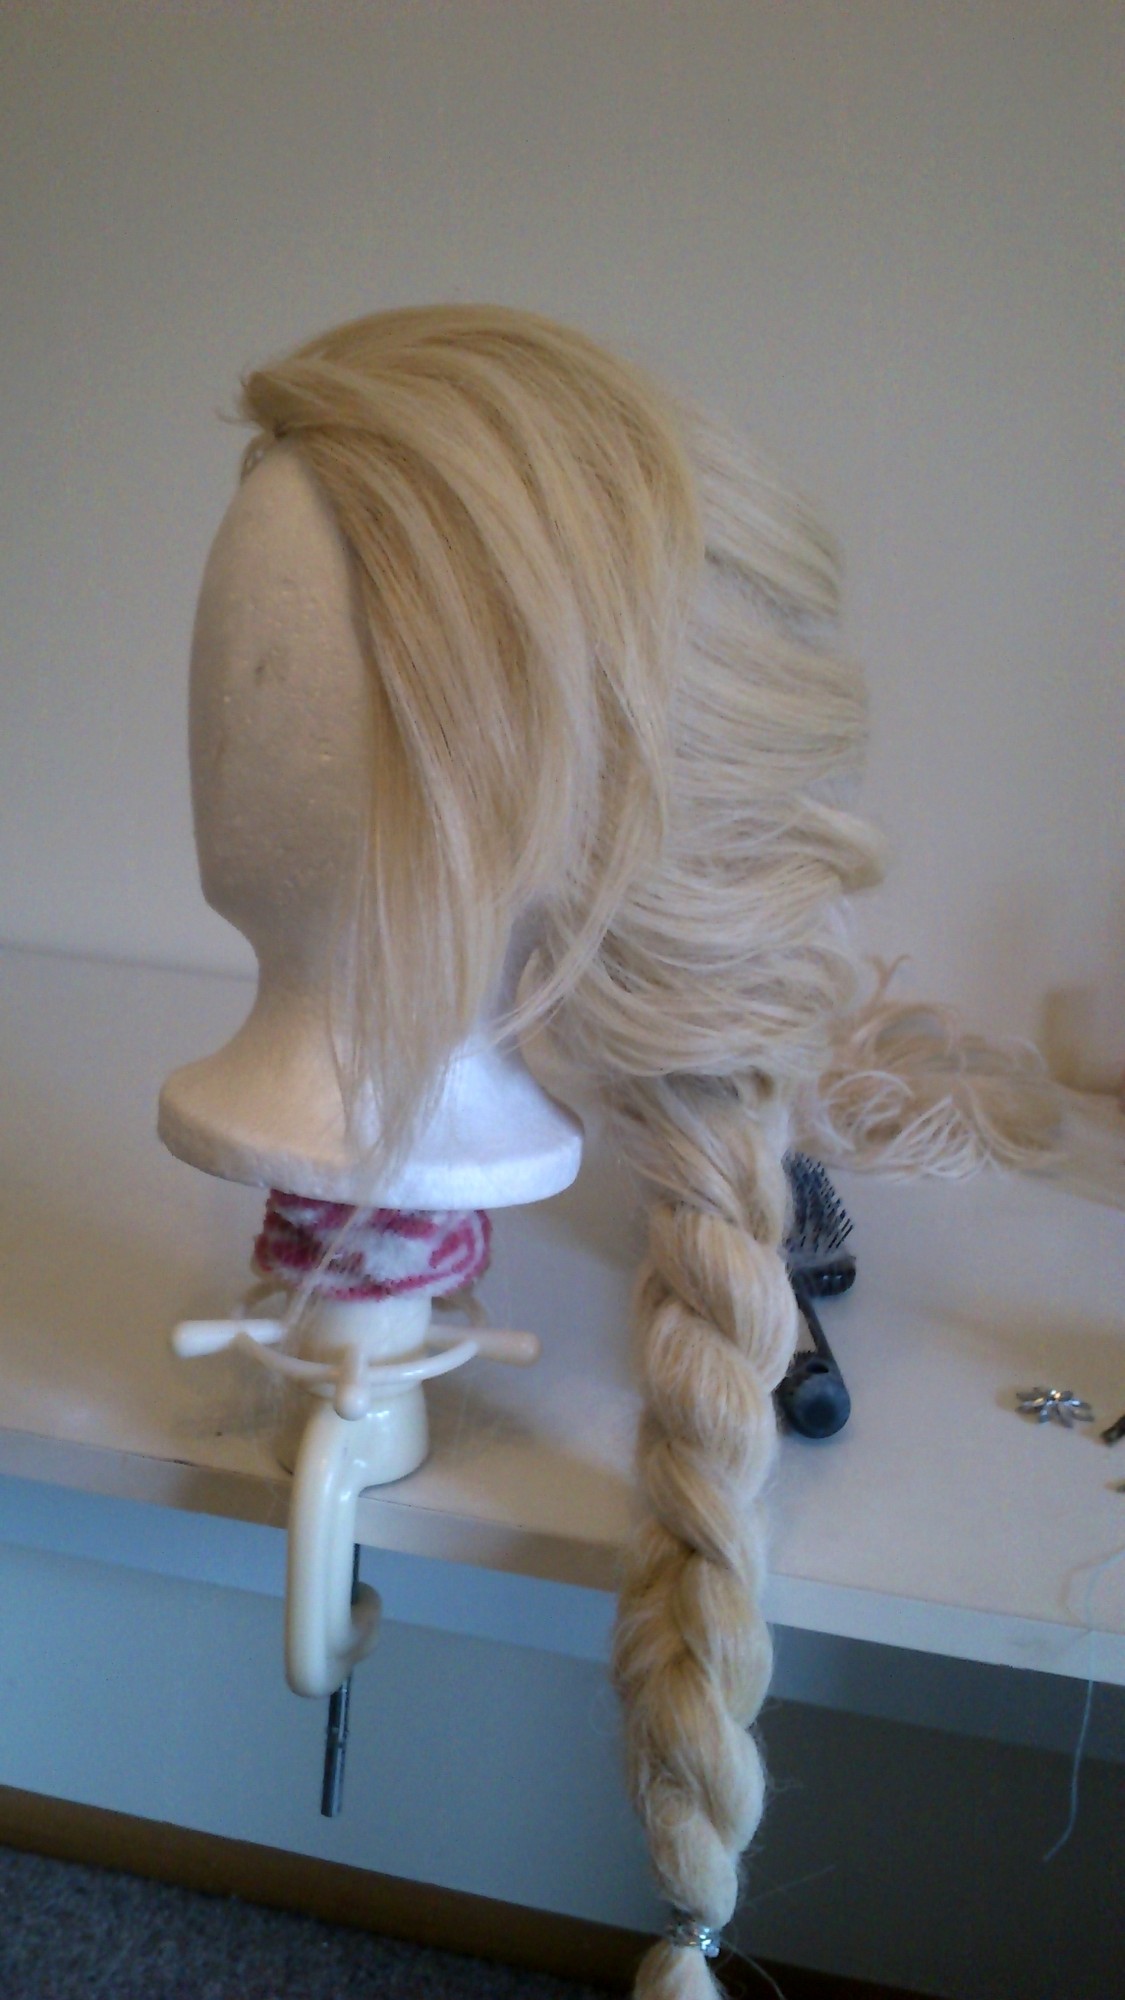
Main wig is “Kim” from Sepia in 613 (pale blonde) and secondary wig is just a standard halloween wig ($NZ5) in a slightly pinker tone. Acrylic paint mixed with methylated spirits for a fast drying dye bath (ie denatured ethanol not actually any methanol at all due to health laws in NZ).
Currently she is in a pile on the floor in my room. But I did it. I test patterned doing the dress as a single piece and I am going to try and do that for the final version- seam lines were great and the skirt was full without being too full. At least for the lining. I don’t think I want the same skirt fabric under the bodice sequins….
Super fun, so fun. However I was terrified. I think N. and A. may have picked up on stress but it’s not just a worked-in-to-fatigue stress it was a “I feel ugly and ungainly and stupid” stress (not part of the other aspect of wearing big hair, big make up and what was essentially a pageant dress!) But it was all relieved when we got to the carpark and I heard a muffled “OH MY GOD!” from the back of a people mover. And then someone said “awesome cosplay” so I mentined the CNZ facebook page. Pimping the community at every opportunity.
And then at the cinema foyer… teens, tweens and little girls just came flocking. I’m not saying my costume was amazing or I was but it was wonderful to be part of making people smile. And wow, do people love Elsa. So much. Having her as an accidental antagonist rather than villain was a good move.
Anwyay, so I’m very happy, one of my materials has arrived 🙂 Hopefully it’s a cooler shade than on the site but if not I deliberately got matte sequins to be able to get some overcoating.
But seeing Elsa in full cinema scale rather than on the tv or computer in the various releases (love the snow fight tv spot!) it’s pretty clear Elsa is very definitely shaded to the green side of aqua and its really closer to a duo tone than interference. SIgh. That is hard to get in sequins. Very hard. Her cape seems t be darker on the inside than outside, which I think is more a marker of how light reflective the ice particles are (and looking at them… It would be best to use scattered sequins than anything else as the cape needs to be super light and also those pariticles are large and at least evenly spaced and scattered. So I may be breaking out my giant frame of doom.
It should be easier than Glinda’s bubble dress for me though. The issues with that were two fold: I had to cut the petals individually to know I had enough and to easily store the various pieces. This made pining to net on the frame and use of the frame tricky. The other was the randomness of the size and shape of the sequins. I can do rows of beads and sequins quickly, it really is easy when you have the same shape to guide you, the difficulty is when the shape goes against the base shape you are working around! But as I’d be using all the same shape then tension of the thread and muscle movement is pretty repetitive. So much easier.
But then I will want a very different net. Possibly. It does look very sheer in photos and it is very light. It’s also durable. Which is vital- the hem of my gown is shredded, so the final gown will also get a handy dandy facing that will overlap slightly (pretty sure like the Eleanora di Toledo gown..) so the very edge is protected and the facing can be removed for washing. Like a balyeuse for 1870s dresses 🙂 Which were made from super delicate laces and sheer linen/cotton so good for washing but made liable to shred on cobblestones!
Anyway. My wig was also a good test practice 🙂 While the marketing media for Elsa has her with a quite warm super pale blonde she has had a blue rinse in the movie 😉 So I’ll give my wig a spot of tlc so I can use it for another costume and see if I can find a wig and matching wefts. Her braid is super full. Definitely needed two wigs. Sadly because I didn’t have a chance to condition my wigs they wound up very matted on the underside where the wig sat against my cape.
And that’s another thing! I should be putting a bridal tulle over everything. The reason why? The sequins will snag my hair, wig and any other fabric. My hair got totally tangled in the diamantes on my Black Diamonds costume and I also was lucky my gloves came up as far as they did to protect my arms from sequin rash 😉
So lessons learned: Yes to having a separate support layer (but with the hips better shaped) yes to the wig style but with softer wig hair! (the acrylic rinse made it all a bit crunchy- but easy to wash out 🙂 ) and yes to having a costume that is child friendly 🙂
Yay! So I am dragging N. to the Frozen Sing Along on Thursday which means a bump in the schedule 😉 Well I had sequinned fabric to get rid of so hey, quickie costume here we go!
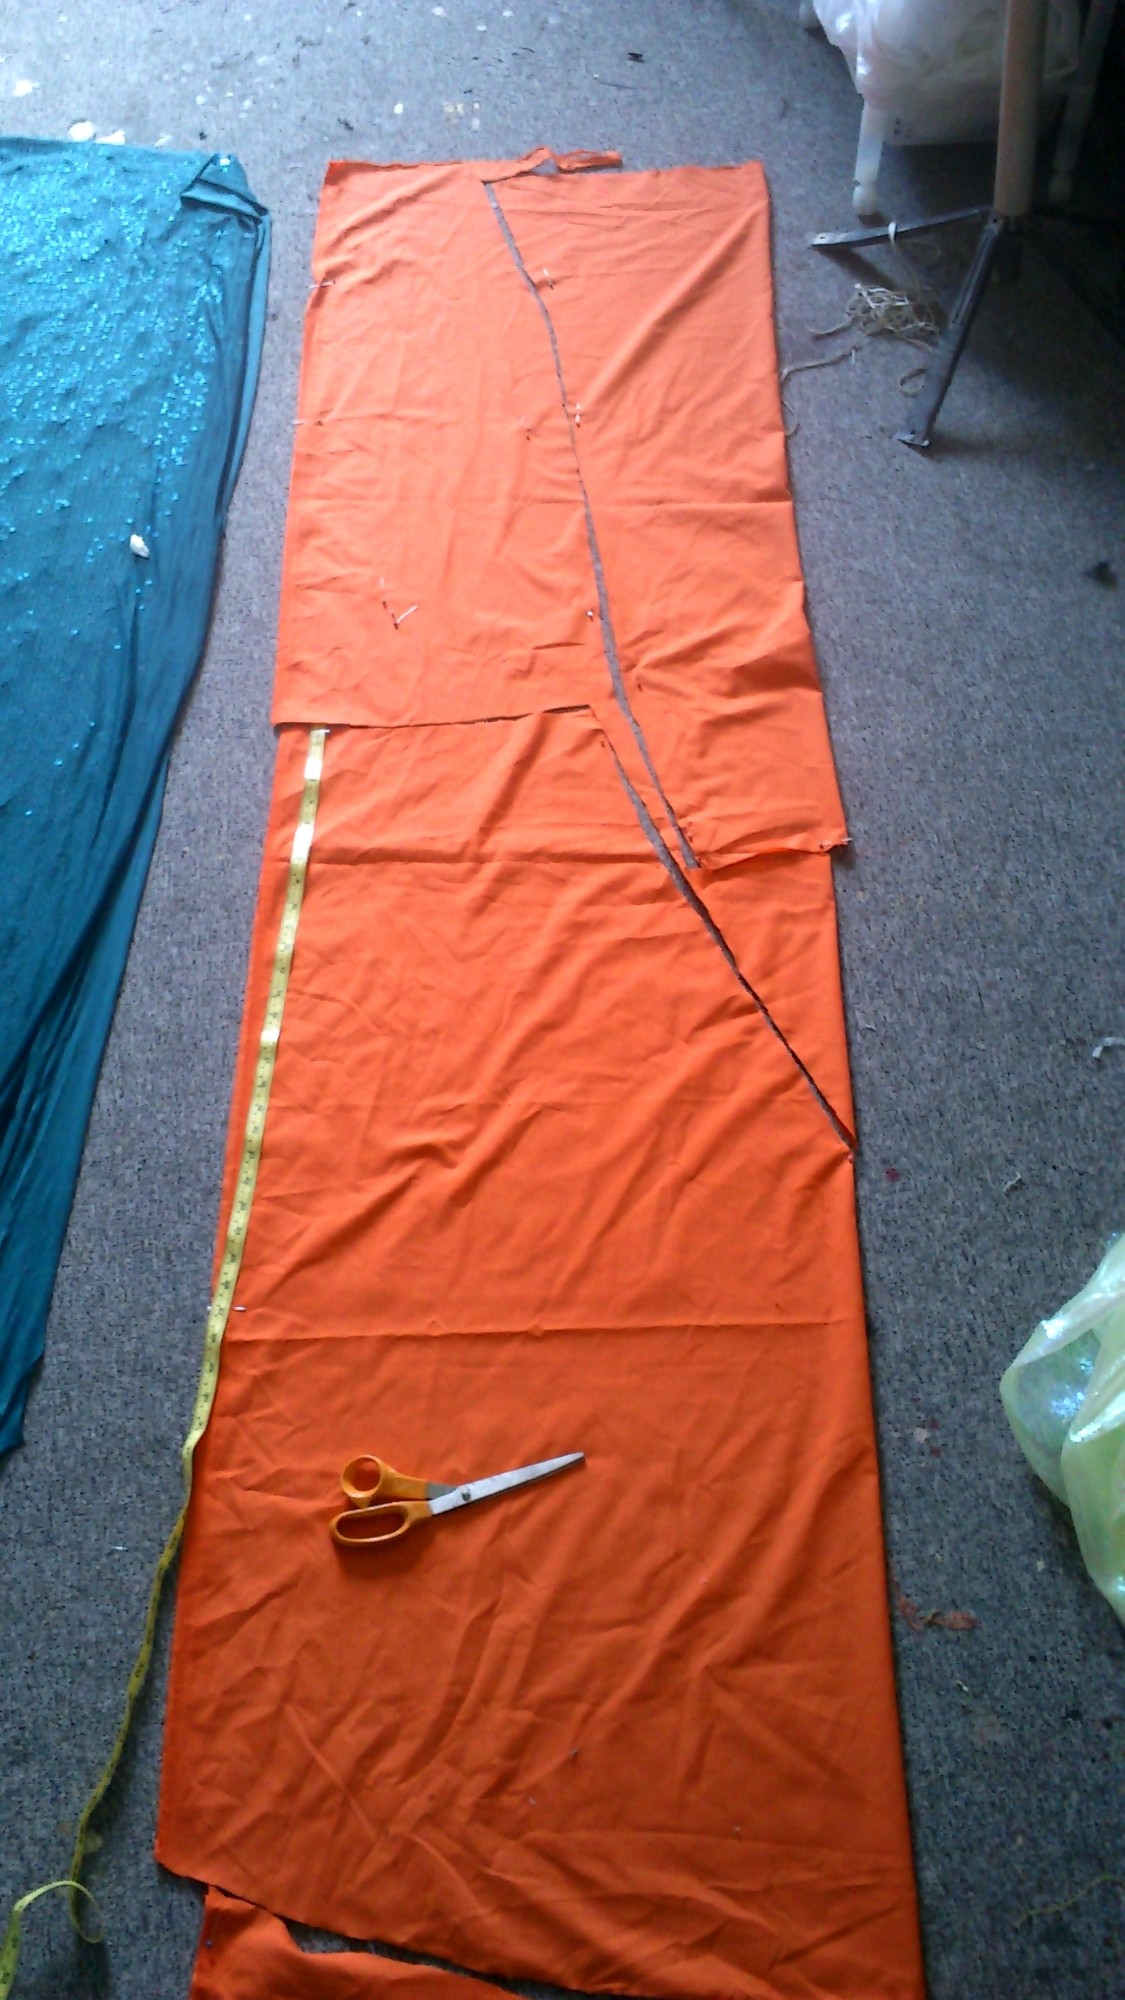
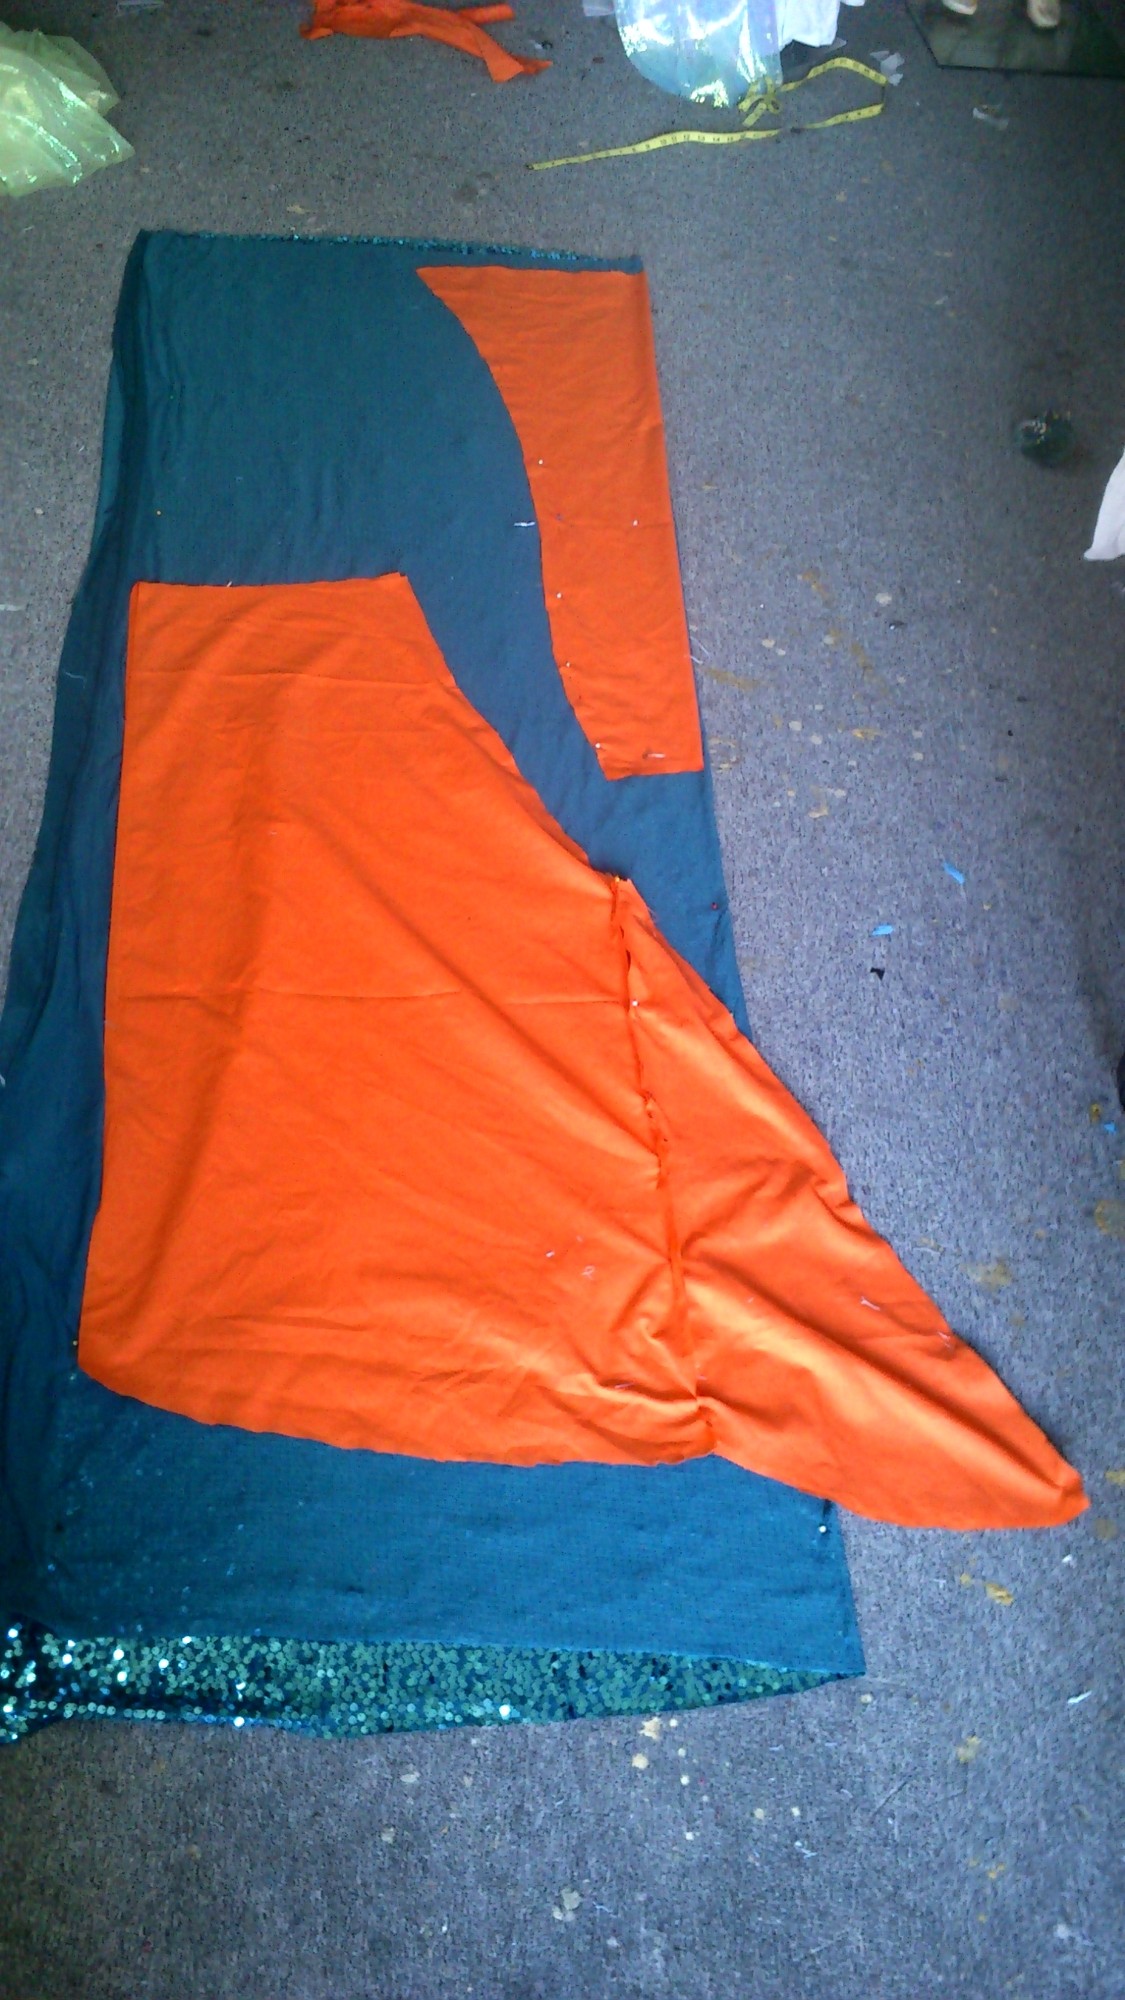
Alcega? Alcega! Or patterning as if I was a 16thC Spanish tailor plonked here and now. Tailors had to make best use of as little fabric as possible. In part due to parsimonious clients but also as they could keep the offcuts. And you talk about actual cloth of gold or actual cloth of silver you can see how there could be a bit of a conflict!
1) Measure the dimensions for the front panel (waist from side front to side front, then hips and then full length and remember this is on the fold and is twice the width! Then cut with the hem at the end of the fabric so as to be able to top and tail the back pieces! Then work from the other end and make whatever you can for the back piece because there is eff all there… Remember there is scrap to be able to piece in to the back.
Front panel is upside down on the upper right, back panels right way to us on the lower left.
2) rotate back piece and lay against the scrap to work out how much there is to finish the back panels and see if you can squeak out a train.
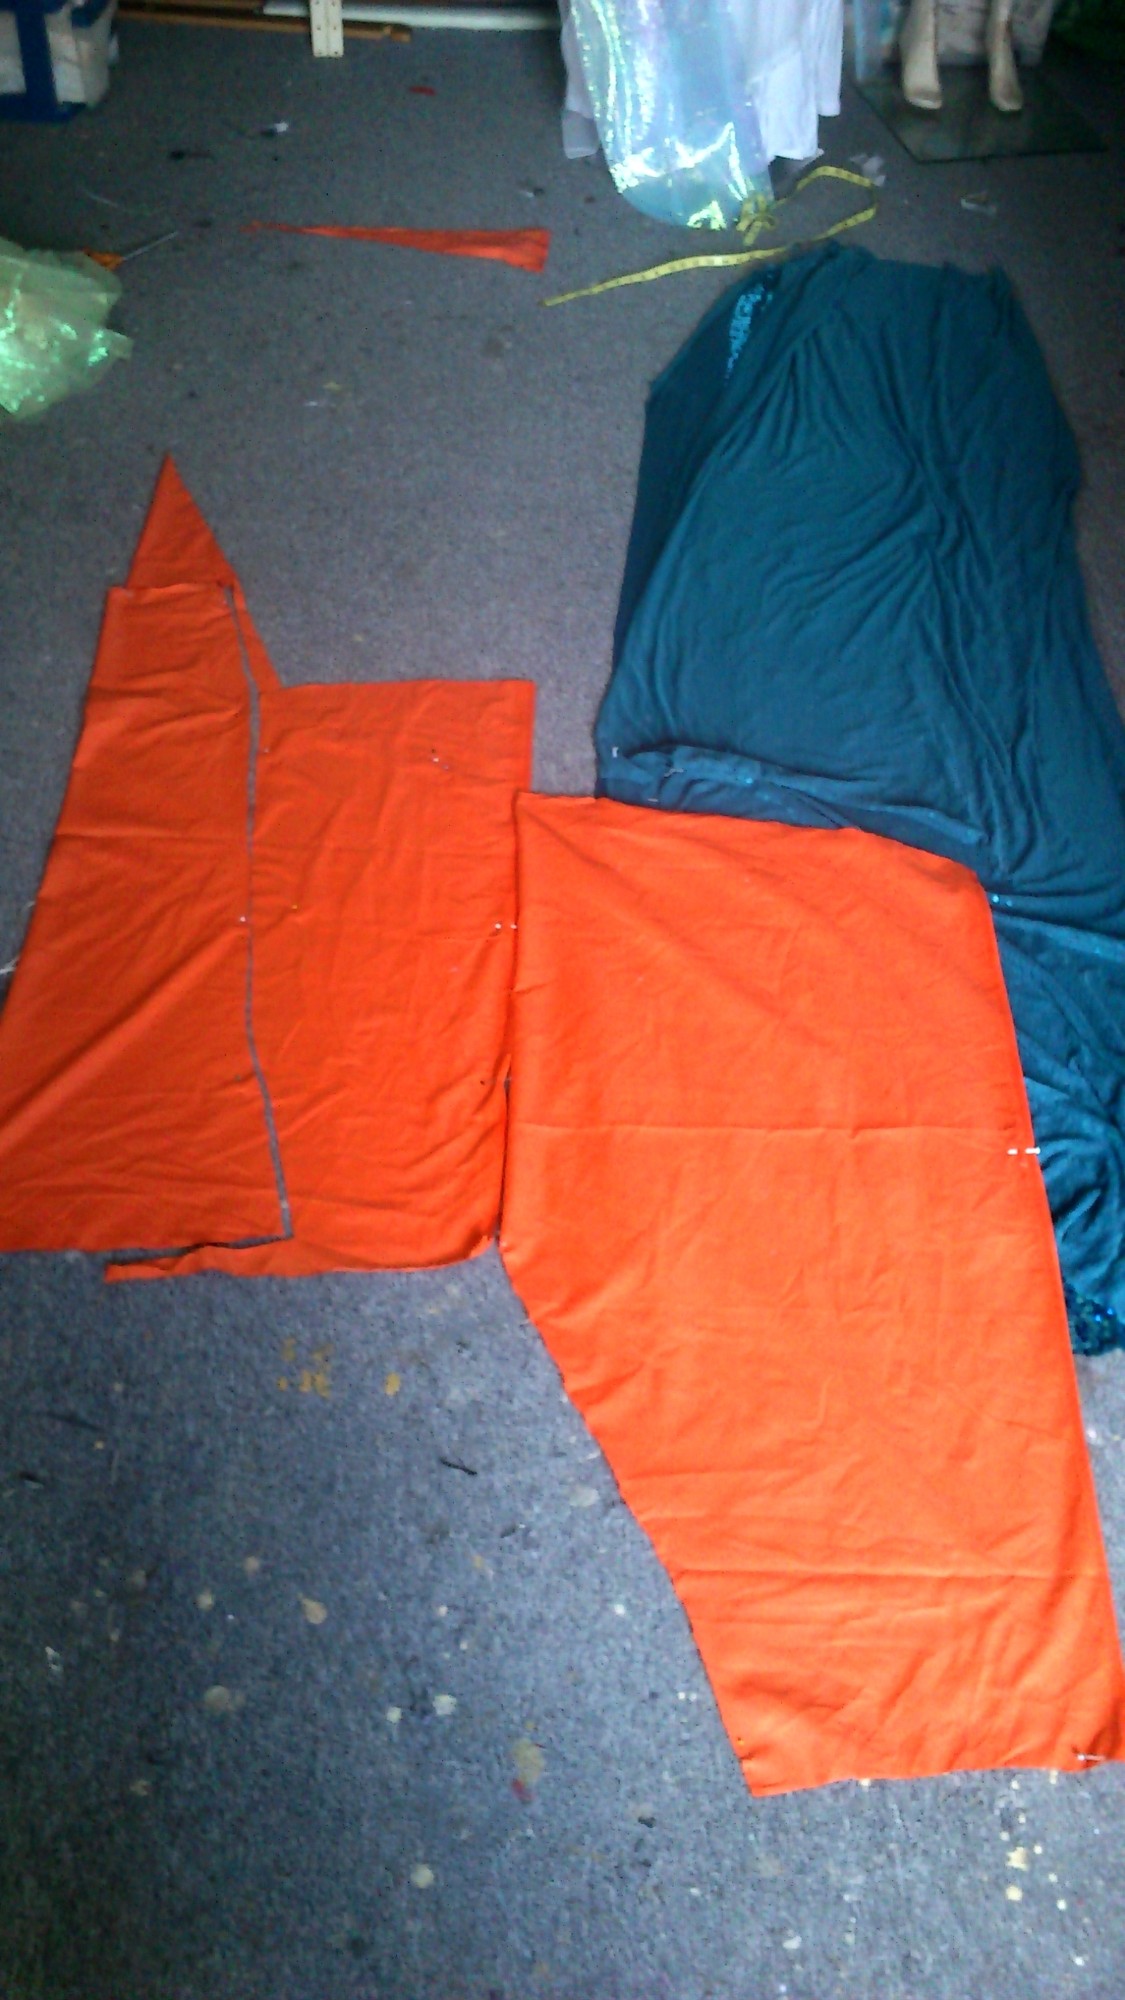

3) success! a three panel skirt but made from five pieces thanks to not having all the fabric in the world.
4) lay test pattern on next test fabric. I had tried the orange on to adjust proportions (narrowing the skirt front) but yay for being super stingy on the first test as there is more fabric here to play with.
Note, knit sequinned fabric twists like mad. This lovely flat view was not so easy to achieve or maintain.
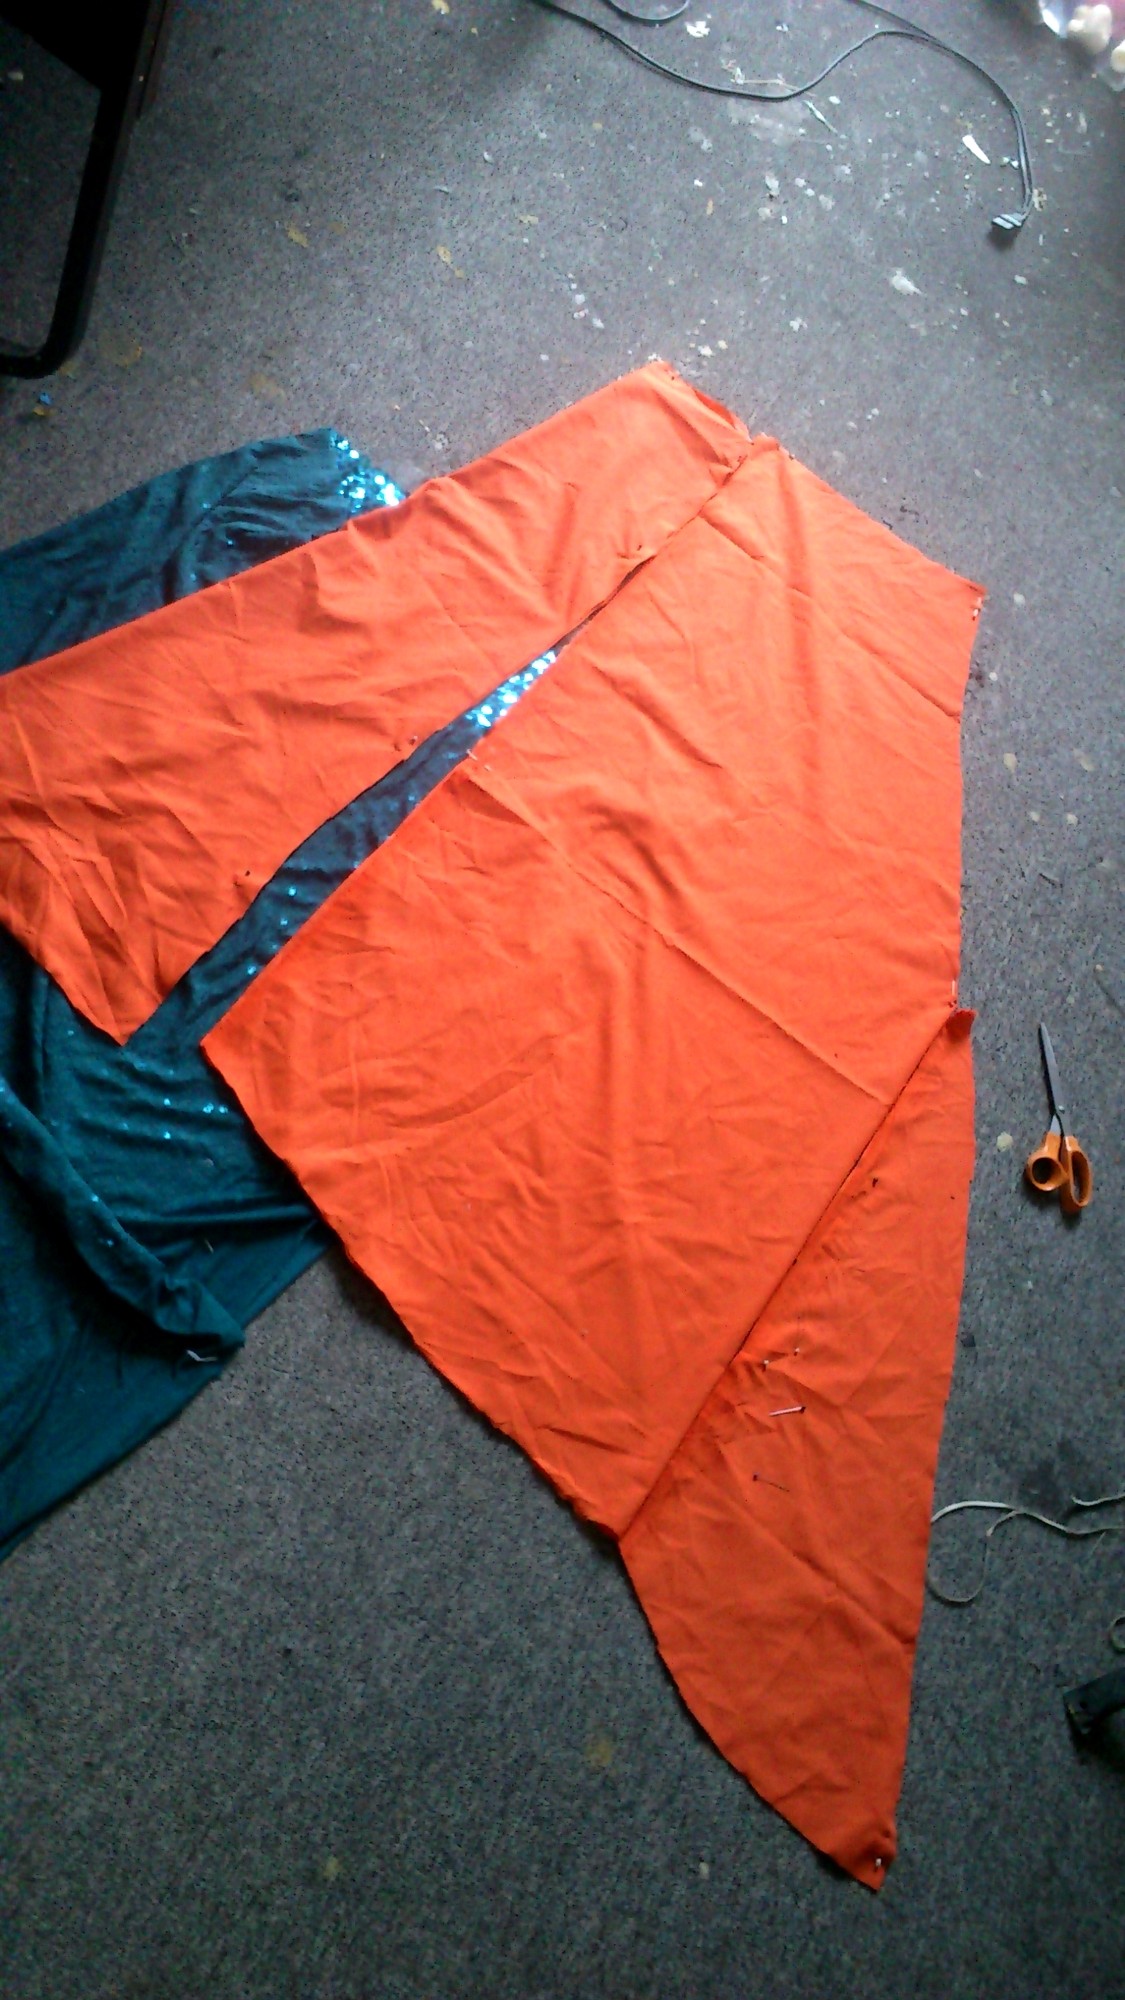
5) Pretty much follow the pattern but add where you can, I like to angle the the back seam up which makes for more flare at the hem less bulk at the waist.
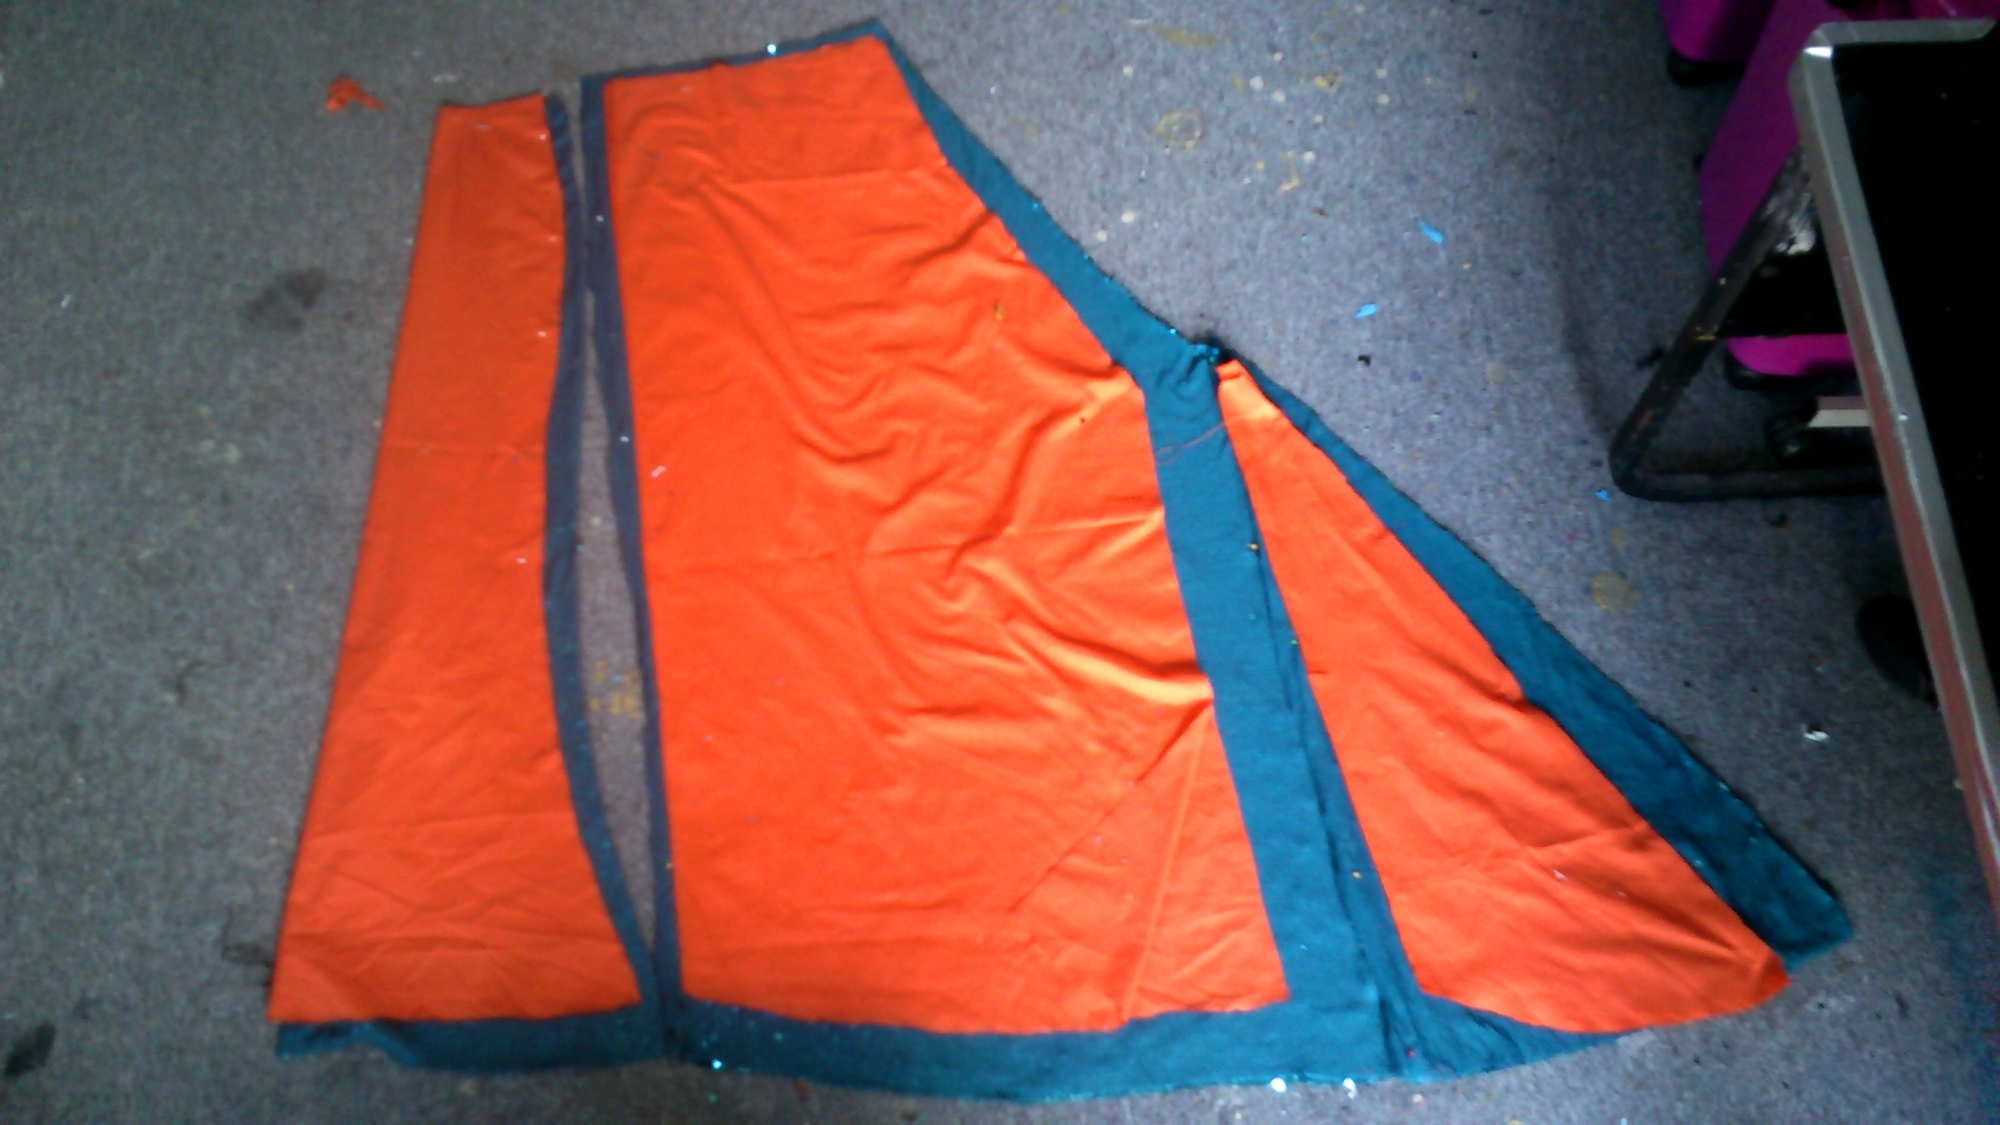
Yes, the knit backing is very dark, the sequins aren’t but I will be doing something to tone them back. And hey as this is a test pattern the skirt will be looking for a home.. next week 😉
My cape is mine though. No touchy.
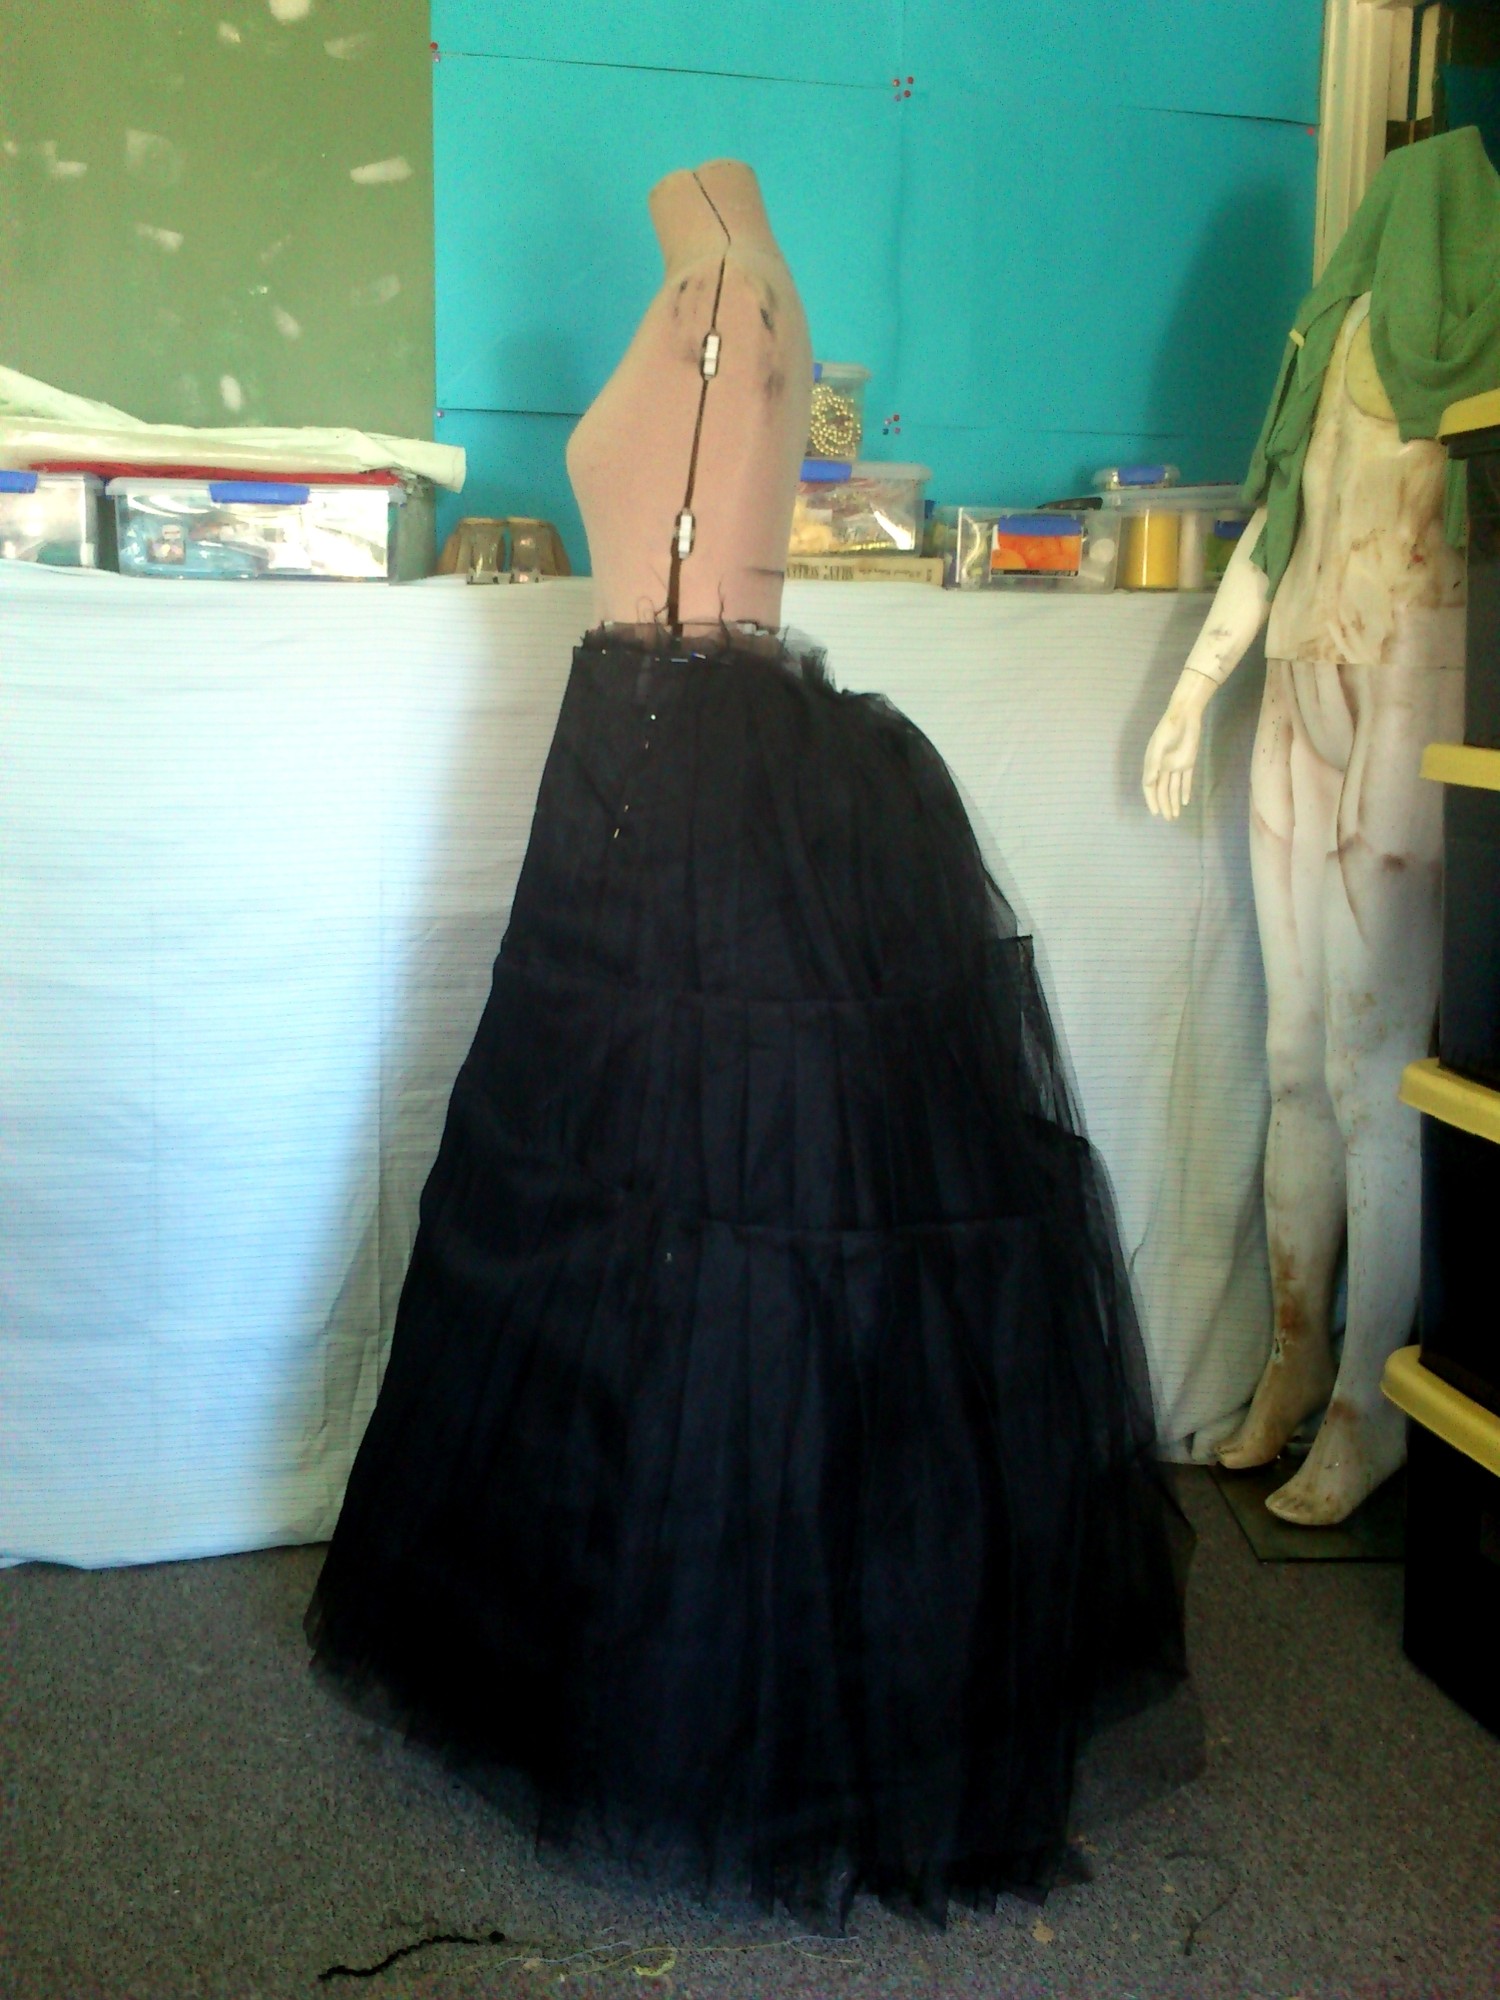
So my corset mock up is ugly. I said it was anyway, so here it is! Institutional mint and badly drawn lines everywhere! But look, a cape! And from just barely over 4m of fabric!
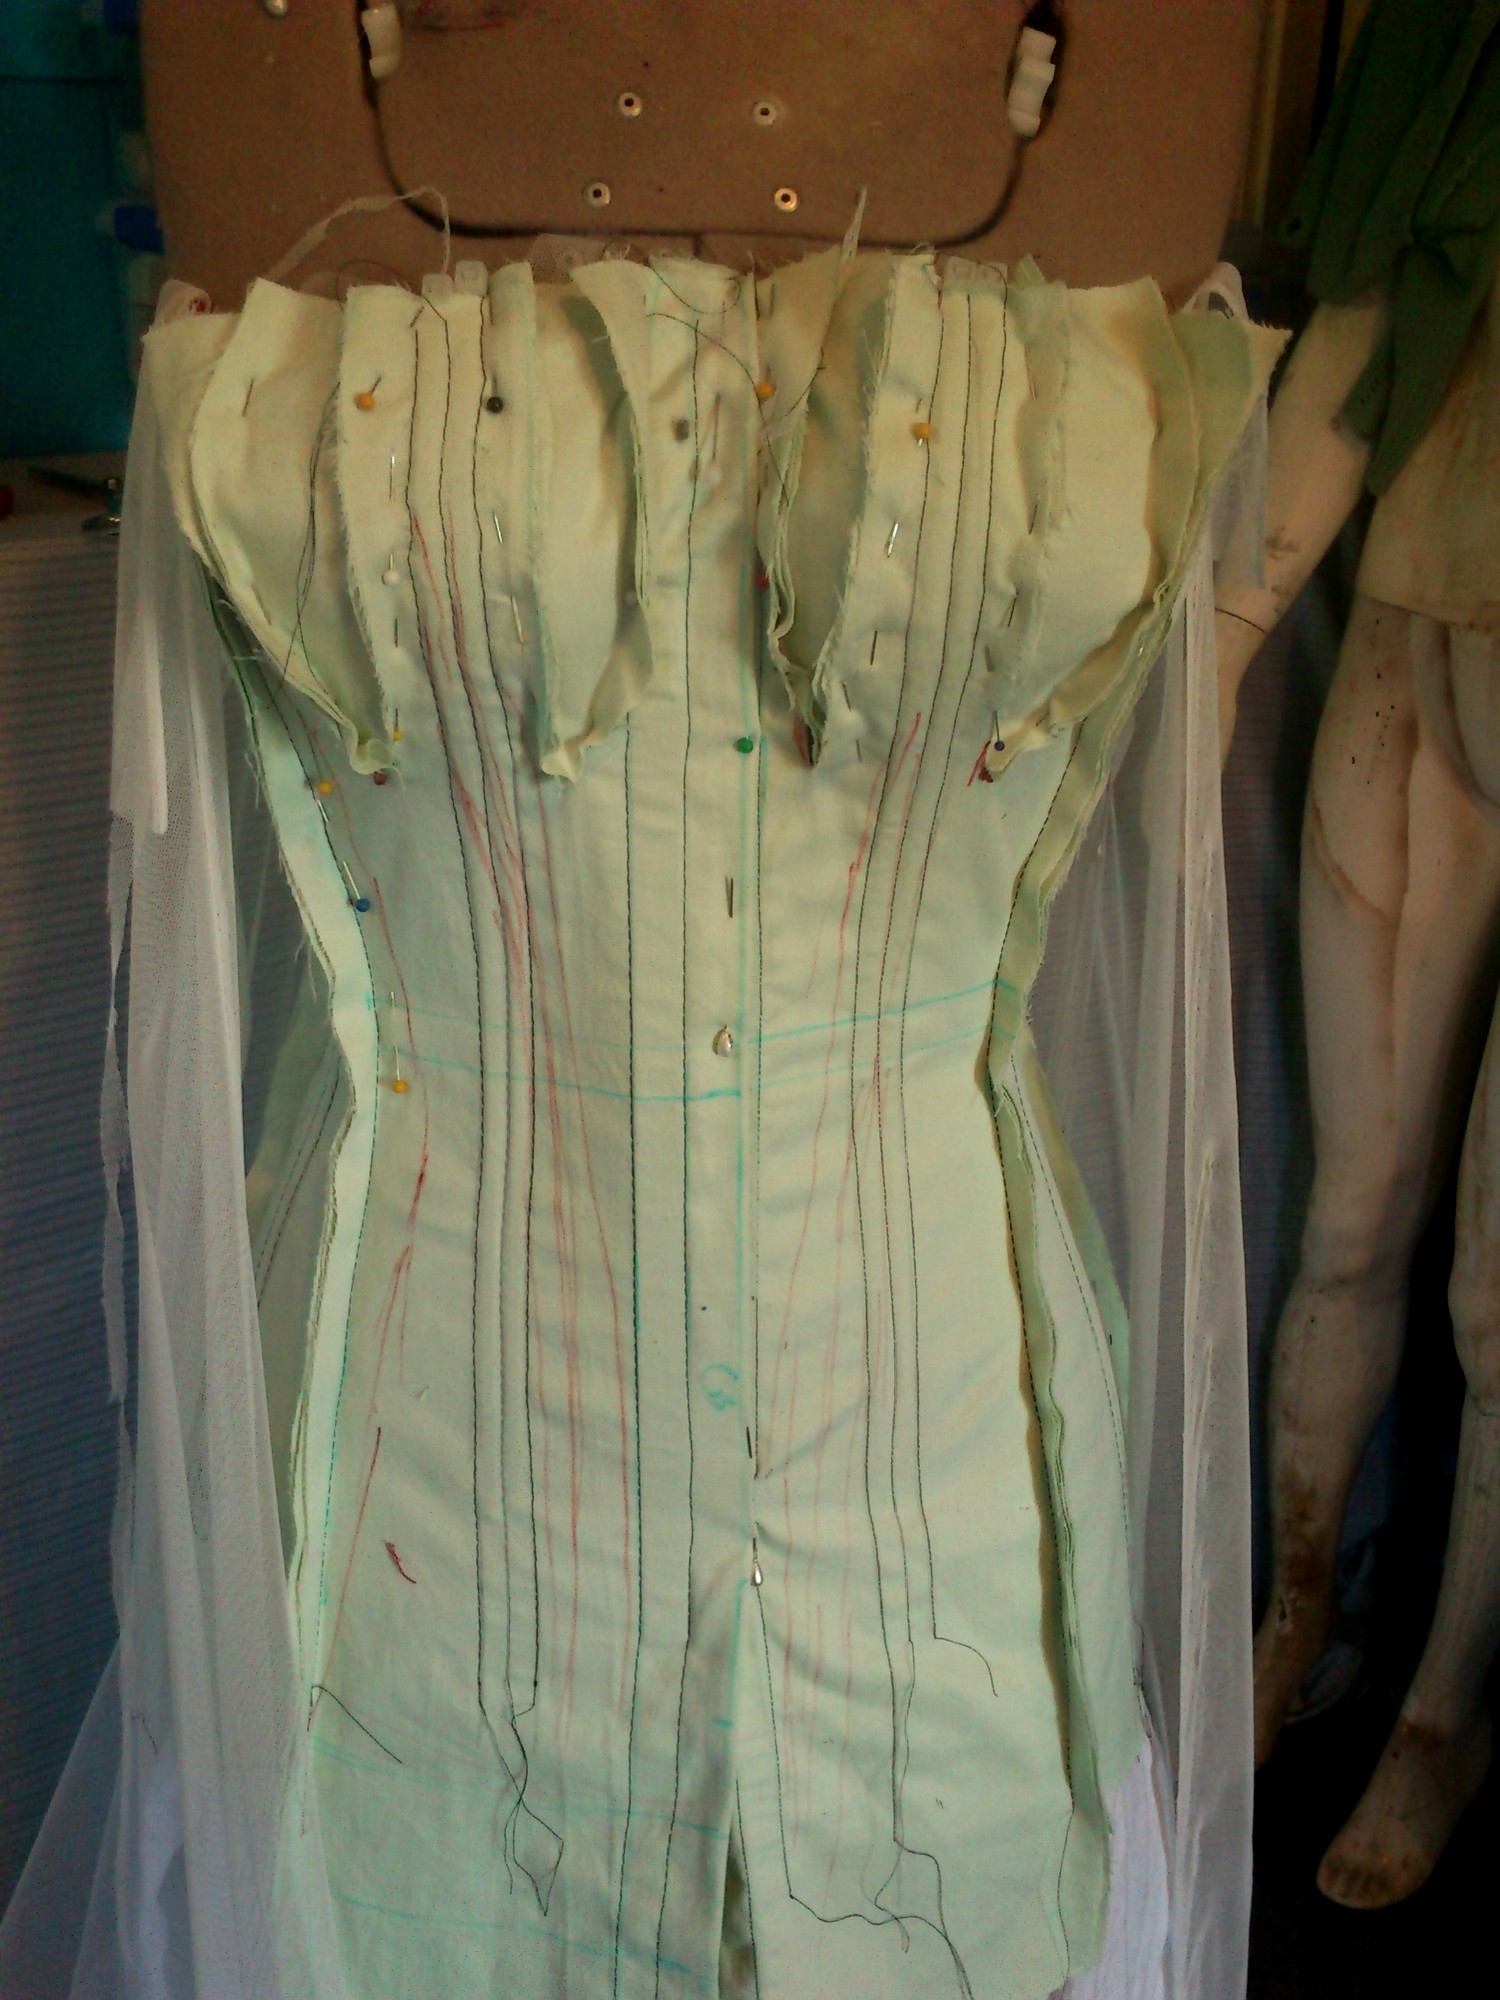
She has boobs! Yes they are OTT but you can see the places I am taking in and will also balance those puppies out 😉 This is also for an over bust which means it does look ridiculous! This is my base pattern to fit me and work with my idiosyncratic shape. There was a lot of experimentation in the 19thC for corsets so mine is a blend of genuinely conceivable pieces. I do only have four panels but may wind up cutting through the bust and angling to CF hem.
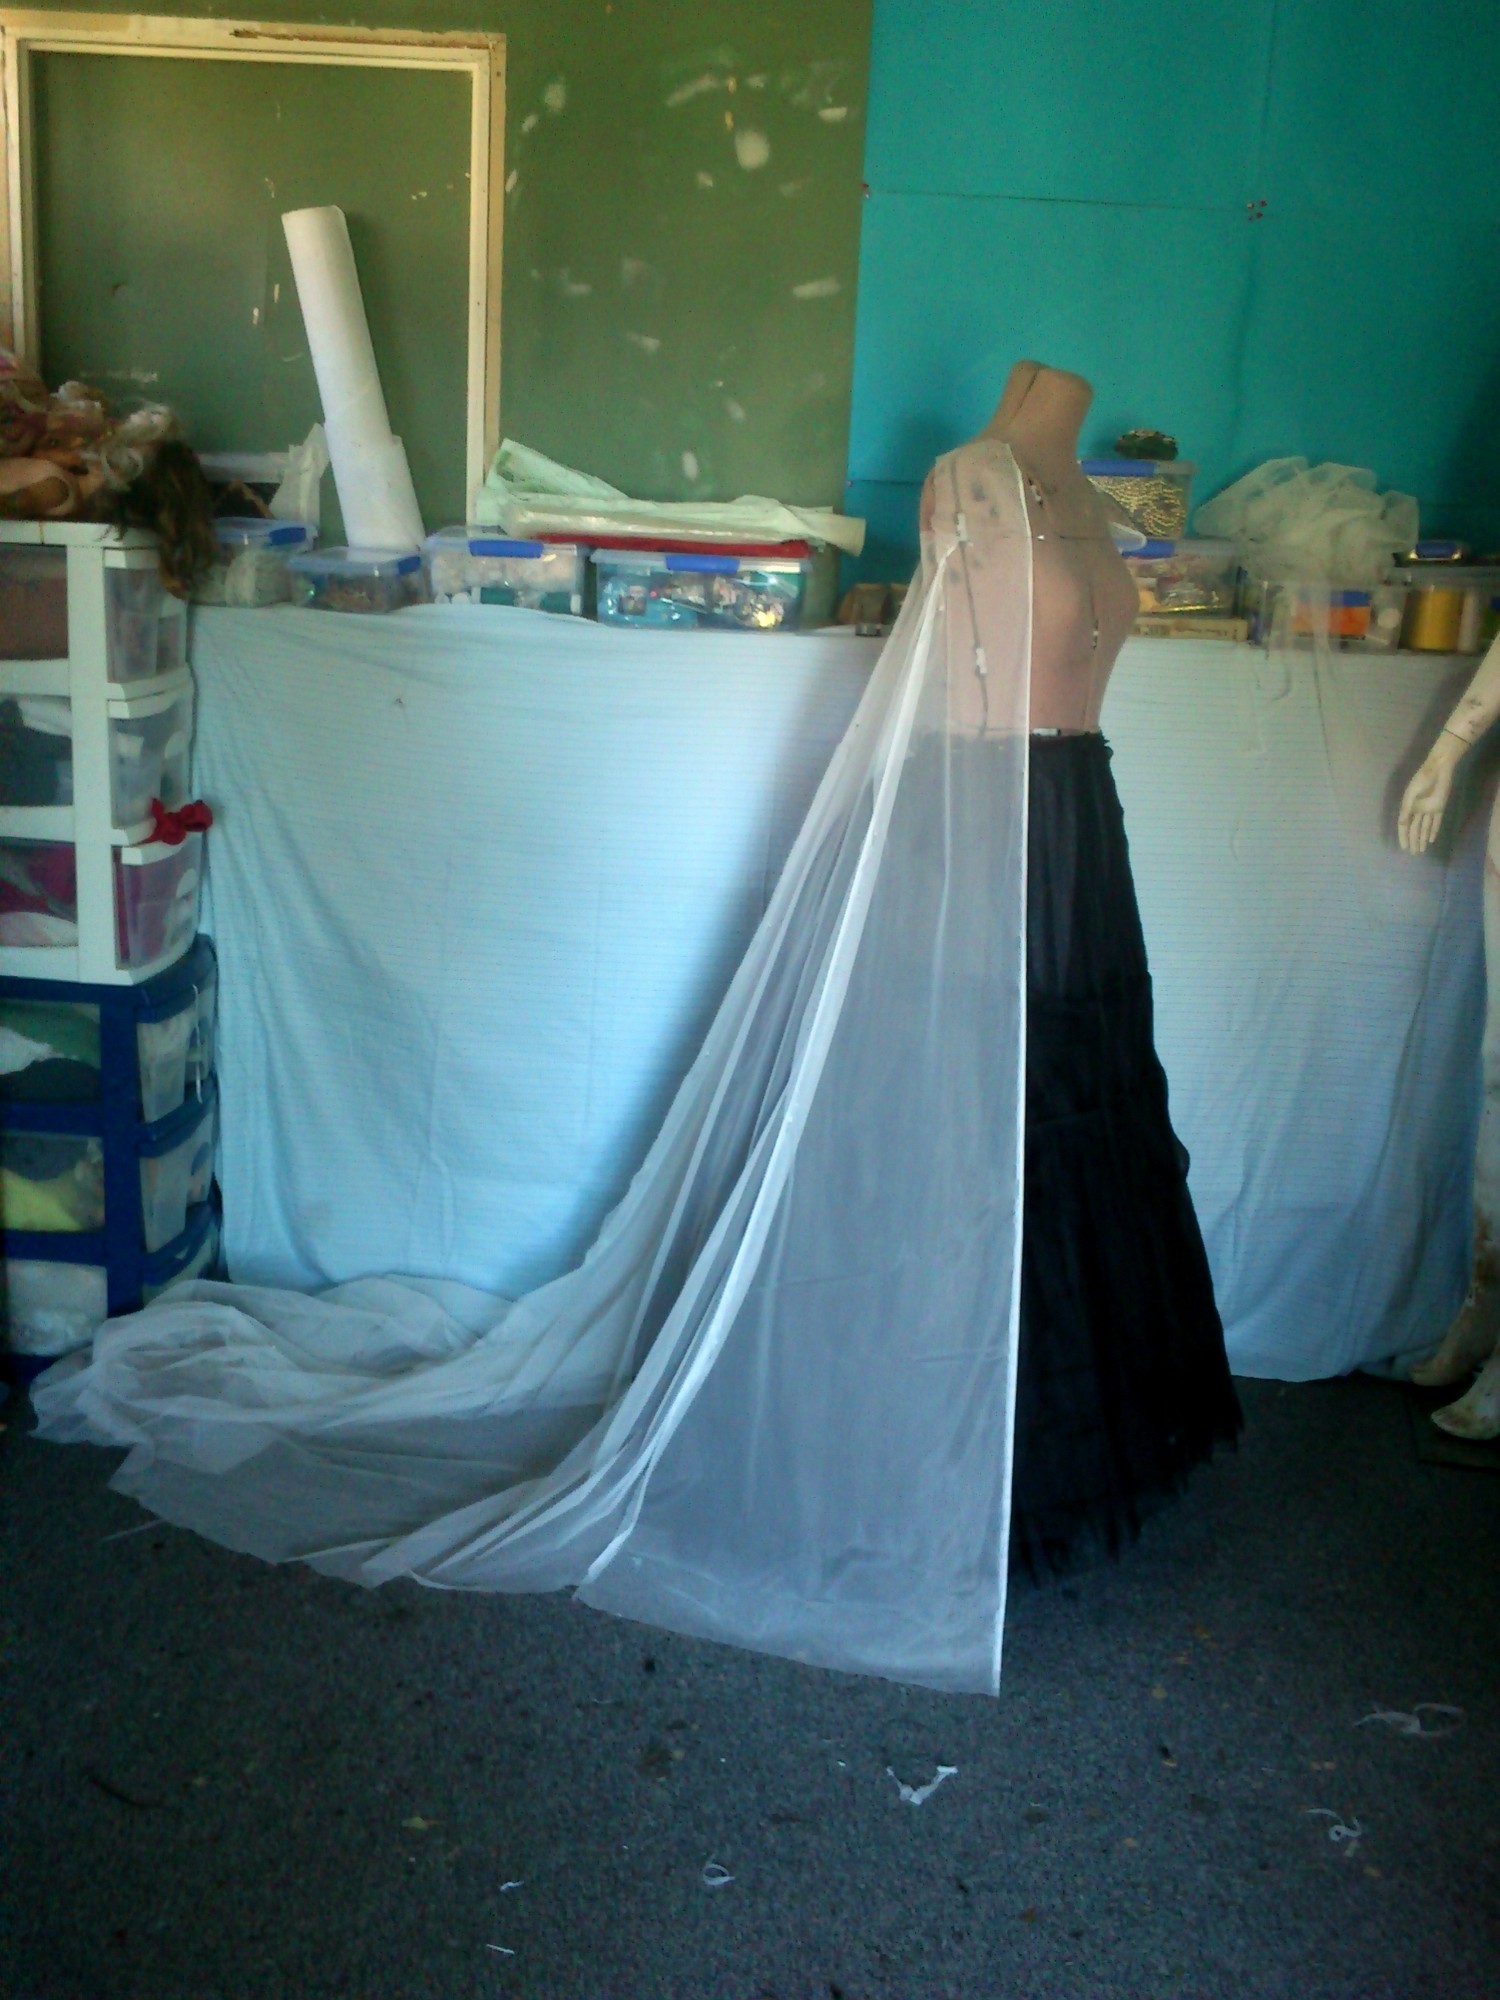
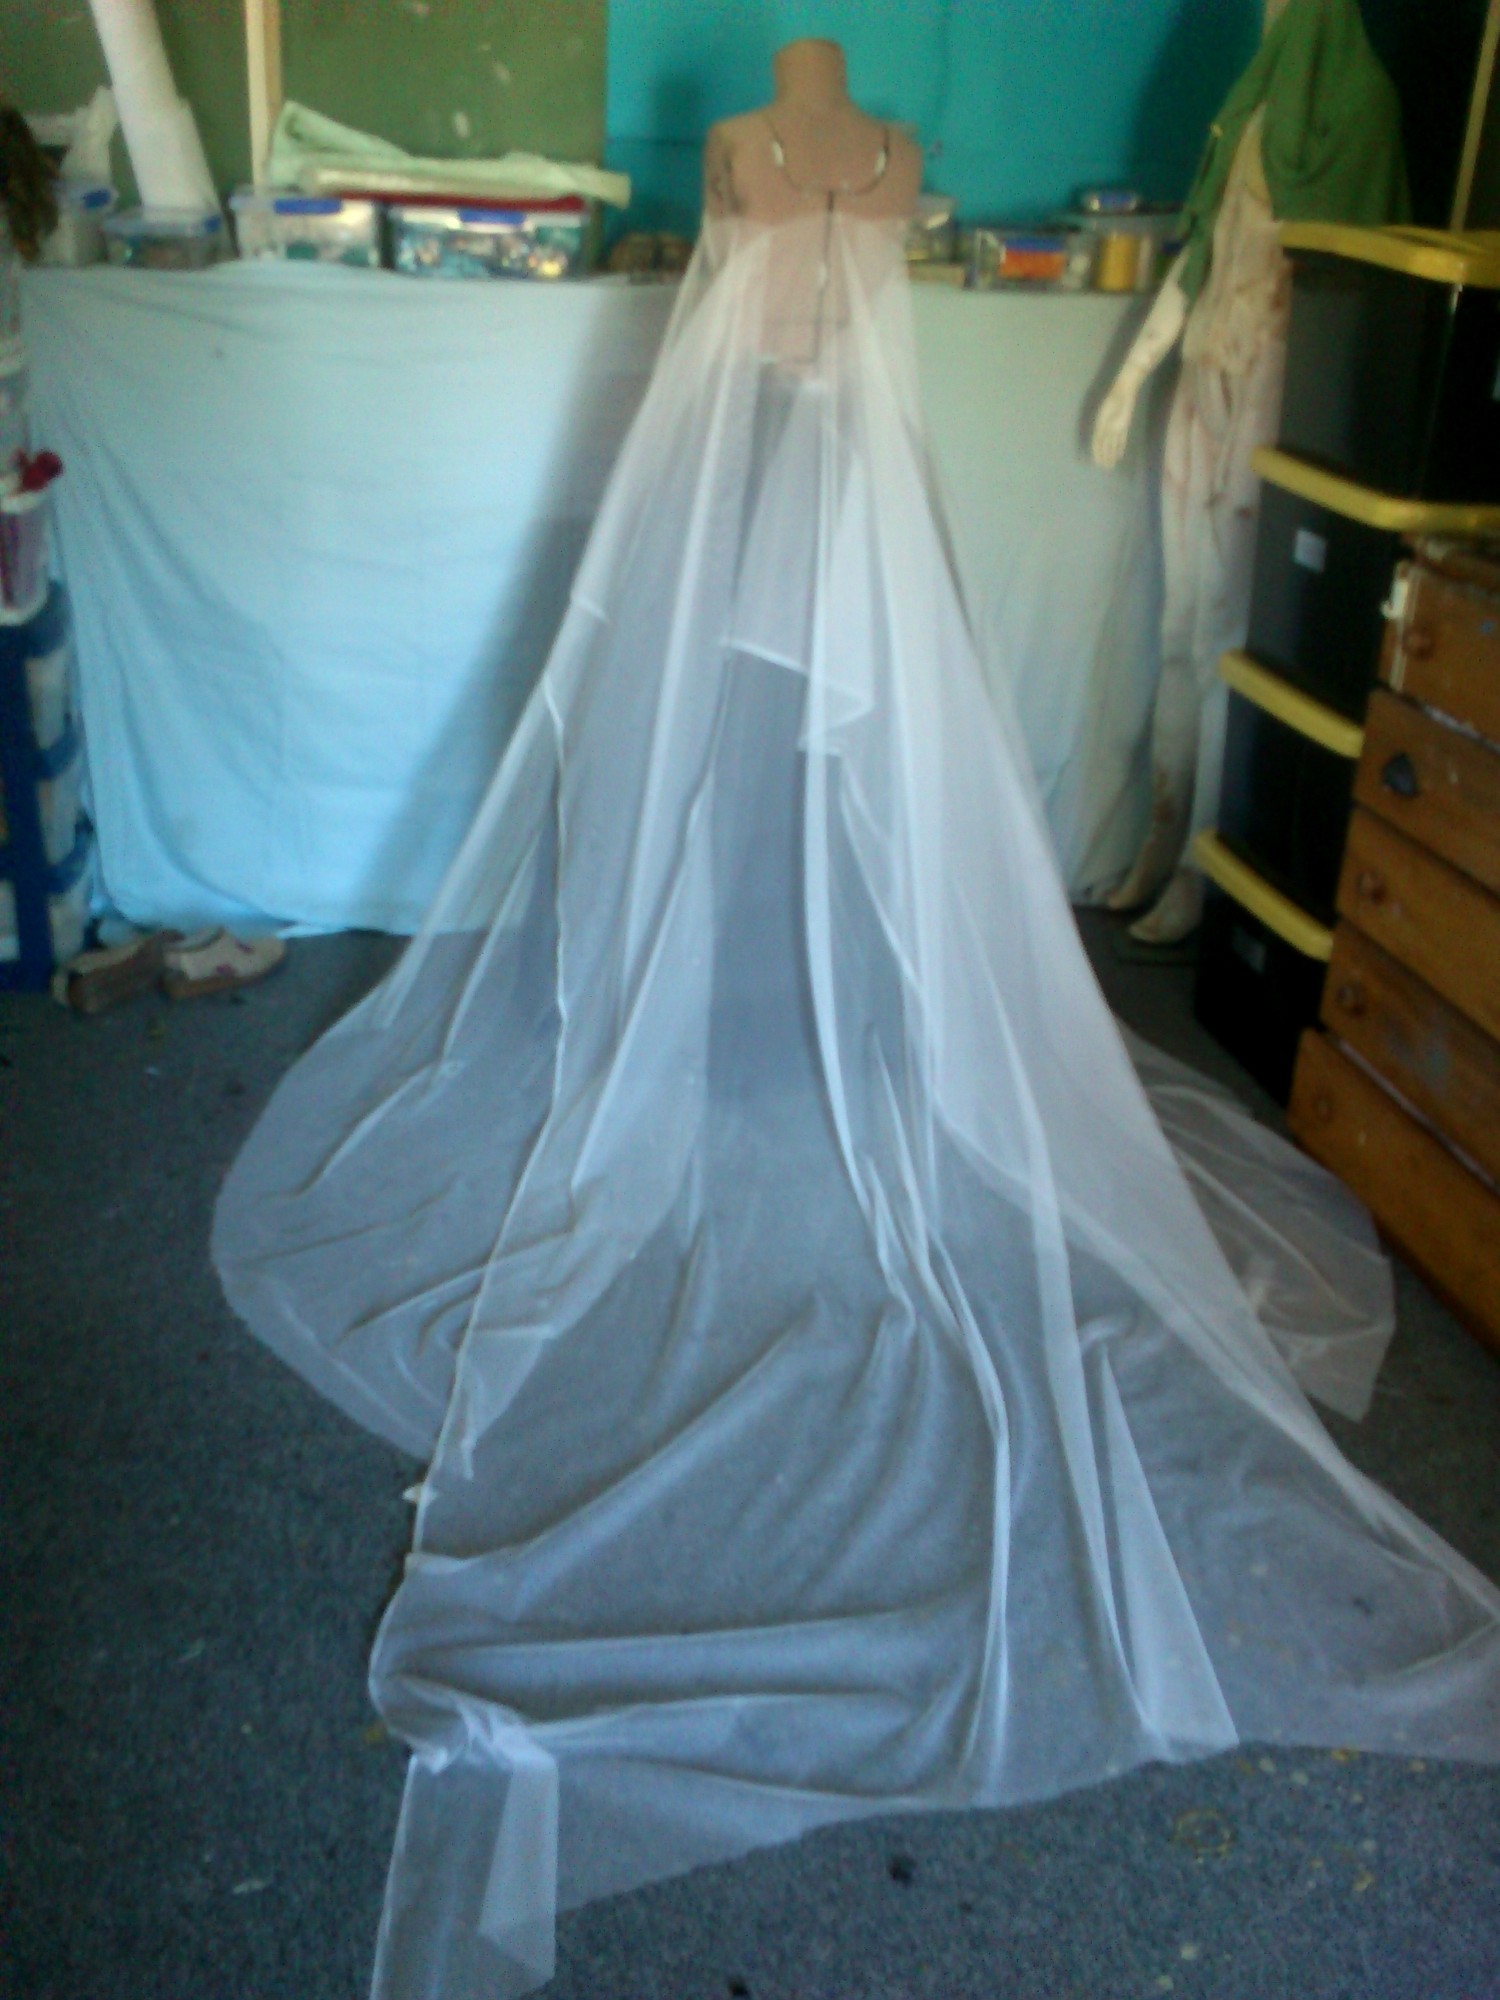
So, now the Elsa cape:
Super sturdy but fine tulle (photos show how transparent it is.) I cut the pattern over my Elissa underskirt to make sure I got the train as long as possible and forgot to account for it going over a pair of legs and a skirt.

1) I started by pinning the tulle to the form, selvage for the side/front seam and to see how long the gore would be on the diagonal, ending at the point which winds up side back of the train.
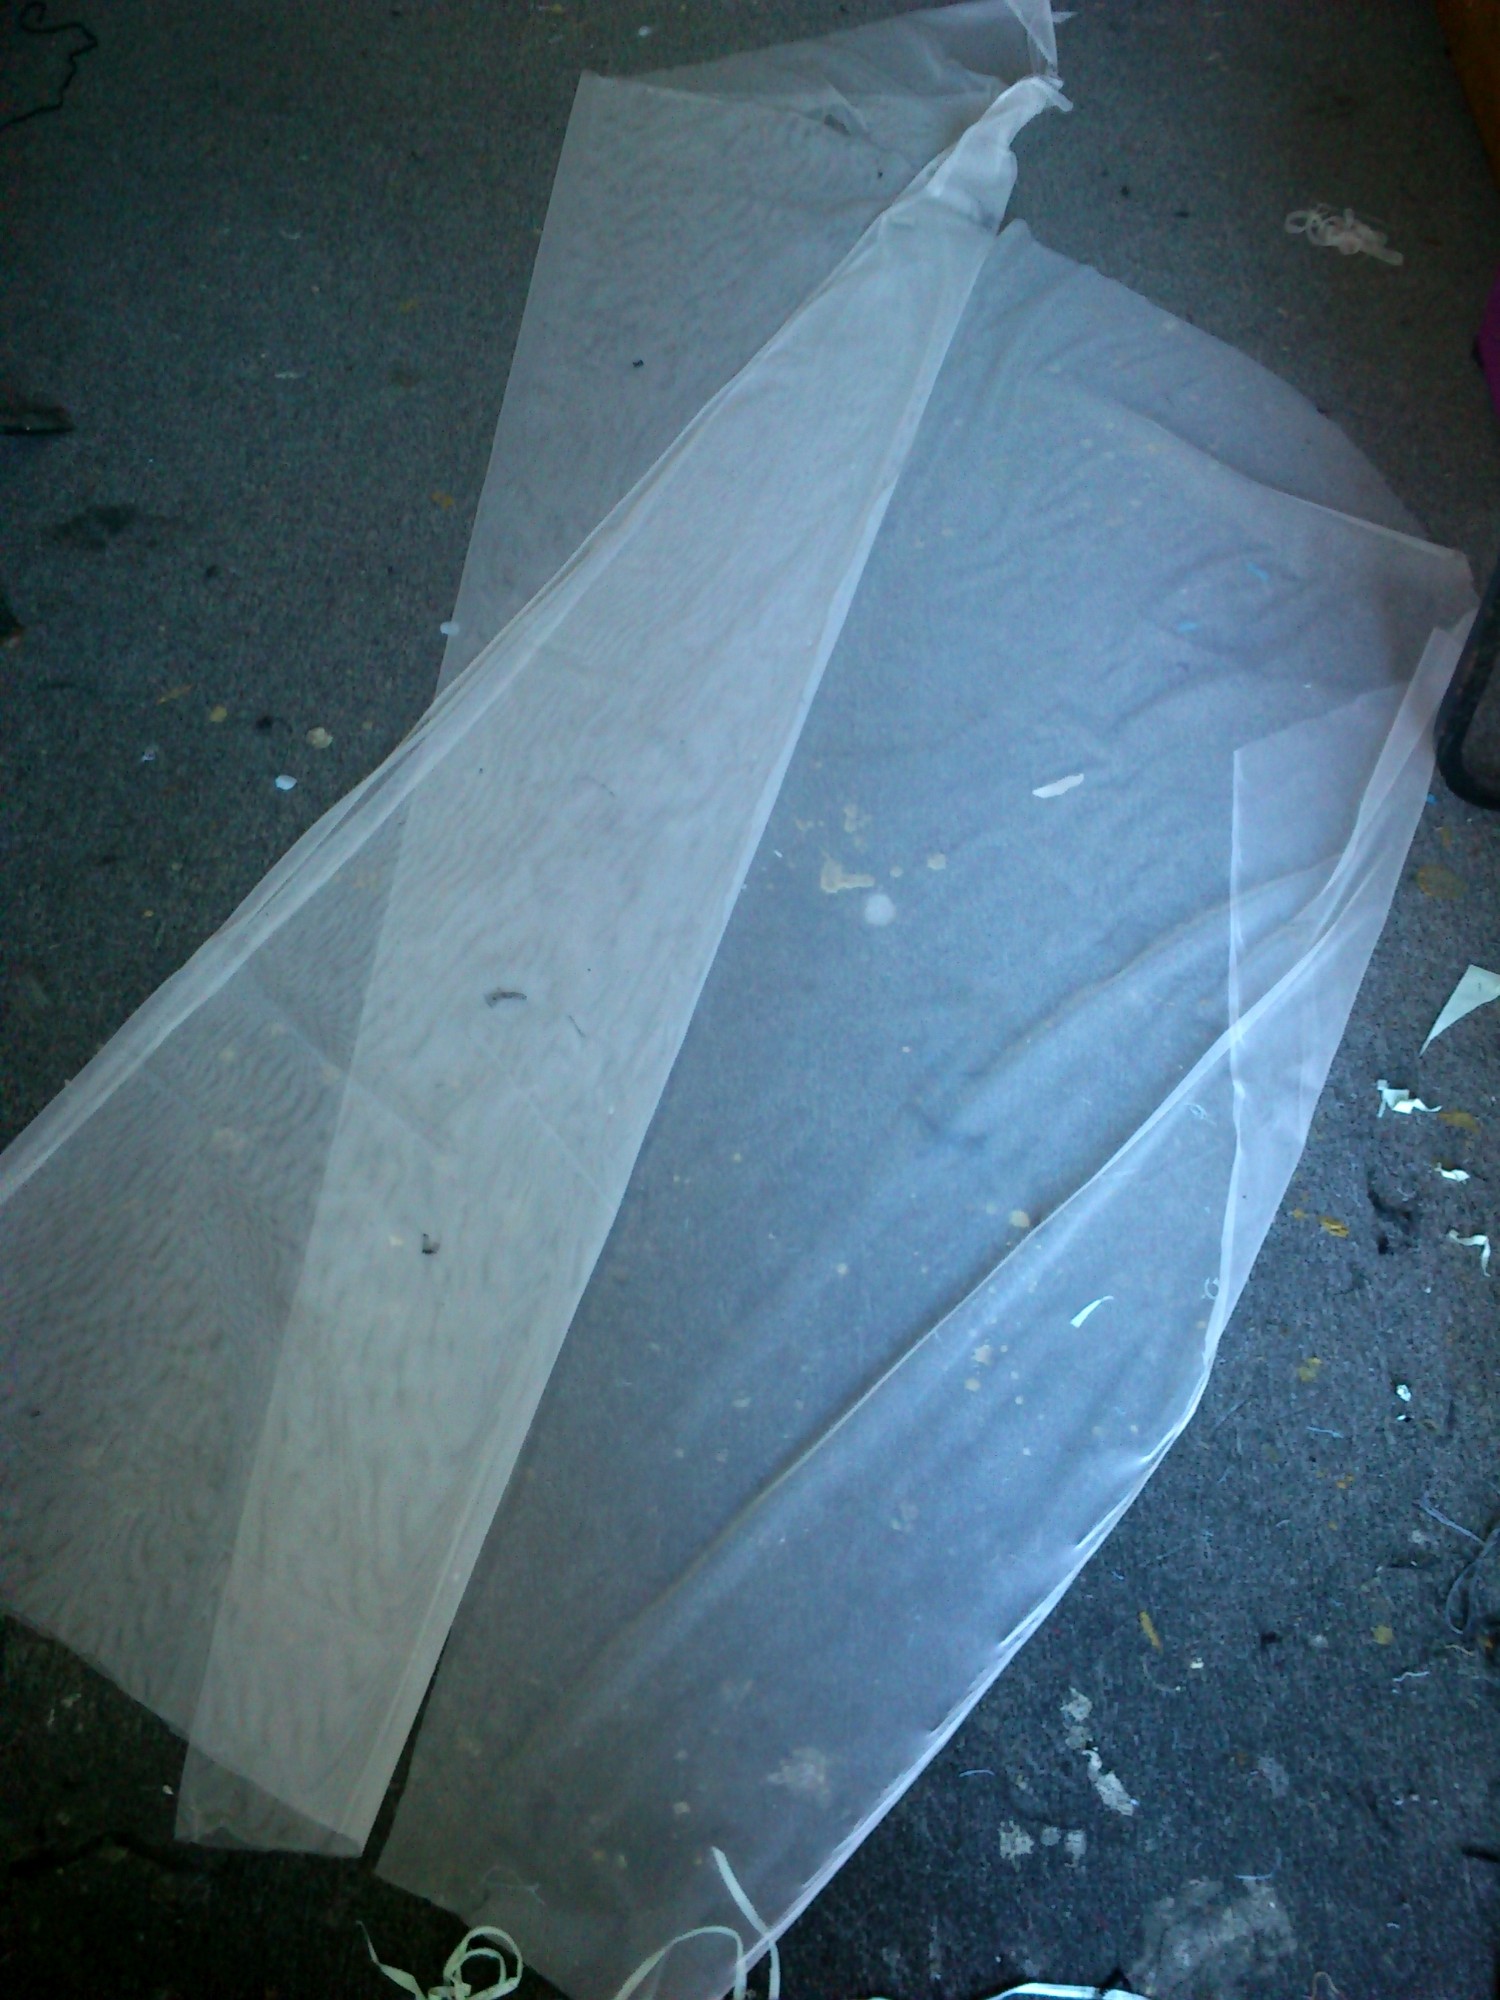
2) so this created a gore that I could top and tail (yay for reversible fabrics!) And so I smoothed it out by folding the fabric along the line and then cutting the first gore. 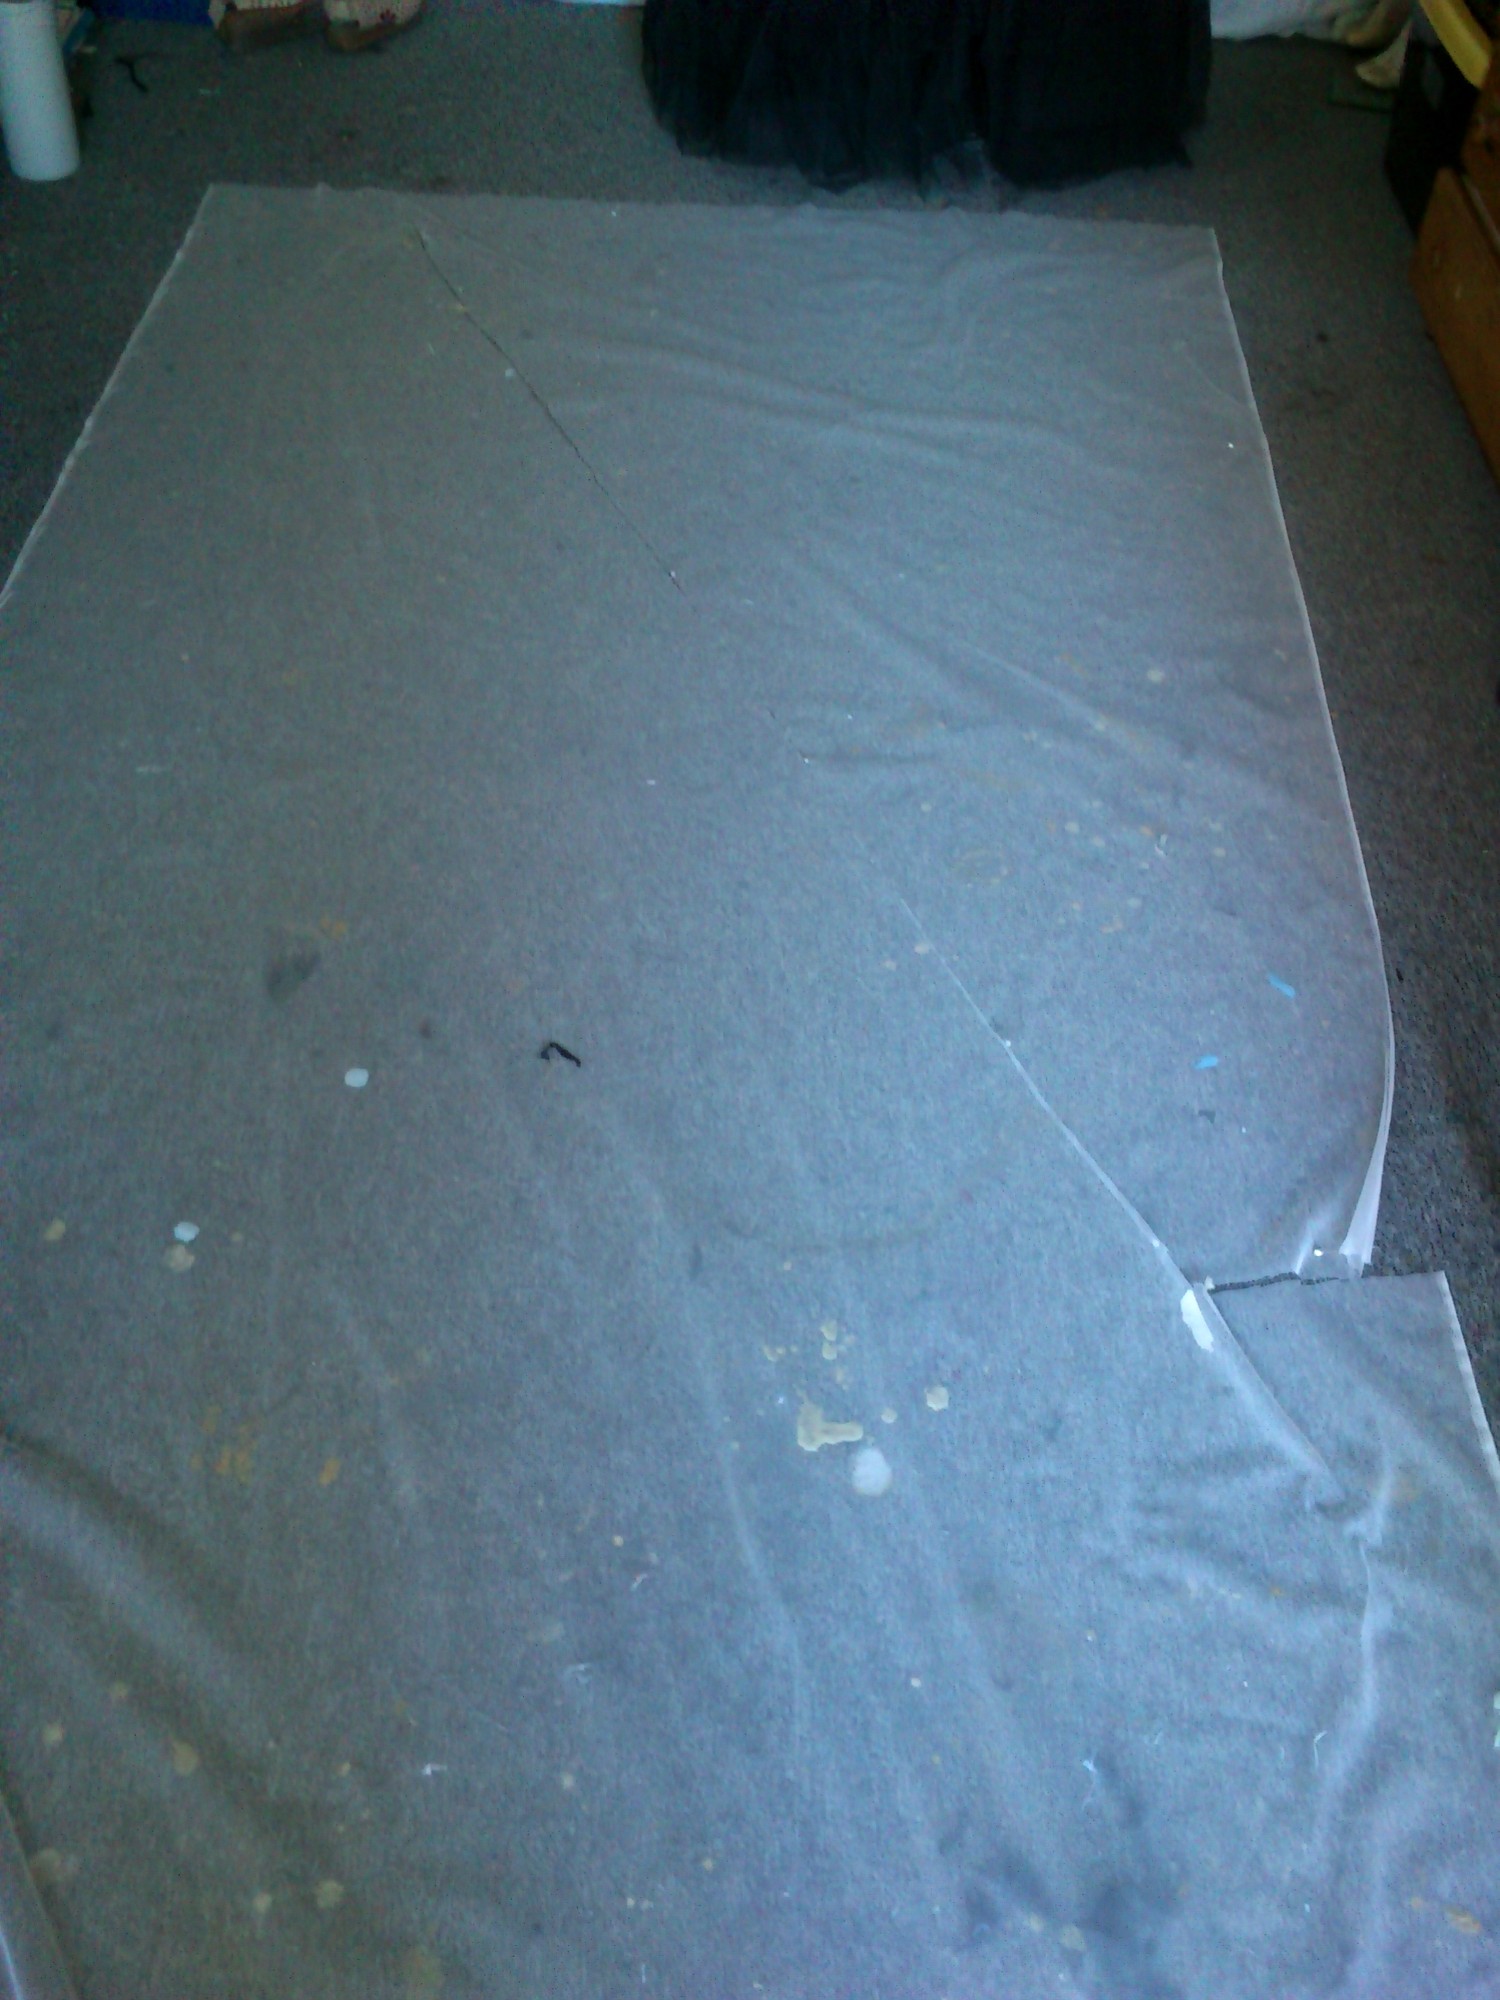
3) I then laid that over the other side and cut and trimmed to match (if this was not reversible this would not work and I’d have two of the same sides)

4) So this creates the sides. I had measured to make sure there was enough length left that the back could be cut. This meant at least as long as the diagonal line plus any extra.

5) Success! Enough with a little left over. So I then pinned the remaining fabric to the back (cB on the fold and pinned at the hem as far to the selvage as possible) and pinned to best shape with the already cut pieces:
6) I laid the fabric on the fold and then used the same folding on the diagonal to smooth the line as before, matching the length to the side gore:
7) this left a narrow gore on either side. So rather than waste it I added it to the fonts and then reshaped all seams (smaller at the top tapering as wide as possible to the bottom).
I’m pretty sure there are five panels I just am not sure if I got them exactly where they are in the film (you see one straight to diagonal seam in the last scene on the fjord at least and the way it folds suggests seams) but i’m not too worried if not. This tulle is $14/m and I still have to dye it 😉 So I wanted best bang for buck!
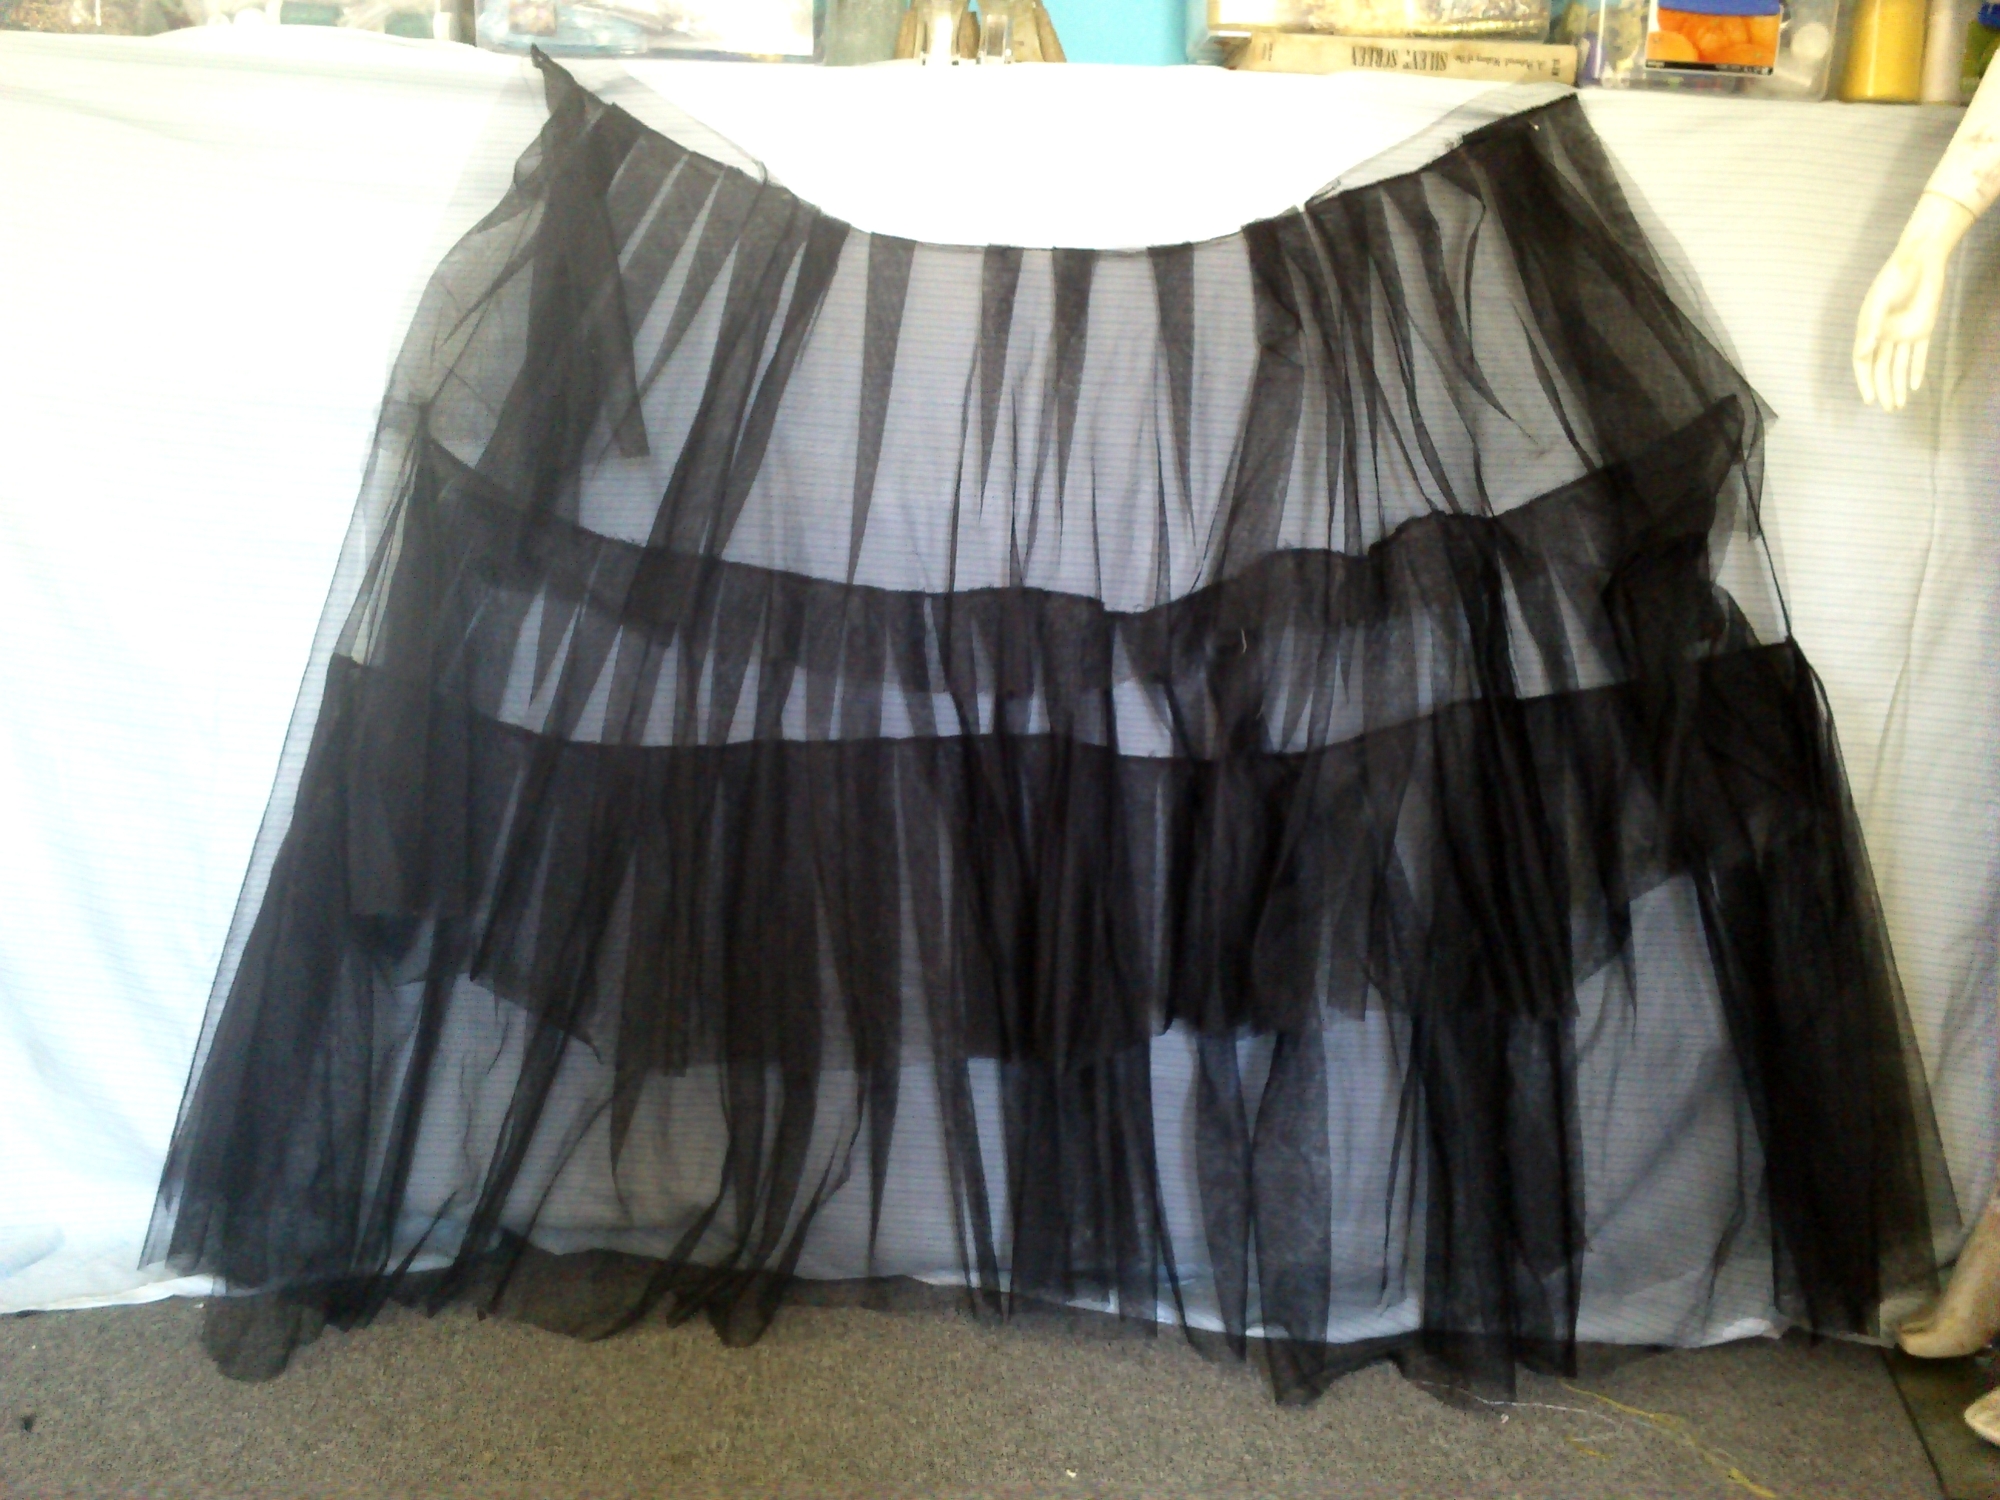
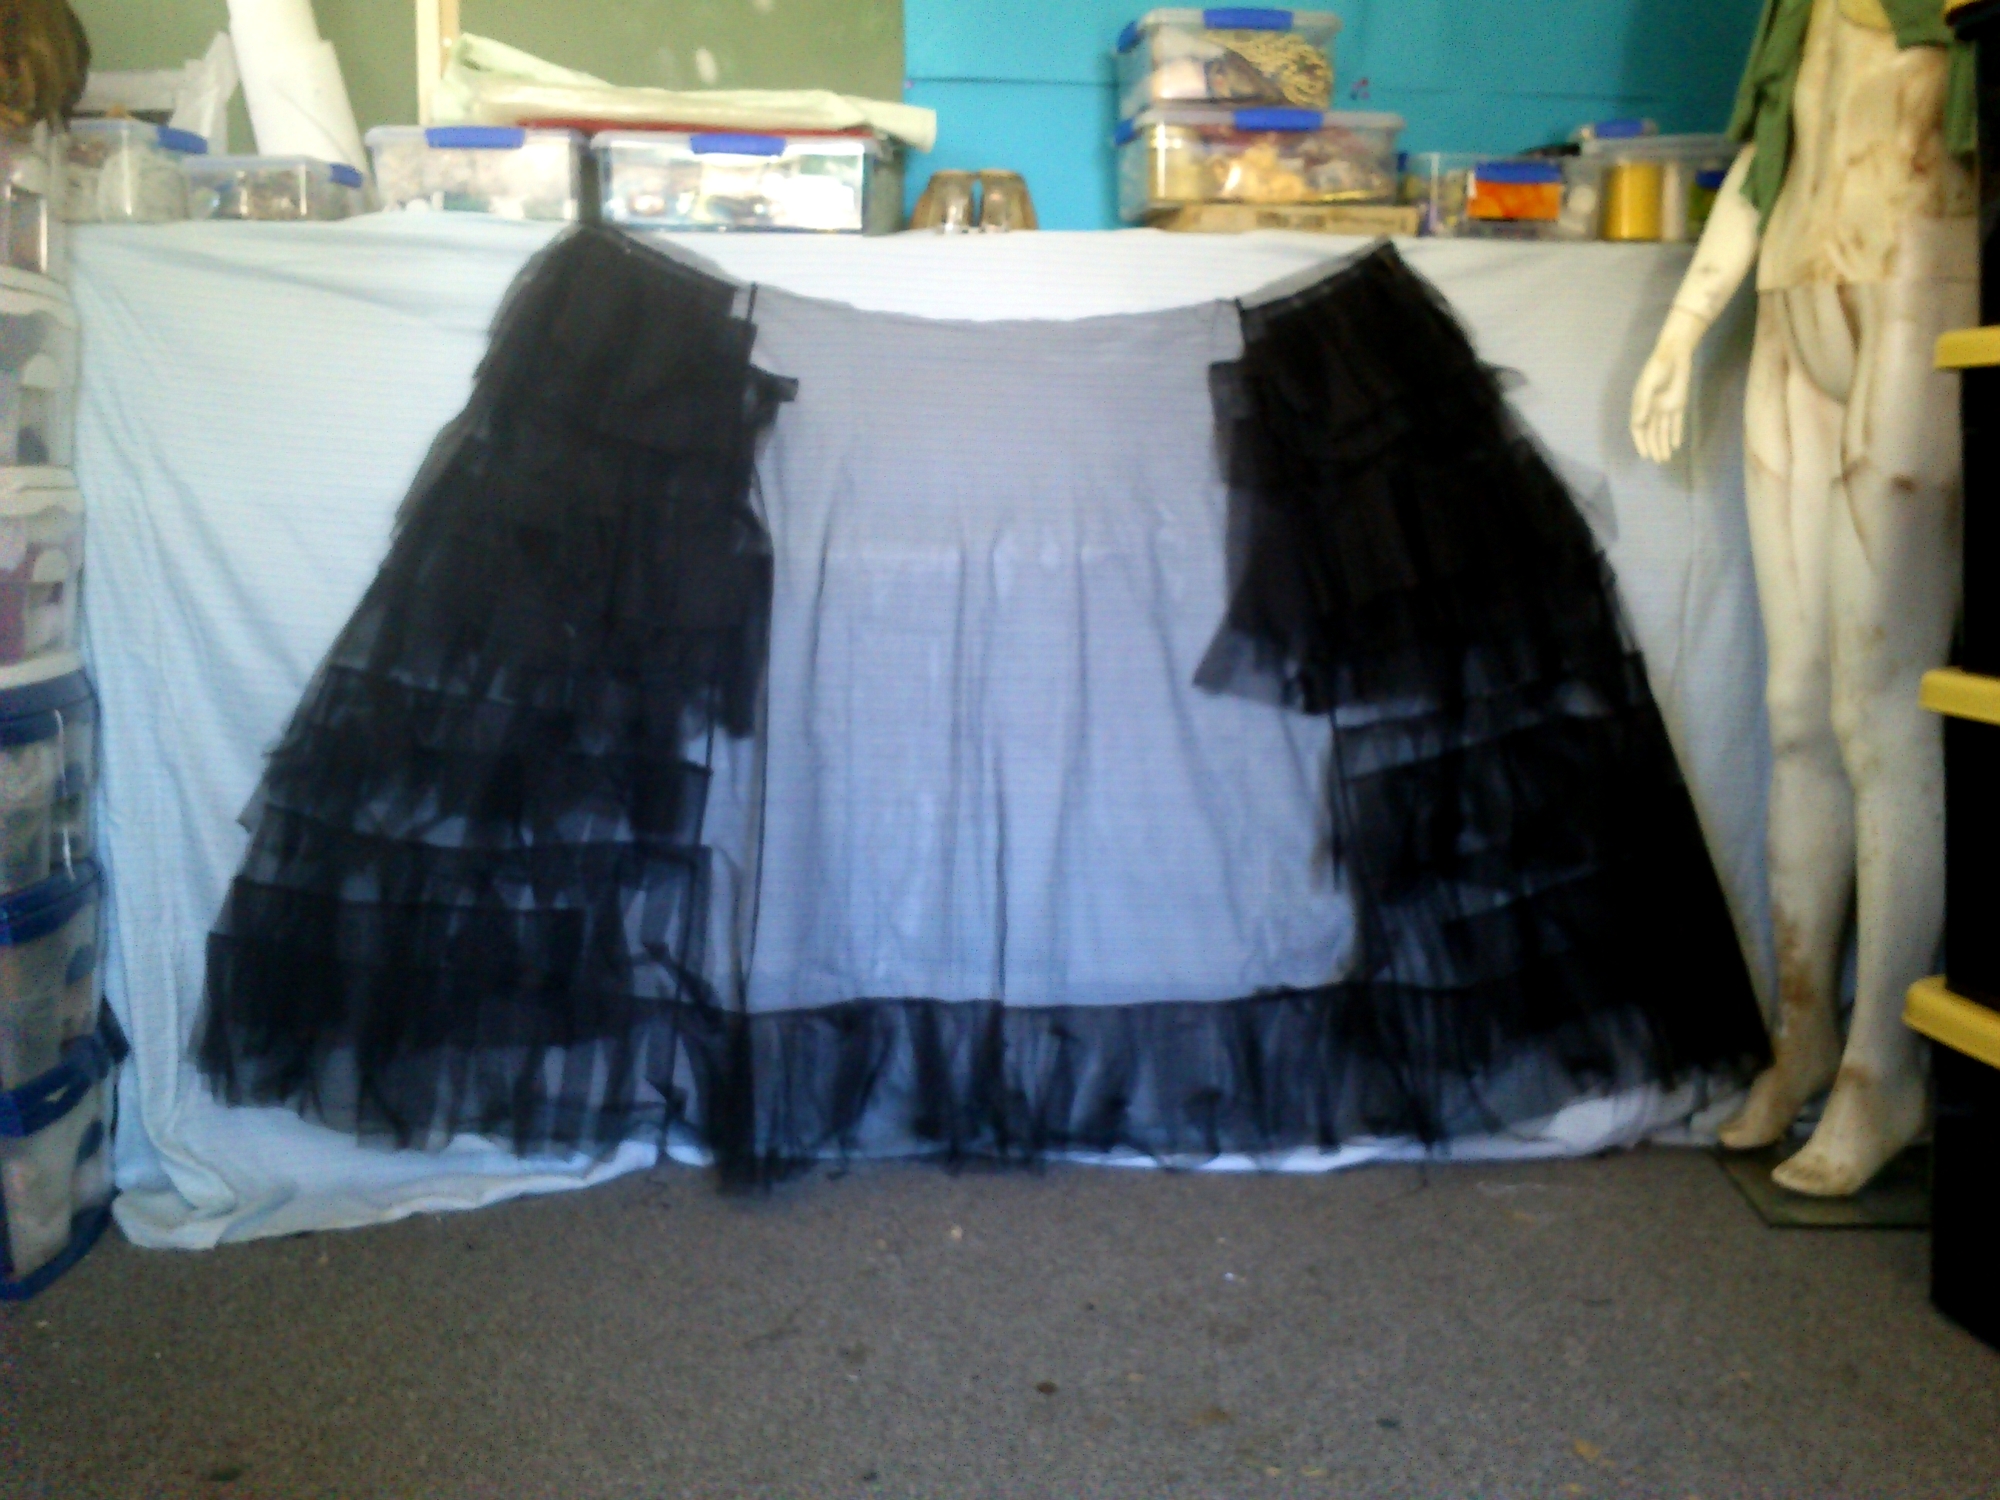
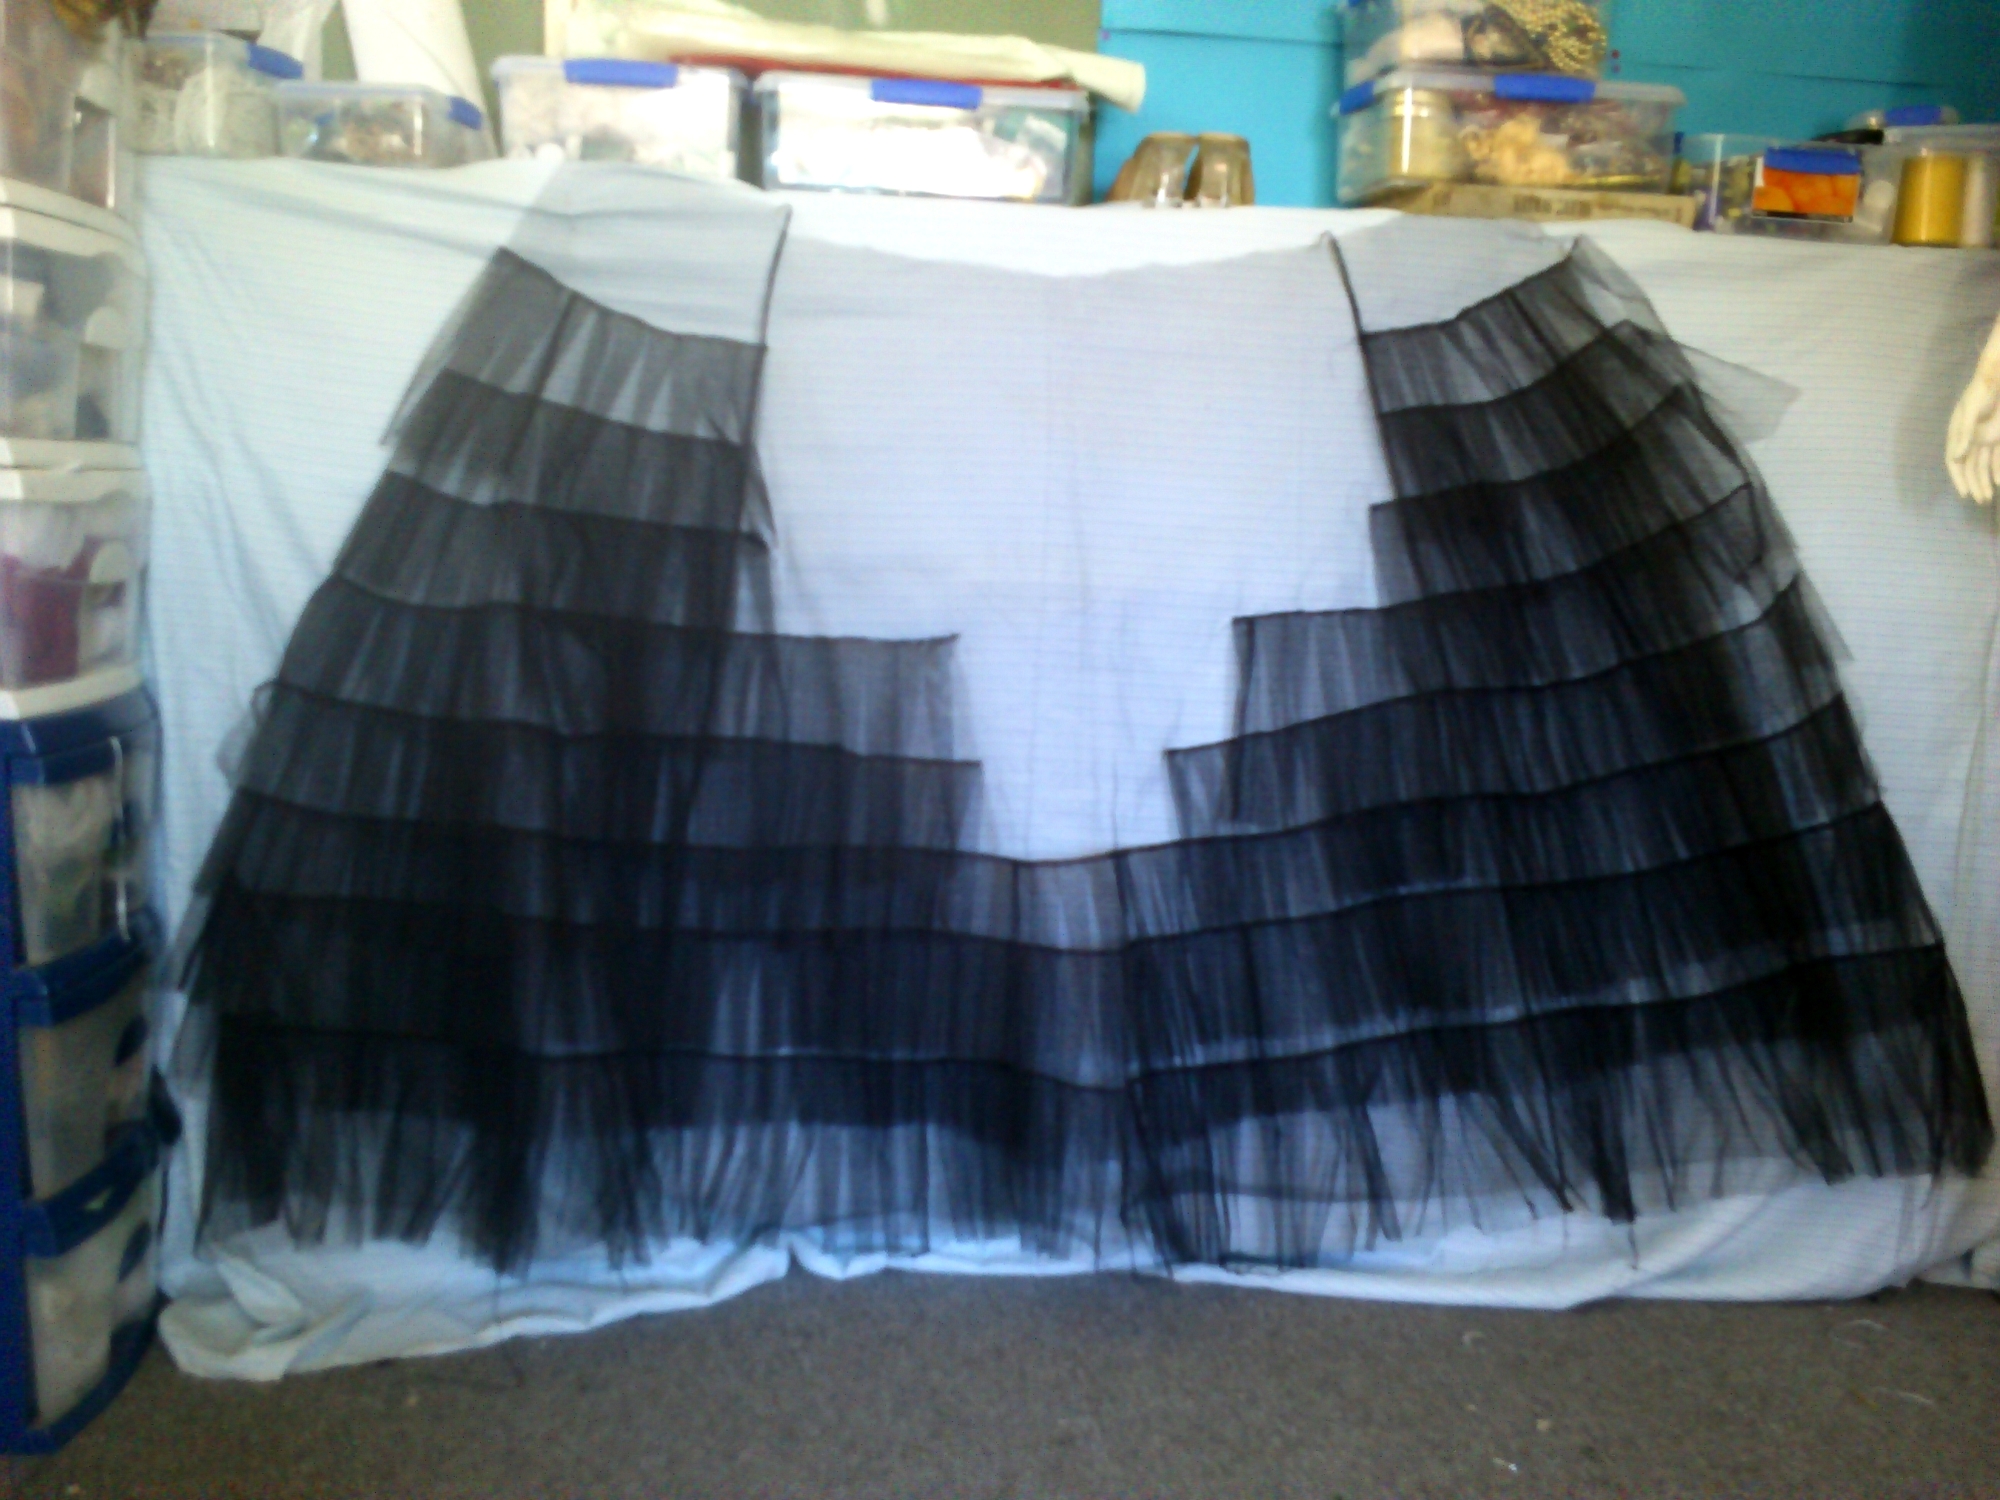
I took the original apart and made an extra layer so there are four all up with ruffles on each. Put face to face so that all the ruffles are inside rather than directly under the taffeta skirt or against my legs.
And it stands up by itself..


The third layer is the most supportive:
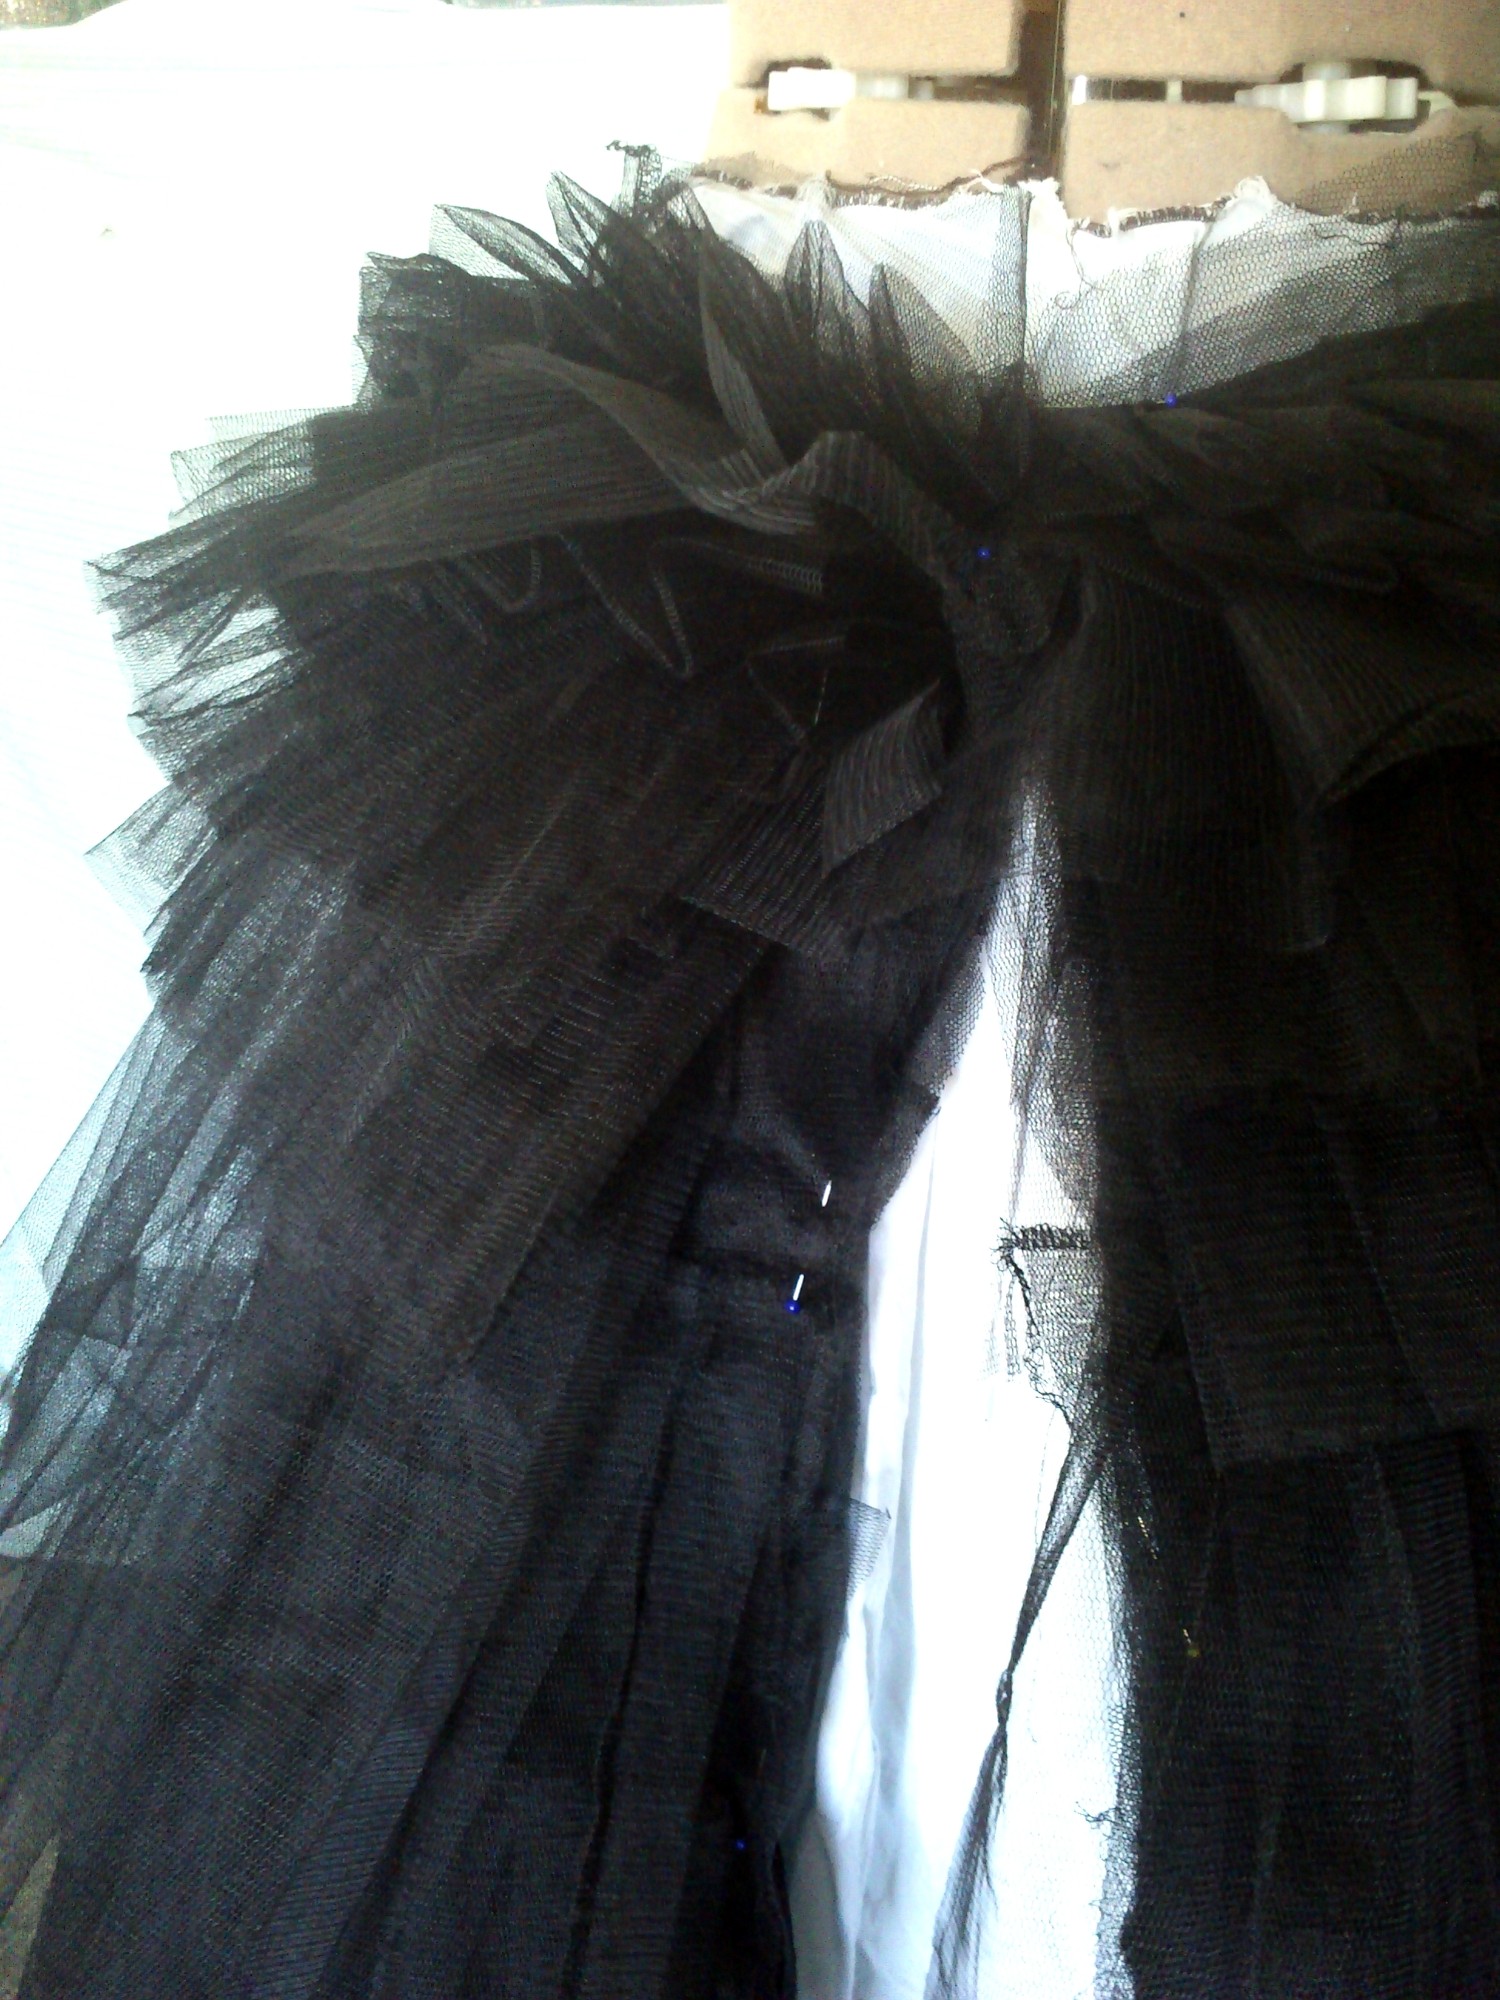
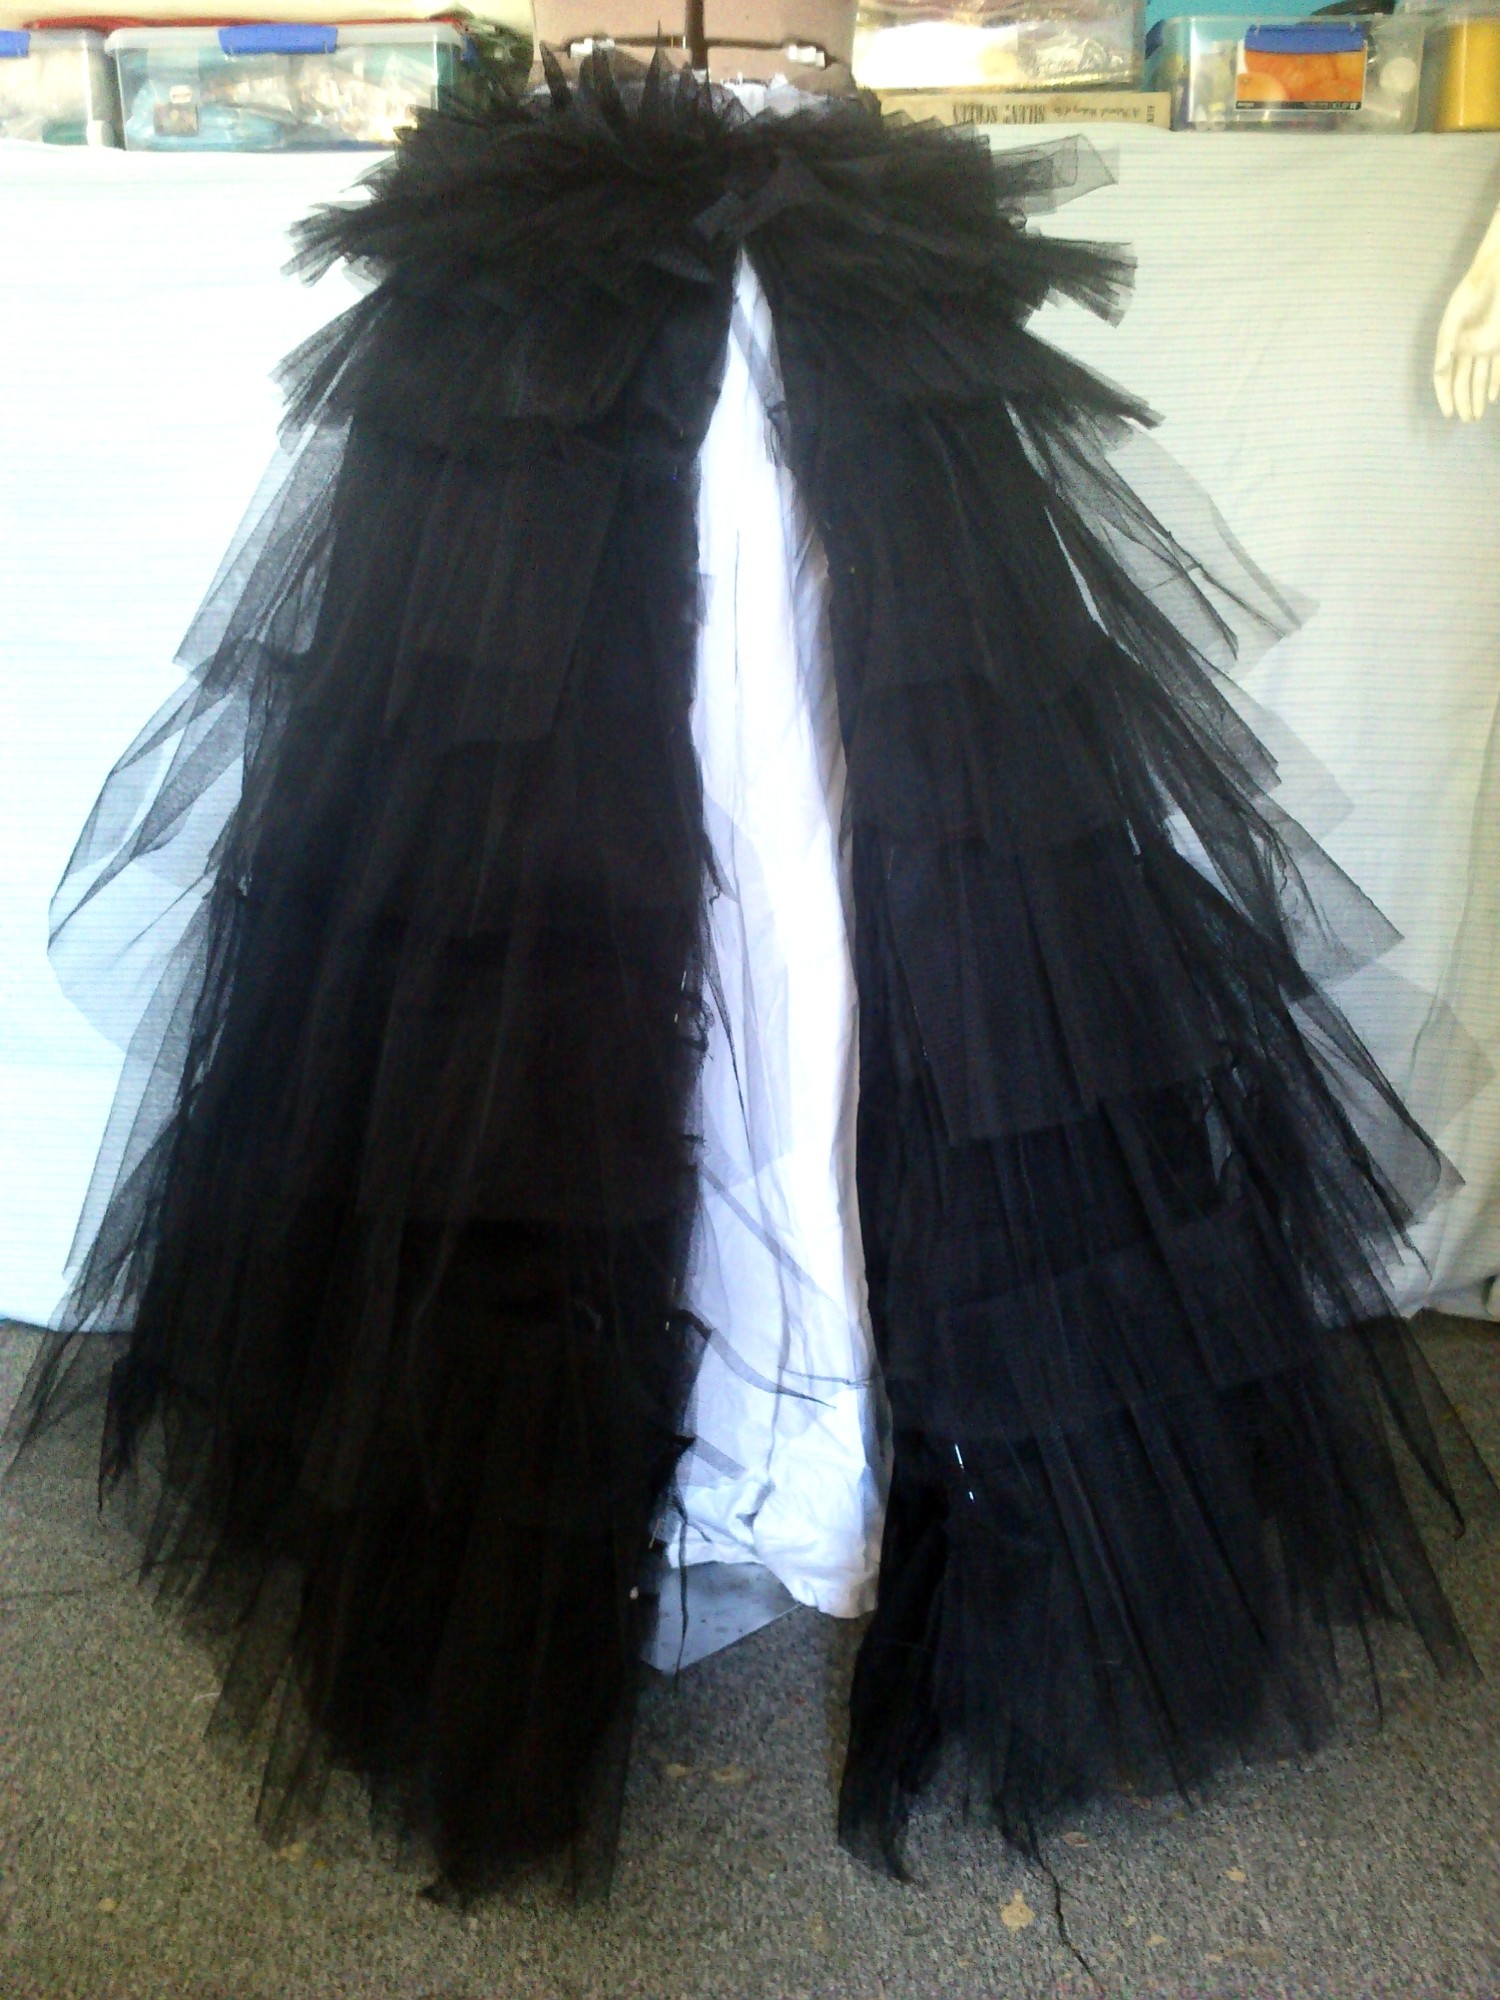
The ruffles are super dense at the top to create a bit of a bustle.
Outermost ruffles are soft and long (three rows). So the following photos are from outside in:

Happy N7 Day to you weirdos in the slower timezones 😉 My own N7 celebrations fell over because 5 hour power cut and half battery on all my portable devices.
But I am about to refresh my hair colour to a more Lizzie Shep colour 🙂
(Photo credits:
1) Matt and Kristy (http://www.flickr.com/photos/mattandkristy/10488492154/ )
3) & 4) Me 😉
5) Fraser Clark (http://www.flickr.com/photos/judasnz/10569174124/ )
5) The friend of the maker of the Pinkie Pie Cannon: http://reddit.com/r/gaming/comments/v4u4h/so_my_friend_went_to_a_gaming_expo_and_took_this/
Right to the dye and shower and lots and lots of scrubbing with Ajax to clean up after! Will miss the pink-purple hair but it is fading and this should just liven it up a bit. I’m tempted to just put in a stripe of red to be honest…