See, buns for supporting horns/lekku etc. It’s not a made up thing 🙂 I think the slots on the top of the support also pass her hair through and you can then pin/tie behind an use front hair and extensions to hide everything.
https://www.youtube.com/watch?v=-KmK0XdntGk
Evil Fairy clip, the darn tabbard is closed all around so I am now a bit lost as to how to make this work. Her robes turn in to an open cape as she races across the moors. That may be the CG model but surely they didn’t just cut out her robes for this? Mind you the original robes make zero sense in terms of layers and cronstruction…
Kristen / 6 Jul 2014 11:38pm #WOuld love to know what paints are used to hand paint lenses, must be something that sinks into the lense itself rather than sit on top, more like an ink than a paint.
Makes sense with the buns for the horns to sit on, Angie has such lovely thick long hair, it has to go somewhere. Though she also says little little buns, which makes me think of the time i had my long hair put up under a wig by Fiona Cush, who worked for Optic Nerve. She twisted my hair into many many teeny little buns that could then be flattened onto my head with pins and then the wig was laid on top. Might be a combo of both techniques to smooth out her hair that flat.
Sigh, the gown is closed up the front, but the stress folds do look like there is a facing on each side of the seam.
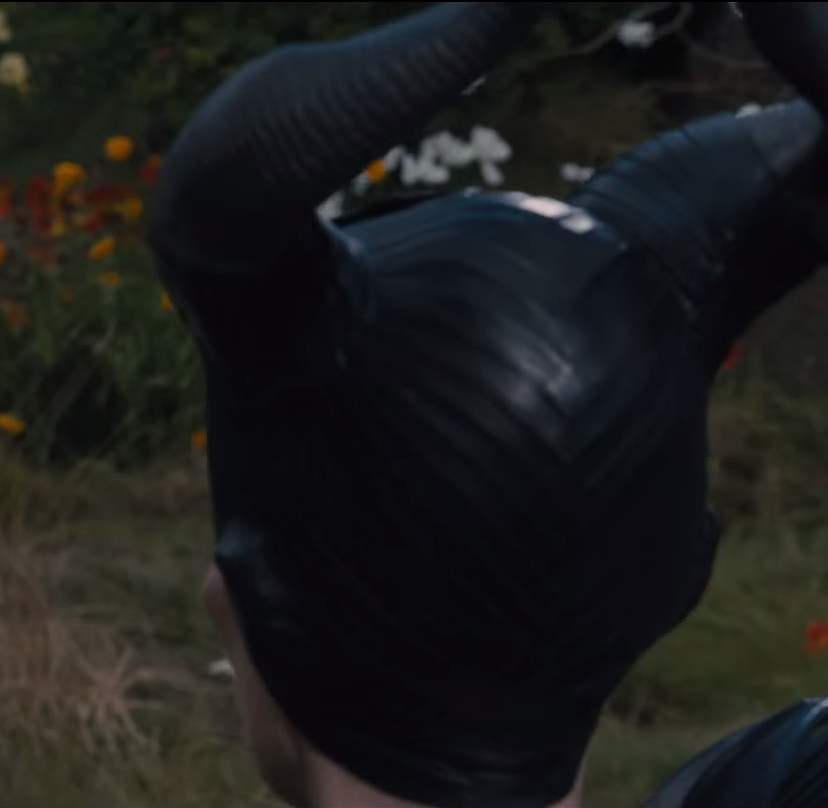
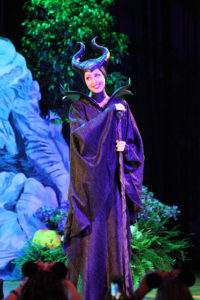
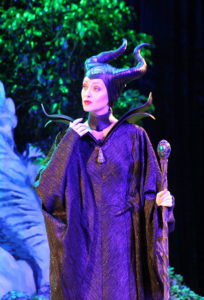
Nice view of the very molded and defined shape at the back of the headpiece. Very twilek in shape of the back of the head, curves up to an adze shape at the crown almost.
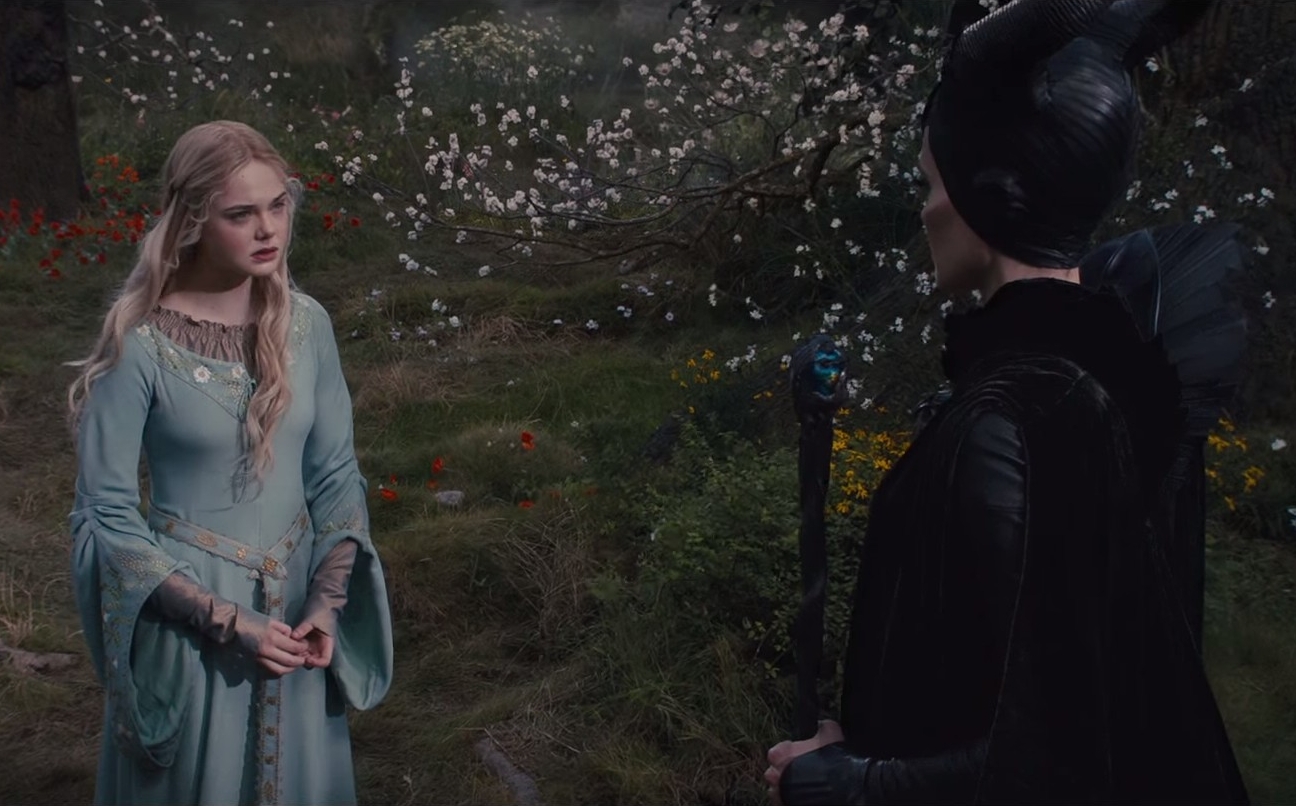
There is a very defined flare as a separate piece in CB. Also, I adore Aurora’s Ophelia gown. So I left her in this grab. I’m sad few people are wanting to do this costume as it is so beautiful. I’m not 15 so… Mal is more me 🙂
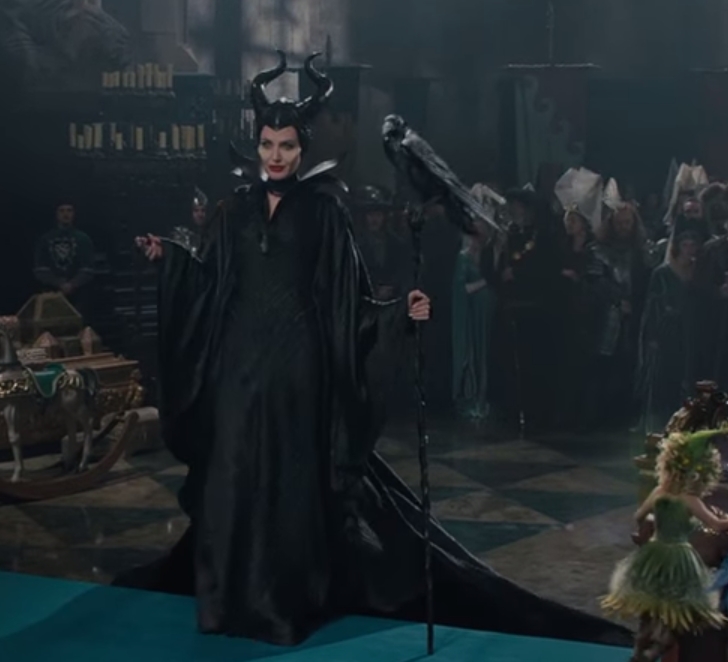
Last costume was the most anticipated for the designer 🙂 And yeah I spotted so much gorgeous metal work and sigh I can’t wait to see the full thing properly.
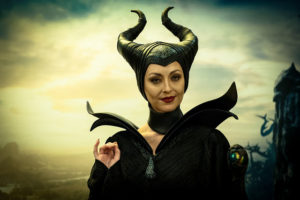
Baker created cheeks, a nose and ear appliances for Jolie that were silicone and gel-filled. Maleficent’s cheeks look sharply prominent in the film, but the appliances are actually very small. Baker explains, “It’s amazing because the appliances are less than a quarter of an inch at their thickest points and only about a half inch wide. They sit right at the crest of her cheekbones.”
Special makeup effects artist Arjen Tuiten was on set daily to transfer Baker’s designs to Angelina Jolie. “It was important to Rick [Baker] that all Angelina’s prosthetics conform to the angles of her face,” says Tuiten. “From the life cast of her head, we formed the rubber cheekbones and ears, following those contours. The whole application process, including hair weaves, which took about a half-hour, was about four hours every morning. Angelina was very patient with the process.”
Turning his attention to the horns, Baker faced several challenges. “The horns were one of the big issues because no one would want to walk around all day with big horns on his or her head,” relates Baker. “So, I wanted to make them as lightweight as possible and removable because when you have something that sticks out a foot beyond your head and you’re not used to it, you’re apt to run into things.”
Baker and his team sculpted at least four different designs of horns. “I did some drawings and modeled some of the designs for the horns on the computer,” says Baker. “Then we actually ended up sculpting them. We chose the one that we liked the best and did all the work using that one design.”
For comfort, the horns are very lightweight and thin, and made of urethane casting resin. “After much experimentation, we ended up basically with a maxi-form skullcap that had on it the base of the horns and the first inch or so of the horns,” explains Baker. ‘The rest of the horns stuck on with a magnet. They were very strong magnets that held them in place but we could then pop them off in between shots.”
Goodwin’s most challenging designs for the film involved the battles scene. “From early on, I had an idea for a helmet and footwear for her battle scene, which had to be hard, formidable yet elegant. The helmet’s sculpted shape is covered in leather that looks reptilian and this detail was continued onto the boots, which had customized bone-like heels. Together, these pieces were my most challenging as well as being my favorites.”
Lots and lots of info suddenly coming out, how wonderful!
And I am not sure if the wings are made for the exhibition but I shall work out how they were made (one set was for young Maleficent) as they had to have worked out how to fake feathers too
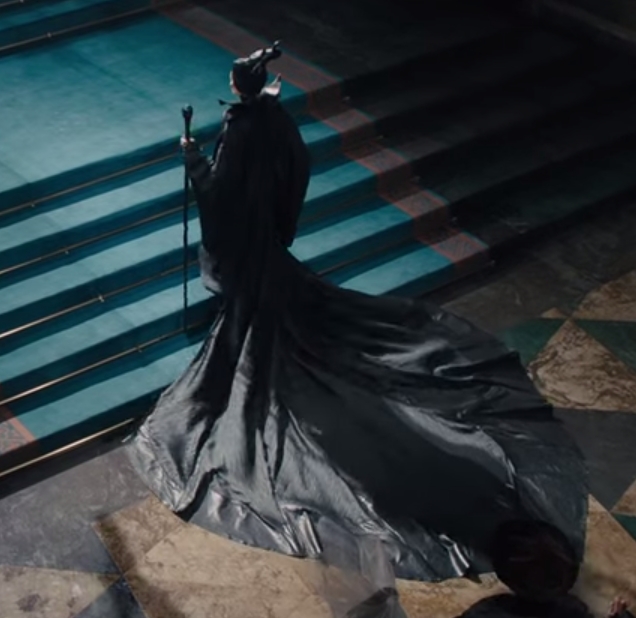
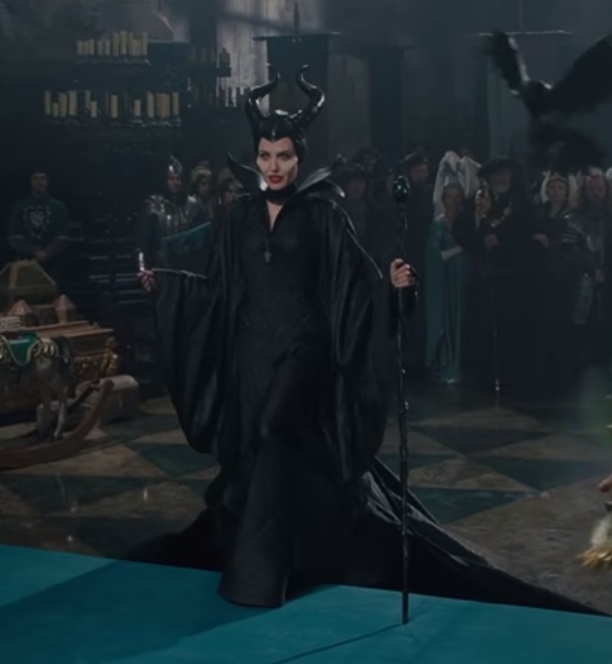
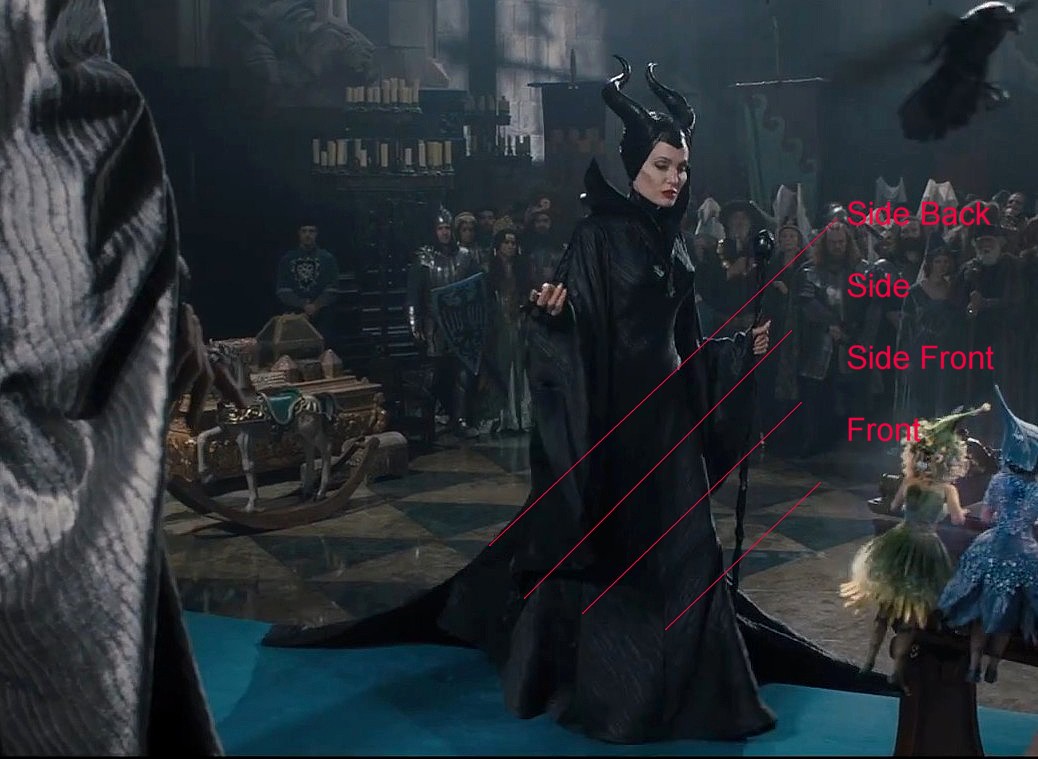
Hmmm they totally removed the train, I mean totally, which pulls the skirt round the back. But it confirms the sleeve weirdness: the hem is oversewn, overlocked or what but it’s not a turned hem- there is some major fuzzy happening along the edge. Also there are notches on the sleeves. Inside and out.And I was right, platforms Just with narrow heels.
Real python is not for me but I can see some hand painting on the silk that peeks out he velvet gown. And the collar and spine details are lovely. And the duo tone velvet (green and maroon.)
Click to see details of the heavy robe and umm.. suede???
I had suspected but a few images put together really do reveal this quite clearly.
If you watch the Awkward Situation clip you can see how the train skims the ground without folding or dragging. If you watch the edge of the train as she goes up the steps it even catches and springs just like a hooped skirt. If you have ever worn hoops or a cage crinoline with flat steels/plastic it wibbles a bit like a jellyfish.
Note how the front edge of the train stops, it doesn’t just pull like fabric under tension it moves like there is a wired edge. And in movement the edge then springs forward once released from that first step.
Here the train is caught on the last step but this is mainly to show the front of the gown is not also stifened. It does have a fairly deep hem which does has some sort of facing but it still flows. It also looks like Angelina is wearing platforms to add to her height- note how the toes push the fabric out above hem line.
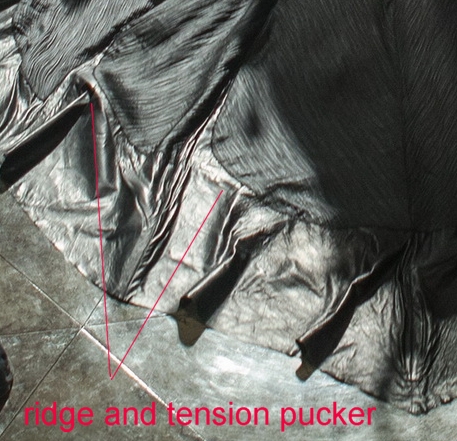
You can also see the wired edge also extends in to the seam where the train is sewn to the gown. This makes sense to help support the full train. Having now made mine it is very heavy indeed.
This then explains why that seam appear to be top stitched or otherwise additionally reinforced in other images.
So I had a look at stills again and they do also support the idea of a supported train. In the still below (screengrab) you can see how the train edge is under a lot of tension, but also there is a mystery “bump” near the join between the leather and shell fabric- it does not correspond with the step or any fabric componant of the gown. This is most likely due to a support underneath lifting off the ground- as she is turning this makes sense.
And in this still you can see a ridge that follows the main curve of the leather. And even where the layers are caught to the support hoop in the 2nd to left panel.
So a U shaped hoop on the bottom of the train and two gently flared strips inside the front edge of the train. Imagine a curvy scoop. To make mine I’ll be making a tube of fabric to tack to the underside of my train. And a wrapped facing on the front edge. Then wrap three layers of plumbers coil with sports tape to insert just before putting the entire piece on. I will have to use temporary fastenings to hold the ends in place so as to be able to remove them for convention safety!
I have also just overdyed a huge metal zip (possibly for a sleeping bag) so I will have a super mega firm fastening that will survive the pull and drag of this train. Then I can cover it with a spine.
MALEFICENT explores the untold story of Disney’s most iconic villain from the classic SLEEPING BEAUTY.
*arm flail* Someone please go. The gown will be on display! Though on the other hand I will be aiming to wear mine at about the same time so don’t really want to know what I did wrong! I think I have my full panel at the back on the wrong gore but I’m thinking I may be able to swap it out… I hope. I need to even them all up anyway and it is all on the bias. I have since switched around panels… nightmare!
I can already see there is some stay support at the front neckline which is what I was planning on doing because, hello bias cut gown and V neck to the base of the neck is just made for horrible stretching.
Also hooray for google searching for help for another cosplayer (looking up support structures for things what hang way from the head) and finding this 🙂 I am now super mega happy with my fabric choice 🙂 I just need 10m of lining and hooray!
Oh and my horn molds are curing well 🙂 I was worried they may be a bit jelly like but they are curing well 🙂 I can do the rest of the keys tomorrow and leave them soaking in soapy water. Then take All The Antihistamines, again, to make the jacket and then finally get filler and fibre and resin all in one spot. Erg.
And even more, scroll backwards for images from the meet and greet.
So from the recreation:
The gown is less full but is made from a knit mounted over a more stable fabric. The sleeves have extra details to reflect the original gown (deep wedges/notches at the hem of the front of the sleeves.
The headdress appears all in one and has more sculptural lines on the leather parts.
The collar sits wider, possibly not hooked to the choker, which is what I suspect may be needed.
The choker has a centre front seam.
The fabric is not purple but the lighting was used to make it so- another nod to the original.
The hem of the gown and the train is not as large as the original. Makes sense having just tried to wrangle the back alone….
There are skirt gores and they are similar to the ones in the Game of Thrones Westeros gowns. But narrower! There is a sculpted detail like a tail that covers the top of the gores and appears to go through in the recreation, it appears flatter in the original so may just be butted.
The back has a spine of some sort. Probably to cover a zipper- a good quality metal zipper as per the burlesque corset reblogged the other day 🙂 I’ll attempt a sculpted urethane piece.


2 Responses to “Even more maelficent references”
Kristen / 6 Jul 2014 11:38pm #WOuld love to know what paints are used to hand paint lenses, must be something that sinks into the lense itself rather than sit on top, more like an ink than a paint.
Makes sense with the buns for the horns to sit on, Angie has such lovely thick long hair, it has to go somewhere. Though she also says little little buns, which makes me think of the time i had my long hair put up under a wig by Fiona Cush, who worked for Optic Nerve. She twisted my hair into many many teeny little buns that could then be flattened onto my head with pins and then the wig was laid on top. Might be a combo of both techniques to smooth out her hair that flat.
Reply
Kristen / 6 Jul 2014 11:42pm #the contact lense company site – http://www.eyeinkfx.com/
Reply