Maleficent sculpt progress

I haven’t shared here, I have just been so tired after sculpting (it’s full body, standing, sitting, holding- something this size and floating in the air? yeah you need to use your whole body!)

The latest huge 10 update has also changed all my import settings and my phone is not happy! So I’m still waiting for my images to import before going further 🙂

October 8

sm_dsc_0633 sm_dsc_0656 sm_dsc_0670 sm_dsc_0638

After reshaping the polymorph frame using a heat gun:

sm_dsc_1110 sm_dsc_1112 sm_dsc_1108 sm_dsc_1109

October 9th:

After cutting back the polymorph with a dremel. Note the horns are so long the ends look disproportionately large from the rear view.

sm_dsc_1190 sm_dsc_1192 sm_dsc_1194

October 10th, more cleaning, more reshaping of the flare.

sm_dsc_1209 sm_dsc_1207 sm_dsc_1208

October 11 even more subtle shaping- mainly of the extra horn supports

sm_dsc_1226 sm_dsc_1228 sm_dsc_1225

Detailing the supports more aggressively

sm_dsc_1274 sm_dsc_1278 sm_dsc_1279

And then to show why I have been taking photos up close despite distortion, it’s more detailed 🙂 My phone does not like even lowish light. But here you can see the horn tips really are not like bunny ears!

sm_dsc_1284 sm_dsc_1285

wow, it worked!

malhornsmodel malhornsmodel2

malhornsnotexture

That would be a 3D scan of my horns created from about 40 photos from my plain old DSLR! I have yet to find the “remove everything but the selection” to remove the background of my workroom but.. but.. I may be able to tidy the sculpt and more the table more centrally in my room and then mask off the walls. the few errors in the capture of the horns has a lot to do with not being able to get to the back of the stand.

It did take all night, and I may have to make sure the model doesn’t accidentally wind up published but yeah. I can probably also scan the head cast for fully 3D sculpting! And I will be able to get my hands done too 🙂

day of sculpting

The very early night has been of benefit. I am indeed rested.

So today will be a sculpting day!

Also I’ll be attempting to use a 3D modelling app to turn photos of my Maleficent horns into a printable file. This will be just the start. I will then need to tidy and make the files actually printable (should be fairly easy as the scan is only of the surface, vs creating a file from scratch and the need to remove internal frames.

But I also didn’t realise just how nicely my sculpt has remained, so there may also be some tidying of the polymorphf head support. It may be worth getting my calipers out 🙂

I can also work on Ahsoka 🙂 The clay is soft enough to smooth by hand 🙂

sculpting

I did decide my hoops were going to destroy my peace of mind yesterday so instead I trimmed some wig heads (the neck to fit inside my mannequins and the foreheads to actually mimic my face shape- will turn them all in to custom wig heads along with a tutorial.) I also wound up sculpting.

sm_dsc_0863 sm_dsc_0864 sm_dsc_0867

The reality of sculpting is it’s messy and takes forever. But it’s cooler today which may make some of this easier… And I really really really really want to put those horns on a much better headcast. Don’t lean forward when making a head cast is all I’m saying.

Did stuff

Bought thread, pulled apart costume for zip for Maleficent, sewed a row of ribbon on my verdugardos, tidied channels along seams on the inside of verdugardos, covered and inserted shoulder pads in my spring jacket (also reshaped the shoulders), dyed fabric for farthingale hem (firm cotton and fulled wool) trimmed Valois skirt (tore skirt, fixed skirt) reassembled skirt pinned in full silk lining.

Now I think I can have a break, but I may wind up trying to do more of my Cleves hem trimming.

Early start to what should be a good day

First a shower, I am online with a coffee to wake up. Then removing some clothing from my project workboxes, and then I can work on my real passion projects:

  1. Vasquina y ropa y manga redonda. It still needs a jubon y manga justa. That will require my embroidery frame set up to lay the miles of trim on!
  2. Maleficent Christening Gown- so close to finished, and then I can work out how much leather I really want. Also I have a date for this one now 🙂
  3. Mina Red Gown- well I need my corset finished to refit the bodice. My new mannequin is amazing so should be much easier.
  4. Marie Antoinette silver gown- I had some fail with finding enough colour remover, I have it now and can press it all tidy.
  5.  Worth Sunburst gown- I need to transfer the cutwork, so it’ll be a case of machining the detail and then beading on the frame and finally cutting.
  6. Cleves festkleid, I am facing tiny narrow strips and scarps for the hem as spotlight no longer sells vibrant red velveteen (crimson- it’s crimson)

So that is a lot, but I’m able to put the projects in different project boxes so I can use the machine and frame.

The neighbours are also working early- so this is great. I’ll put All The Musicals on! To the CD storage box.

Why I am obsessed with the Maleficent Christening Gown

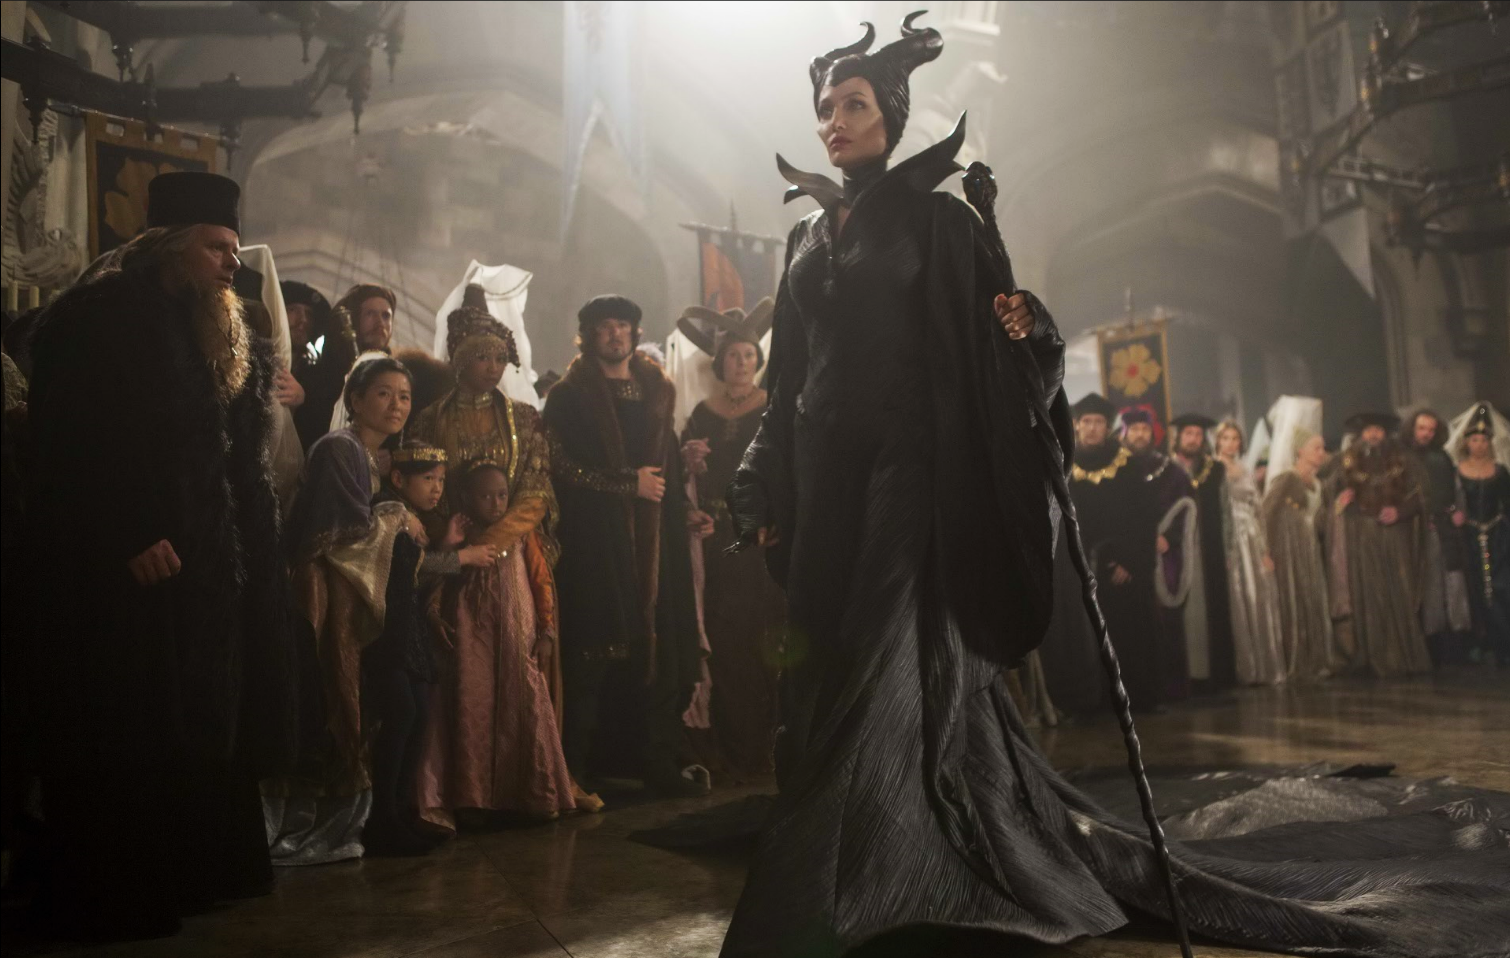
I thought I’d take a bit more time to explain just why the gown made me take a breath and stop and be able to see right into the heart of Maleficent even before we heard her words.


We’ll start with the court, as they represent the human world, and it so mimics parts of our own. The people are all wearing heavy fabrics. Fabrics that are not only heavy but stiff. They don’t drape, they hang. Even with veiled headdresses the overall appearance is of people wearing things.

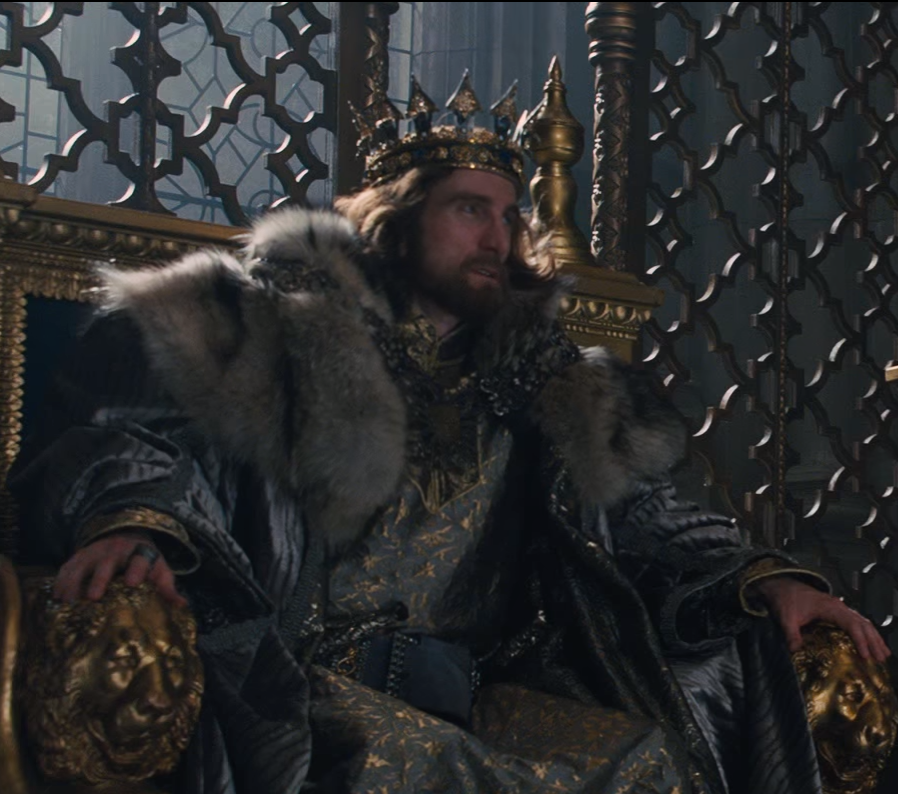
They are dressed to please King Stephan and his own clothing reflects this, and further. He wear fabric that looks like rock, or steel, there is a flat watery pattern to the fabric but over all he looks hewn like the stone of the castle.

Screenshot 2016-07-23 17.18.04 Screenshot 2016-07-23 17.26.25

Screenshot 2016-07-23 17.18.31

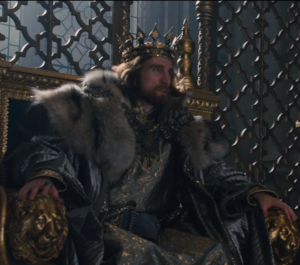
The colours are cold, he is surrounded and enveloped by his own fear and need to protect himself from Maleficent. He has waited years for her to truly confront him.

More than that the way he is dressed is how we perceive kings and queens of the past to be dressed, to impress but impractically and in these very heavy robes.


And then there is Maleficent.

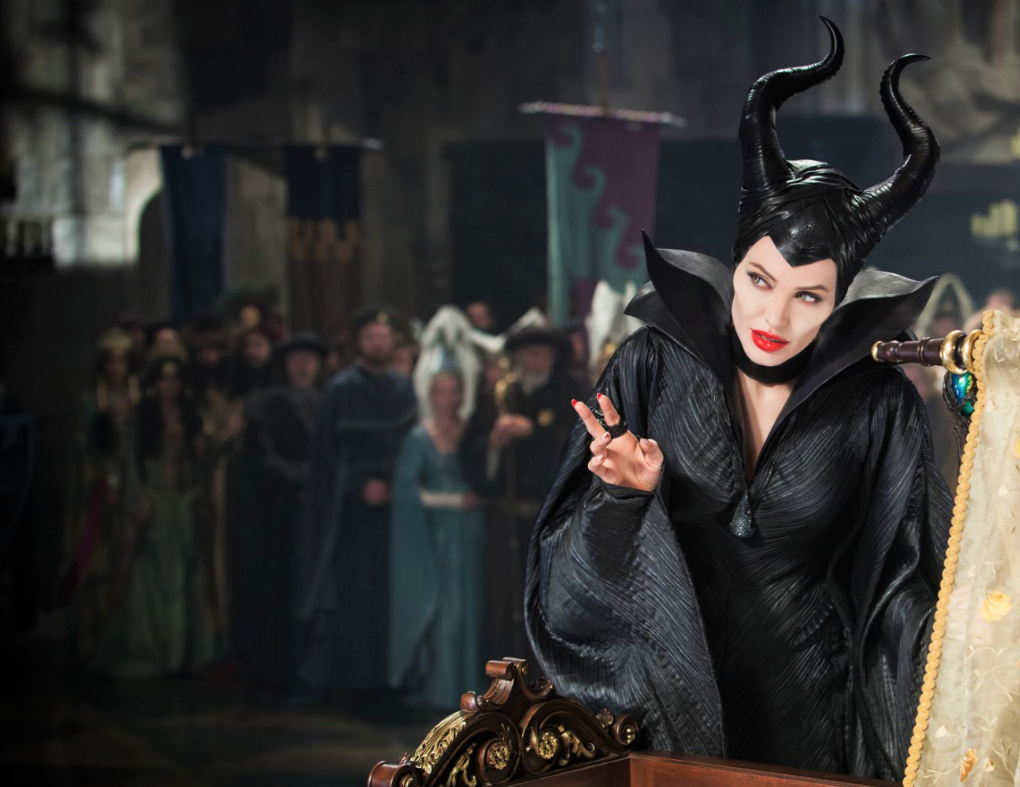
And what she wears is a huge statement to Stephan and the people in the room.

Maleficent was not invited, she is an outsider. And she made sure to not just let everyone know she knows that, but she does so using their fashion, what is familiar to them, and totally makes it her own.

Screenshot 2016-07-23 17.49.05 Screenshot 2016-07-23 17.49.12

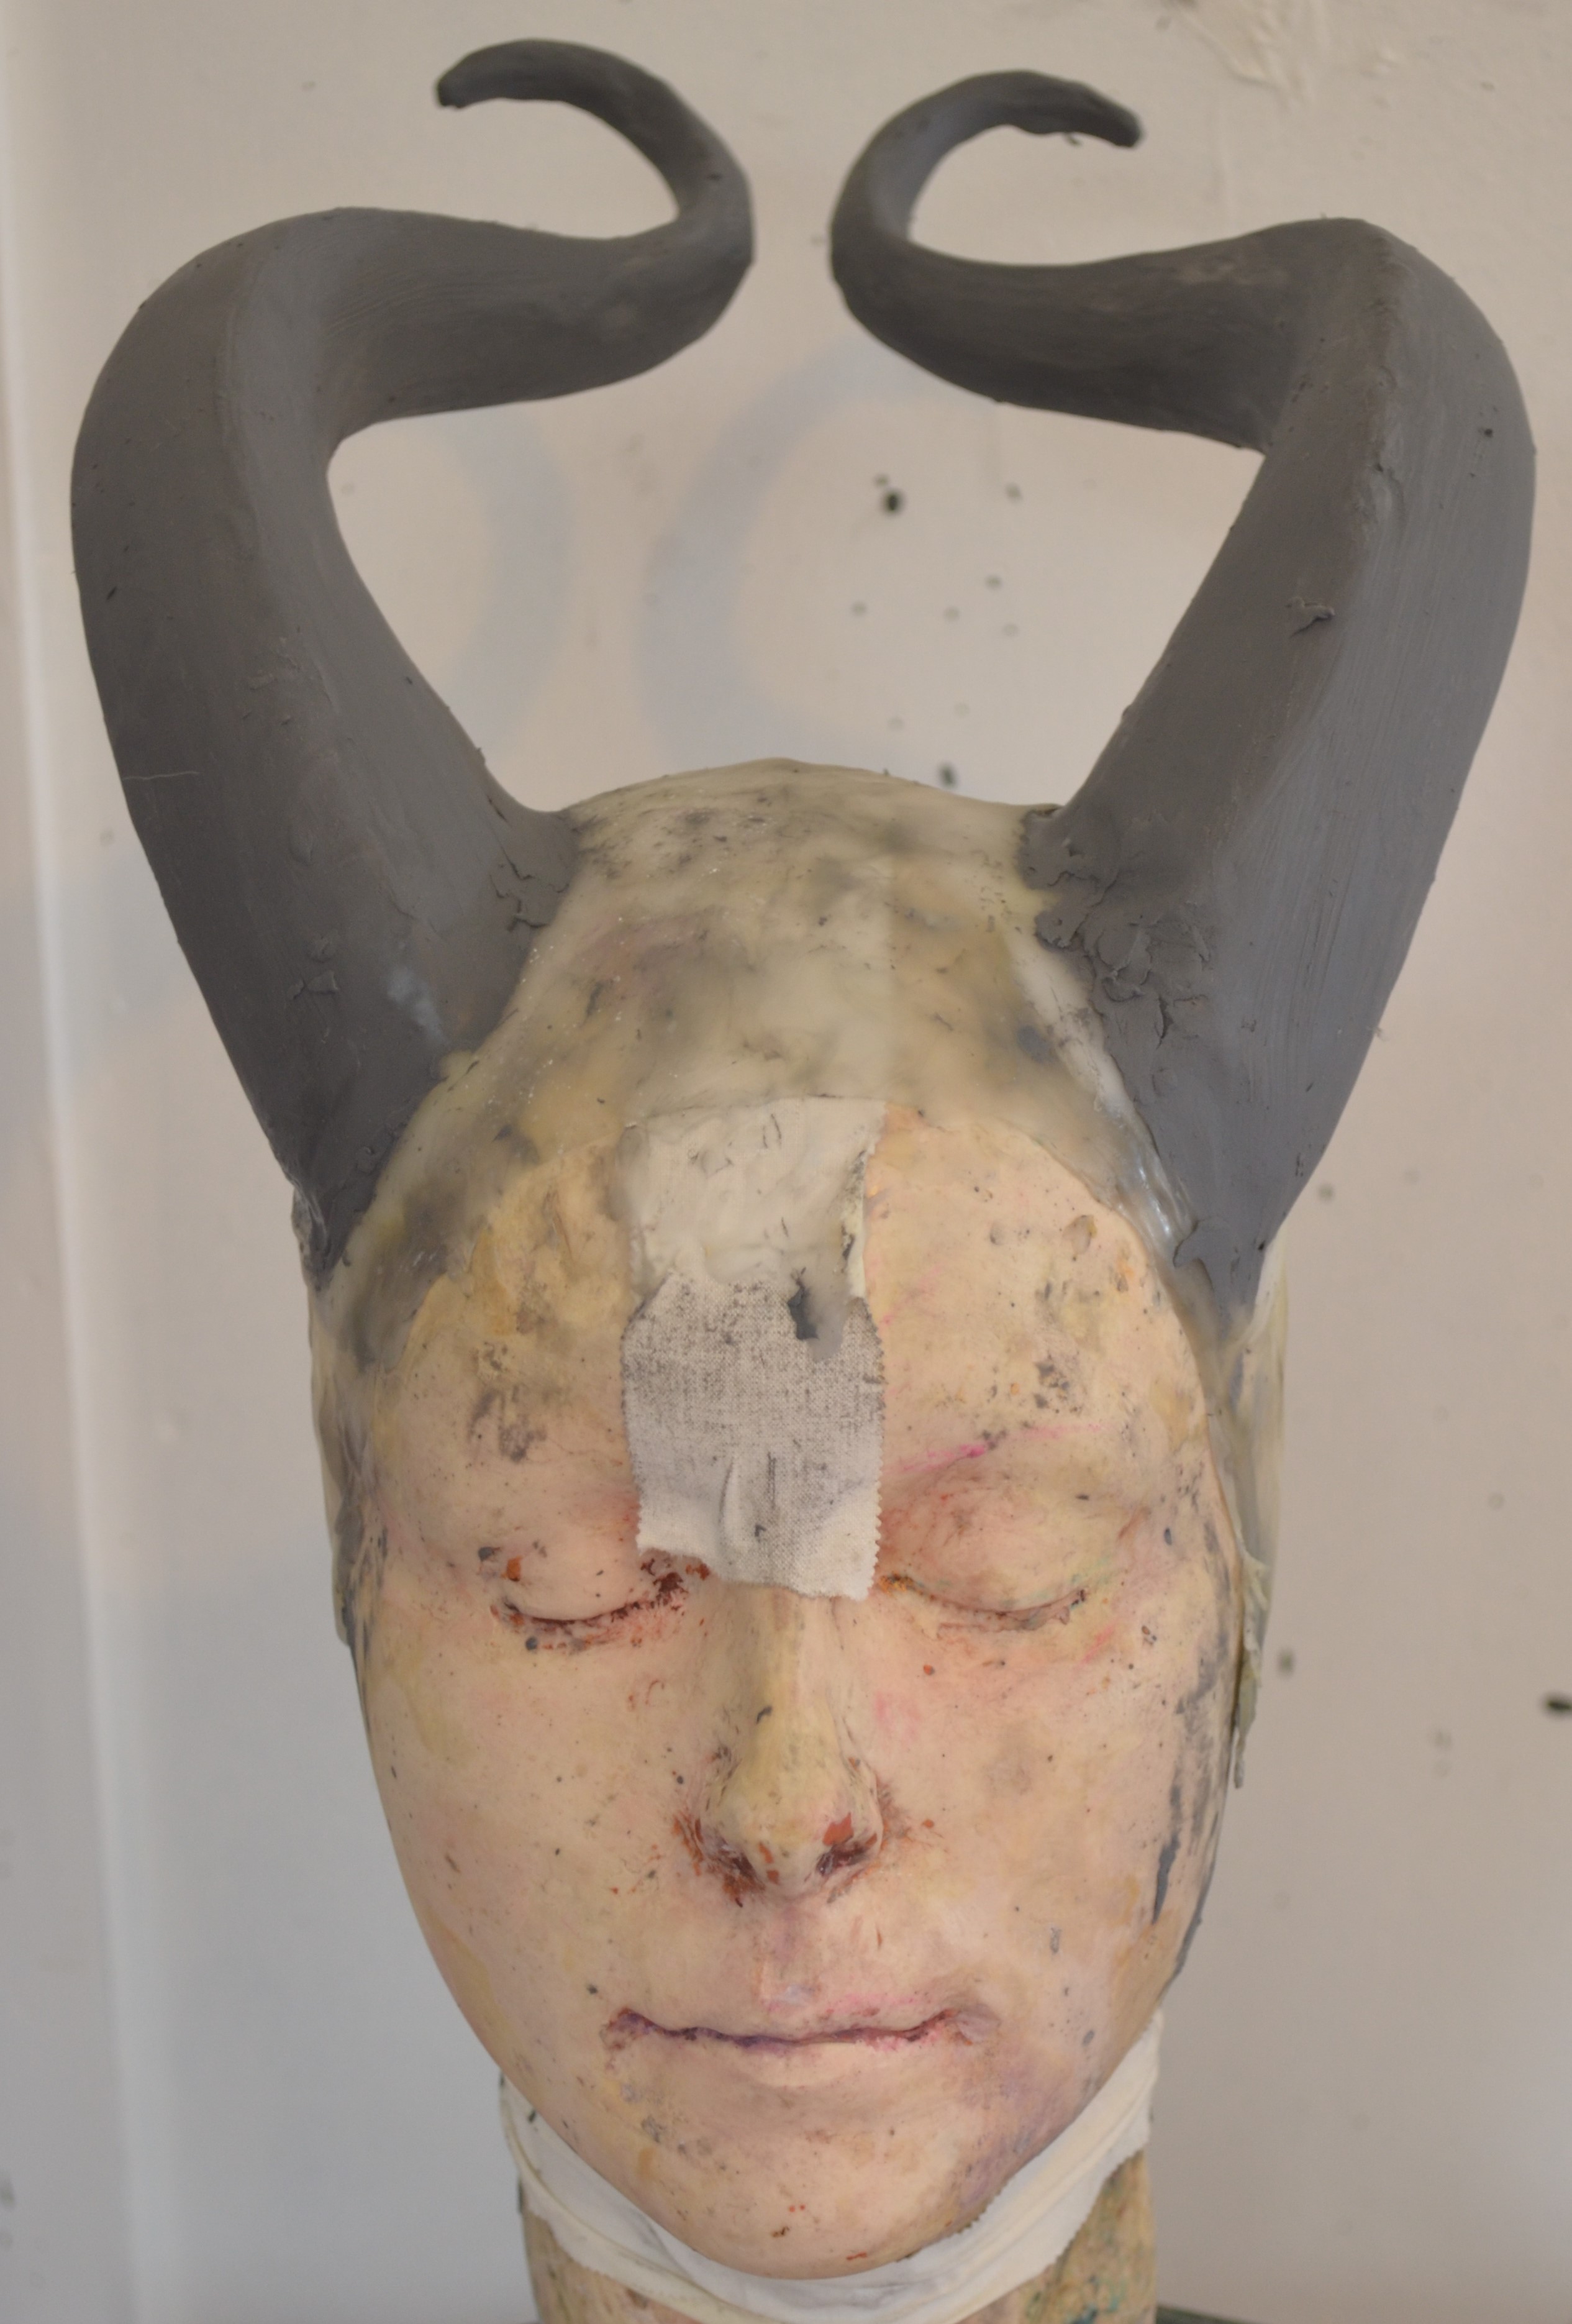
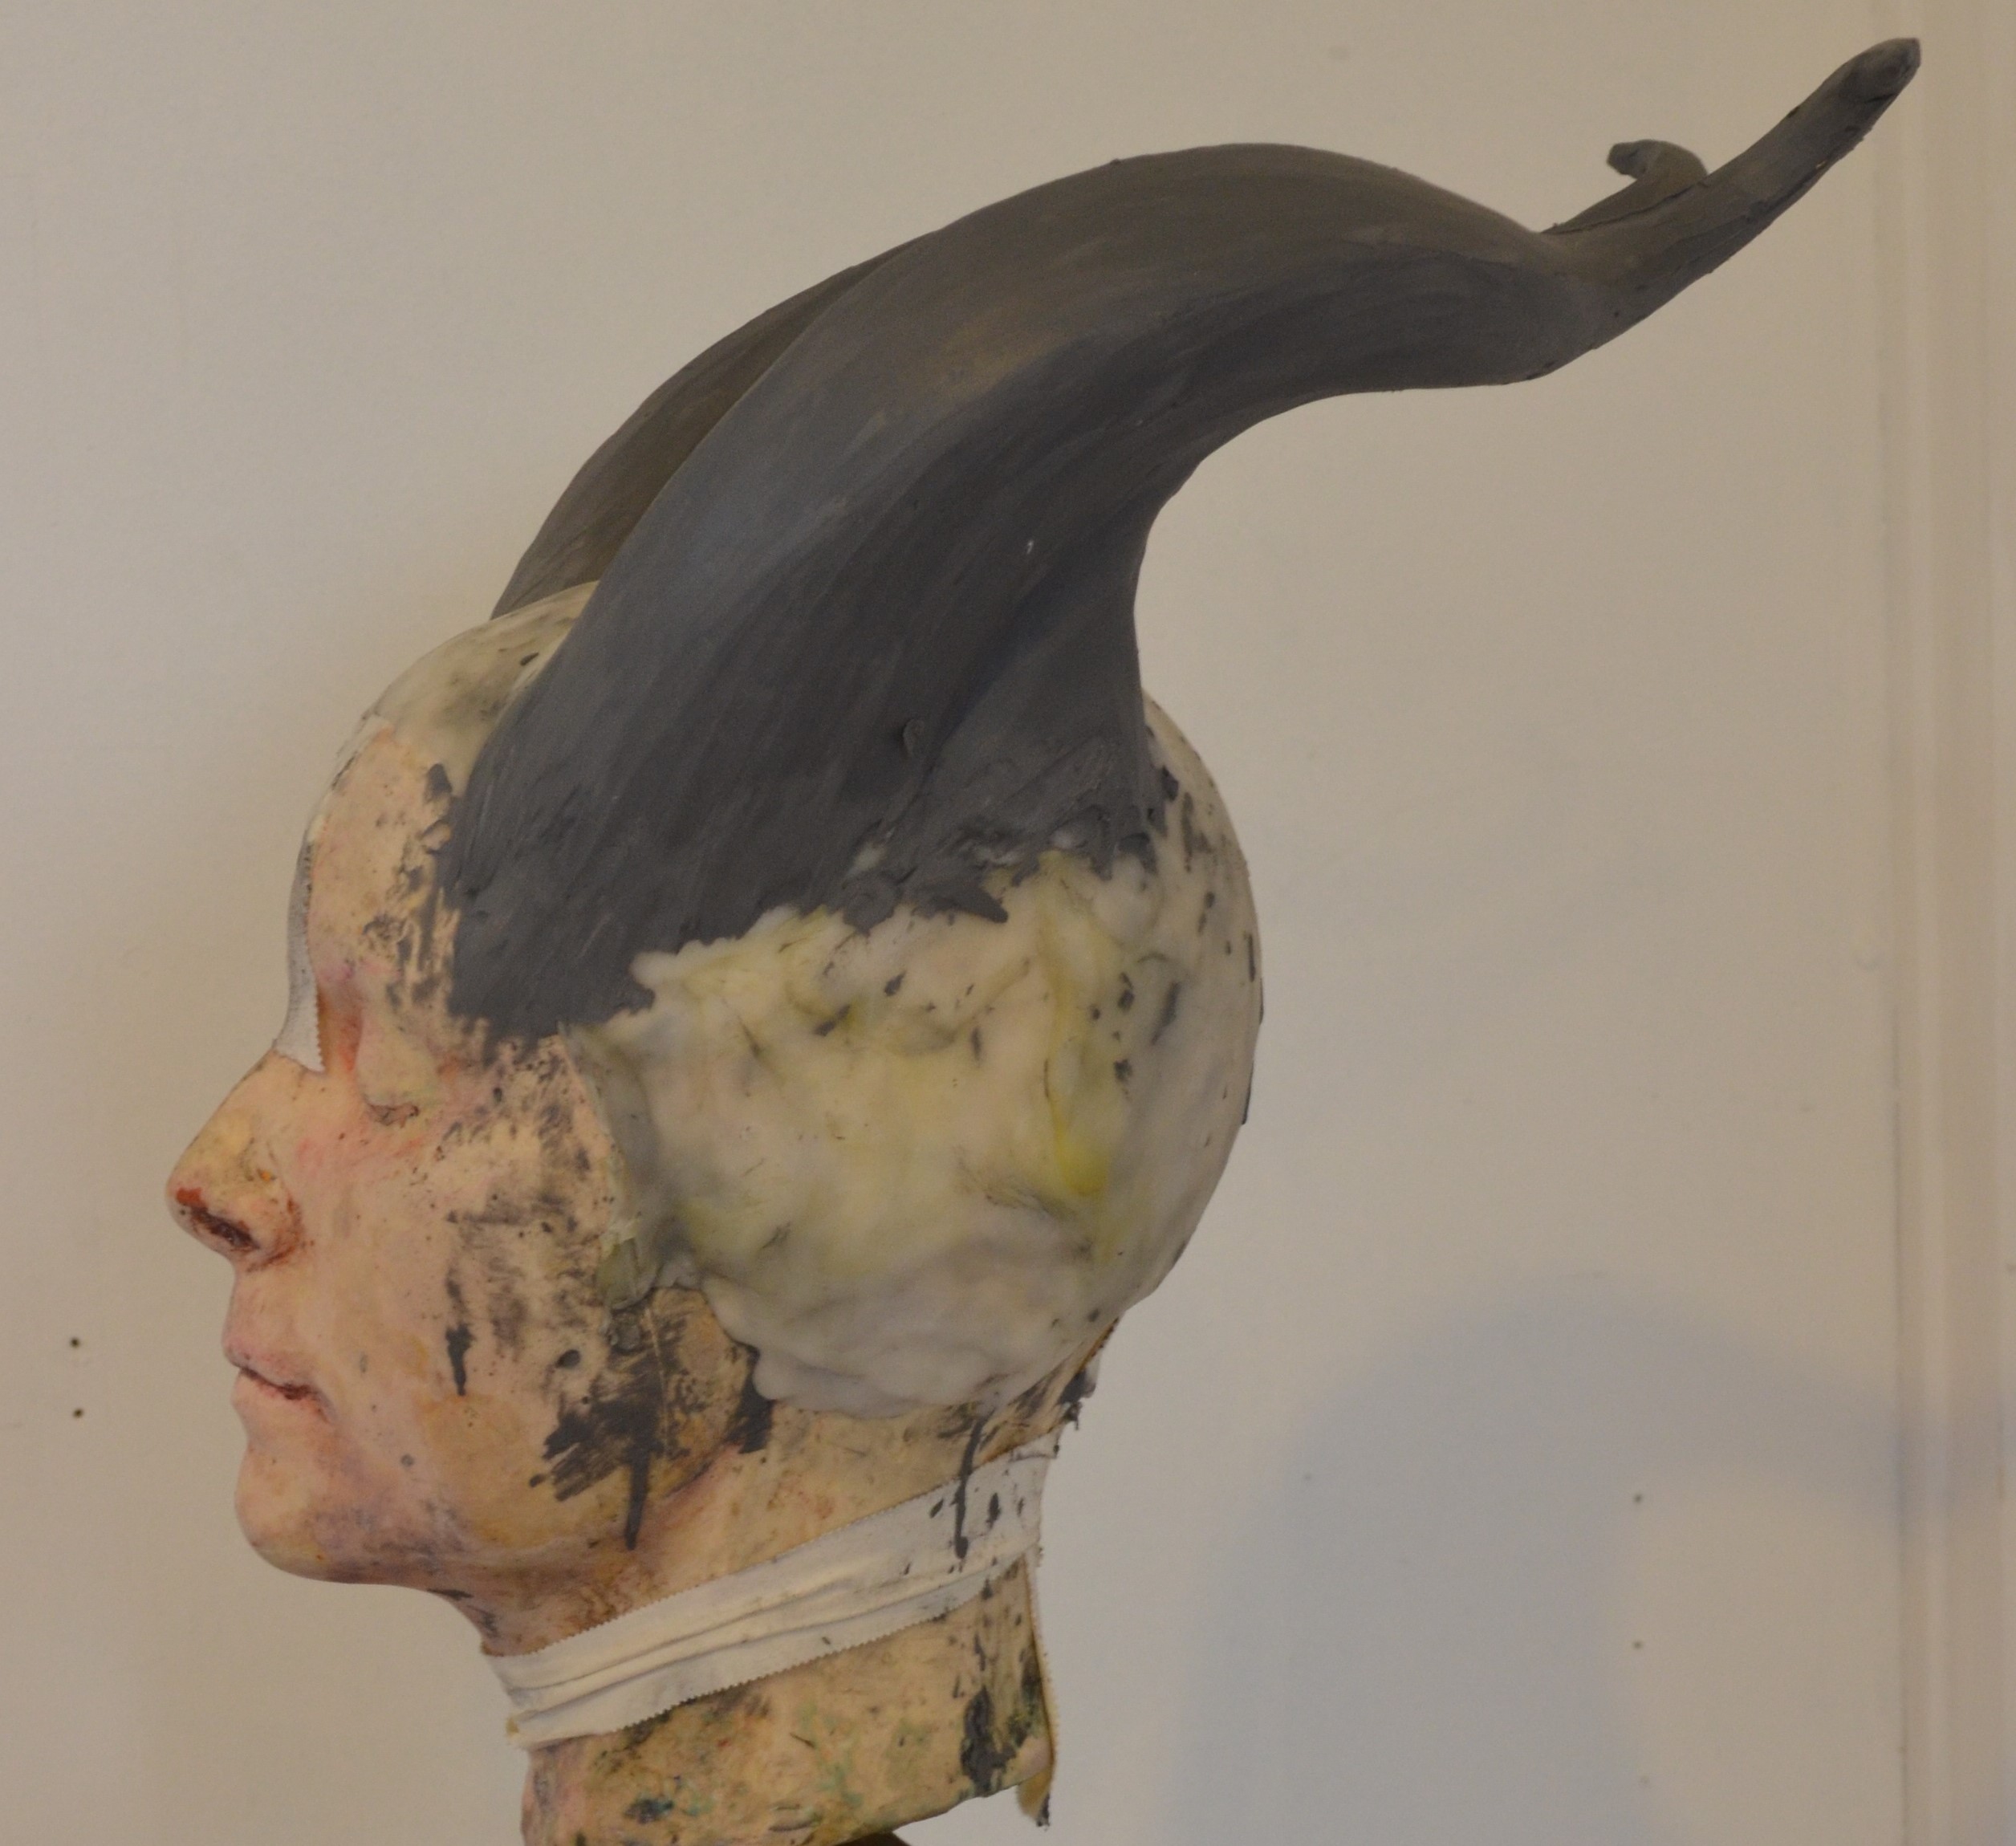
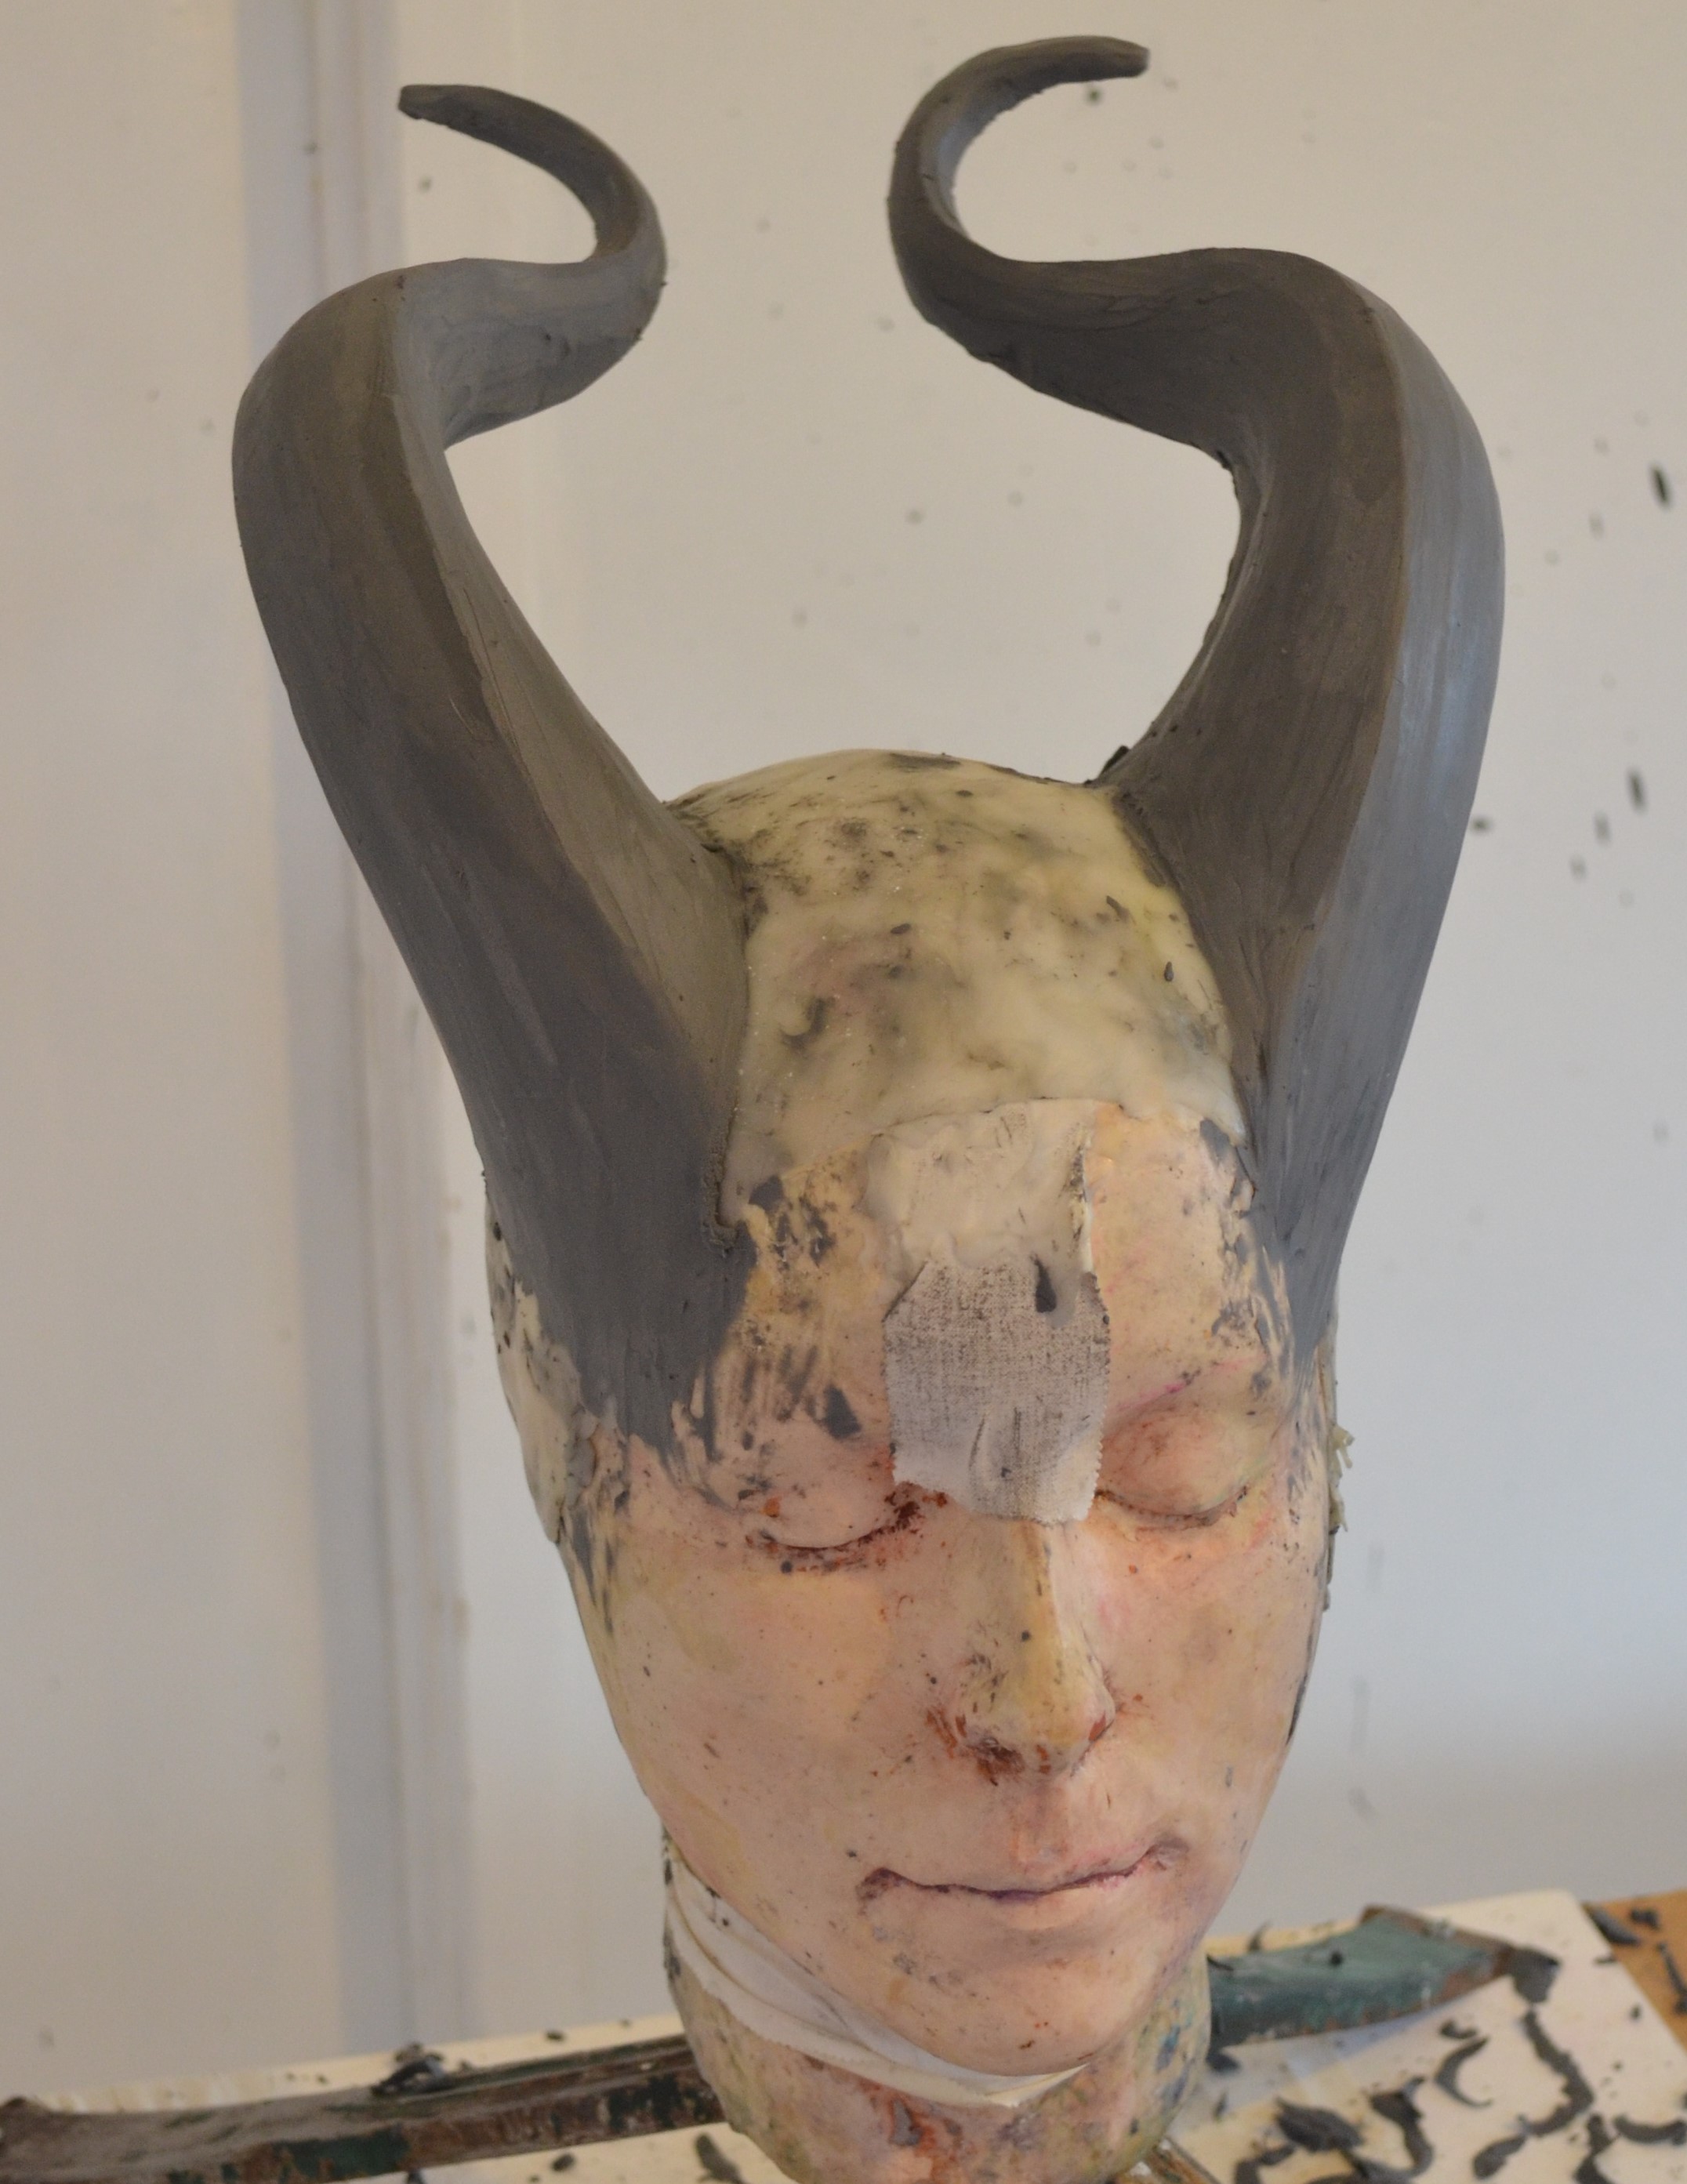
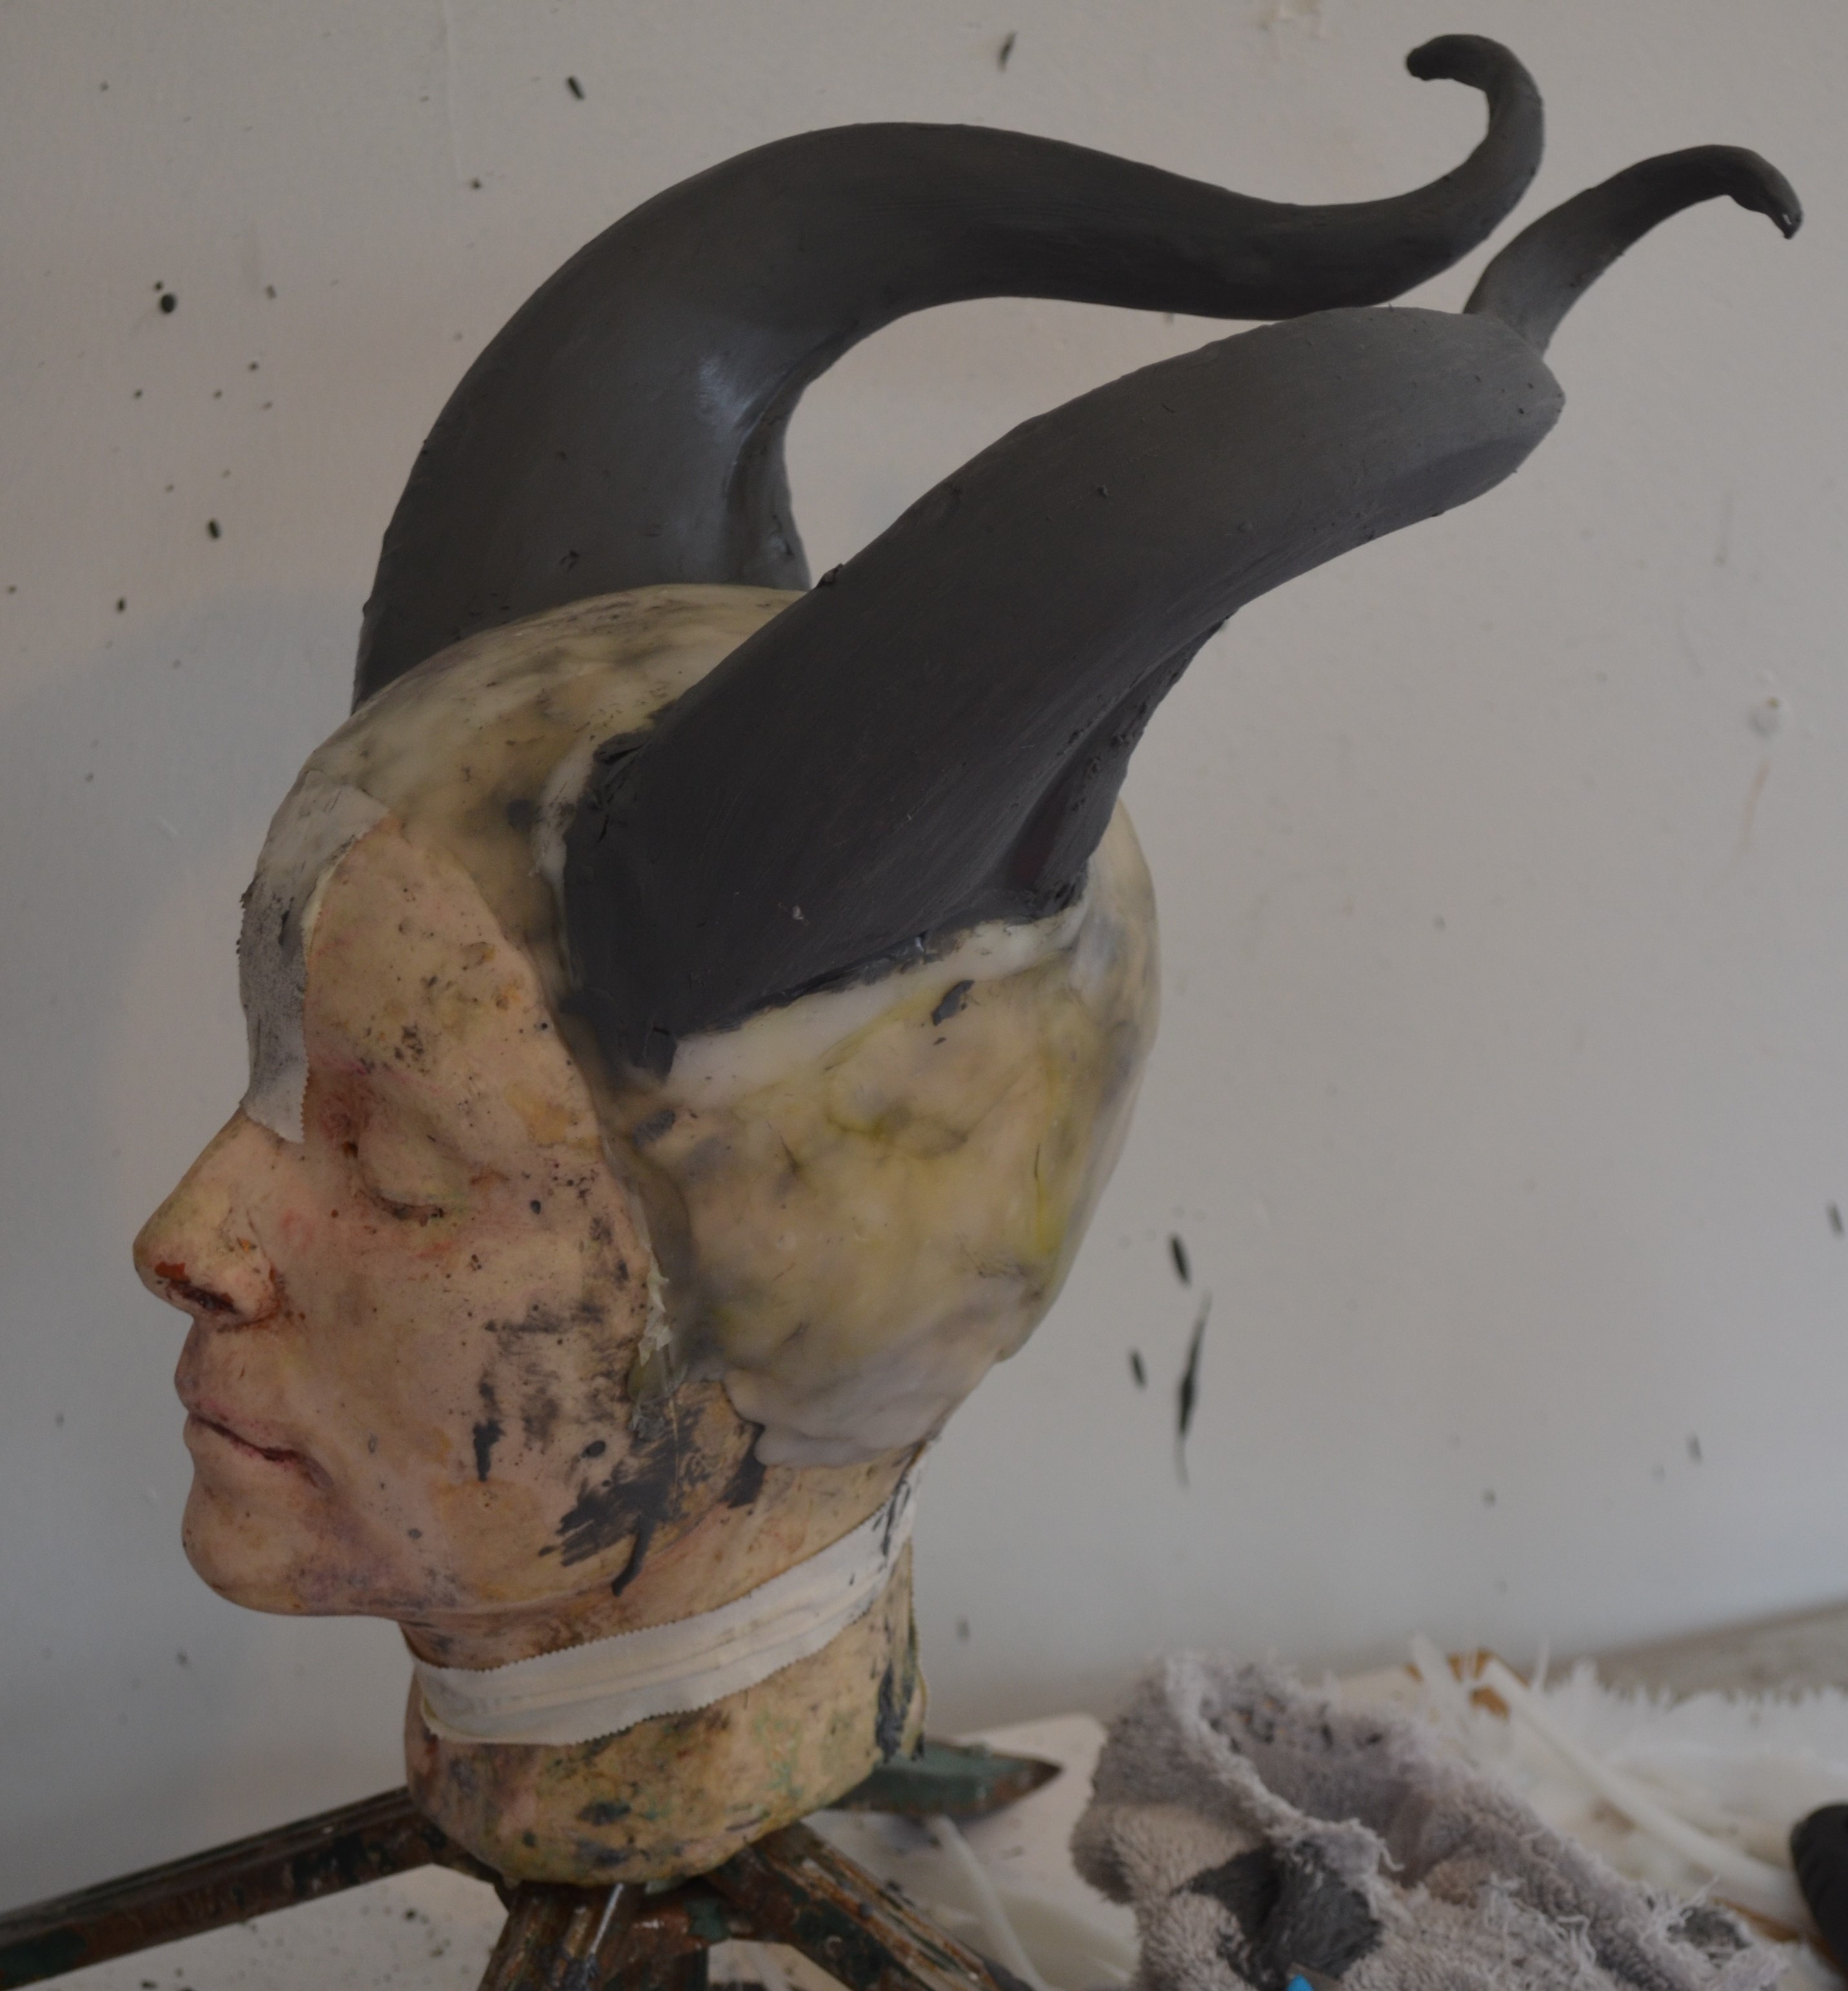
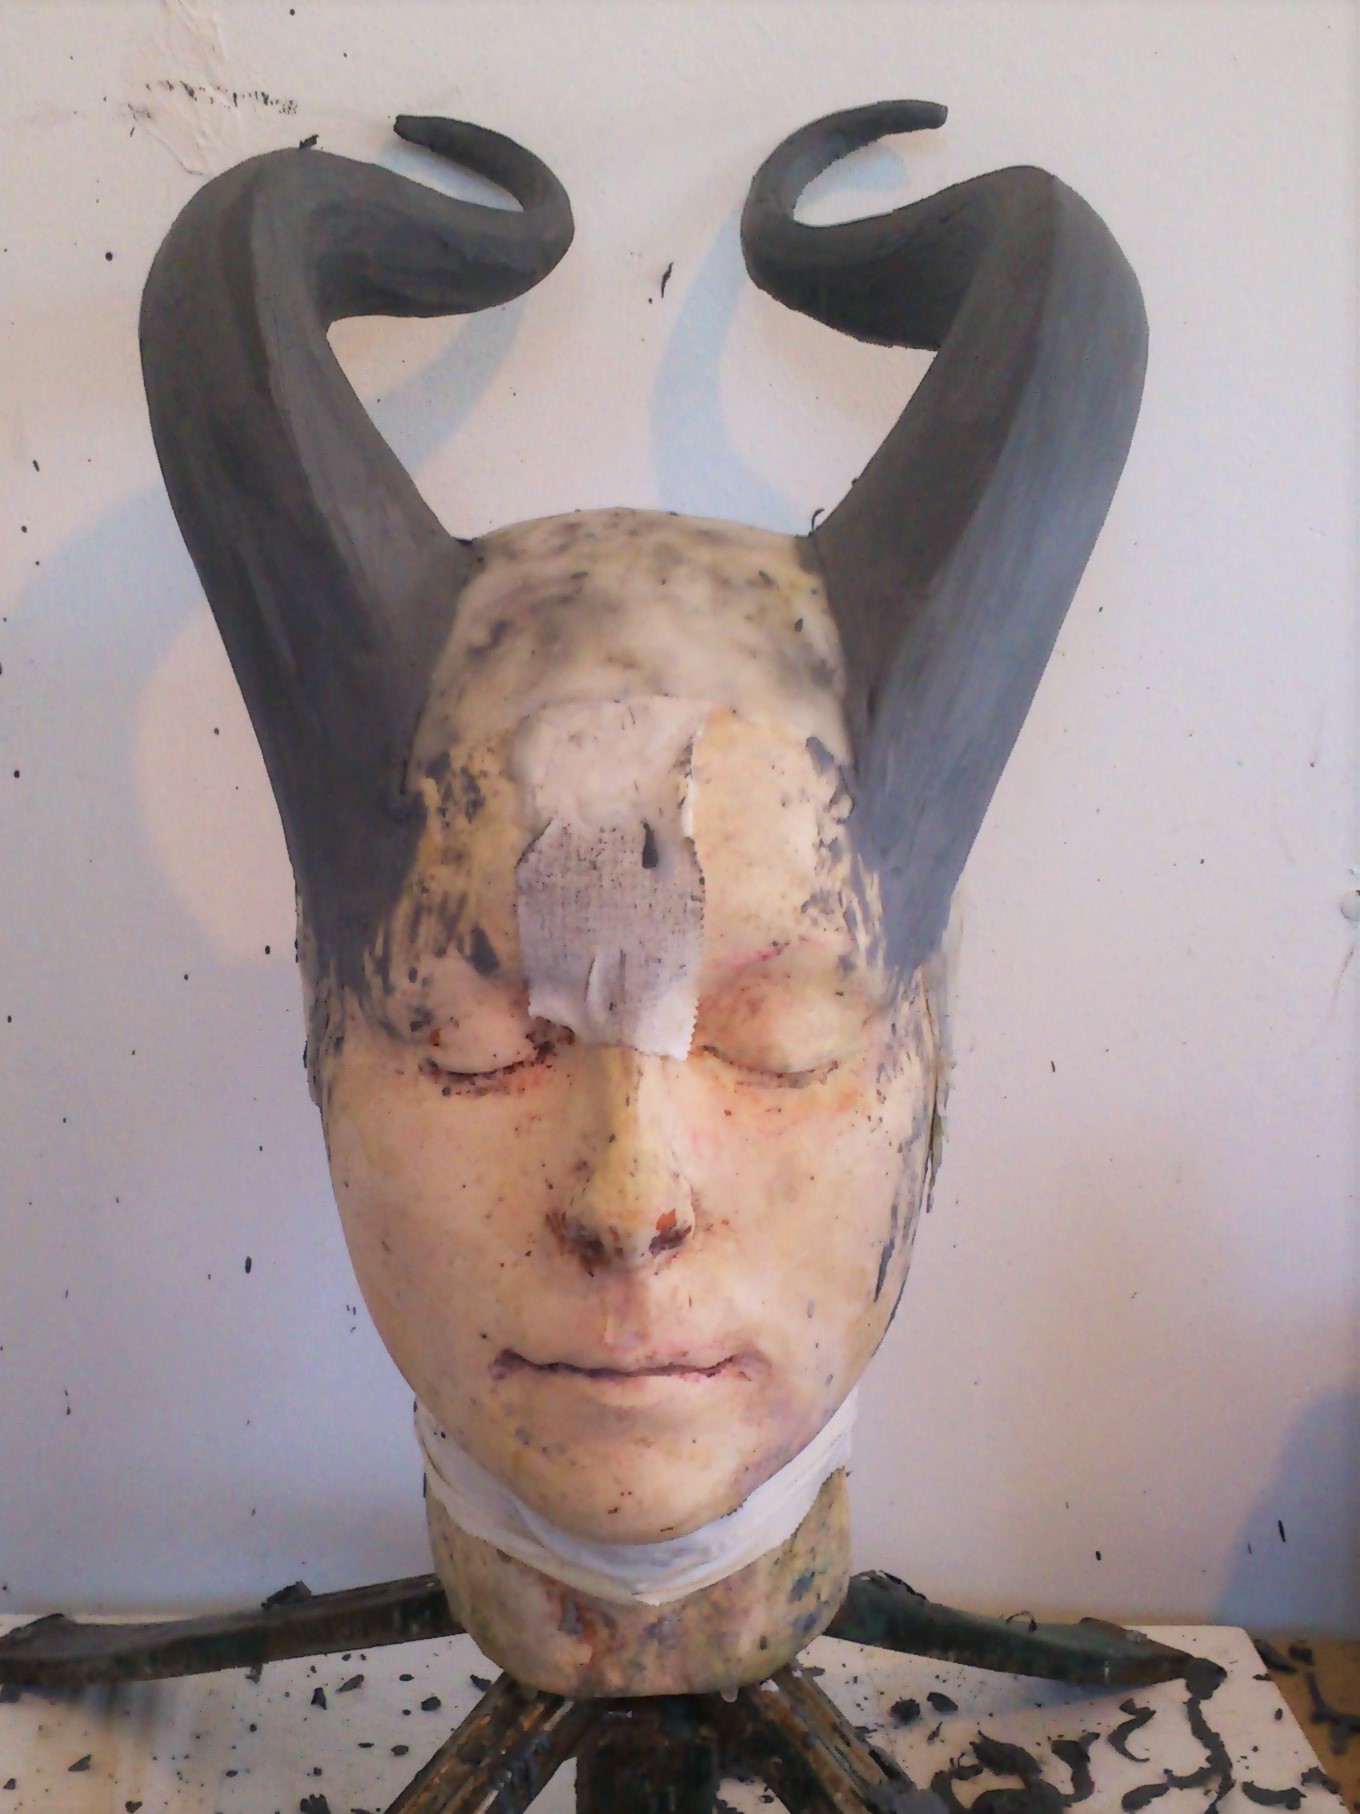
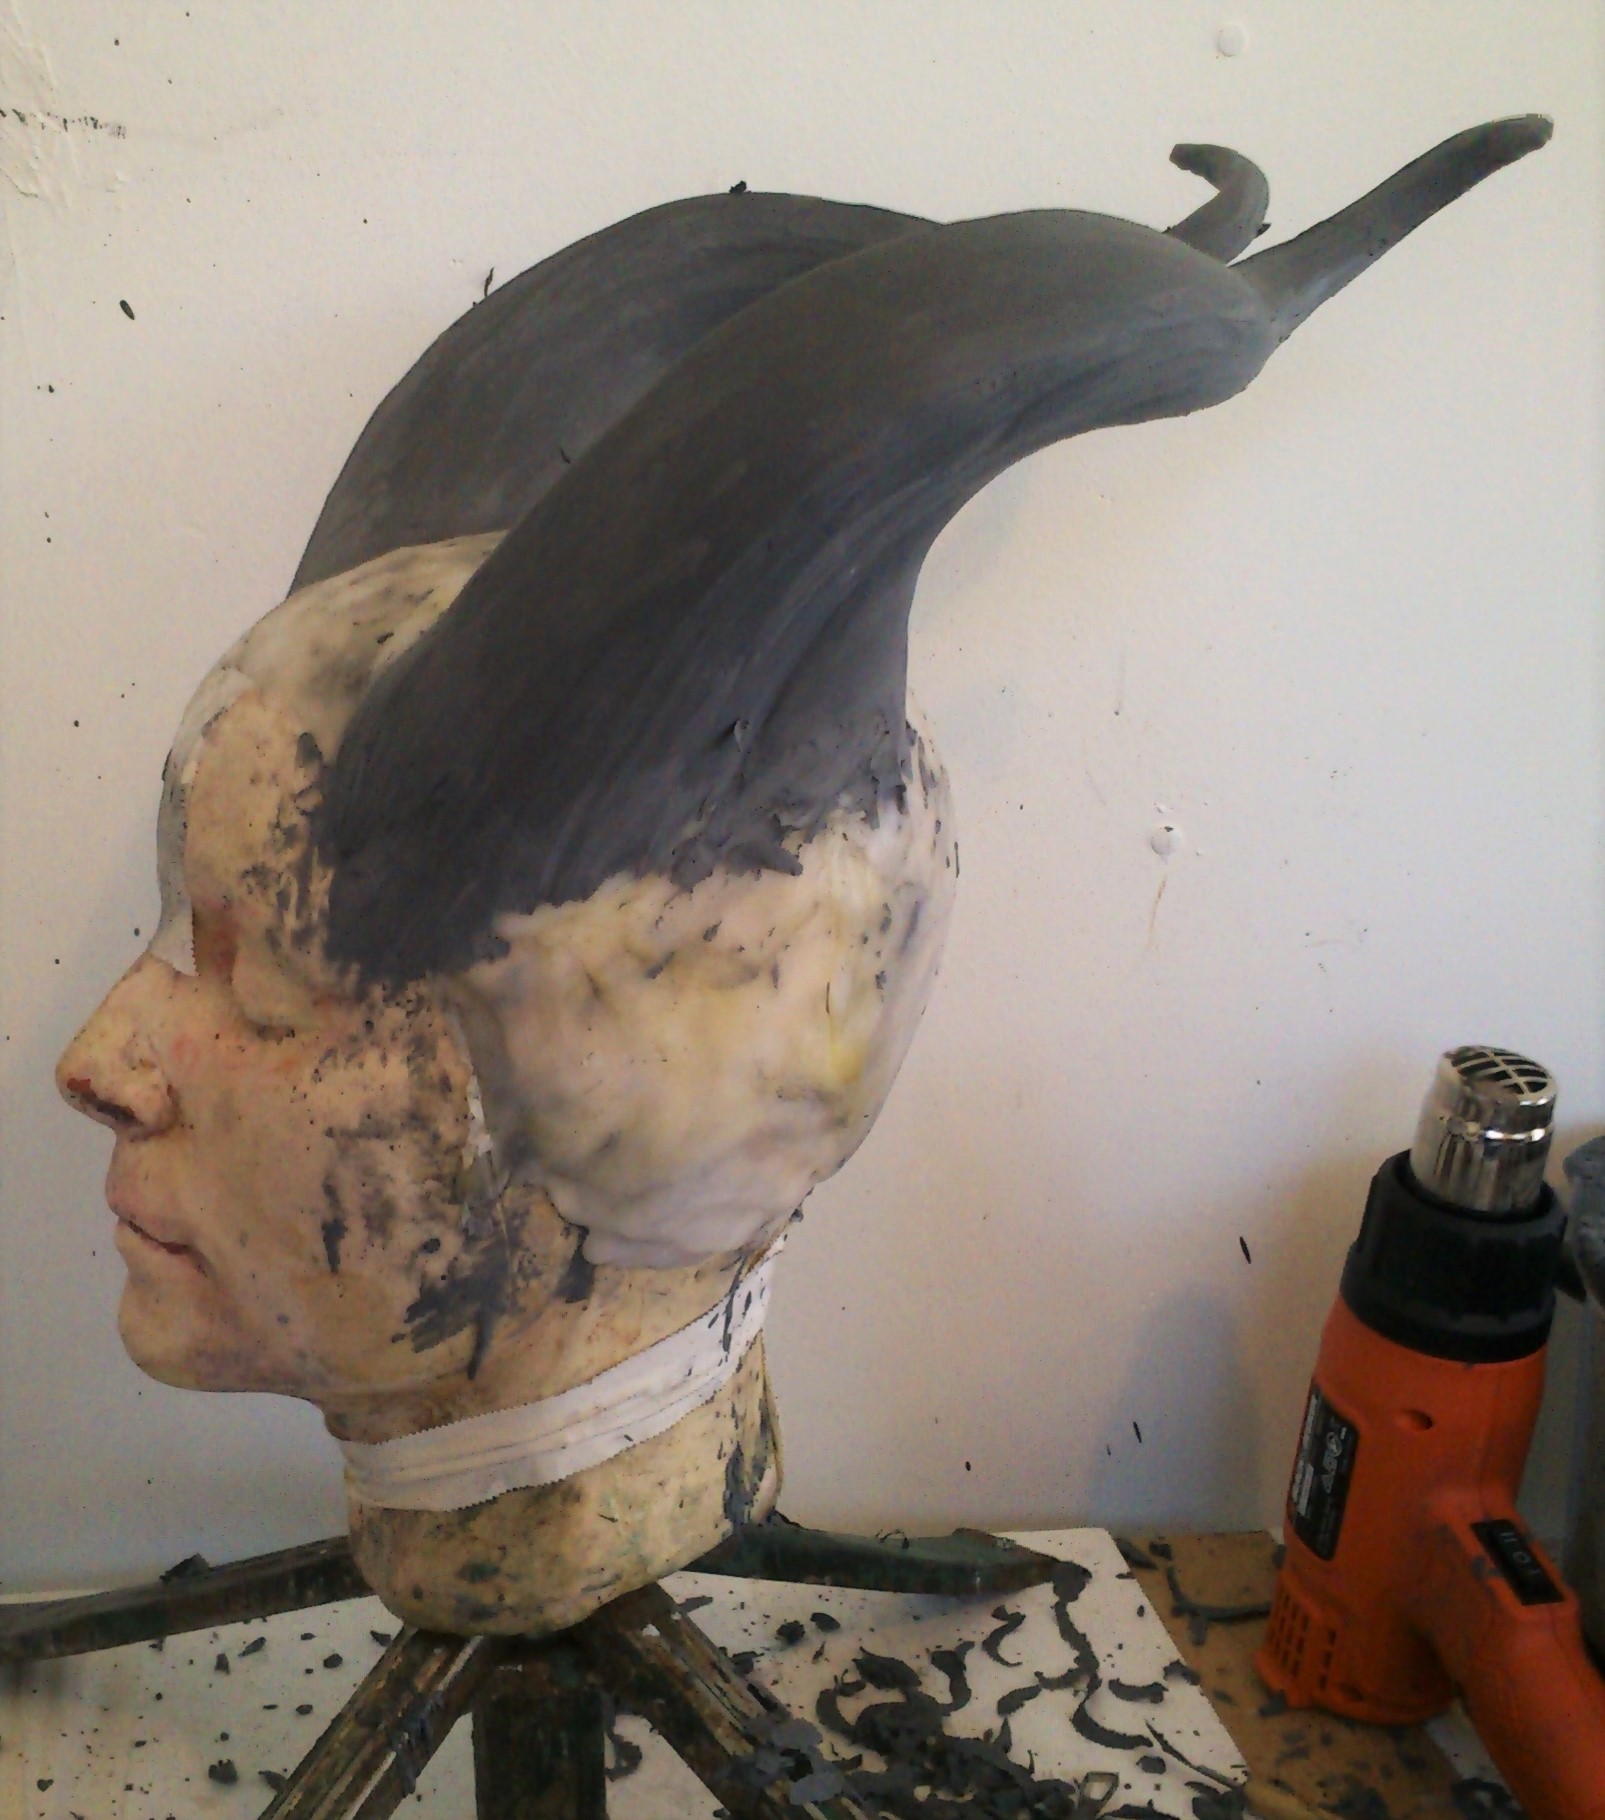
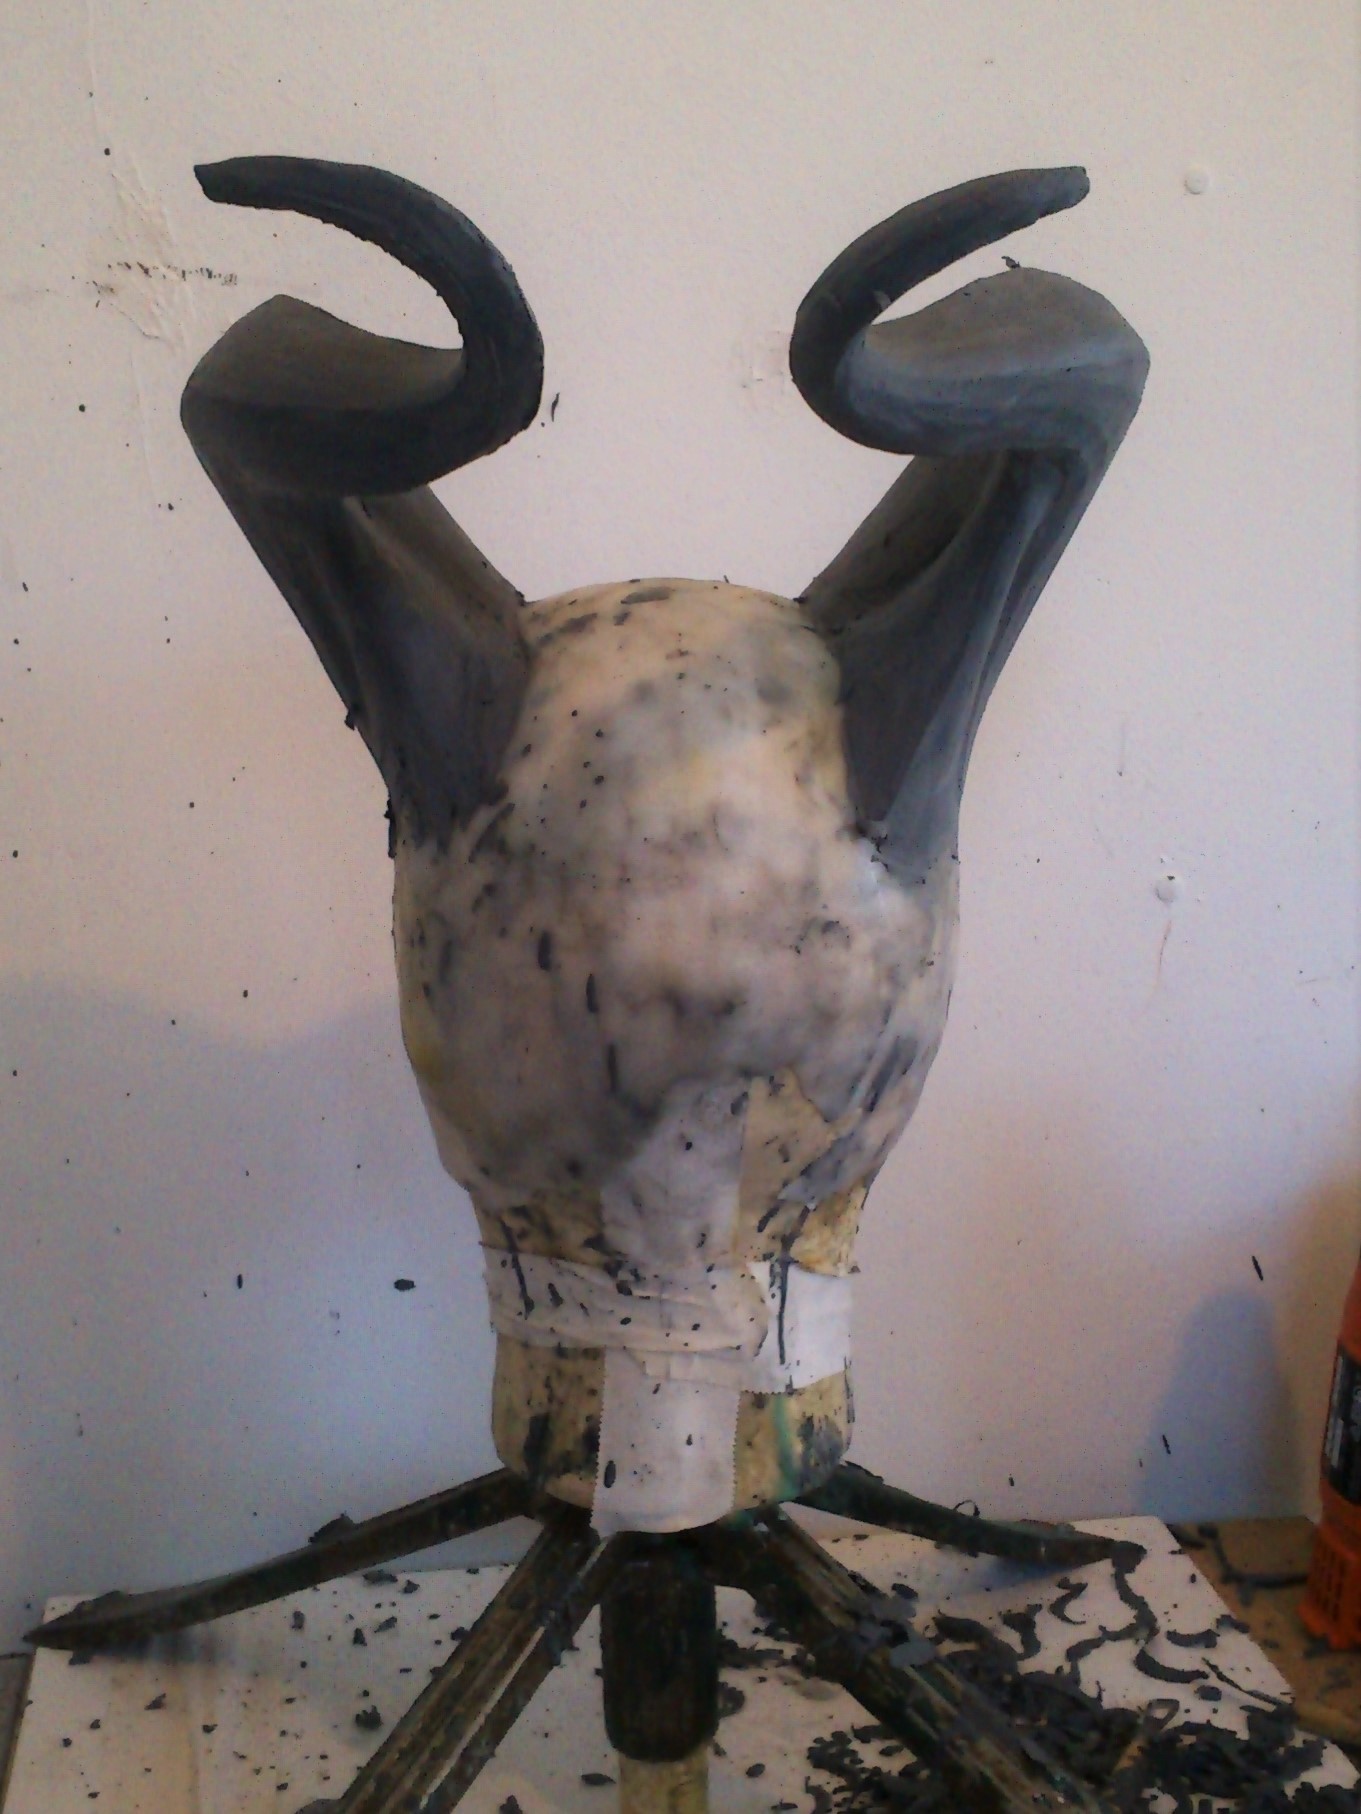
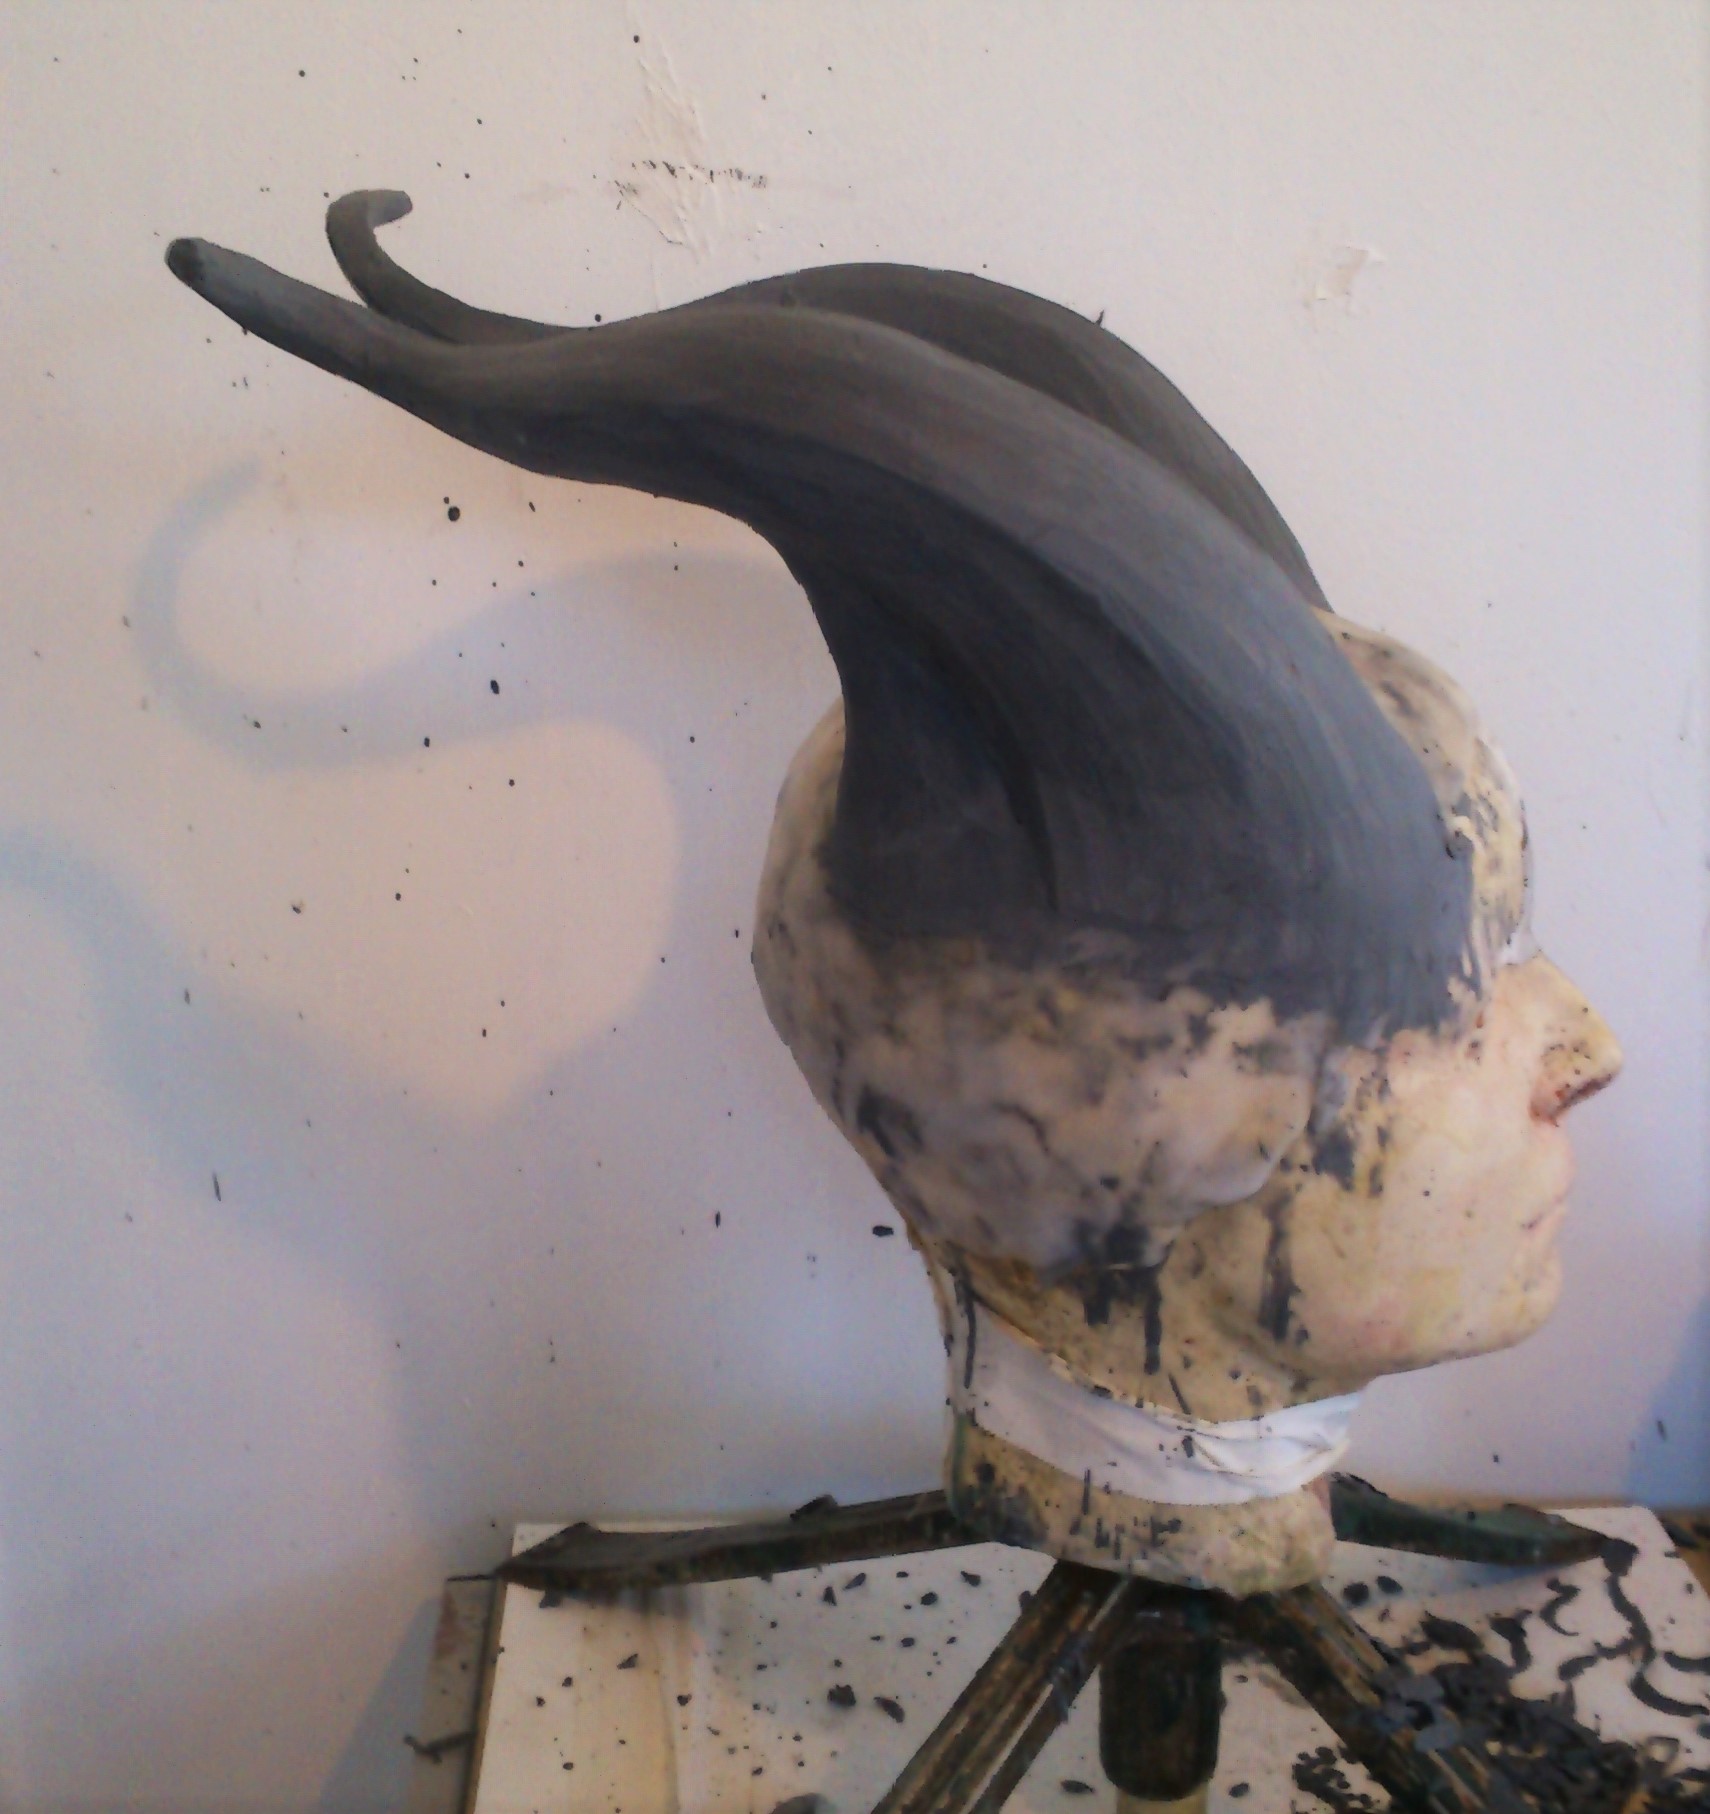
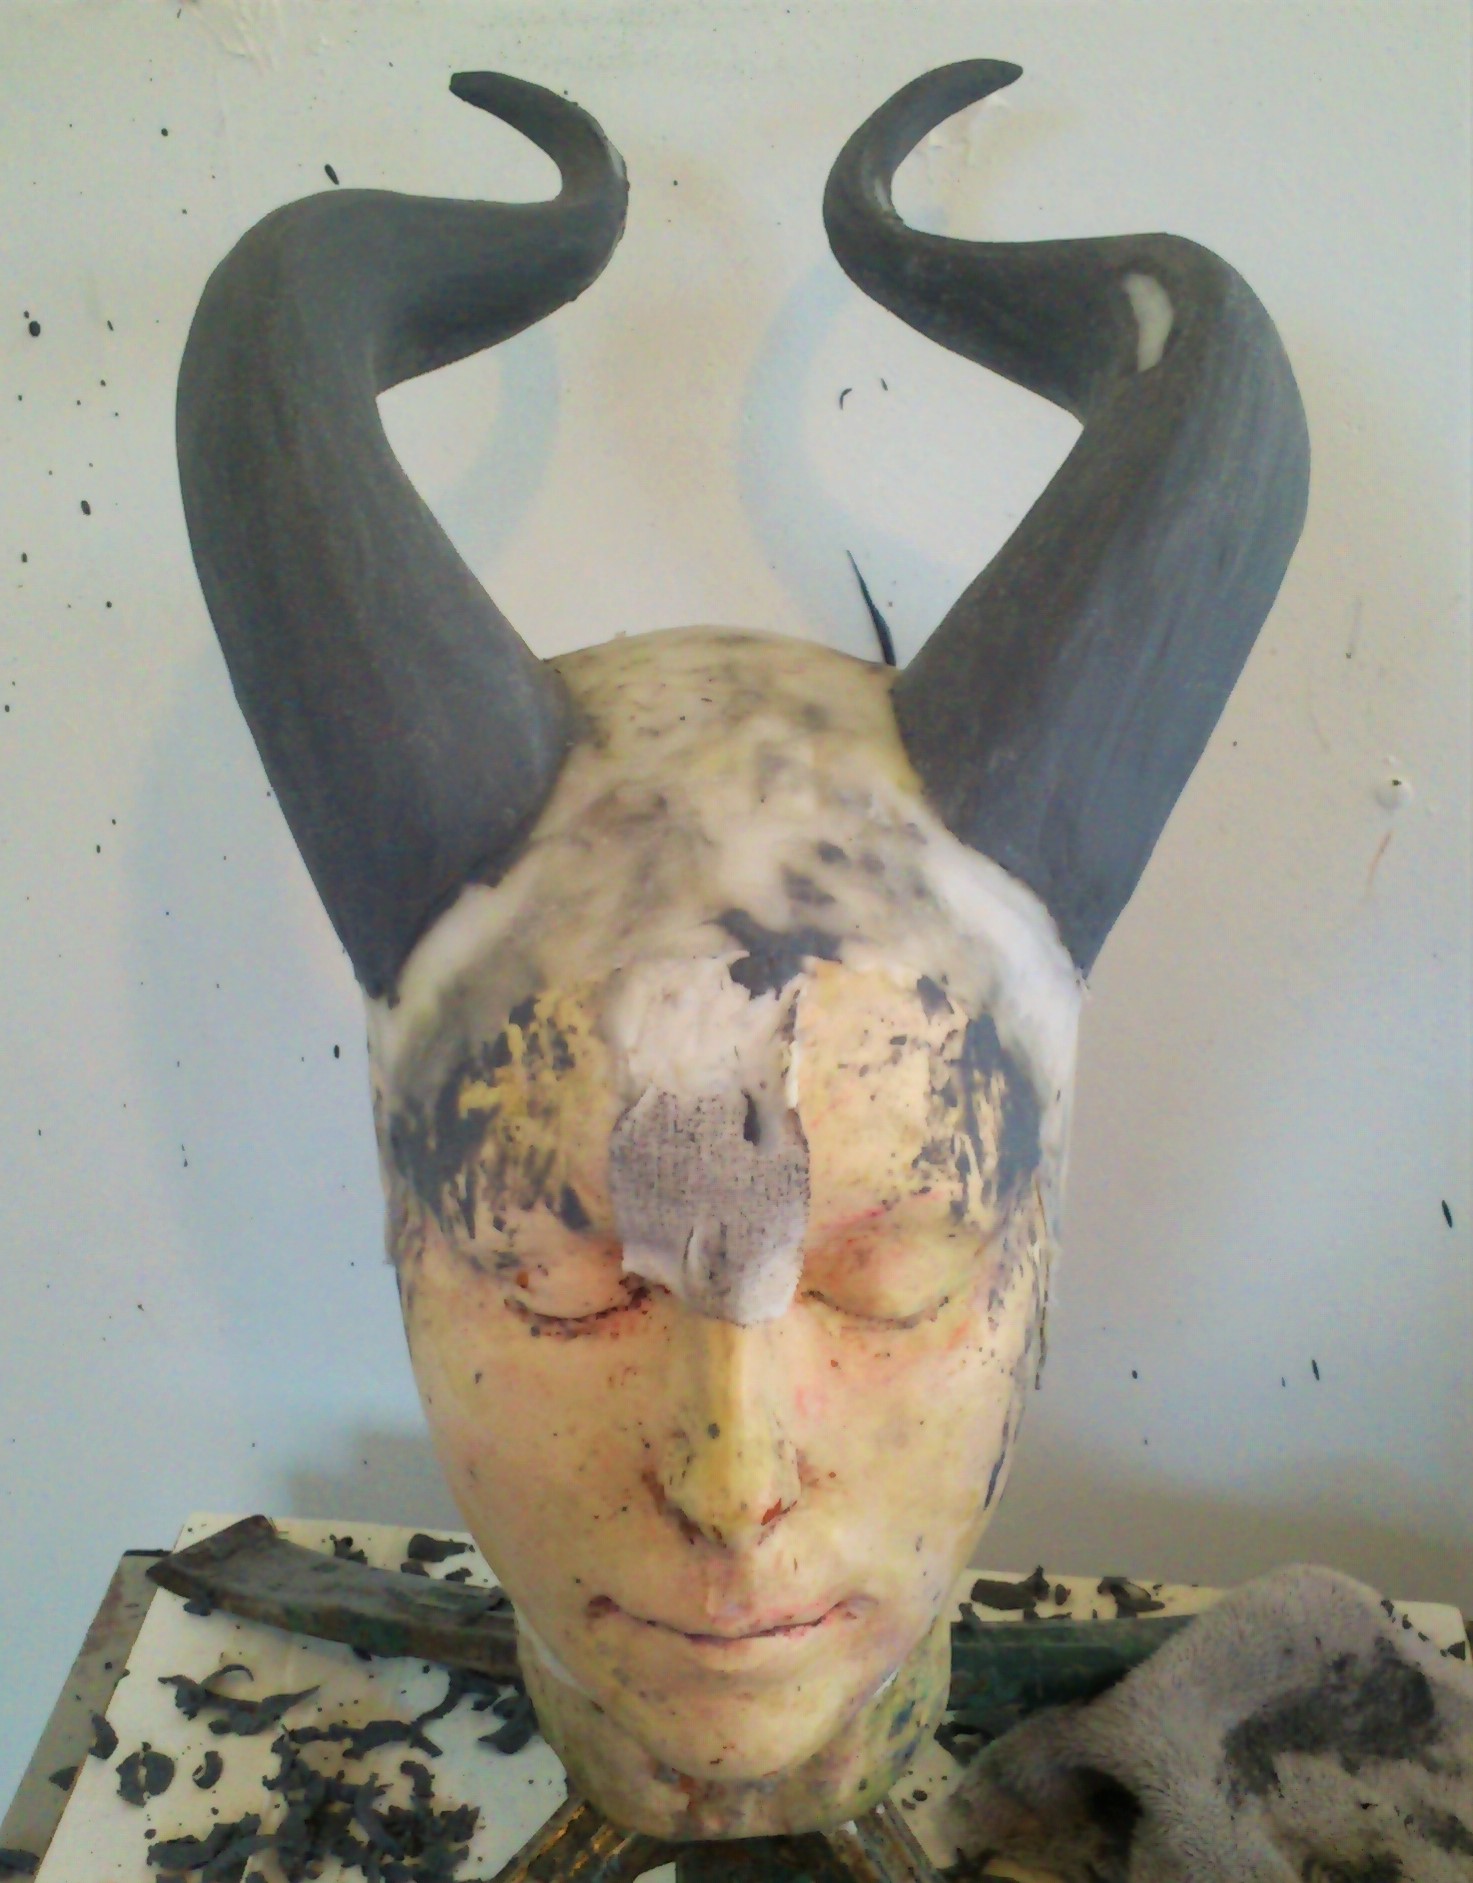
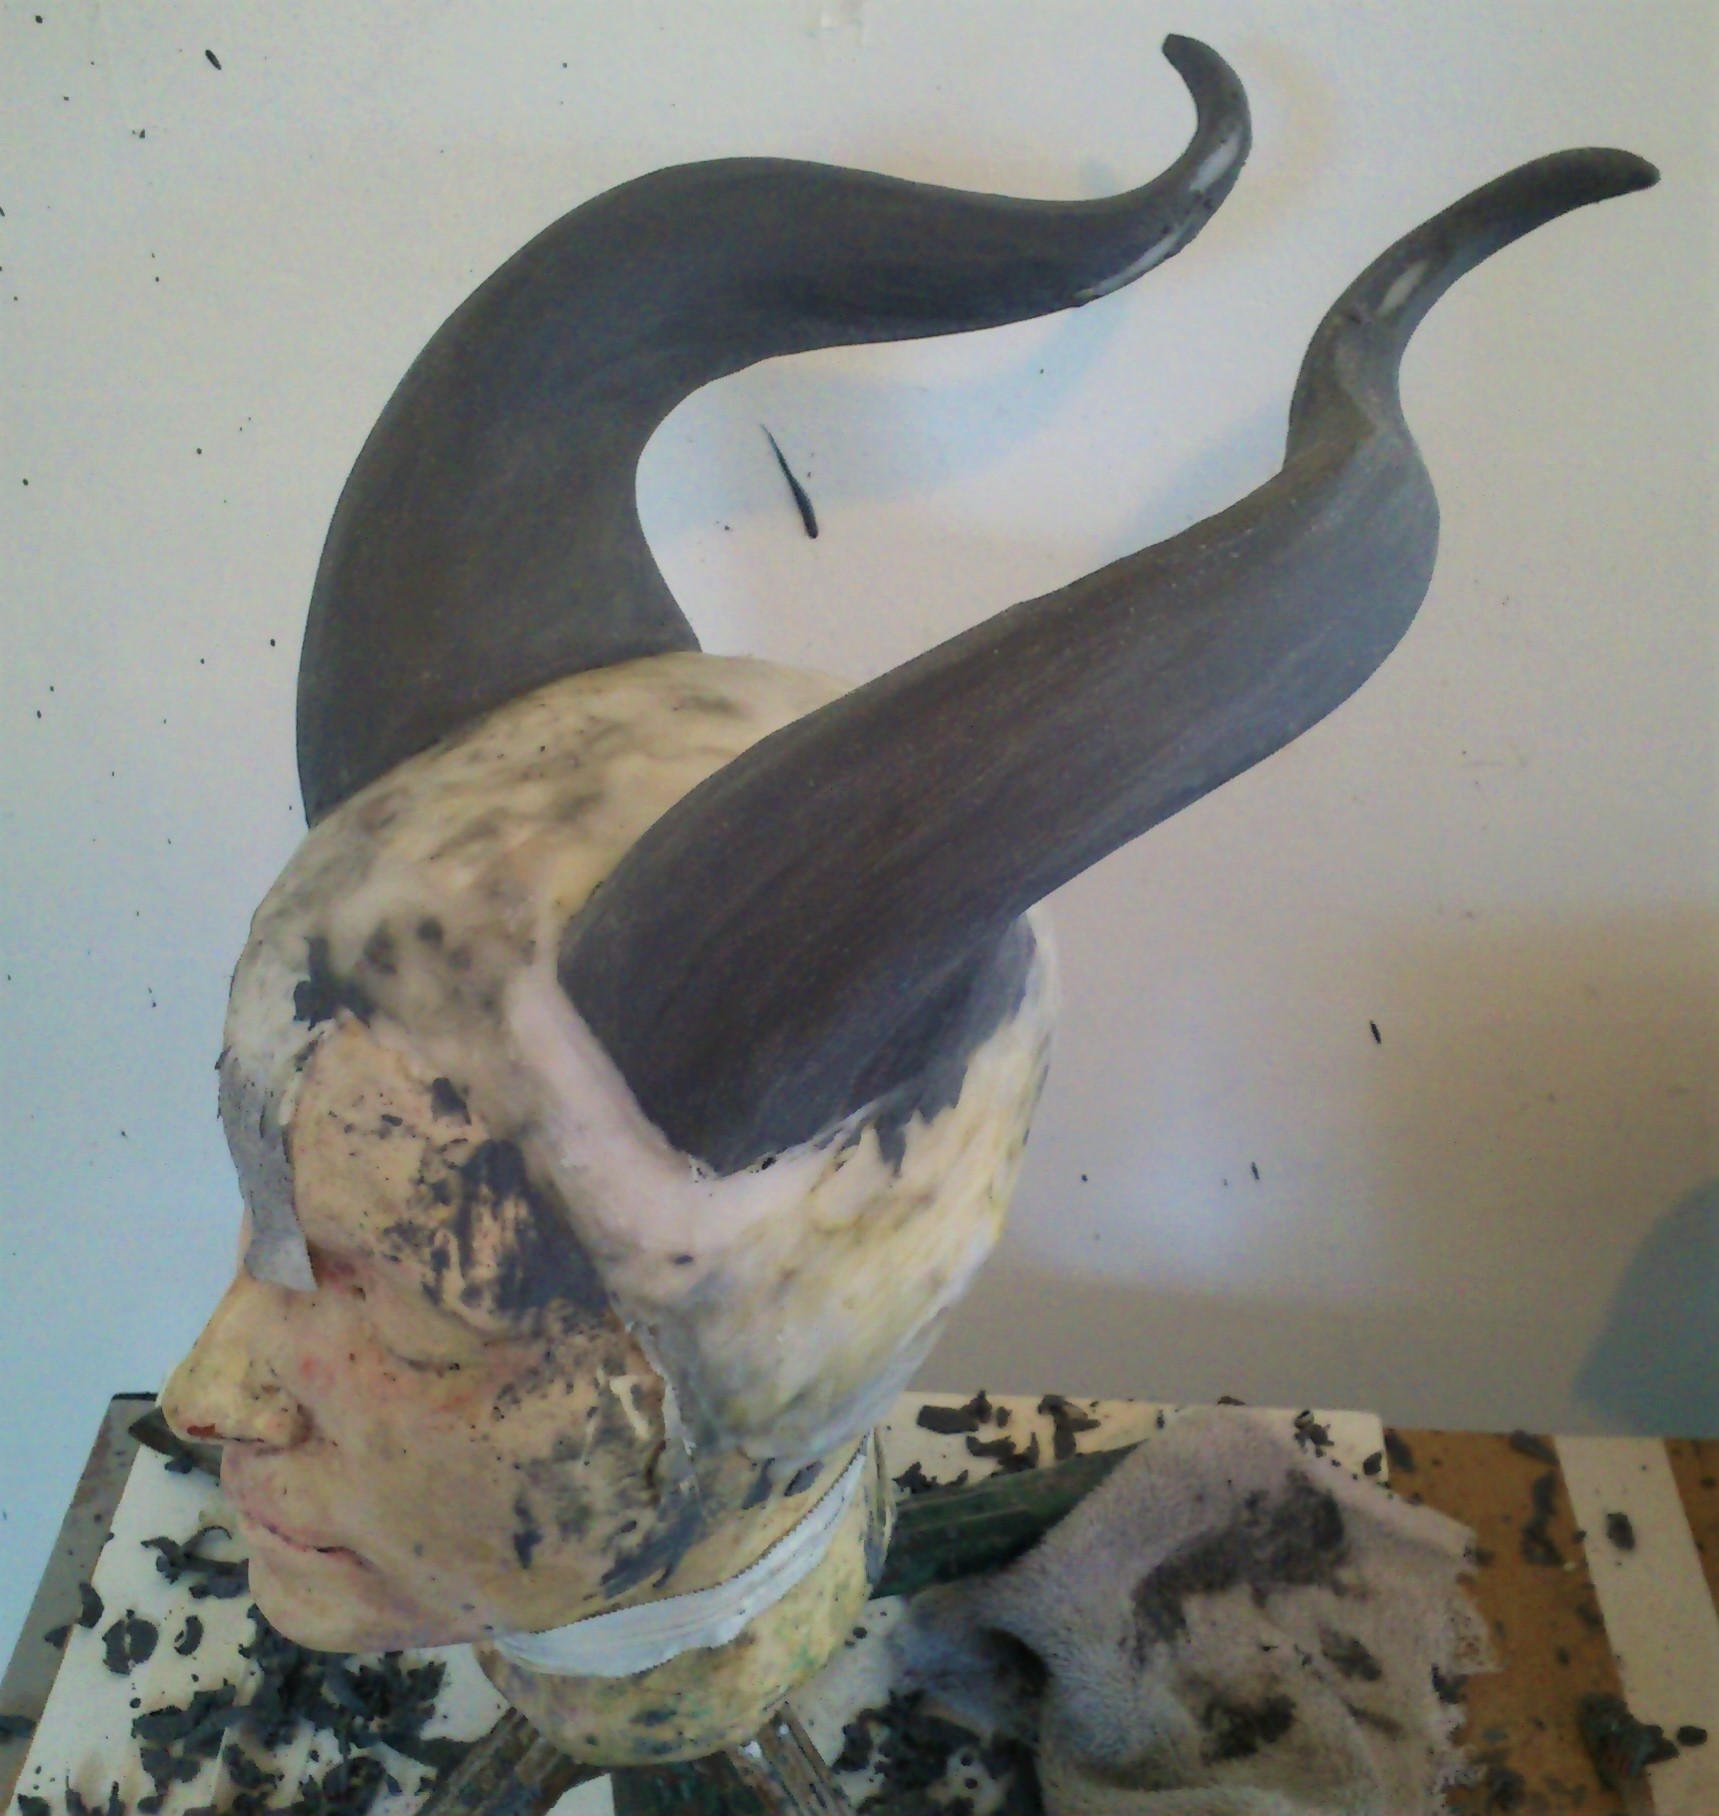
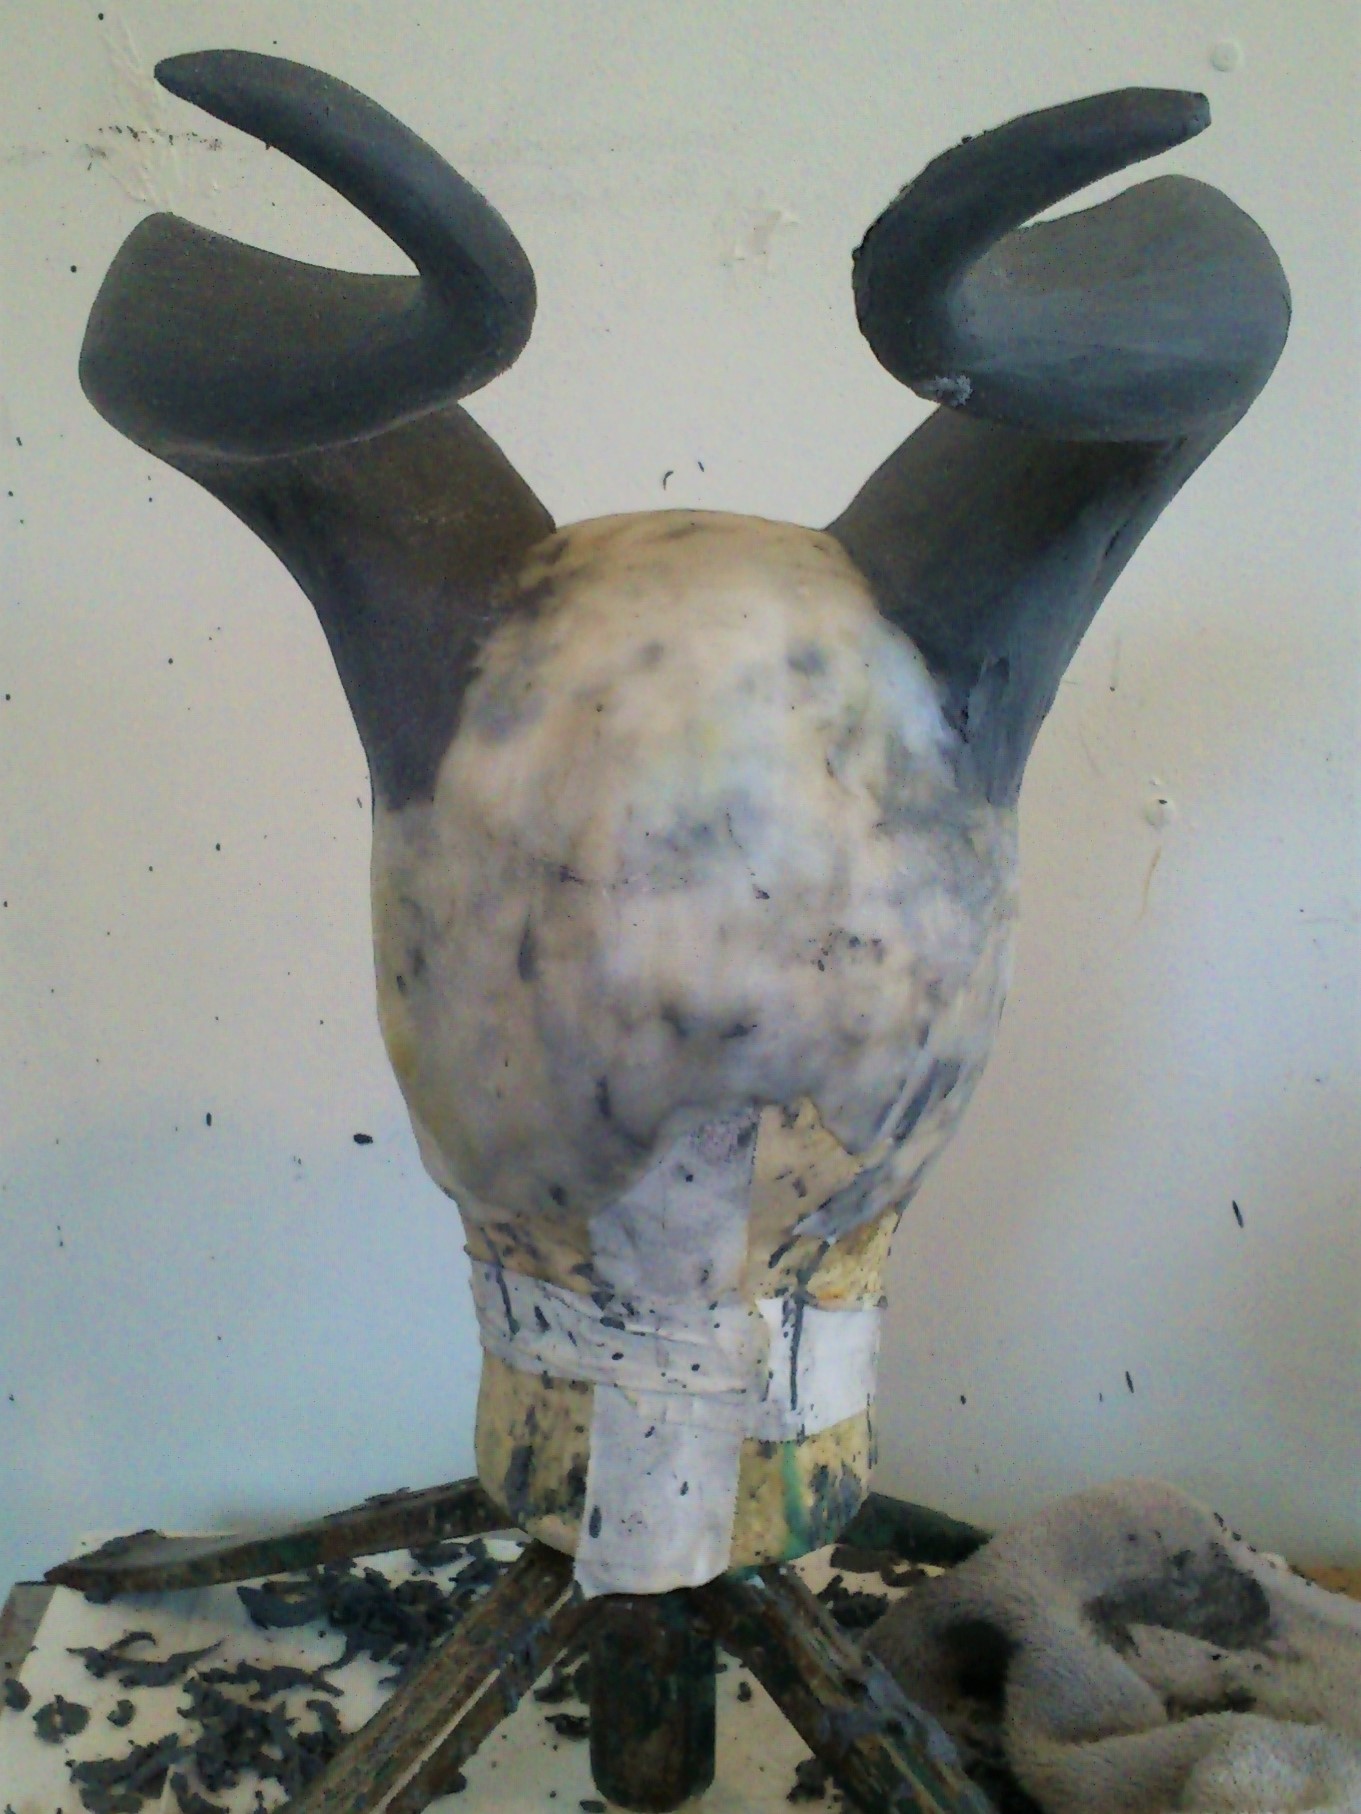
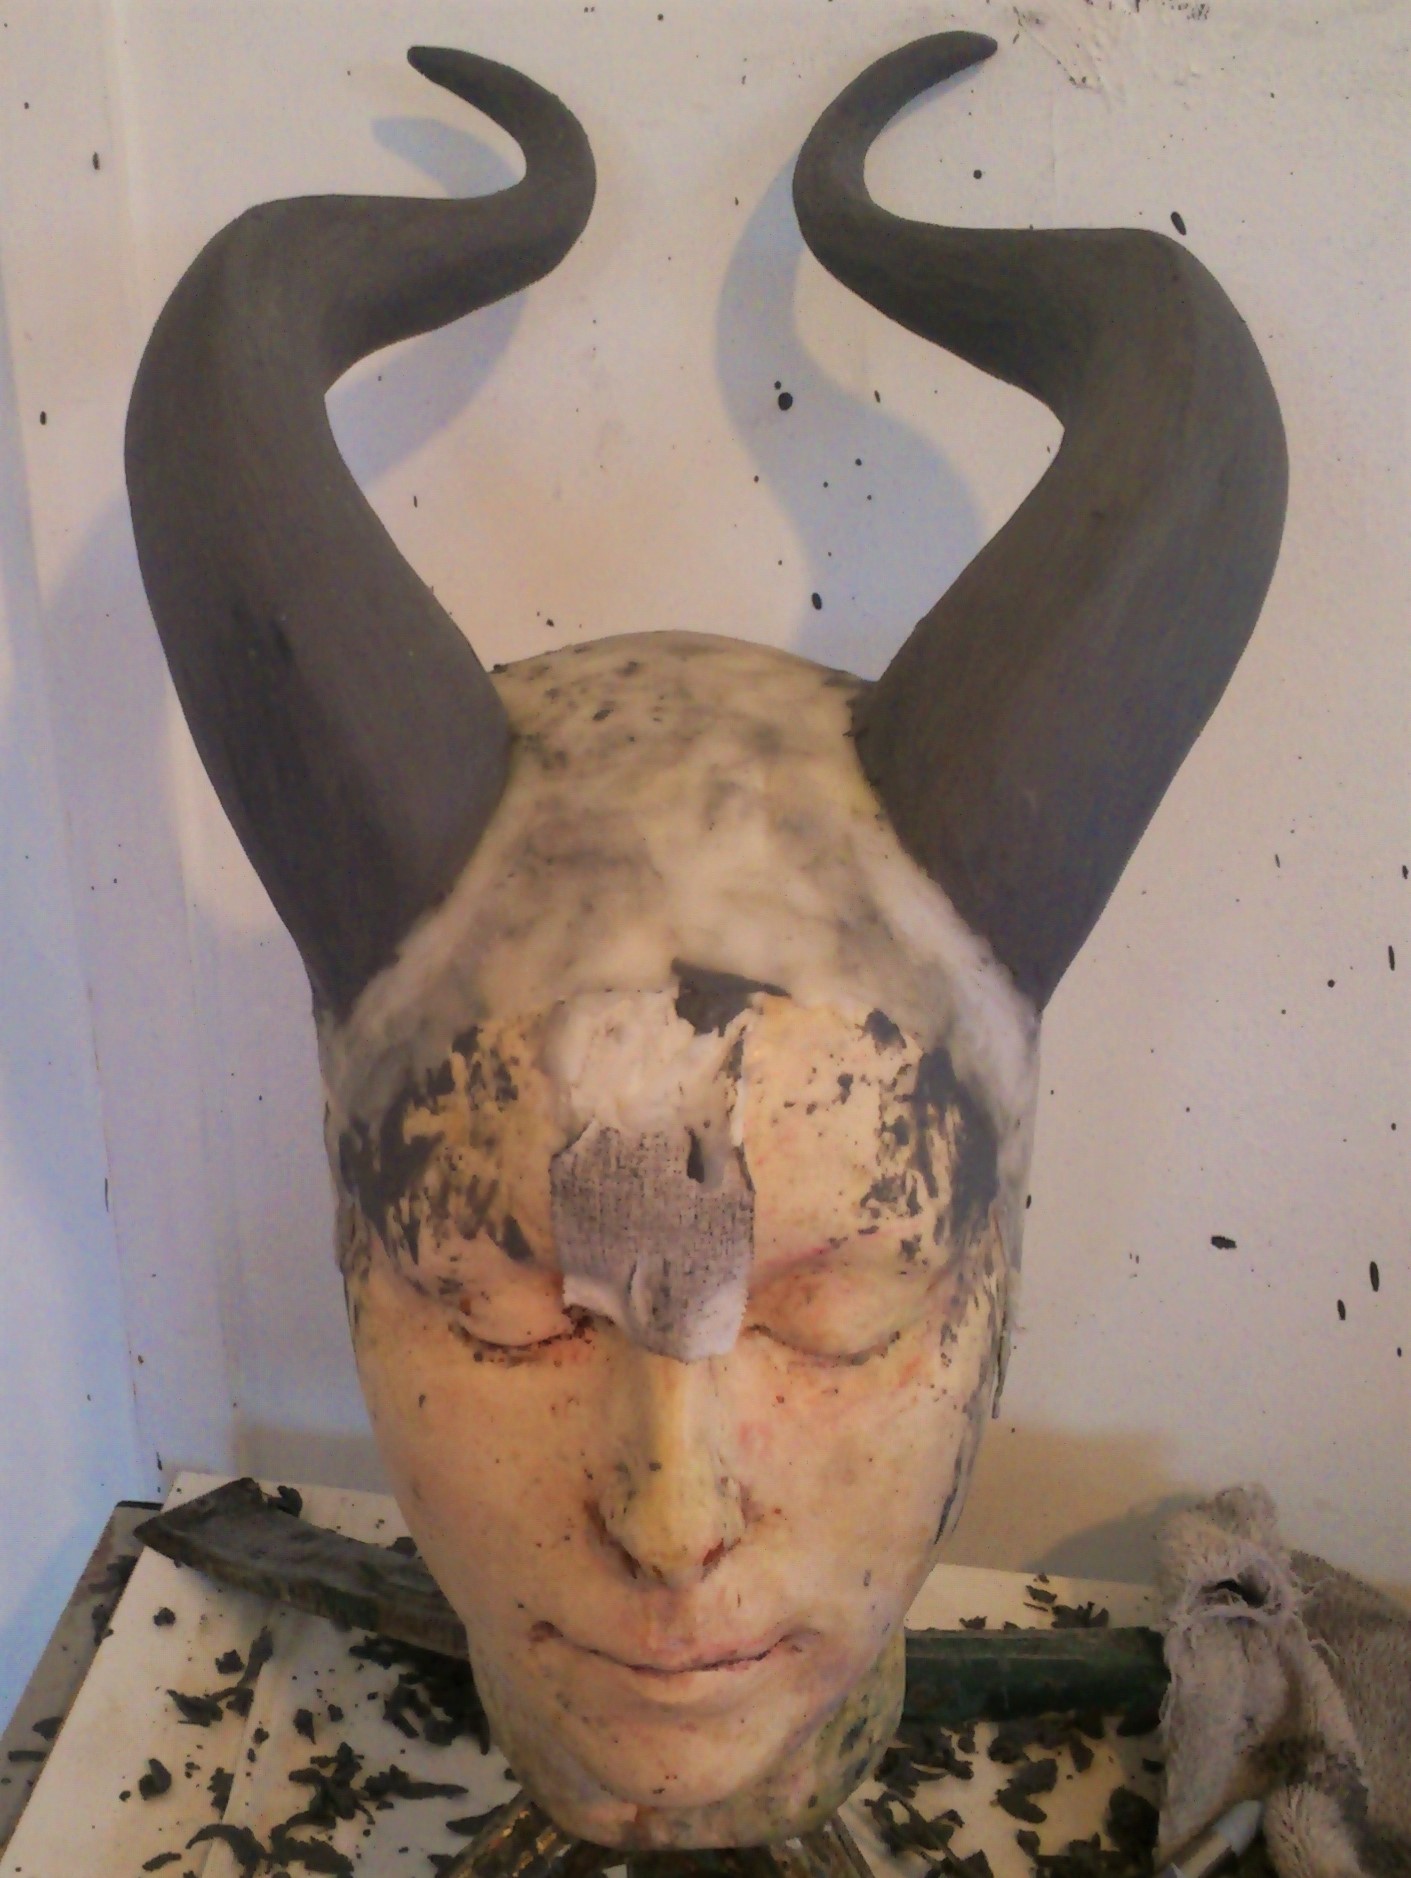
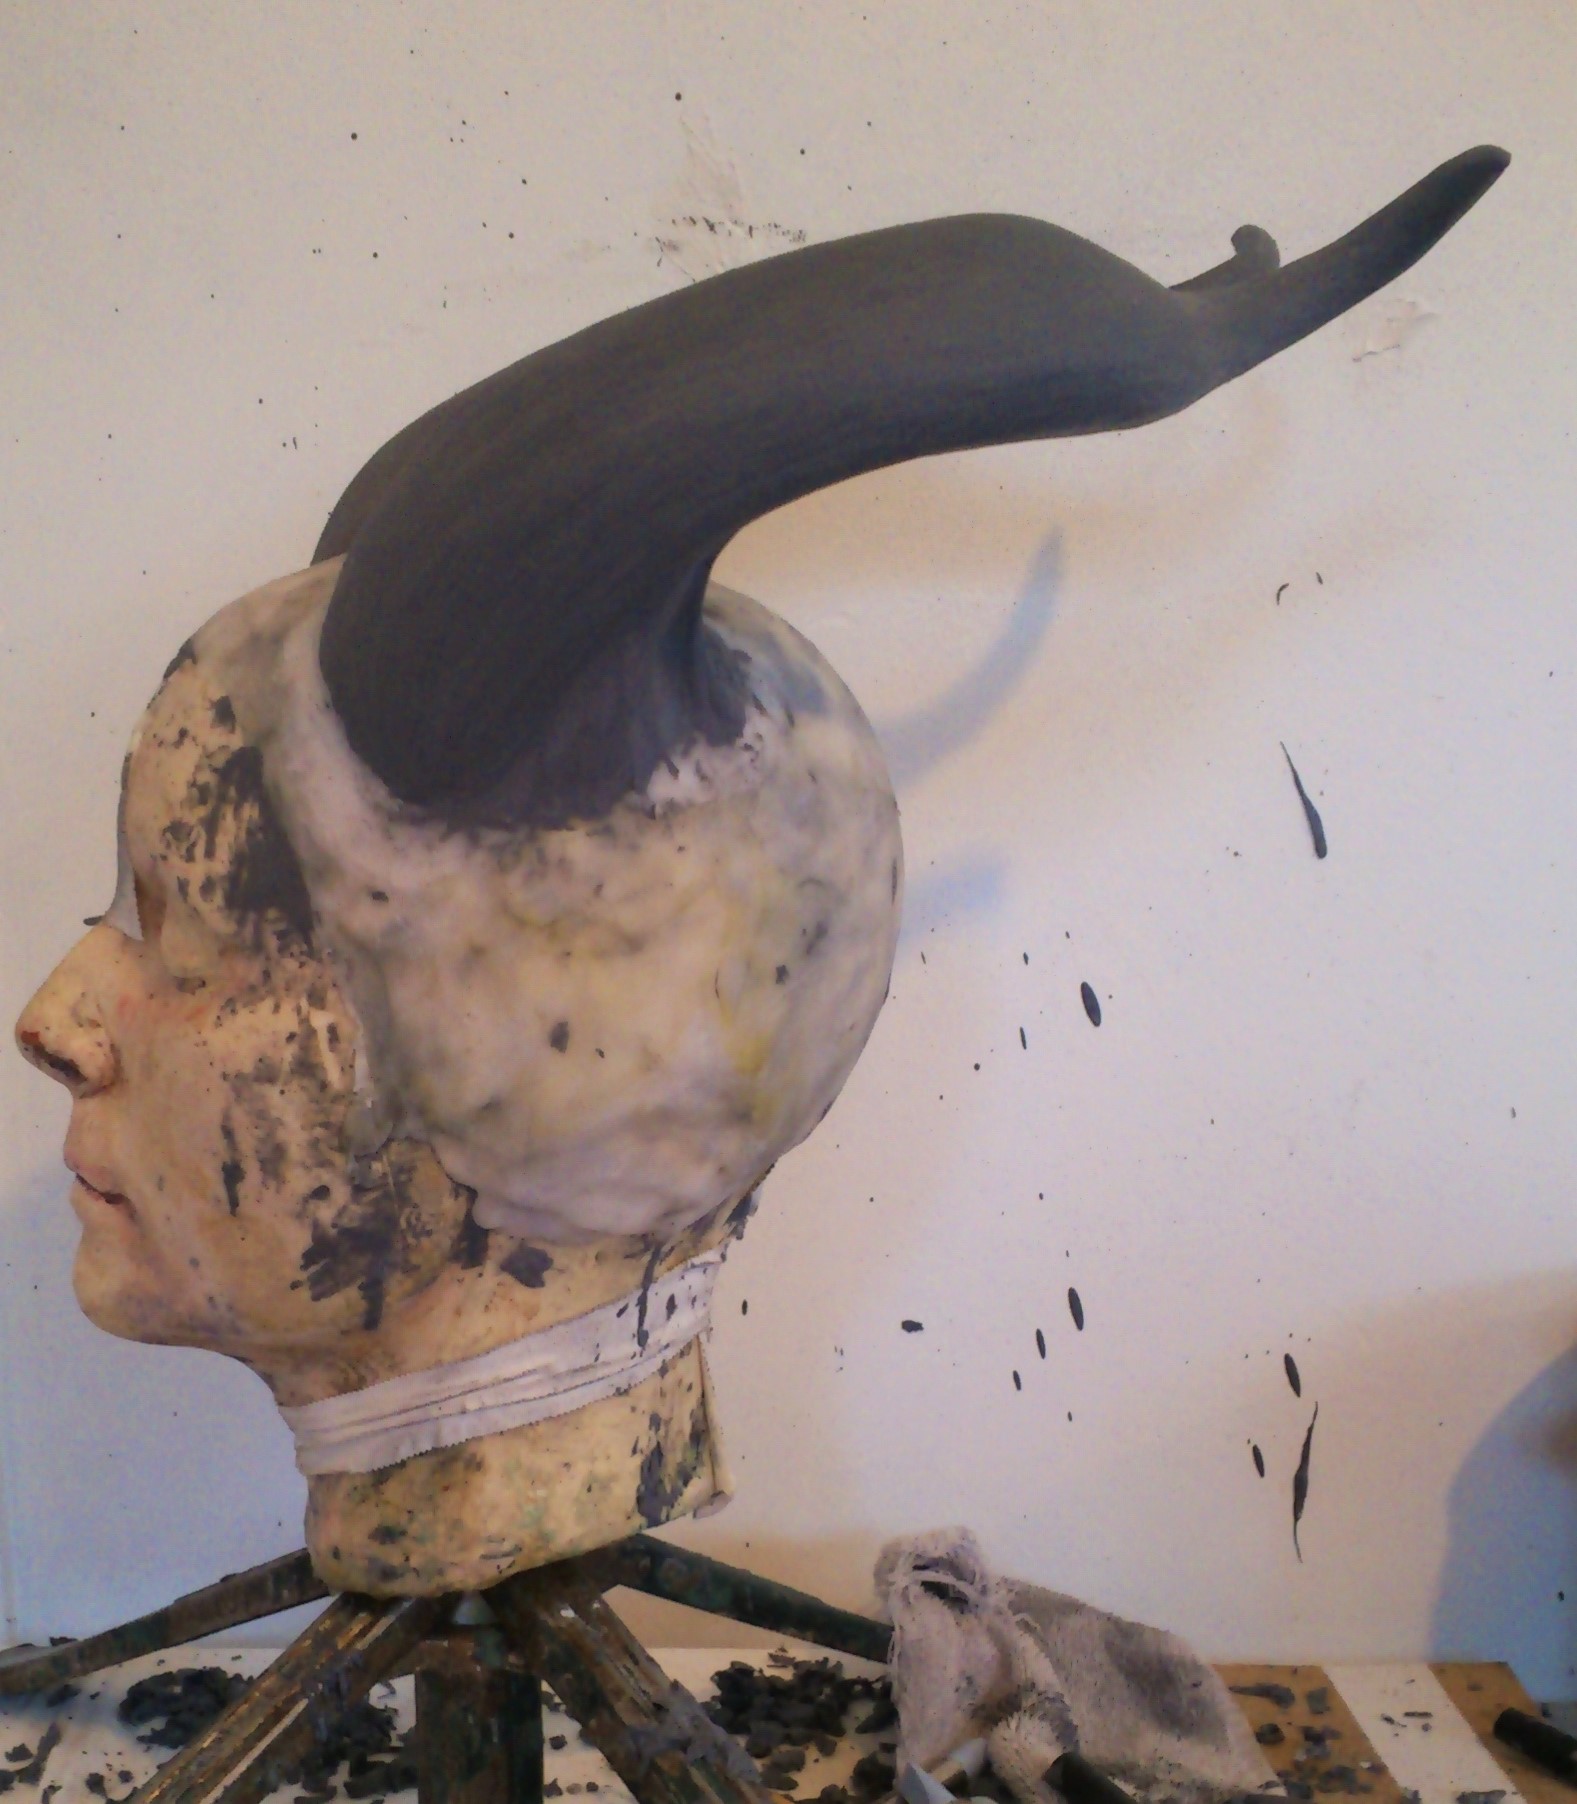
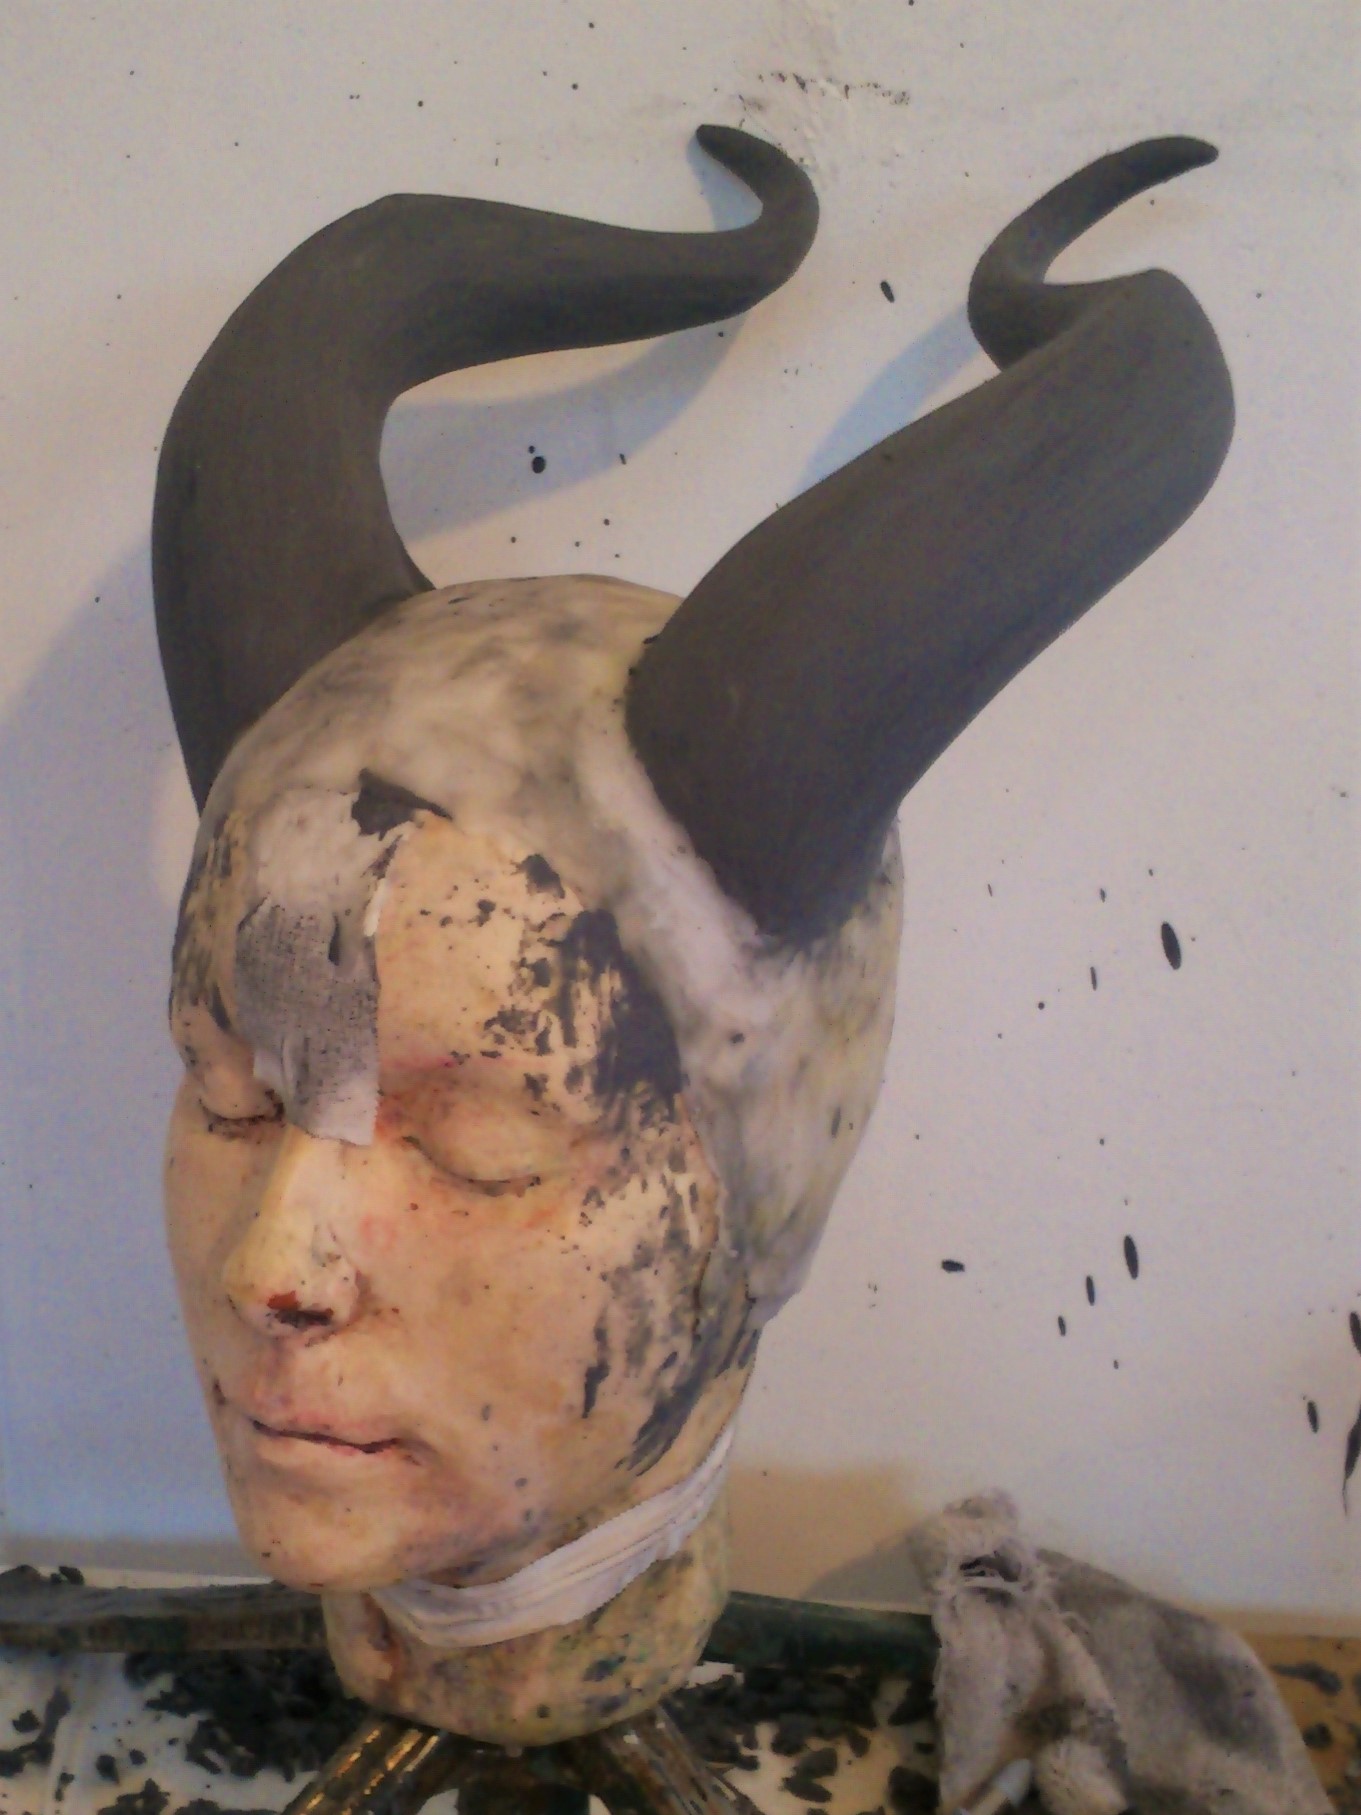
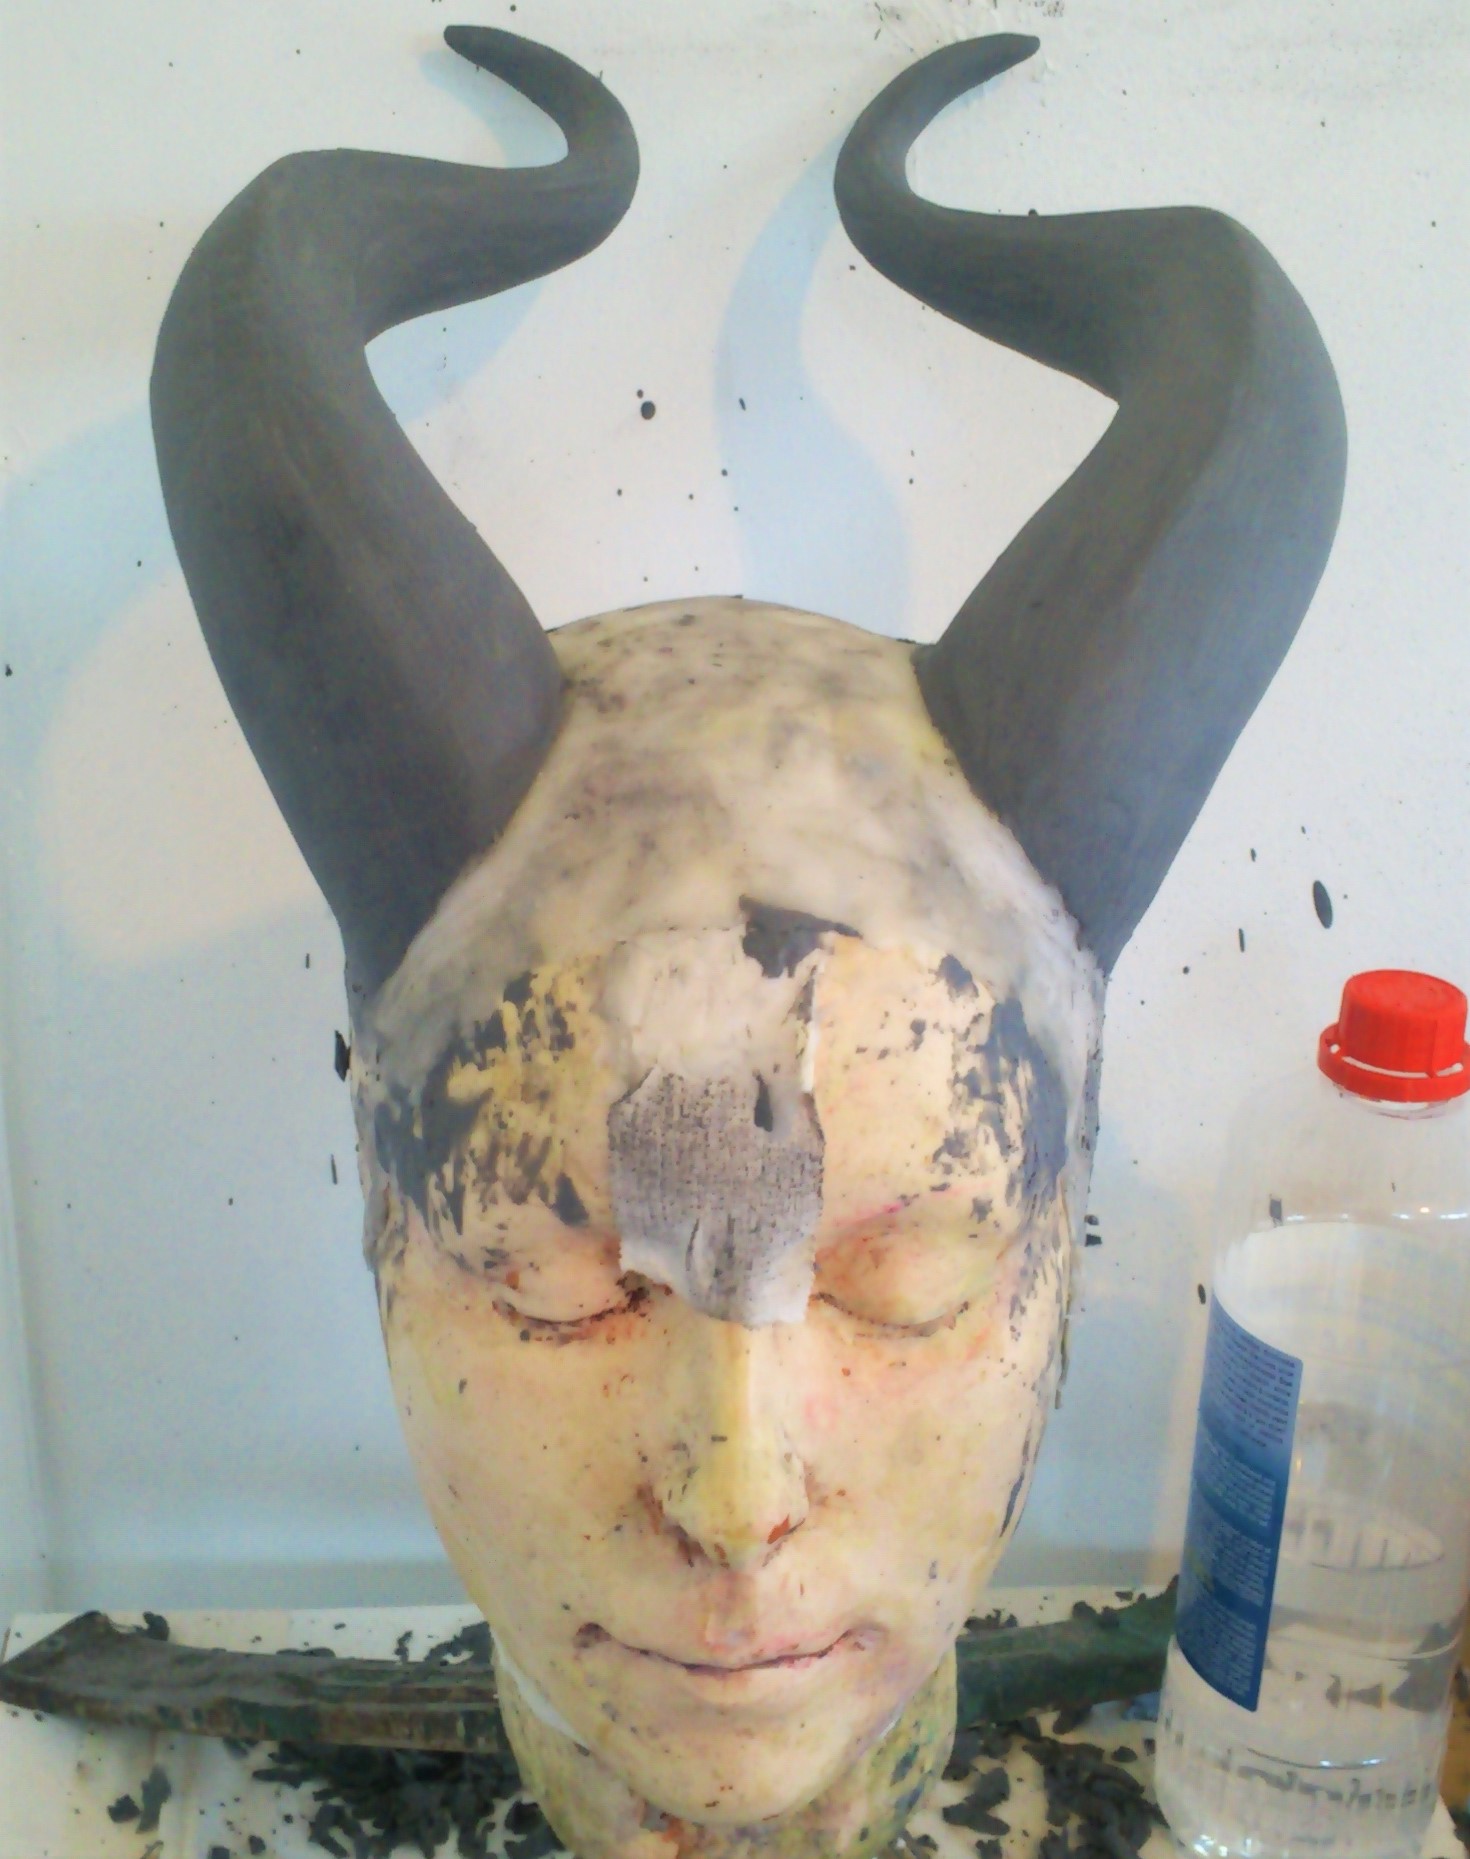
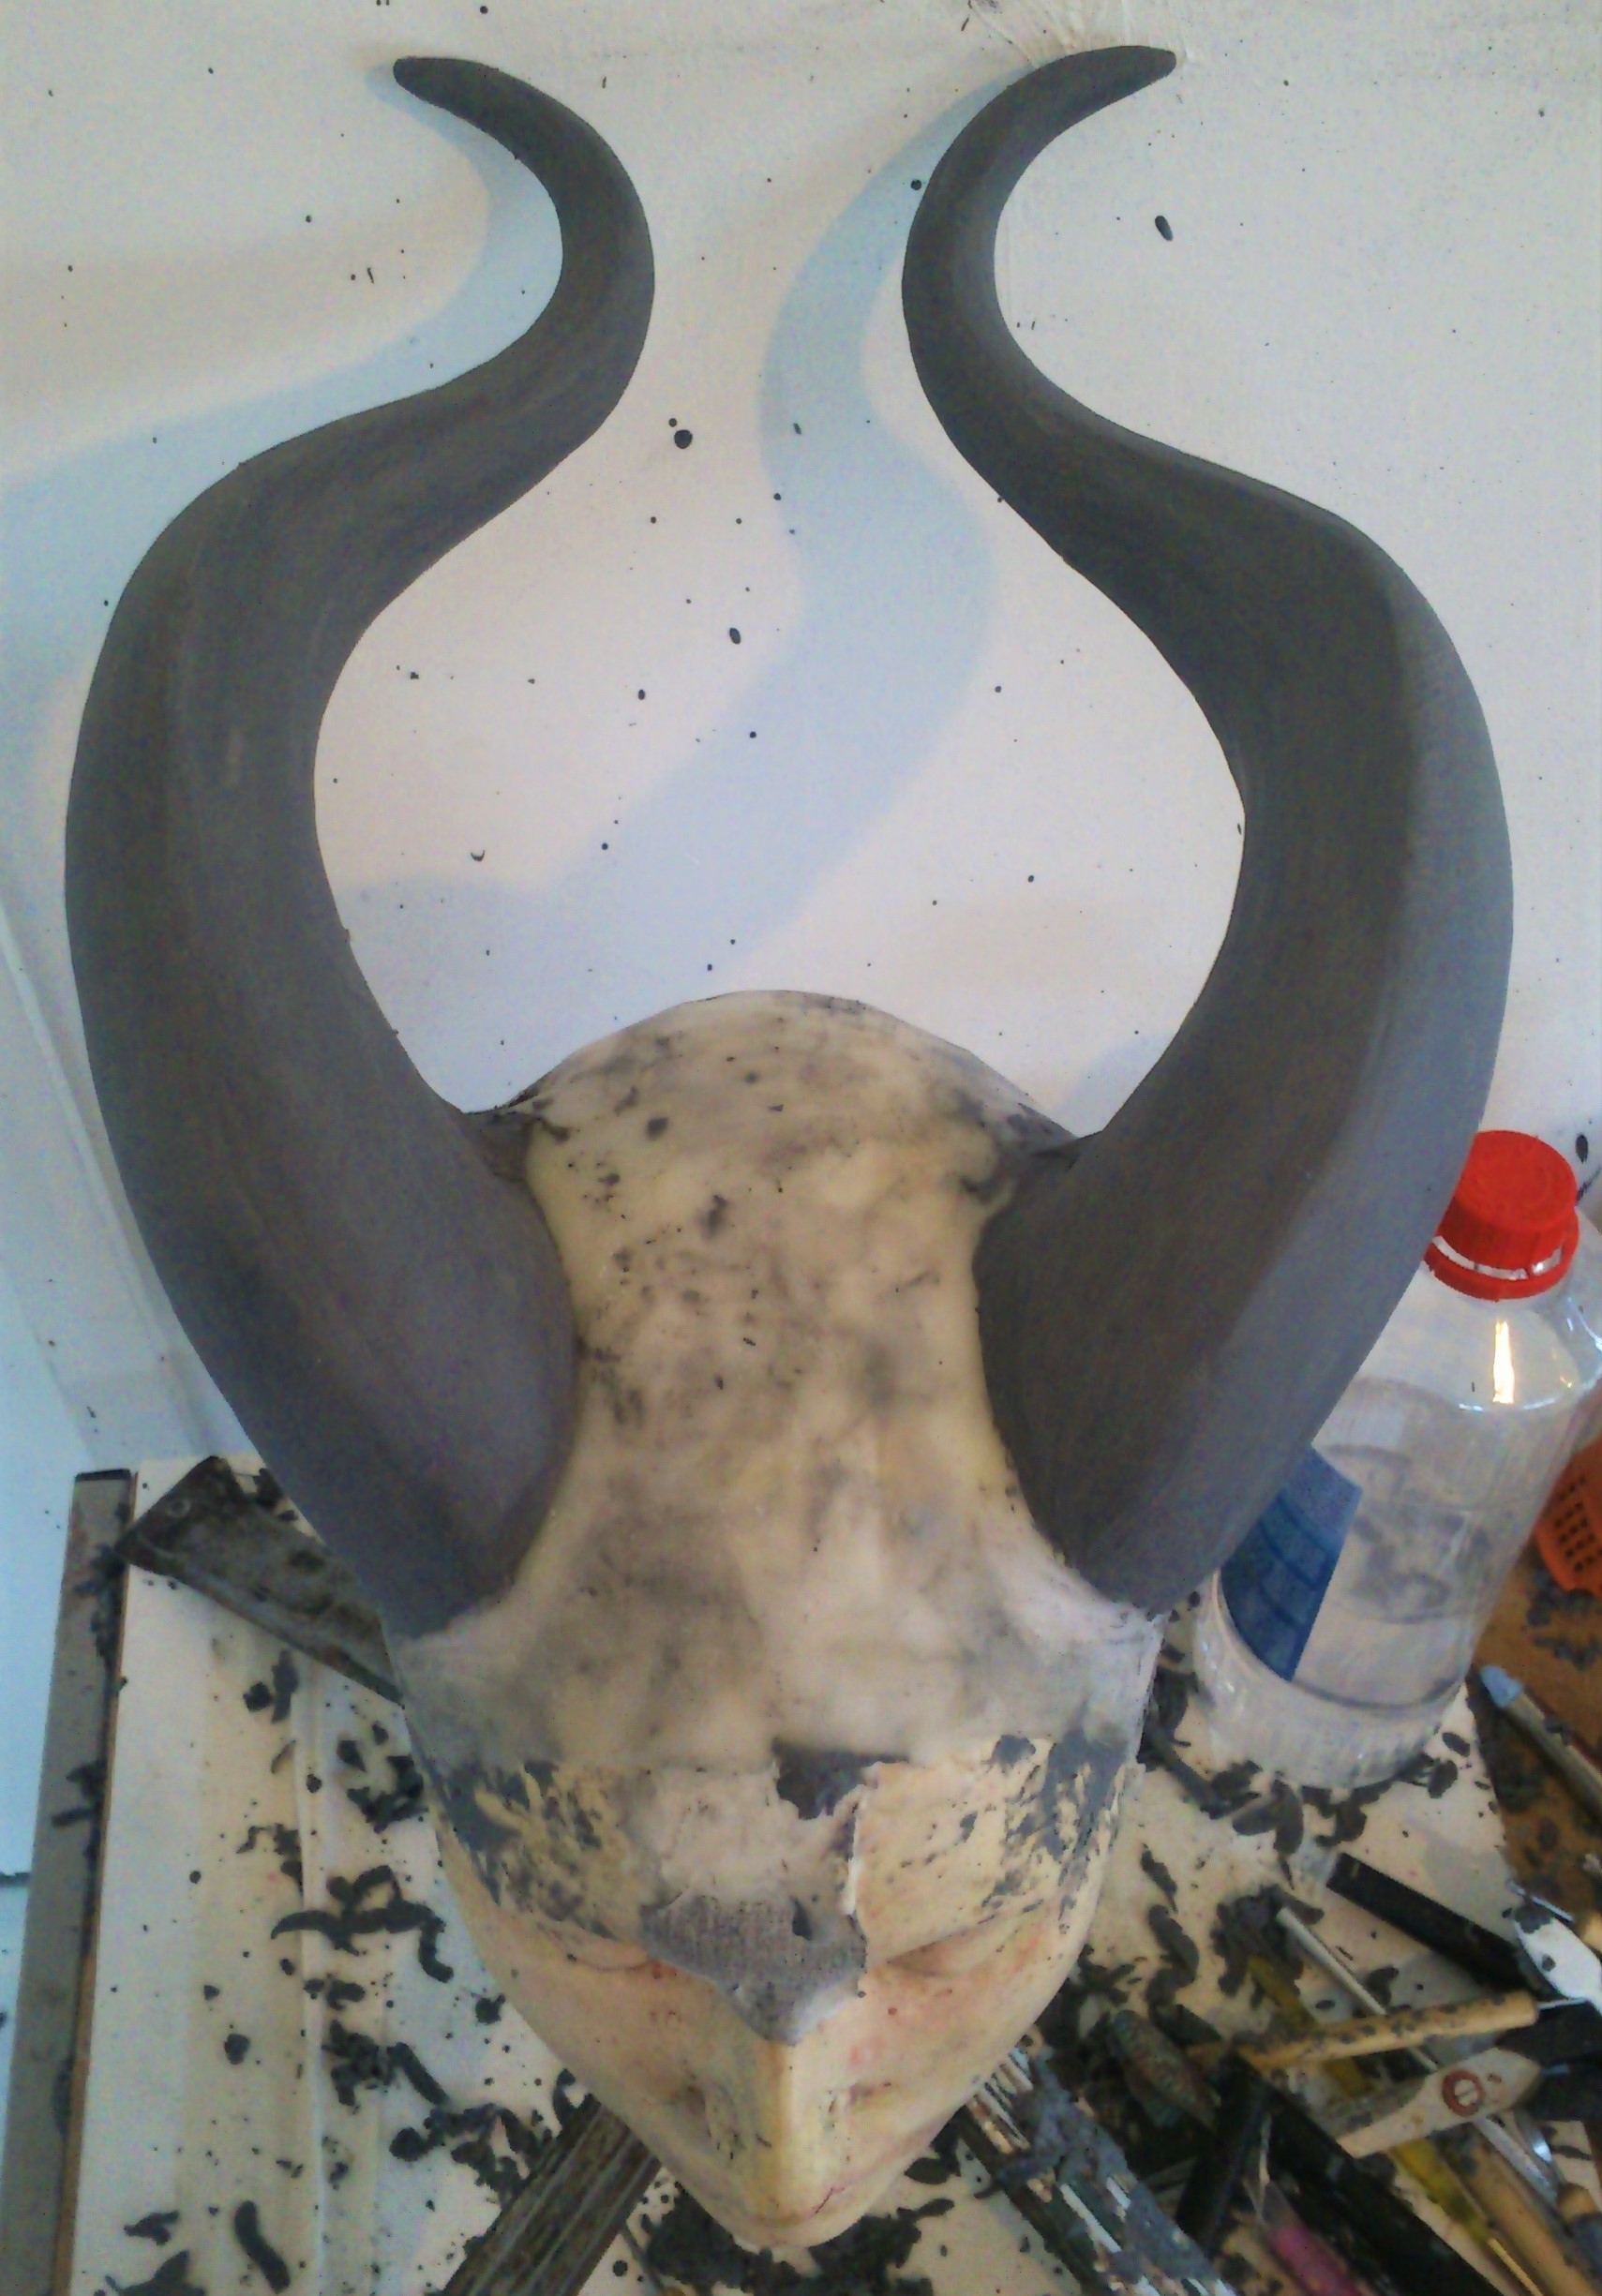
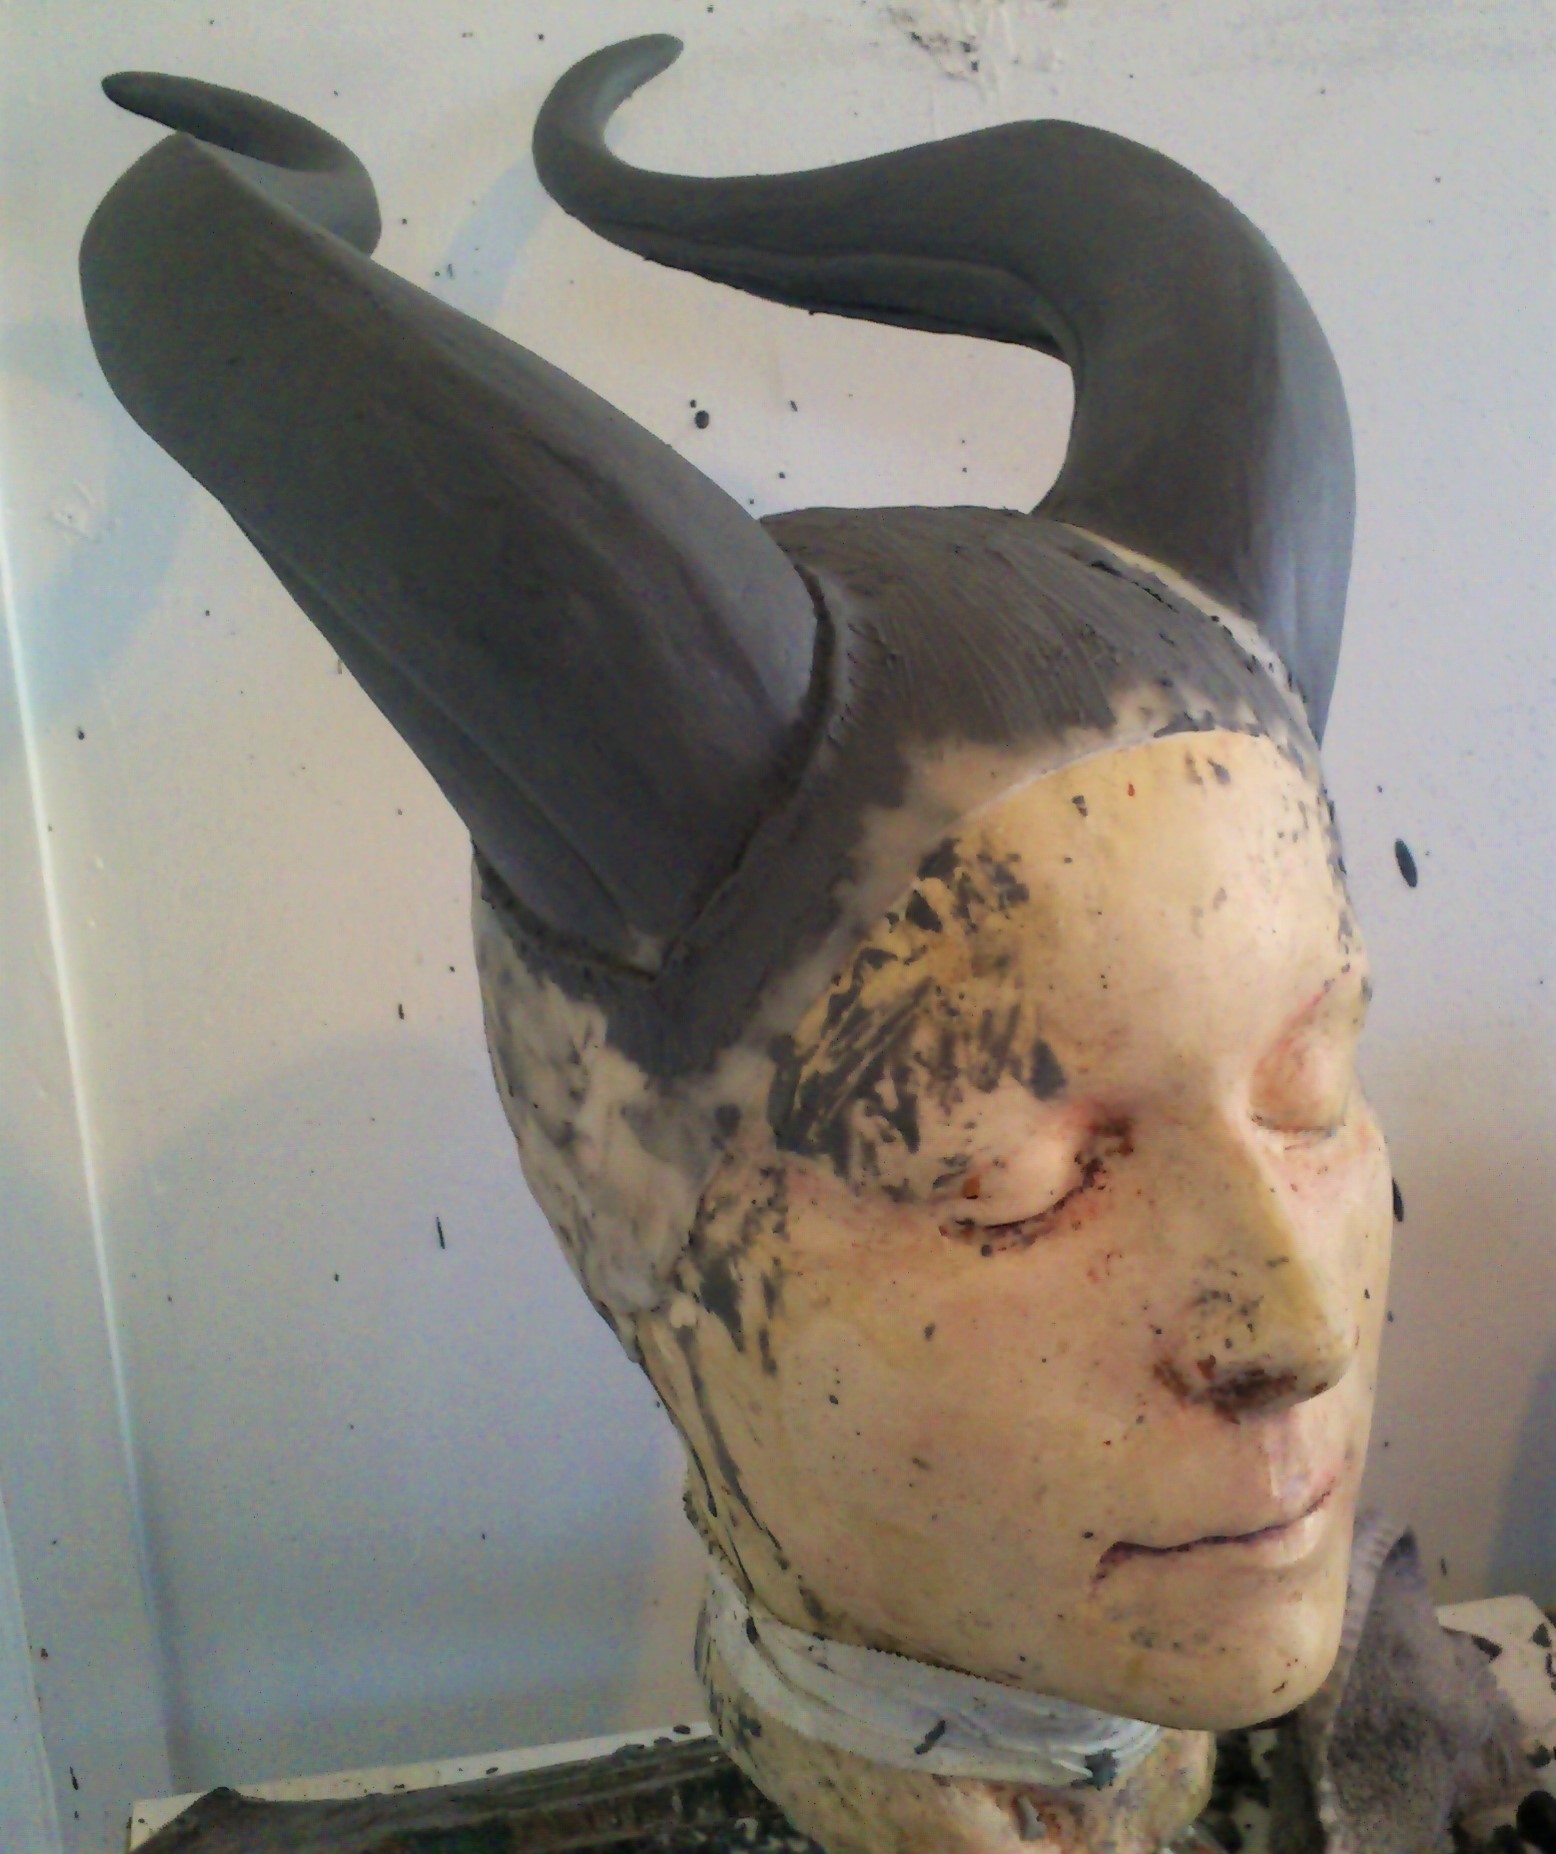
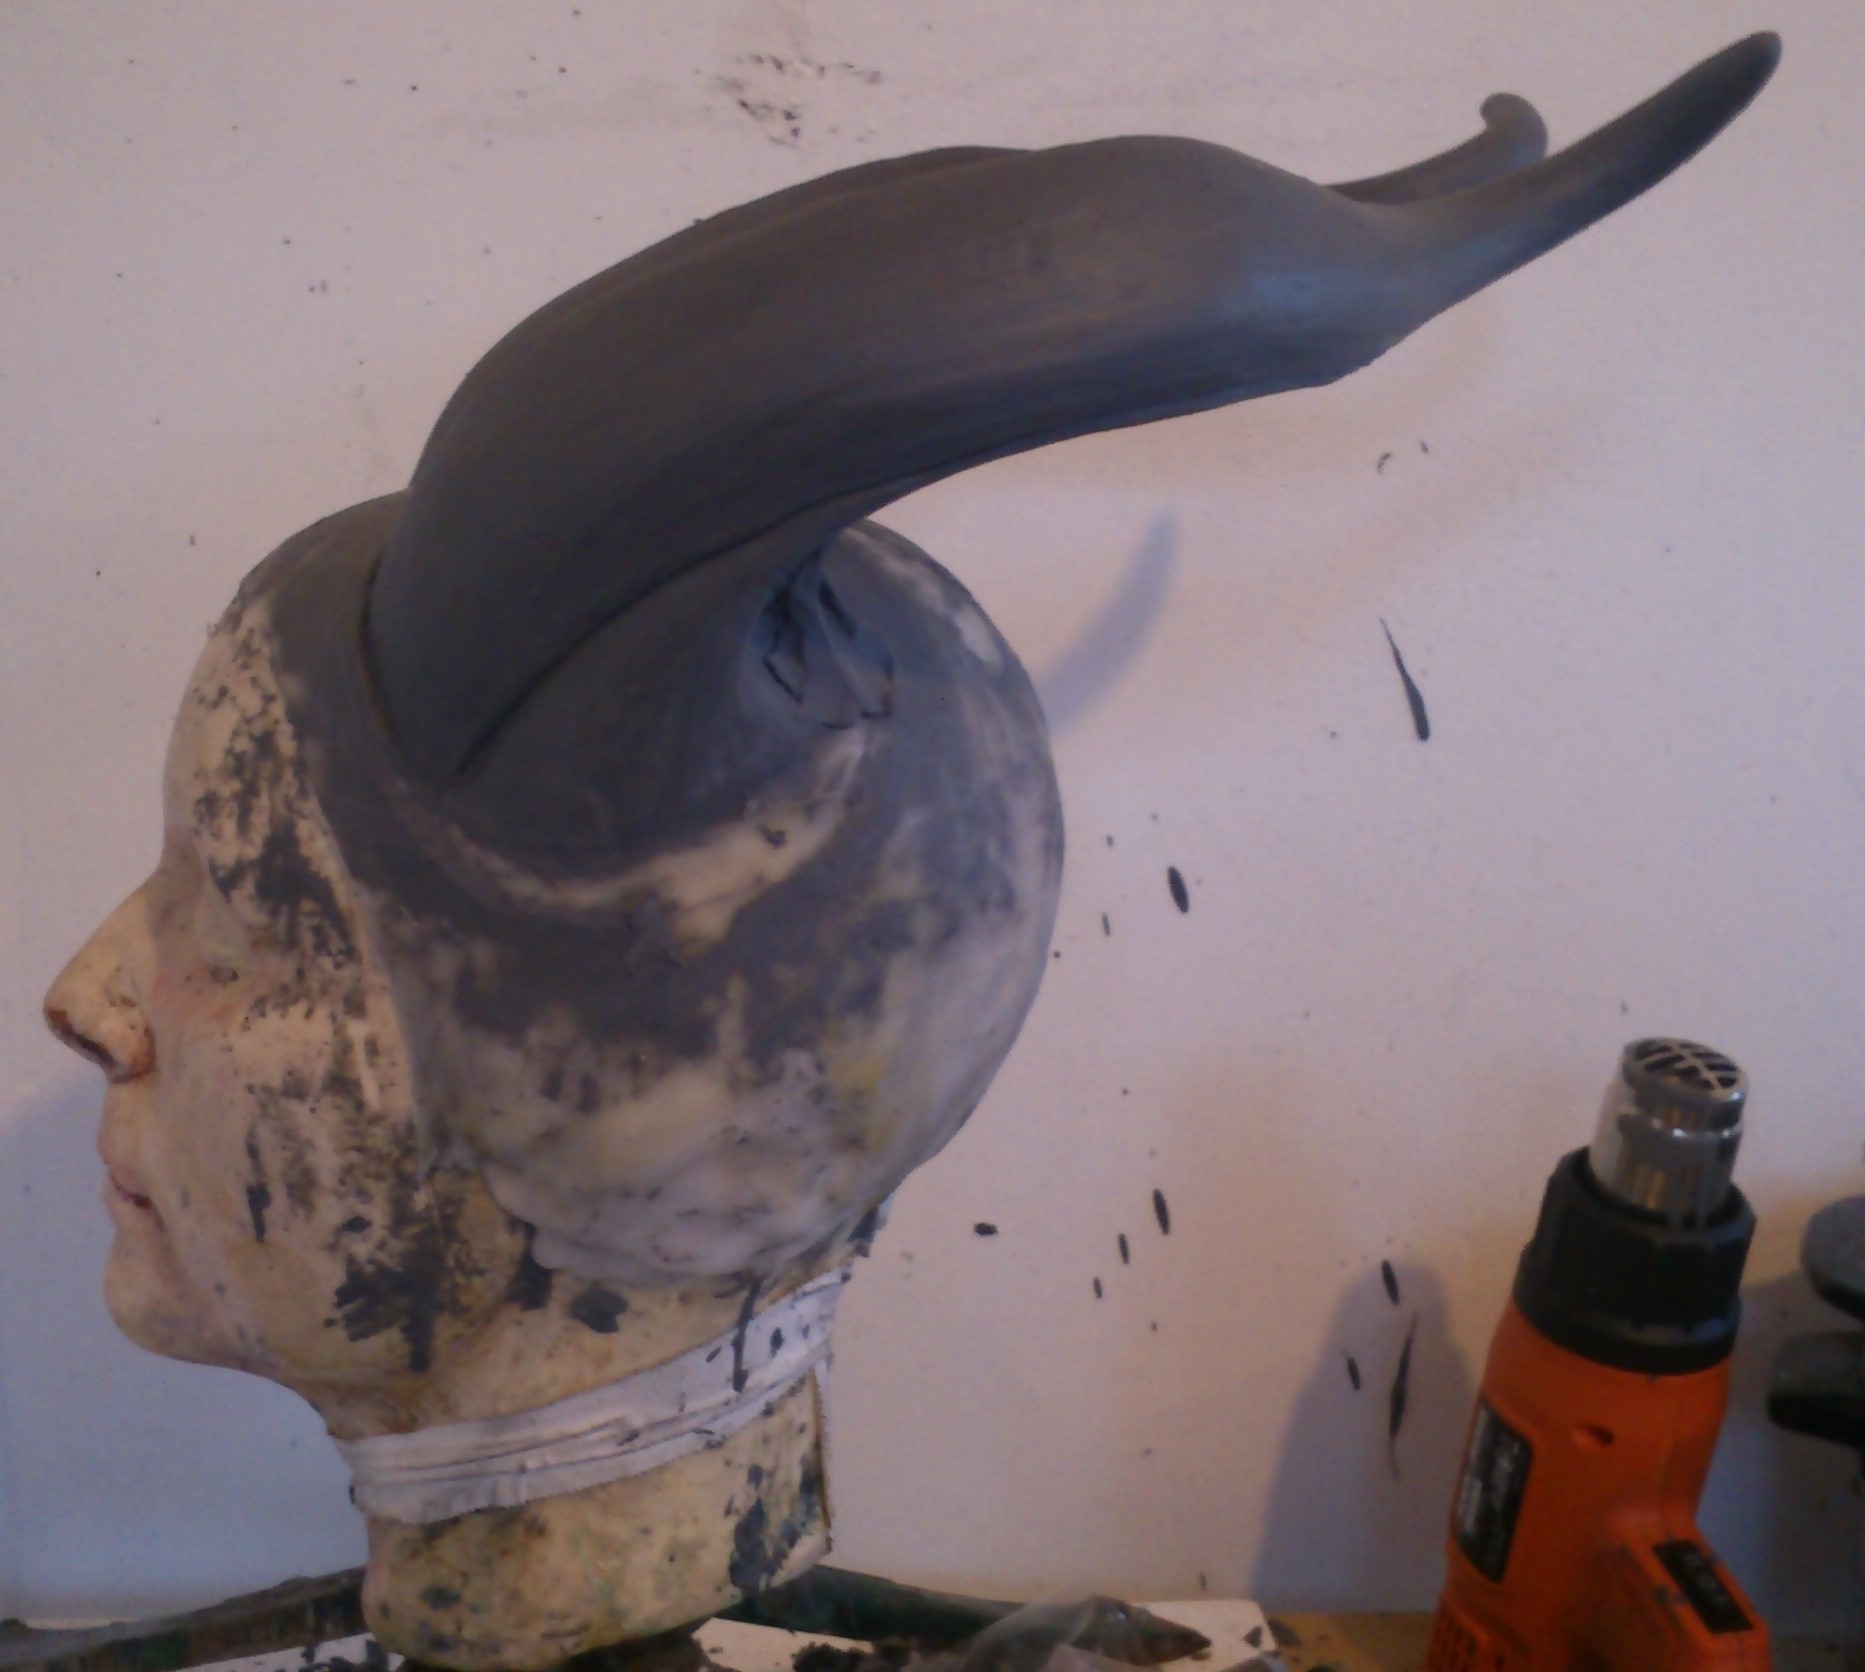
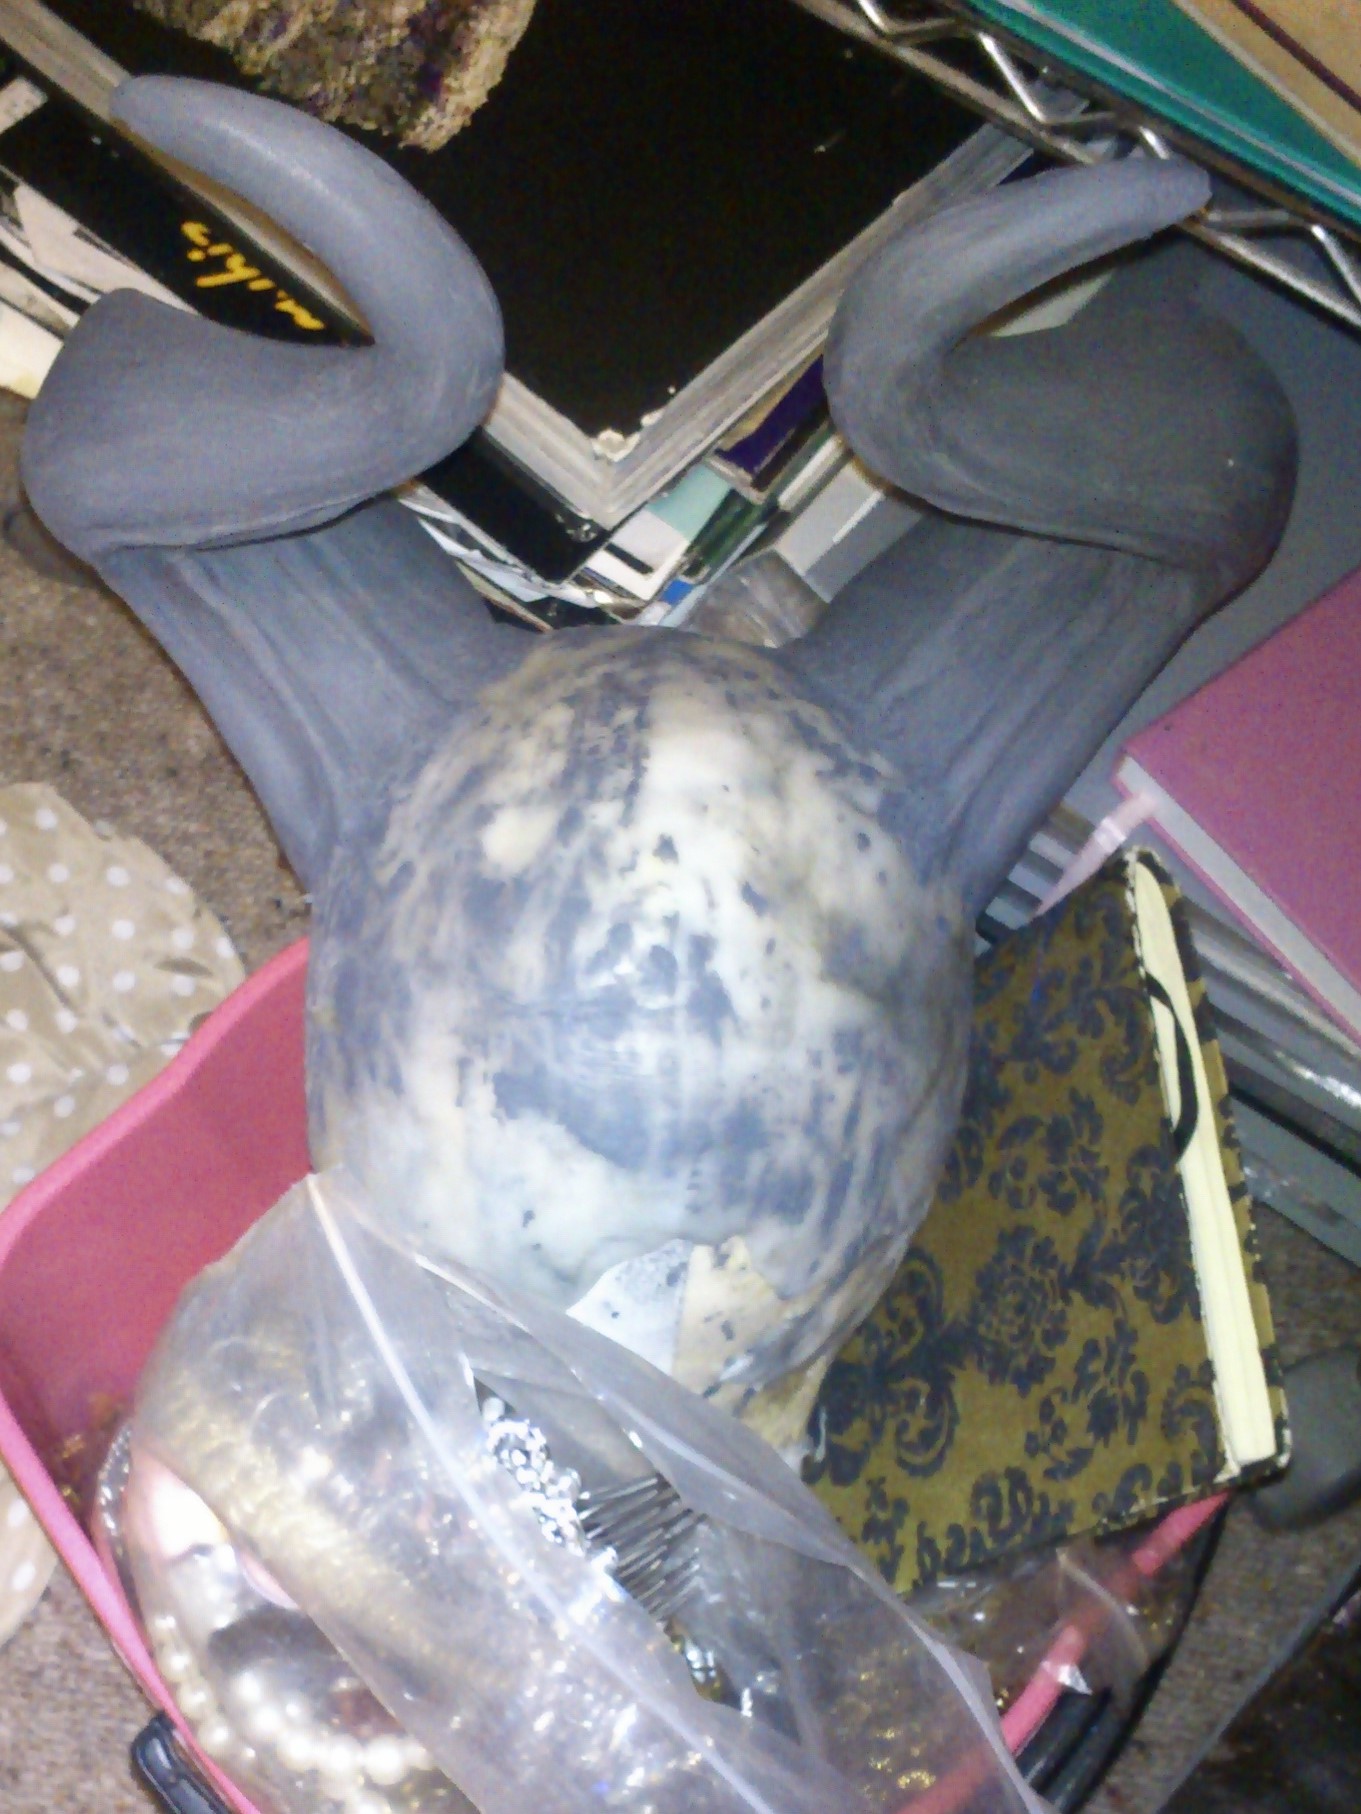
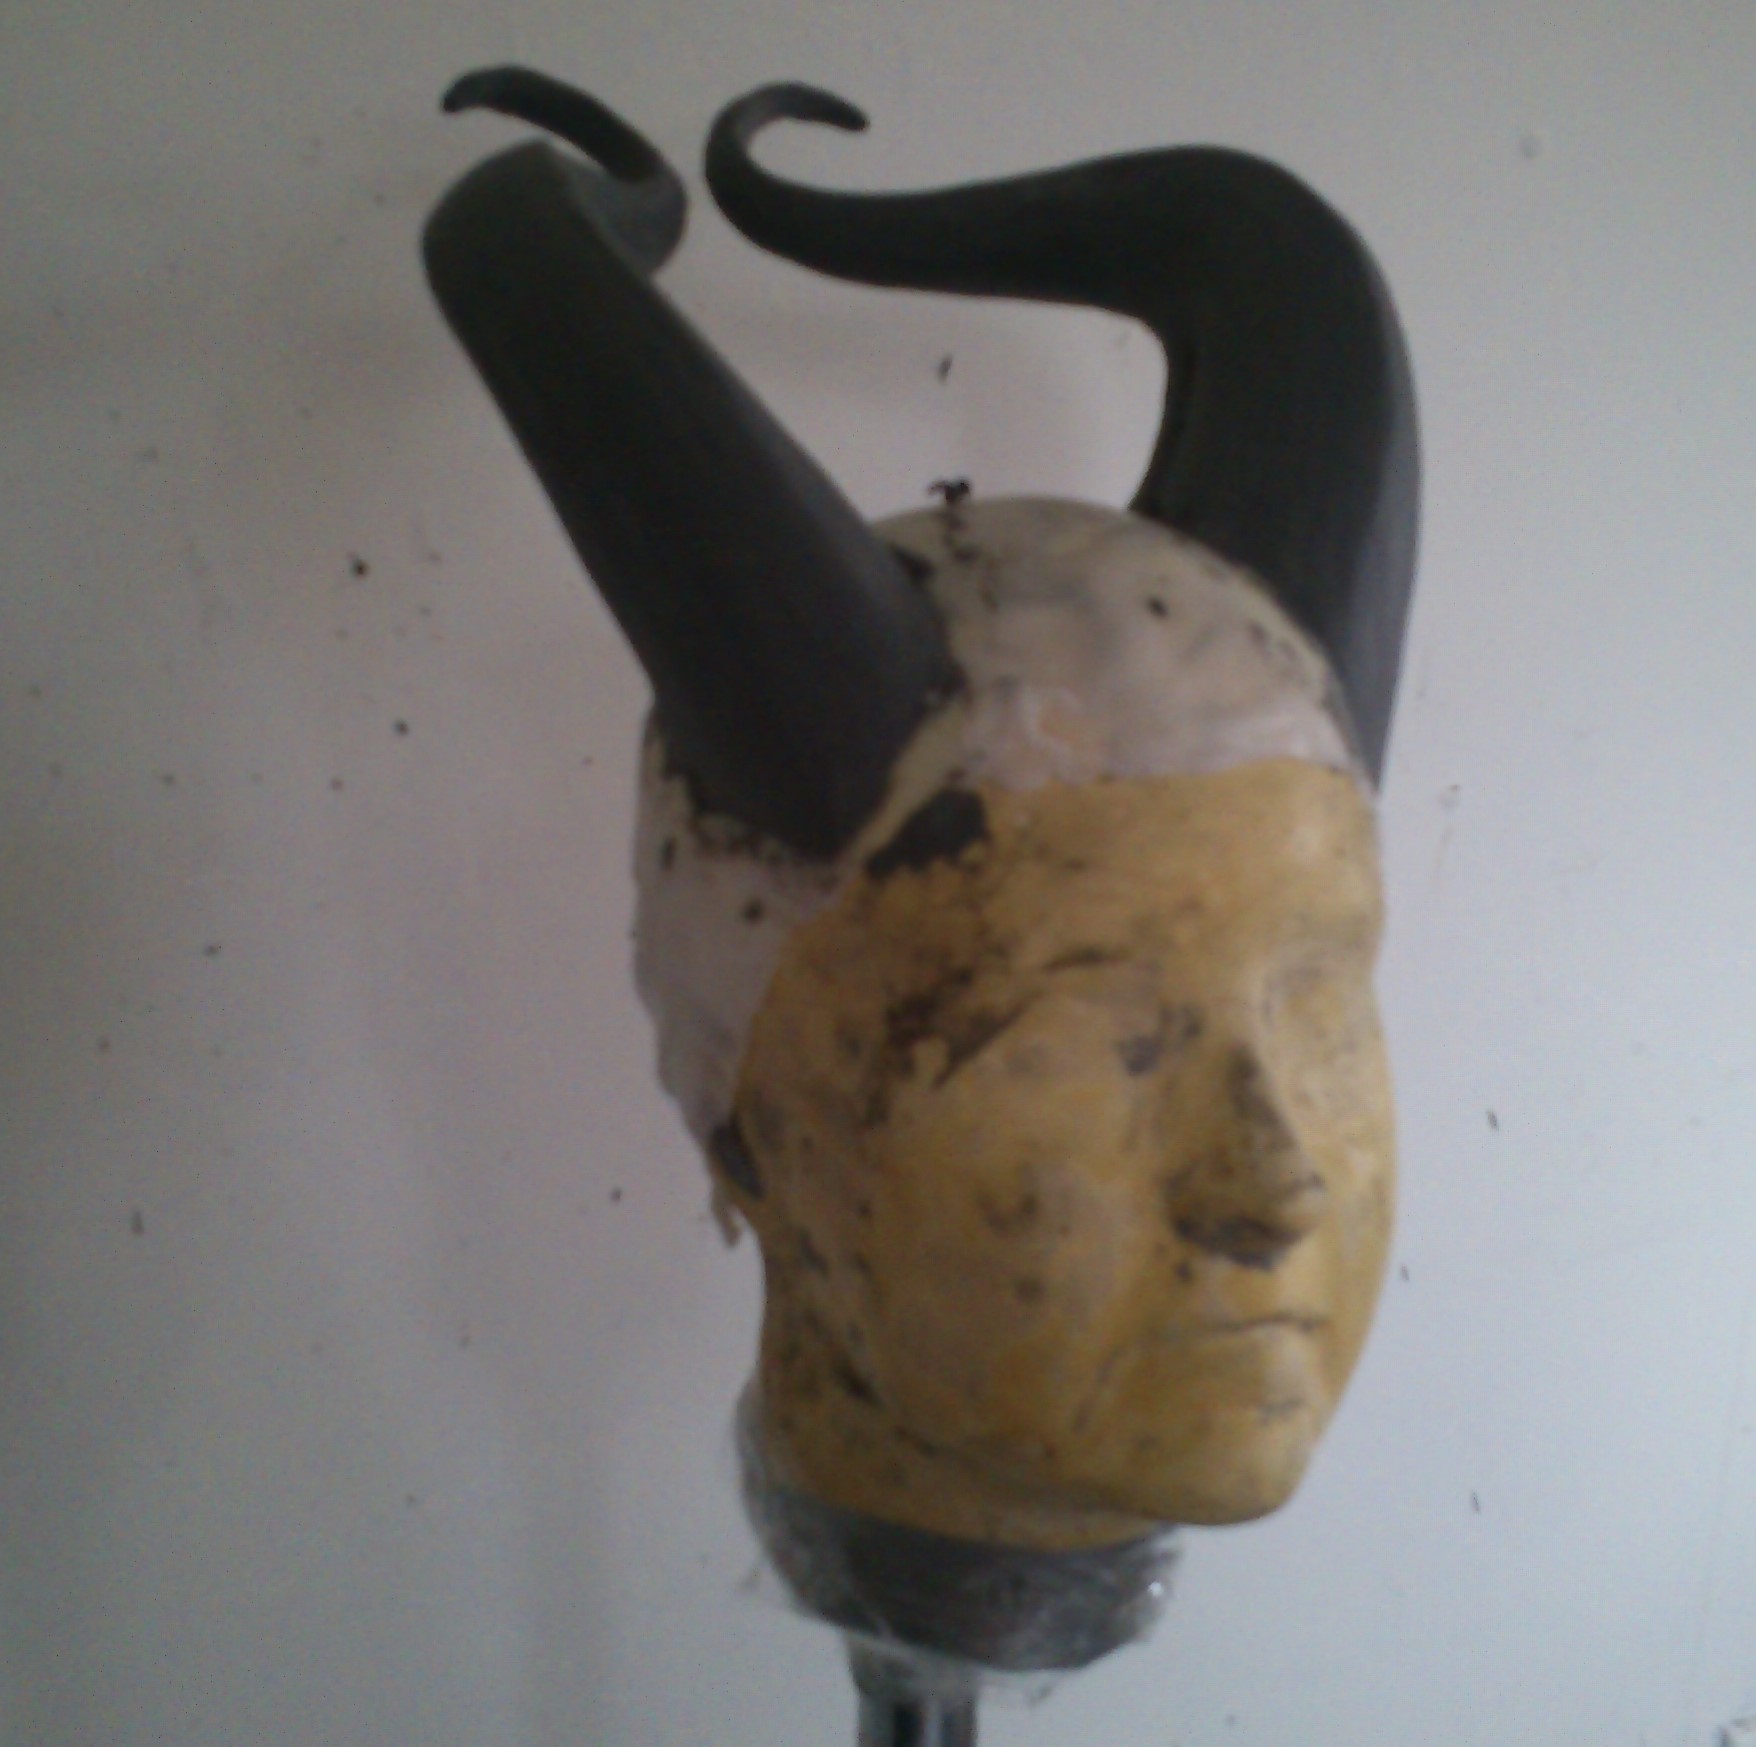
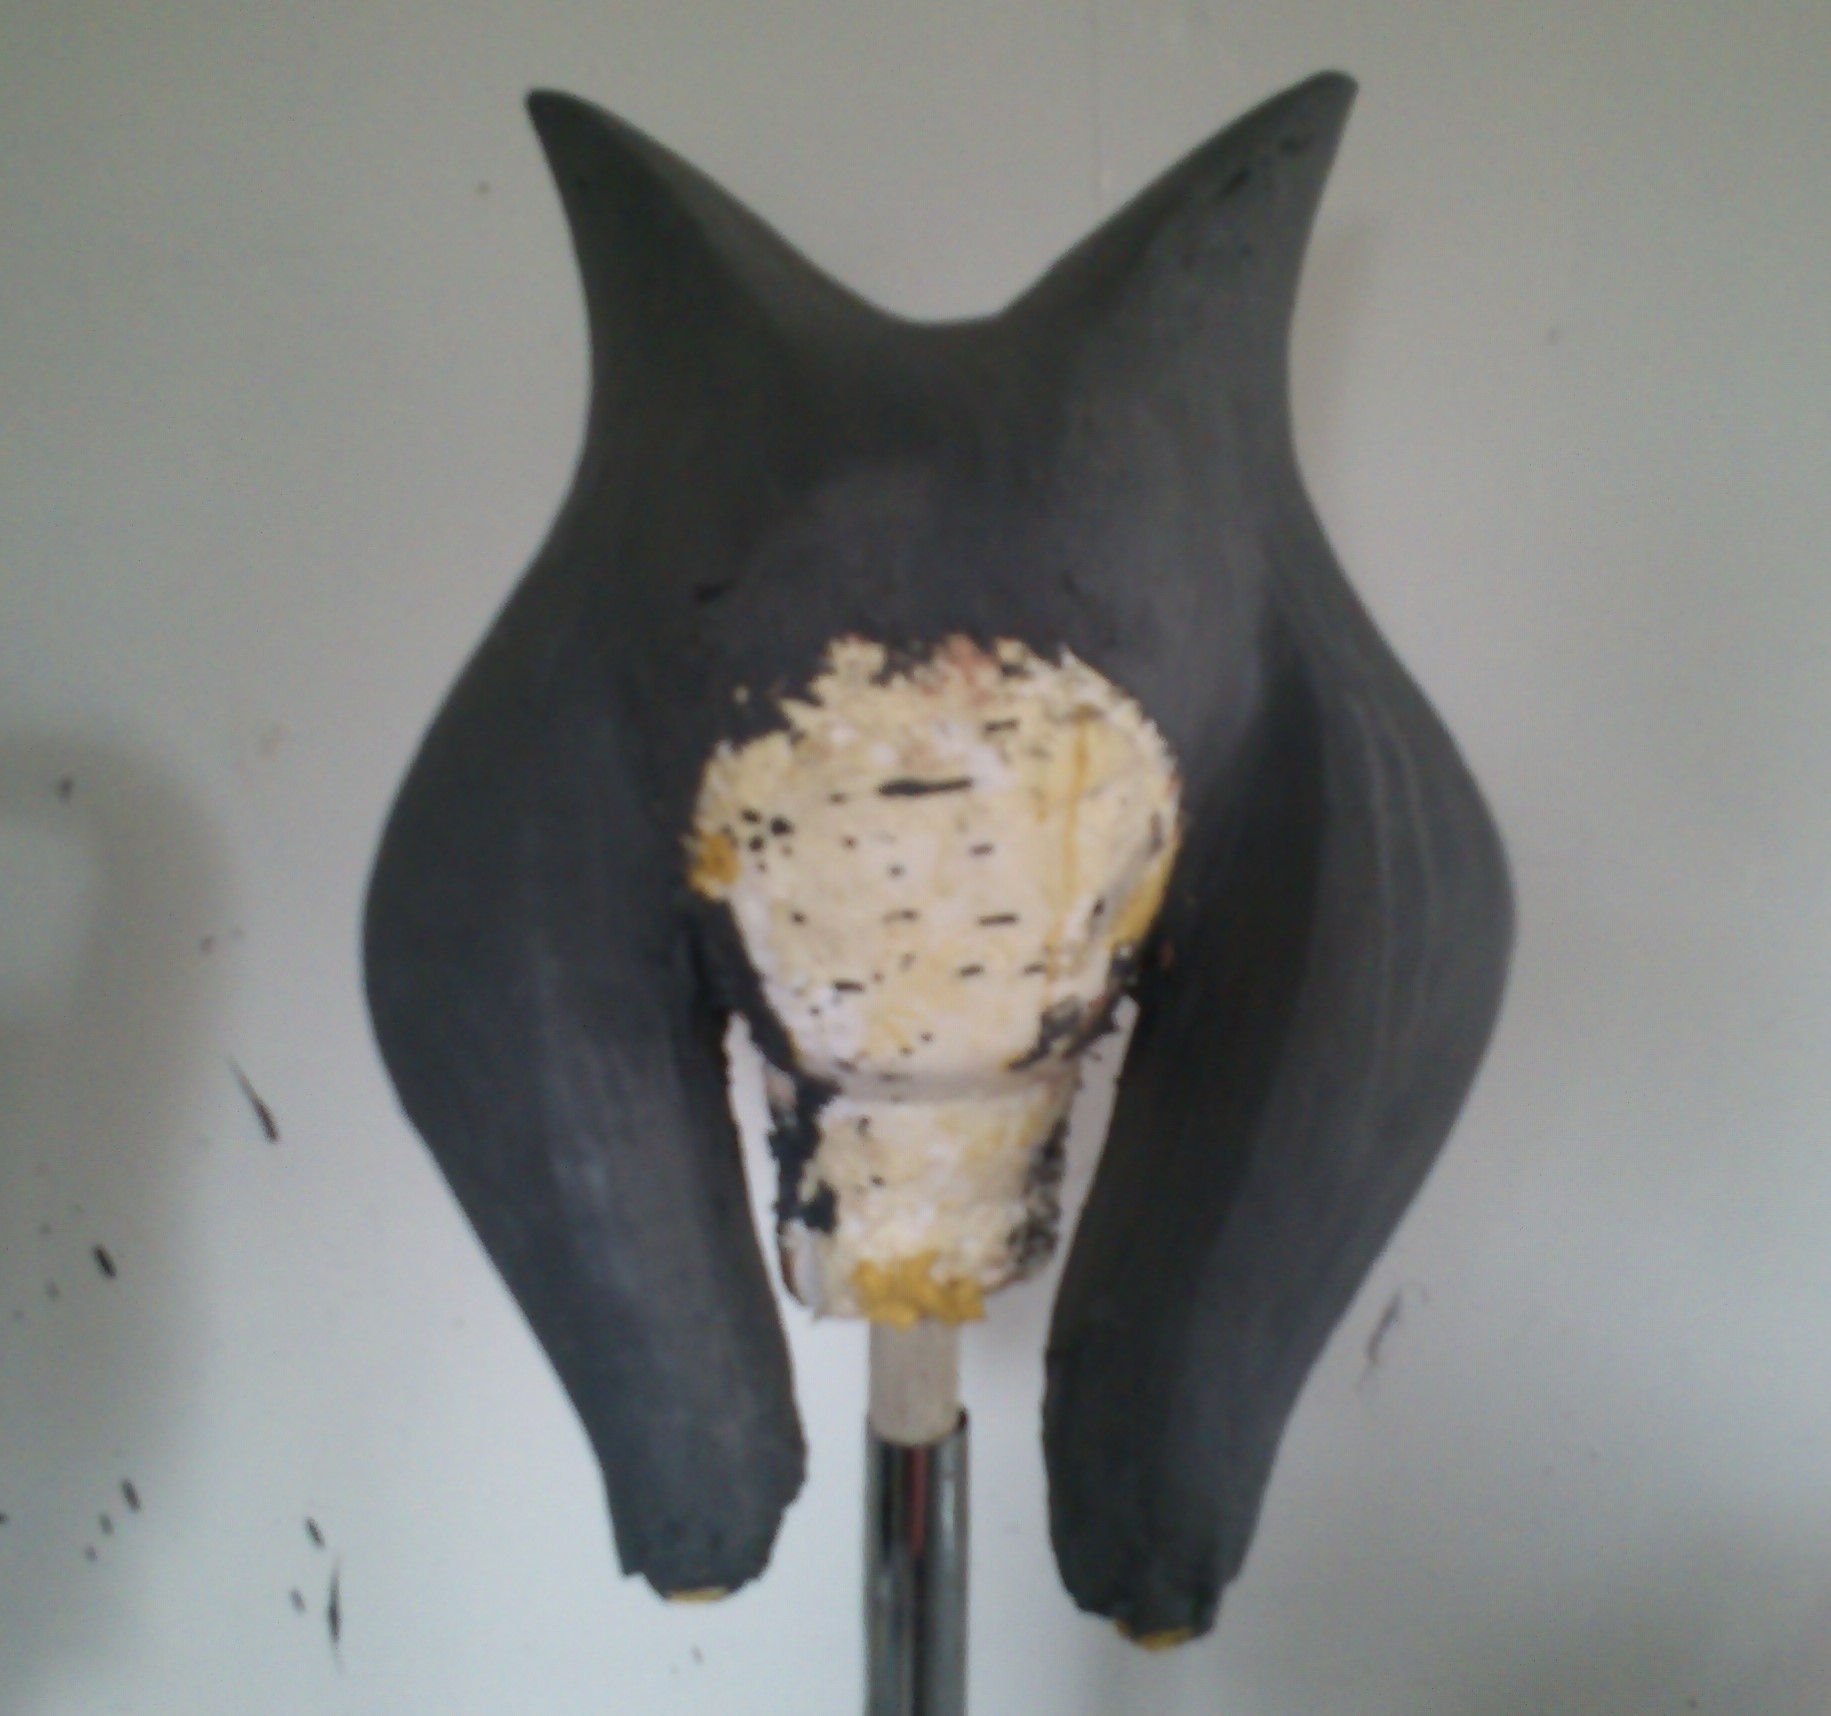
When we see her in juxtaposition with the crowds, even the visitors from other lands, we see horned headdresses. Hers are real. She has them on display, but literally sheathed. She is letting everyone know she has her power restrained right now but that she is powerful.

The surface texture and colour of her fabric could blend in with the crowd. Even her low V neck and train. But again they are all, odd, and weird when seen in the court.

Screenshot 2016-07-23 17.52.02

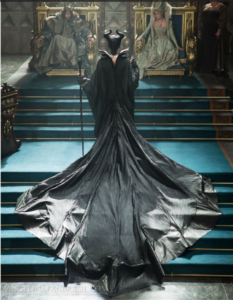
Maleficent’s gown is out of time and out of place. It could only have been made by a master in bias cutting. This one difference allows her gown to flow like liquid, her sleeves to billow and ripple, and finally for her train to shudder gently as she walks.

So her gown mimics the ripples, and the cold, of Stephan’s garments but her gown feels alive, an extension of her. Again this is because her gown uses extremely modern draping. While the rest of the cast could have had their garments drafted and fitted, this gown had to be made on a form, and more than than that several times as the bias of fabric alters the hang and fit of a garment permanently.

What is so wonderful about Maleficent is just how modern her costuming is, it both feels familiar as we are now so used to bias cutting, and yet distant as many of her garments feel like they could be from the Golden Era of Hollywood.

This is where the designer and the technicians work together to realise an idea, to make it feel part of a world, to use the physical properties of the materials to create something unreal.

http://www.scientific.net/AMR.627.585

The Application of Bias Cut in Clothing Design

Ching Hui Lin, Chin Mei Lin

Bias cut is one of techniques in clothing construction. The 45°gyrosigma produce tensile elasticity to have the custom curve and outfit more graceful, elegant and lively.


http://www.koreascience.or.kr/article/ArticleFullRecord.jsp?cn=BSMHBM_2012_v20n4_594

Development of the Bias-Cut Dress Pattern Making Method by Applying Fabric Draping Ratio
Park, Chan-Ho; Chun, Jong-Suk
This study aimed to investigate a bias pattern making method with geometrical approach. The bias-cut dress has soft silhouette of drape in the garment. However, the bias cut dress has problem of satisfying the intended garment size spec. This problem occurs from various sources. The main reason is that the bias-cut fabric tends to stretch on longitudinal direction and to shrink horizontal direction when it was hung on the body.


http://www.koreascience.or.kr/article/ArticleFullRecord.jsp?cn=BSHHBV_1991_v17_209

A study on the constructive principle and Techniques of Vionnet’s works
Chun, Hei-Jung
The purpose of this study was to identify the constructive principle and techniques of Vionnet’s works. According to analysis of Vionnets works, it was found that Vionnet conceived of the human body as a continuous shaping of a cylinder. Vionnet’s drapery denied the planner presumption of woman and gave real three-dimension to form and to fashion. T

website and costume updates

I have been reuploading older content to my site 🙂 So now if you o to the menu above you’ll find costume genres rather than a full list of all costumes. This just makes it tidier.

In order to get those pages up I had to take my full sized photos and edit them all over again for modern devices. In the past I had to have small files for storage and bandwidth issues, but also for simply image editing! I don’t like using PS on my costumes but I have been able to rescue many unused photos by playing with image temp and saturation and new editing options mean that goes a lot faster!

The exceptions so far have been costumes from before my first digital camera.! I need to get those photos and digitise them 🙂


As far as costume progress is concerned I have demolded my Draenei horns!

The molds are a little brittle. This is fine, and what I can do is use them twice to get a working latex pair and then a pair of urethane semi rigid horns I can then back fill and tidy ready for 3D scanning and also better mold making 🙂 I also found a small pocket of air but luckily I know exactly how to fix that 🙂

I also found exactly what I was looking for in regard to hoofy base options. It comes under things like using AA paint on the body or contact lenses- I’m waiting until I can test their safety before talking about them!

Duty of care and all that!


I have to admit I am really wearing out physically to be making complex curved molds any more.

But I have Maleficent and Ahsoka molds to go.

So today I’ll clean the last of the clay out of the molds, get Maleficent properly sewn up and my Cleves gown.

And write up a few workshop proposals tonight 🙂

Multiple horn making

27950154922_53e22d0746_o 27998052936_aa22359f81_o 27749069240_b65d22d48a_o

Currently working in three fandoms. While each set of horns is being made in clay I am using slightly different techniques to support them. I’m also hoping to find some way to scan these, though scanning is very expensive as there are very few people with them as opposed to printers!

The weather has continued to be very chilly, which is perfect for sculpting in oil based clay. Well for me 🙂 I much prefer carving so pressing clay, I find I have much better density control if I can carve.

Oil based clay melts in direct heat, softens in indirect and then sets solid when chilled.

When working with chilled clay I need to quickly wave a heat gun across the cold surface- our environment is very damp so a fine film of water can form which blocks the clay from sticking. When heated the surface gains a little traction and winds up bonding to the new clay much more firmly.

I heat my clay in a crock pot (dedicated!) and use a heat gun for spot melting. As this warms up and melts I can brush it on, as it cools down I can form hand molded shapes to press.

But the warm clay softens the cold so there is a limit to how long you can work before the bulk of the clay moves too far.

Progress!

It had been a while since I have had a chance to work with Make-A-Wish New Zealand so I was so happy to have had the chance recently 🙂 And the first chance I have had to make snowflakes and share my sparkly icy jewels 🙂
But it was also a chance to speak with a lovely lovely little girl, to listen to her and what she loves, so I am also inspired. I am now working on my Spring version of the gown, just got my materials today 🙂 So yes, a fair amount of CAD in my near future for applique and 3D effects 🙂
(Also I am restocking my jewels so I can share more 🙂

So yes, today was spent getting 10m of Heat n Bond, 3m of pink sparkly tulle (that still needs to be dyed darker) 3m of sparkly green tulle (ditto.) This is on top of the yardage of tulle for the base, and the dye for it all.

Lucky there was a sale, but it’s still a big investment, just assume an average price of $10m. And you can see why it takes a while to collect materials let alone work with them 🙂 And why my gowns are irreplaceable. 🙂

Now I am back to working in Sketchup.